
M8 Howitzer Motor Carriage
Tamiya Kit No. 35110, detailed with
'Yanks Miniatures' M8 Interior Set #9711
'Eduard' Detail Set #35139
and 'AFV Club' M3 Track Set #35019
1:35 Scale Model by Terry Ashley
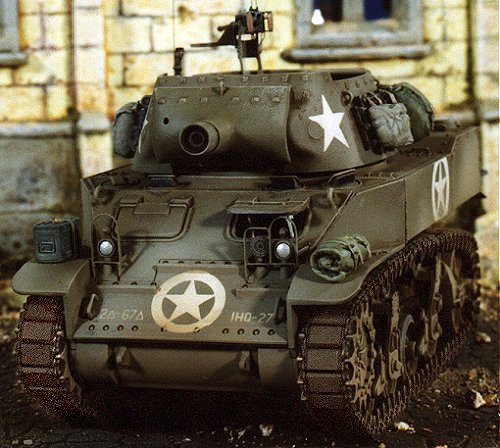
Driver and assistant driver hatches were moved forward to accommodate the large
turret overhang of the 75mm gun. The chassis was also modified to tow an armored
ammunition trailer because of the limited storage space inside the open-topped
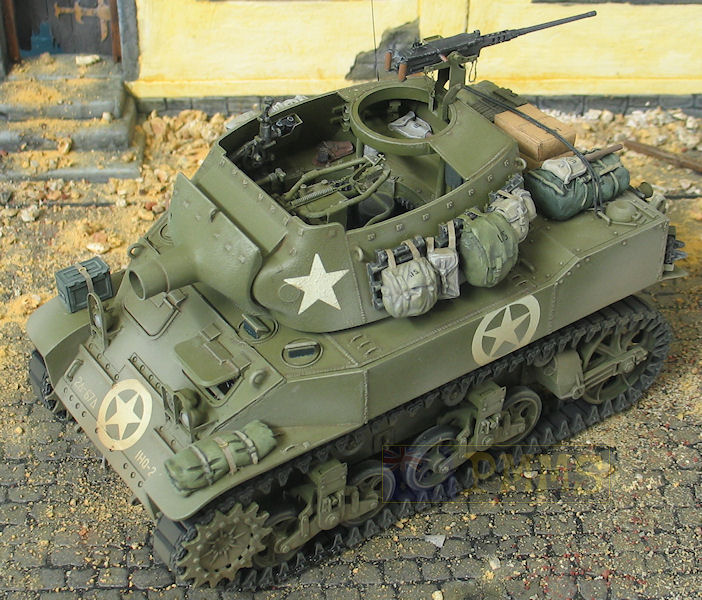
carriage. A cal.50 M2 machine gun was mounted on the right rear corner of the
turret.
M4 Shermans with 105mm howitzers were available from late 1944 and gradually
replaced the M8HMC.
| Crew | Commander, gunner, driver, co-driver | Traverse | 360° | |
| Weight | 36,000 lb | Elevation Limits | +40° to -20° | |
| Dimensions | Length | 14' 2 3/4" | Engine | Cadillac Twin V8 220 hp |
| Height | 7' 6 1/2" | Max Speed | 36 mph | |
| Width | 7' 4 1/4" | Cross Country | 24 mph | |
| Track Width | 11 5/8" | Road radius | 100 miles | |
| Track centers/tread | 6' 1 1/2" | Fording depth | 3' | |
| Armament | M1A1 75 mm pack howitzer | Trench crossing | 5' 4" | |
| Armor Thickness | Maximum | 67 mm | Vertical Obstacle | 1' 6" |
| Minimum | 12 mm | Ammunition stowage | 46: 75 mm | |
| Ground Pressure | 11.6 psi | Suspension Type | Vertical volute | |
| Production | 1,778 | |||
| Dates | 9/1942-1/1944 | |||
I have always liked to look of the M8, compact, chunky with a big open turret for the hull size and that short little gun all makes for an interesting looking vehicle. I have had this kit in my cupboard for years and it's only coincidental that I started building it the same year Tamiya re-released it. So, with the help of a few detail sets and some wire, sprue and card, lets get into it.
The hull sides lack any form of texturing or detail. Using liquid cement. I painted the sides and using a finger daubed the wet surface to add texturing. This can be sanded when dry to give a uniform texture. There are three prominent weld seams along the hull side which I added using thin sprue.
Firstly glue the sprue in place, then apply a liberal amount of a solvent type glue (I use Tenax-7R) to soften the sprue. With a small screwdriver head, add weld texture to the soft plastic, this method works well for me. Finally six bold heads were added to the rear engine compartment sides. I cut these from an old M3 kit using a scalpel and added them to the M8.
The front plate was replaced with the 'Yanks' resin item which has interior details included. Take note of the 'Yanks' instructions about removing some of the hull bracing before attaching the resin part. The fit of this resin piece was spot on. I replaced the moulded on hull periscope tops with 'Verlinden' resin items, repositioning the two outside scopes facing outwards. The headlight guards are from the 'Eduard' set and fitted nicely after careful bending.
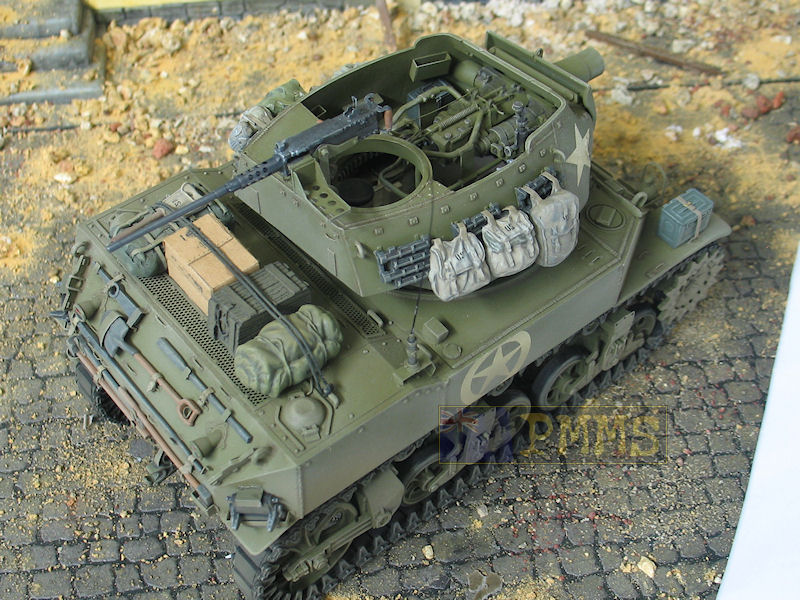
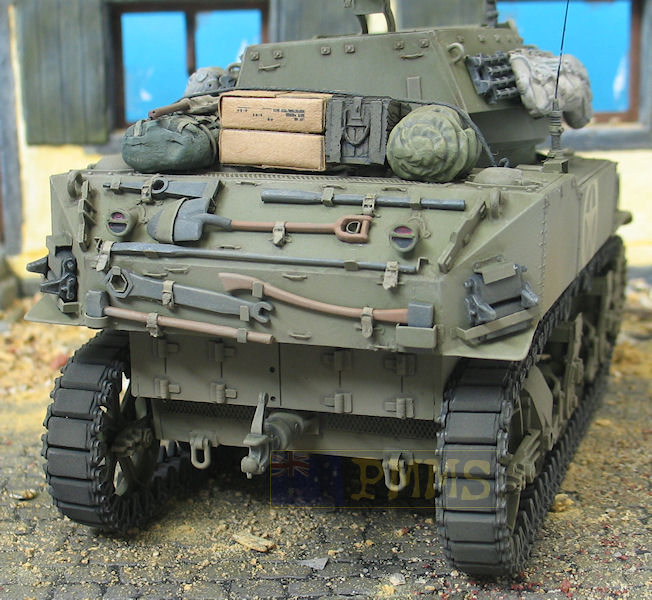
All the tool brackets on the rear hull are also from the 'Eduard' etched set, carefully bent to shape. I replaced the support for the sledgehammer with a scrap bit of brass as it should be round and not square as supplied. There are approximately 36 small tie-downs around the vehicle, which I added from thin wire after removing the moulded on items with a #11 blade.
Also note if you do this, that the tie-downs on the rear hull as moulded are for the M5 and are slightly different on the M8. Check references for the correct positions. All these metal parts were attacked using Cyanoacrylate adhesive. The tool securing straps were added at this point from thin paper, the tools themselves were left off until after the final painting. The kit engine deck screens were cut out and replaced with the 'Eduard' etched parts. Finally the aerial mount and extinguisher bracket were added to the rear hull.
All M8's had solid drive sprockets and road wheels. 'Eduard' supplies etched parts to fit over the kit drive sprockets to remedy this, but I had to settle for the old spoked road wheels. Before adding the etched part to the drive sprockets firstly carefully cut off the moulded on bolts, as these have to be re-applied to the etched parts after fitting. It may be easier to use other bolt heads for this, which is what I did.
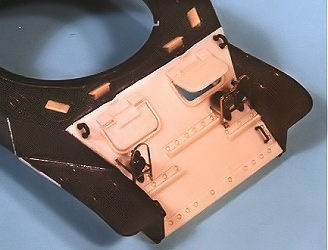
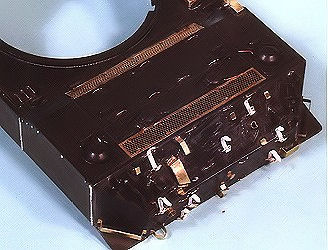
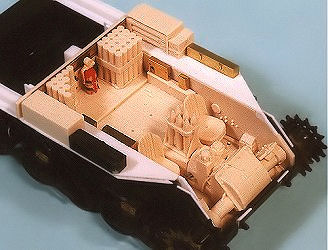
Before installing you have to remove all moulded on bits inside the Tamiya hull. (The kit was motorised when first released, and has all the bits for this). I replaced the side sponson panels with card as the resin bits were too small and didn't extend to the hull rear.
I also didn't glue these parts to the lower hull as called for, but made a separate tub, which could be removed at any time. This made painting the lower hull exterior much easier as no masking was necessary. The only addition to the 'Yanks' set was the gearshift lever from stretched sprue and a few boxes from the 'Eduard' set.
Not a lot of the front driver's section is visible when completed, so I didn't spend much time here, the 'Yanks' set is so complete you don't have to anyway. The seats, ready rounds and extinguisher were left separate till after the main painting and weathering was finished to make things easier.
One thing to remember is to test fit the parts regularly to ensure there won't be any snags when final fitting is done, this includes the top/lower hull fit. Additions inside the top hull were the resin periscopes, support for the open driver's hatch and driving levers from thin card.

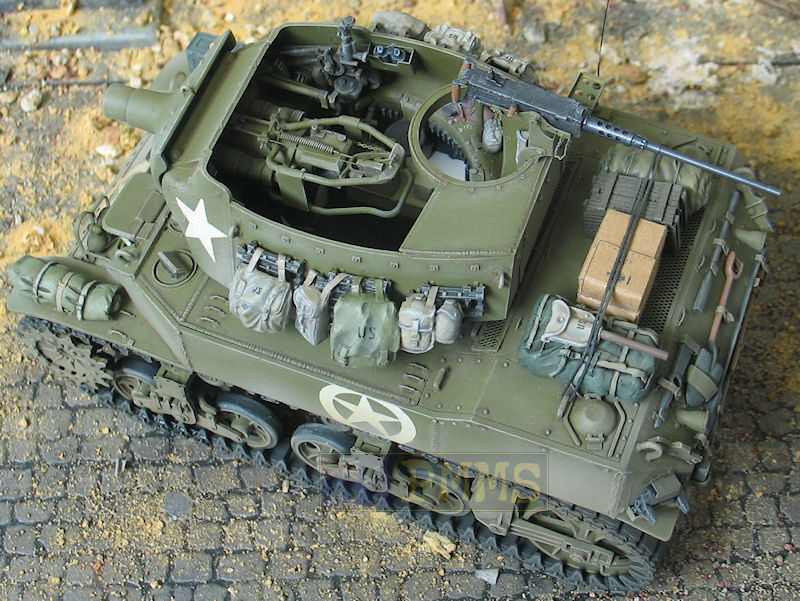
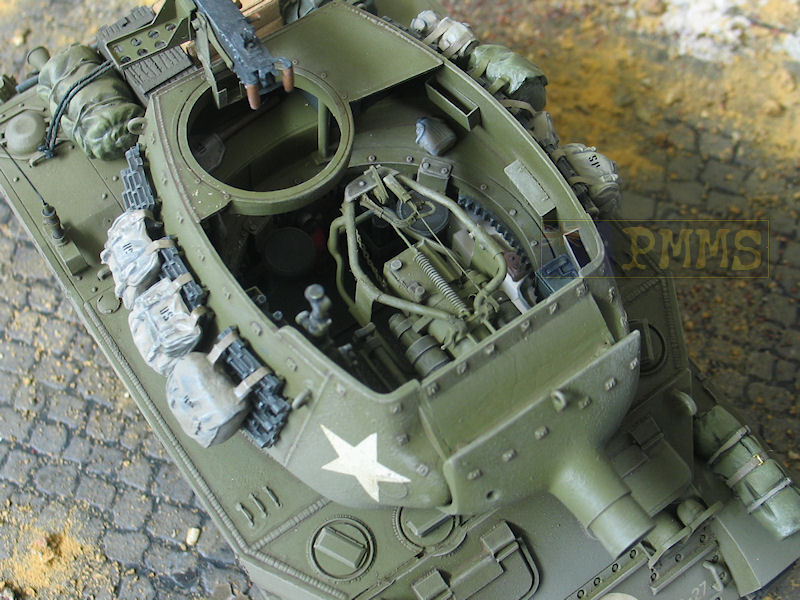
On the outside, the front part of the turret and the mantlet required extra texturing. This was done in the same manner as the hull sides with liquid cement. Additional small squares of card were glued around the turret front for the missing cover attachments. The four lifting eyes on the turret sides were replaced with thick wire for a better "round" appearance. A guard was added to the turret front just under the mantlet to close off the gap between mantlet and turret with card. (This guard can only be seen from above as it is fitted below the line of the mantlet).
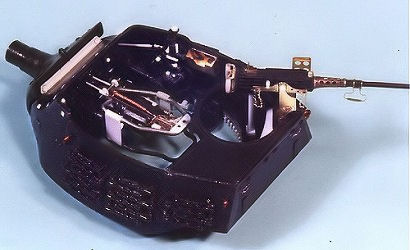
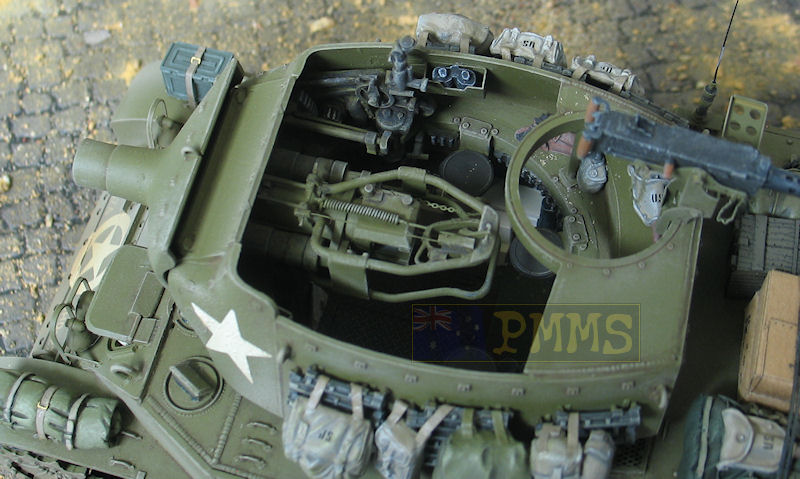
On the inside, turret rotation teeth were added around the bottom rim using short lengths of rod, with corresponding teeth added to the traverse gears on the right inside of the turret. Additional bolt heads were added to the attachment points of the gun mount to the mantlet. The gun sights were detailed with various small card discs and thin sprue.
The gun breech assembly would have to one of the busiest around. Tamiya supply the upper and lower guard rails, but unfortunately the top bar is the wrong shape. It should be raised on the left side and lower on the
right. I replaced the kit part with rod solder to get nice even bends. (There are some interesting angles here). The rear of the top guard had small fittings added from scrap brass sheet, wire and thin card. Bending thin wire around a twist drill shank made the center return spring on top of the breech-block.
The breech-operating handle was added to the side from thin card and a few bolt heads added using a 'Historex' punch and die set. Other small fittings were added from card and wire to the top of the mount. After gluing the two turret halves together (Trapping the gun assembly) there was a 'huge' seam on the rear panel. As this was almost impossible to get at to use filler, I added a piece of card over the entire rear panel to fix this. Two support posts are needed between the rear top panel and turret base, which were added from plastic rod. Check the photos of the kit during construction to see these additions.
The M2 M/G was next. 'Eduard' supplies a stack a brass bits here. The intricate mount was completely replaced with brass. The cooling jacket was removed from the kit gun and replaced with a nice brass bit, after carefully bending to shape. The firing handles and ammo box support were also added from brass as were the front and rear sights. Small securing chains from the ABER chain set added the finishing touch.

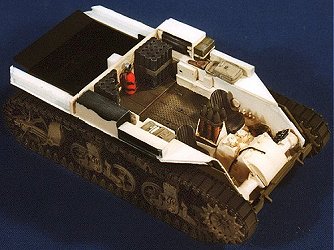
The kit is painted entirely in Humbrol Enamels. The interior was first airbrushed white with the floor center section Olive Drab (Humbrol 155). The separate parts (seats, ready rounds etc.) were brush painted. The area was given a light wash of Raw Umber Oil Paint and drybrushed to give the used look.
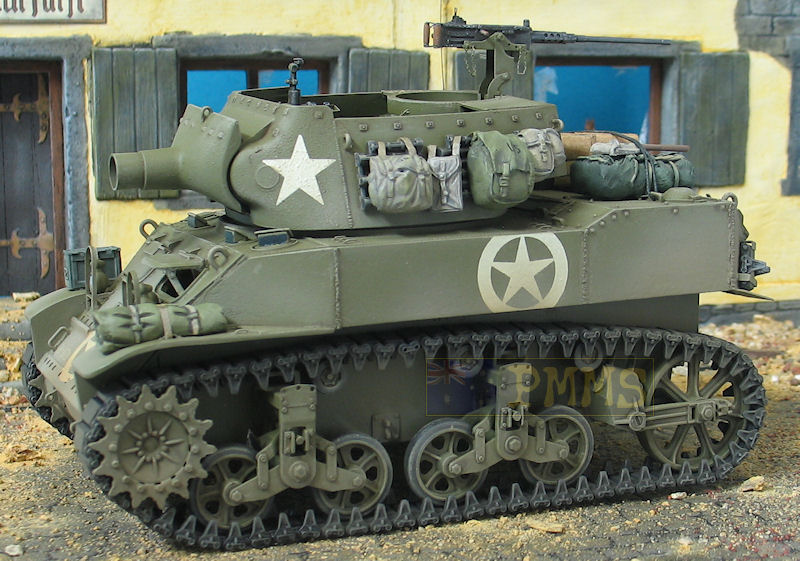
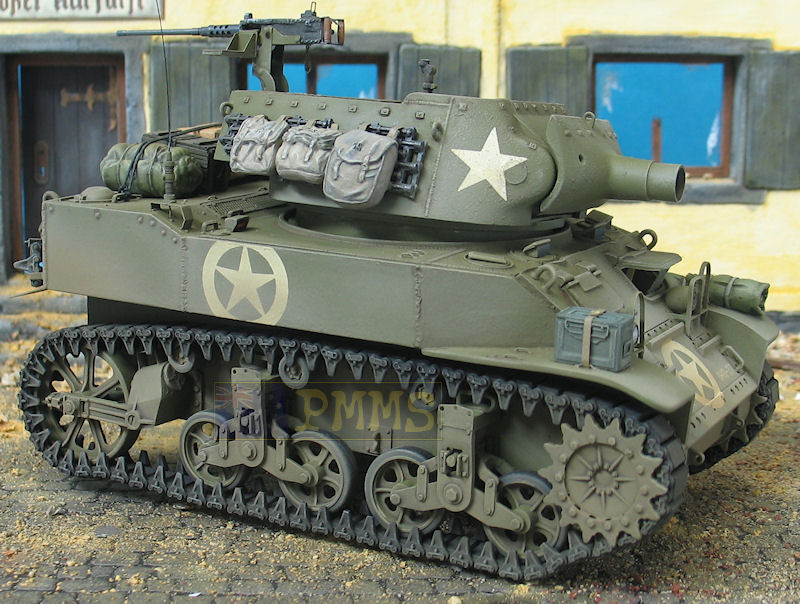
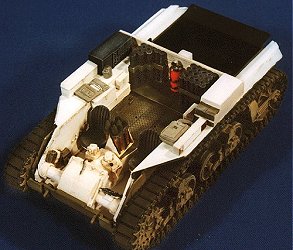
The exterior was airbrushed using Humbrol Authentics MC21 'French Artillery Green' (This gives a nice faded OD colour). When dry the markings were applied using 'Verlinden' rub-on stars from various sheets (I just love rub-on dry transfers for armour). The unit markings on the front plate were from the kit decal sheet and applied after that small area was glossed.
When all markings were applied the model was given an overall coat of 'Wattyl Estapol Matt' (This is designed to be used on floors and dries rock hard). Allow at least 48 hours for this coat to dry before applying any washes or weathering. Various parts in the turret interior were picked out with appropriate detail painting (Traverse gears, breech-block, gun sight etc.). The grousers on the turret sides were also painted 'Gunmetal'.
Weathering was by first adding a wash of thinned Raw Umber Oil Paint (I use Humbrol thinners for this), use a small fine brush to add the wash only where you want it and pick off any excess with another clean brush or cotton bud moistened with thinner. When the wash is dry, I drybrushed the model using a light khaki drill colour to bring out the highlights and surface texture. (The wash must be fully dry or will just lift off when drybrushing)
I next added all the equipment, storage and personal gear. This came from various sources, mainly 'Verlinden' sets and the new 'Tamiya Allied Vehicles Accessory Set'. The gear bags from this set have excellent detail and come up very well when compared to resin items. Remember to add straps and tie downs for all equipment, unlike the trend set by a well know European modeller, Velcro was not invented till well after WWII.
The dust effect was added using the airbrush to lightly 'mist' various earth colours around the lower sections of the hull and running gear. Remember this dusty effect will cover most of the rear deck, just check out the family car after a trip down dusty roads. It is important to have all gear and accessories added before this final dusting as they get covered too. The last thing was the aerial added from finely stretched sprue
As I said, I really like this vehicle and enjoyed building the kit, the extra bits added help to enhance the final appearance.
 STUART A History of the American Light Tank STUART A History of the American Light TankR.P.Hunnicutt. Presidio Books ISBN 0-89141-462-2 |
 STUART U.S.Light Tanks in action STUART U.S.Light Tanks in actionSteven.J.Zaloga. Squadron Signal Publications ISBN 0-89747-084-2 |
 M3 & M5 STUART Light Tank 1940-1945 M3 & M5 STUART Light Tank 1940-1945Steven.J.Zaloga. Osprey New Vanguard 33 ISBN 1 85532 911 5 |
Please to help the reviews continue, thank you
