
 |
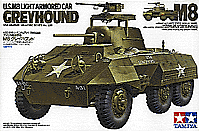
 M8 Light Armored Car 'Greyhound' 1/35th Scale Review by Terry Ashley |
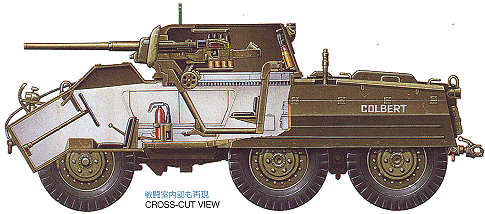
Illustration from box top

 |
 M8 Light Armored Car 'Greyhound' 1/35th Scale Review by Terry Ashley |

The
Vehicle:
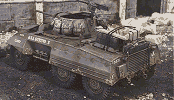
In 1941 the US Army requested a new design for a wheeled Gun
Motor Carriage and requirements required a rotating turret with a 37mm gun.
By June 1942, a prototype design of 6x6 configuration was selected and became
the M8 Light Armored Car. The new M8 entered US Army service in early 1943
and
was extensively used by Mechanized Cavalry units, replacing the aging M3A1
Scout Cars. The Ford Motor Company of St. Paul, Minnesota built over 8,500
M8s between
1942 and 1943,with a number going to the British under Lend Lease, who named
it "Greyhound".
The M8 was of a welded hull design with an average thickness of 0.75in (19mm).
A 37mm M6 gun (also used in the Stuart Light Tank) is mounted in a central,
rotating, two-man turret. The M8 was capable of 55mph (88kmh) on good roads,
this speed was mainly due to the fairly thin armor, which made the M8 suitable
for recon and escort duties only.
A crew of four consists of the driver siting at the left front of the vehicle
with the radio operator on the right. The turret has the commander on the right
side, while the gunner sits on the left. The commander also acts as the 37 mm
main gun loader.
A six cylinder, in-line, JXD Hercules 320 cubic inch, 110hp gasoline engine,
powered it and with its low 6.5 to 1 compression ratio was able to run on low
octane fuels. A 56 gallon fuel tank made for a range of 350miles (560km). All
three axles were powered through separate drive shafts from the transfer case,
the front drive could be disconnected for extended road travel.
As well as the main M6 37mm gun, there was one coaxial .30cal M1919A4 MG and
one .50cal M2 MG for anti-aircraft defense mounted on a pintle mount at the
back of the turret. Later vehicles had an improved skate ring mount added for
the .50cal A/A MG that circled the turret. The 37mm gun could fire HE, APC or
AP rounds and while obsolete against most German armour was more than a match
for Japanese armour in the Pacific region.
The interior was painted white except for the insides of the hatches that were
OD green, as was the interior surfaces around the driver and co-driver's heads.
Post war it was used by a number of other countries as well as by the Allied
forces in Korea and by the French in Vietnam.
Technical Data:
|
|
Construction:
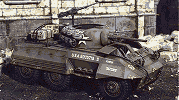
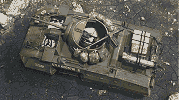
The kit is built basically straight from the box for the purposes
of this review, to explain the construction and highlight any traps etc. I
did add a few details such as drilling out the exhaust and gun barrels and
thinning
of the head light guards for a better appearance, plus other details as explained
below.
Steps 1 to 4 is the lower hull section and suspension. The center on
the lower hull is a separate piece to allow for good detail on both sides. The
drive train is in one-piece (becoming a Tamiya trademark) allowing precise alignment.
Added to this piece are the insides of the diffs, steering arms, springs and
shock absorbers. No problems were encountered and by following the instructions
you shouldn't have problems either. I did leave the exhaust off to be painted
separately.
Steps 5 to 6 is the lower hull interior. This consists of rear and side
bulkheads, front seats and gear shift lever. Also is an excellent driver's instrument
panel with raised detail, which comes up a treat with careful painting. Note
the two front seat backrests are different shapes, take care to get them the
right way around. Also included is the central fire extinguisher and radio in
left side sponson, both are well detailed. I again left these separate for painting.
A few details were added to the interior.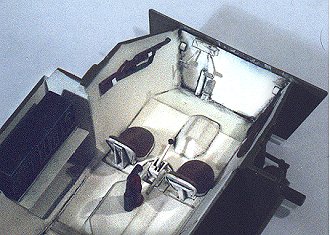 I added the driver's accelerator, brake and clutch pedals from thin card and
wire and the hand brake lever from stretched sprue. I also added two M1 carbines
in racks on the front sidewalls as these can be seen throught the large hull
hatches. I then masked off the edges and sprayed the interior Matt white, followed
by detail painting and weathering. Note the inside of the upper hull around
the two front hatches is coloured olive drab and not white.
Step 7 Attach the upper and lower hull sections along with the engine
bay doors and the insert with the turret ring and driver's hatches. Before attaching,
you must open up the locating holes for the tool storage. There are optional
holes, obviously for the different tool storage on an M20. The holes needing
opening are indicated by small arrows on the inside of the hull top, be sure
to open only these and not all holes. Fit of the hull sections was spot on,
no filler required at all.
Step 8 Assembly of the wheels is straightforward with the separate brake
drums trapping the poly cap to the main wheel section. I removed the small raised
mould line around the center of the tread pattern with 'wet and dry paper',
light sanding of the edges of the tread pattern also removes the 'sharp' edge
and gives a more realistic appearance to the tyres.
In Steps 9 to 11 you attach all the small items to the hull. These include
the headlights with guards (thinned down for a more realistic appearance), lifting
lugs, rear engine deck handles and other small items. There are a couple of
choices here with either mine racks or storage boxes on the hull sides. As most
photos I have seen of WWII vehicles have the mine racks, I fitted these. If
you are going to fit the wheel guards, you have to attach the wheels at this
stage as they can't be attached after the guards are fitted. You also have the
choice of open or closed front hatches, I left these off until all painting
was finished. No problems were encountered with the fit of any of these parts,
the only caution is to handle them with care as some are very small and finely
moulded, just check out the rear towing pintle as an example.
We now turn to the turret in Steps 12 to 15. The turret is in two halves
with nicely moulded ammo racks attached to the inside walls. As mentioned earlier,
there are a few small ejector pin marks on the sidewalls, these are easily removed
with a piece of 'wet and dry'. The gun and mount are brilliant. The main gun
breech is in two halves with separate breech block and barrel which is moulded
in one piece eliminating any seam line (no oval barrel syndrome here). A well
detailed guard frame is added to this. This assembly then fits between the two
part gun mount which includes a separate elevation mechanism, added to this
is the main telescopic sight and co-ax .30cal machine gun (this too is very
well detailed). This all builds into a beautiful little assembly which is slipped
through the opening in the turret front to which the outer mantlet is attached.
This to is nicely done with subtle surface detail including cast numbers.
The turret ring and basket is moulded in one piece, which is a brilliant piece
of engineering in itself, with excellent detail including rotation teeth. Attached
to this are the crew seats, traverse mechanism and mounting brackets. This
assembly
then fits to the bottom of the turret. All this section is painted olive drab
with various bits detail painted, eg the seat covers, sight and M/G. You have
a choice of attaching the M36 gun mount to the turret top, this again is a
nicely
detailed assembly made up of 7 pieces. It is up to you if this is attached
or not as both variations were widely seen during WWII. If using the gun ring
make
sure you don't open the locating hole in part D24 and attach part D37 to the
turret rear instead of parts D36 & D40 (Parts D17, D36 & D40 are attached
for the rear turret mounted .50cal M/G when not using the gun ring). The turret
base has the mounting bases for two M1 carbines, but they aren't included in
the kit. I found two spare M1s and attached these to the base with the top
clips
made from thin paper. These added a more 'lived in' appearance to the turret.
The M2 M/G had the barrel handgrip added from an etched detail set. Finally
the aerials and tiedowns were added using thinly stretched sprue. Again no
problems
were encountered during this sequence, this is helped by the precise and well
detailed instructions, something we have come to expect from Tamiya.
Step 16 is the final assembly, attaching the turret to hull and assembly
of the nicely detail figure. There is only one figure with the kit, that of
a standing GI looking through field glasses. No crew figures are included but
I'm sure the resin figure companies will come the rescue here. Warriors
with their excellent M18 crew spring to mind, these figures could easily be
used for the M8 as well.
Conclusion:
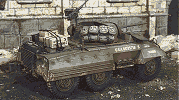
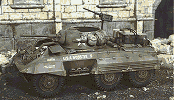
As you may have gathered, I am extremely impressed with this
kit. It is up to the standards we have come to expect from Tamiya. As with
their other recent releases, I didn't have to bother with any filler. While
the interior
detail is good, there is obviously scope for additional detail to be added
for those wanting to 'give it the works'. It is a welcome addition to the range
of allied vehicles now available in kit form and as mentioned this kit is set
up to easily produce an M20 variant some time in the future.
I would highly recommend this kit to any anyone, while it's ease of assembly
is good, younger modellers' may be challenged by some of the smaller parts,
but with assistance from the 'old man' everyone should enjoy building it.
I myself will be building more as the variations and markings are almost endless.
Click here for a review of Tamiya's M20 Armored Utility Car
References: