
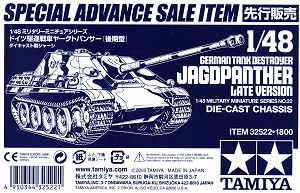
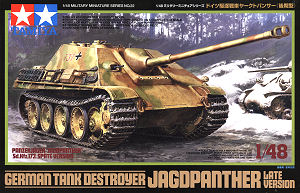
German Tank Destroyer Jagdpanther
Late Version
1:48 Scale - Kit No.32522
First Look by Terry Ashley
A ‘Special Advanced Sale Item’ kit was released in plain white box with a small blue label and signed by Mr Tamiya San followed by the full colour box release, the reason for this is unknown as there was only about a week between the two releases. Maybe to create some collector interest or the colour box was not available for the scheduled release date, but the kit inside is the same for both.
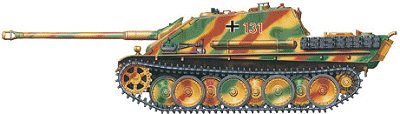
The kit can only be built as a late model Jagdpanther Ausf G2 with large flame dampener exhausts due to only the late design engine intake grills being provided although Tamiya give you the earlier three and one pipe exhausts as an option these shouldn’t be used due to the grill type. This late version did not have Zimmerit applied so that’s one job you don’t have to worry about.
Another issue arising from the late model is that all the tools were relocated to the engine deck or rear hull plate with none mounted on the hull sides so you will have to relocate these on the model adding the appropriate tool clips and brackets.
Moulded in the usual light beige plastic the kit has 195 parts plus the die-cast lower hull tub and a couple of poly caps and screws for attaching the upper and lower hull parts and a length of thin twine for the tow cables.
The standard of moulding is again typical Tamiya with clean crisp mouldings and nice surface details but there are a few pin marks to contend with while some parts lack detail which is quite noticeable as with the Panther G kit, also all the grab handles on the hatches are raised plastic and will need to be replaced by thin wire for a better look.Lower Hull:
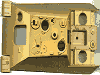
This is the now standard die-cast tub which is severely lacking in details
with basic underside panel details, cast on axles that lack definition between
the axle and hull which is most noticeable on the idler axles. There are no
shock absorber attachment bolts, no track pin push back plate on the hull side,
no weld block on the side of the front hull and there is a large gap to be
filled between the separate plastic front hull extensions and the die-cast
hull but we should be used to these detail compromises on the metal tub by
now.
Additional plastic parts are the side hull extensions, the lower front hull plate with top weld details as well as a separate rear hull panel with the fit of these parts to the metal tub being quite good.
The final drive housings are also separate parts but totally lacking in any detail with the large attachment bolts being very conspicuous by their absence while the drive sprockets only have detail on the outer faces with the inner face totally bare as well as having some large pin marks. The outer detail is very crisp and nicely detailed and the two poly caps are trapped between the inner and outer sprocket halves for fitting to the axle.
The road wheels again have nice details on one side only with the 24 outer rim bolts but no details on the inside of the wheels, this is not noticeable on the inside pair of wheels as they fit closely together but is more noticeable on the other pairs of wheels.
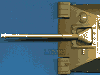
The track is moulded in plastic link and length sections with nice outer link details but pin marks on the inside of the links and no lightening holes in the guide teeth. The long sections of track are for the top and bottom track runs with shorter sections for around the sprockets and idler wheels. To ensued the track is aligned correctly there is a small pin on the inside of the idler wheels that fits between the guide teeth on the track sections as they go around the wheel and this ensures the track lines up when it reaches the sprockets.
Upper Hull:
The upper hull is a single large moulding with separate sponson overhang fillers
to eliminate the hollow look as well as separate side fender strip while the
separate full length Schuerzen is in one piece and quite thick for this scale.
The front fenders are also included in the hull moulding which are also a little
on the thick side and you can thin the edges yourself or wait for the inevitable
etched replacements.
Openings are included in the hull for the separate engine fan covers and intake grills, central engine deck that covers the screw point, all the hull top hatches and sight flaps as well as the large opening in the glacis for gun mounting and MG ball.
Detail on the hull is quite good overall with subtle weld marks where the hull plates interweave and nicely defined hull top details while on the engine deck all the intake grills, fan covers, central engine door and other ventilators/intakes are all separate parts for good definition. Under the engine intake grills are shallow tubs unlike the open void of the Panther G and you will want to paint these black before adding the grills unless you plan on adding additional detail inside.
On the engine deck the plates should have raised bolts and not the flush countersunk bolts as with the Panther Ausf G deck but this is easy to remedy by adding small hex bolts made from a punch and die or any of the various bolt sets now available.
The rear hull panel has the inspection plate covers moulded in place as are
the two side storage boxes which have additional top hatch doors to give a
bit more definition as well as the towing pintle and tow shackles as separate
parts plus a nice three part jack that does have the mounting brackets attached.
You get alternate exhaust pipes, one with the later type flame dampeners with
optional curved top cowl and square welded lower covers or the twin single
exhaust pipes with twin engine manifold pipes on the left exhaust pipe but
as mentioned due to the late intake grills the flame dampener exhaust would
be more appropriate. The small fan blades at the top of the flame dampener
exhaust are nicely represented but the bottom opening of the pipes leaves a
large gap when viewed from below after assembly.
The engine deck fan covers are separate parts so you can fit the two low round covers or add the raised heater cover on the left intake for the late model. The details on the covers are nicely rendered and the raised heater cover has a separate upper fan to add a bit more definition, these fit perfectly to the engine deck. Again due to the late intake grills the raised intake on the left side is more appropriate rather than the flat cover.
For the intake grates you get the louvers that were fitted over them on the later models which are moulded quite thin and look okay again giving you opportunity to use these are required.
The separate central engine hatch fits very snugly to the deck cut-out but just remember not to glue this in place before you have screwed the hull tubs together. Added to the door are separate ventilator covers again for good definition and there are also two small brackets at the front of the engine access door which aren’t included and these will need to be added.
At the front is the separate MG ball mount coaming which has a separate inner part for the gun mount and also adds the second bullet splash ridge applicable to the late type ball mount and again the fit of this to the hull is spot on. The top profile of the MG aperture is curved but this should be straight when viewed from above and you can easily fix this with a sharp blade.
The front head light has a separate face with open light slit and the side mounted barrel cleaning rod containers have separate ends for better definition but the tools are moulded with the tool mounting brackets on the hull sides with just the tow clevis and fire extinguisher as separate parts but as mentioned above the tools were all moved to the engine deck and rear plate on the late model Jagdpanther and you will have to relocate these which will be difficult due to the tools being moulded with the mounting brackets.
The two lifting lugs either side of the front hull are missing but can easily be added from plastic rod and card.
On the hull top are separate two part crew hatches as well as separate binocular sight aperture opening flap plus separate covers for the ventilators and close in weapons aperture. All the periscope apertures are hollowed out but there are no periscopes which you will have to make yourself for a better appearance.
The rear fighting compartment escape hatch is separate with separate hinges that allow the hatch to open and close but as there is no interior it’s best to glue this closed while the right side shell ejection port is a separate part for good definition but is fitted closed only.
The spare track carried on the rear flank is moulded in one piece and is quick and easy to fit.
Gun Mounting:
The inside gun mounting makes no pretences to reality and is just a simple
design that allows the gun to elevate and traverse easily with two small
polycaps used for the elevation and the upper gun mount fitting through a
lower mounting plate and held in place with a small bracket for traverse.
The bracket (part C4) is designed to clip in place under the lower mounting
plate (part C9) but unfortunately does not fit and you will need to cut out
a small recess at the back of part C4 to allow this to clip into place over
the lug under part C9. This is an unusual engineering slip-up by Tamiya who
are usually spot on with this sort of thing (see Images).
Once the mounting is assembled the lower mounting plate (part C9) glues to the underside of the large outer gun mounting and the mantlet is glued to the mount from the outside and as the front hull opening is large enough for the assembled gun mount to slip though you don’t have to worry about when you glue the mantlet in place.
Detail on the outer gun mount is very good with well defined bolt head and recess details for the eight large bolts with the width of the bolt recesses being correct for the late version (they were narrower on the earlier model).
The outer mantlet has nice contours which matches photos and also includes the small notch on top of the mantlet but there should be a small hole in this which can easily be added with a small drill bit. Both the gun mounting and mantlet have subtle surface casting texture which should look good when painted.
The Pak43/3 88mm barrel is split longitudinally in the usual manner and includes the late smaller muzzle brake with the barrel halves which fit together very well leaving only the smallest of join seams to sand smooth. The fit of the barrel into the mantlet was very snug and held in place without glue which could come in handy to remove at any time.Decals:
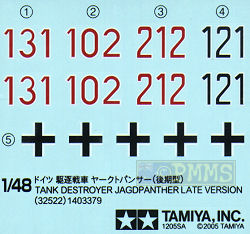
Theses are the usual Tamiya fair of nicely printed markings with thickish carrier
film and provide turret numbers and balkenkreuz for three Jagdpanthers.
Conclusion:
Overall another sound kit from Tamiya with a mix of good crisp details and
gross simplifications (cast hull tub and final drives being two examples).
The detail on the engine deck and hull is very well done but watch the detail
applicable for the late version Jagdpanther.
Assembly is very straightforward without any traps apart from the gun mounting bracket as mentioned above and you should be able to put this together quickly if you are not worried about adding additional details.
Recommended.
Decal sheet
The Sprues
Click on thumbnail for larger view


Detail images


Close new window to return to review
References:
| Jagdpanther
Ausf.G1 & G2 Panzer Tracts No.9-3 Thomas L. Jentz and Hilary Louis Doyle 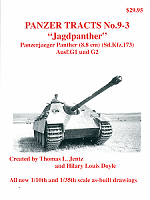 |
Panther Jagdpanther & Brummbar Achtung Panzer No.4 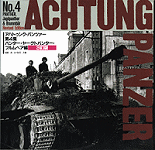 |
Review Kits courtesy of my Credit Card and the excellent service from Hobby Easy and Rainbow Ten.
Page created December 18, 2005