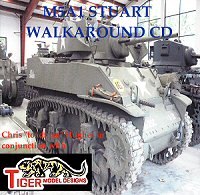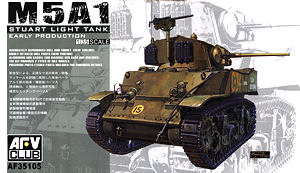
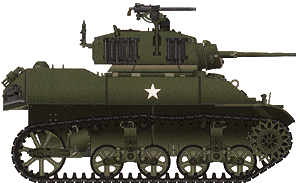
Following on from their excellent kit of the M3A3 Stuart (kit #AF35053) two years ago AFV Club has finally released the much anticipated kit of the M5A1 Early Version which was used in both NW Europe and the Pacific campaigns. It was used by many of the Allies including the US Army and USMC and the British and other Commonwealth forces, the Free French as well as numerous Countries well into the Post War years such as the Republic of China.
The initial M5 Stuart used a redesigned hull with the turret from the M3A1 with the M5A1 having the turret from the M3A3 as well as other improvements such as the belly escape hatch, ventilator added between the hull crew hatches and beefed up idler mounting for the increased weight. Also incorporated were the new pressed steel dish road wheels and reinforced drive sprockets with all these features included in the kit.
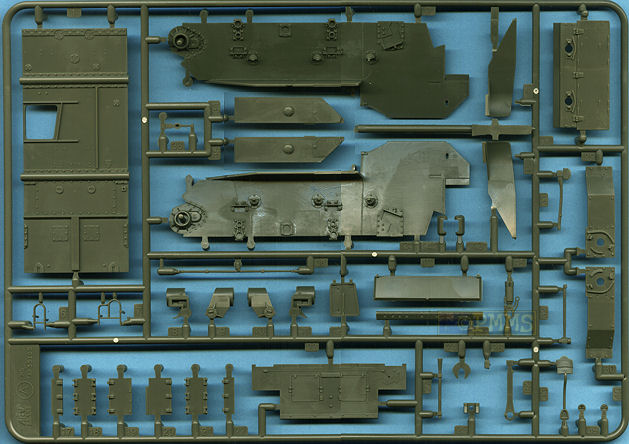
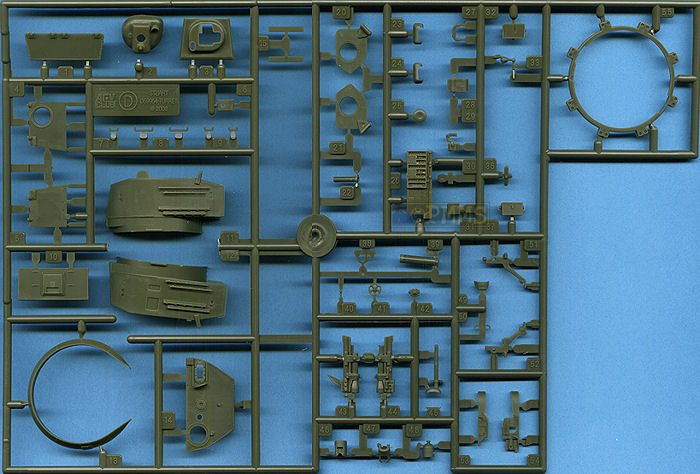
This uses a number of sprues from the earlier M3A3 kit for the running gear, tracks, main 37mm gun and cal.30 MGs plus smaller details along with new sprues for the hull and turret parts as well as some additional running gear parts. There are also some left overs from the M3A3 kit such as the turret halves and old smaller idler mountings and you should ensure you use the correct parts for this kit.
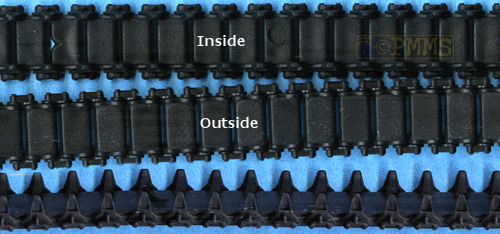
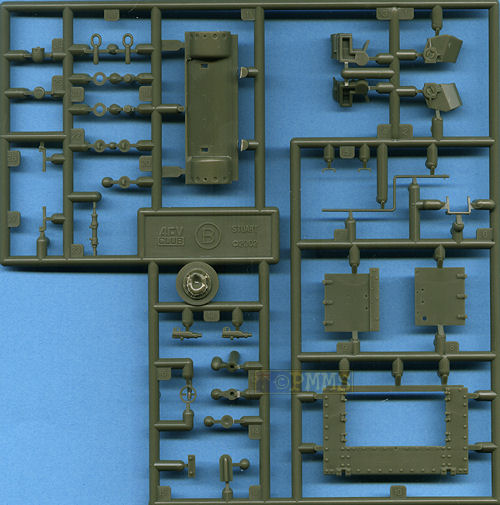
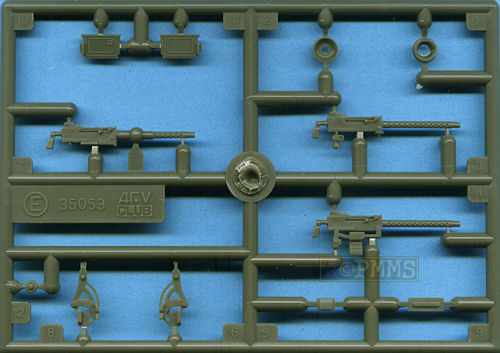
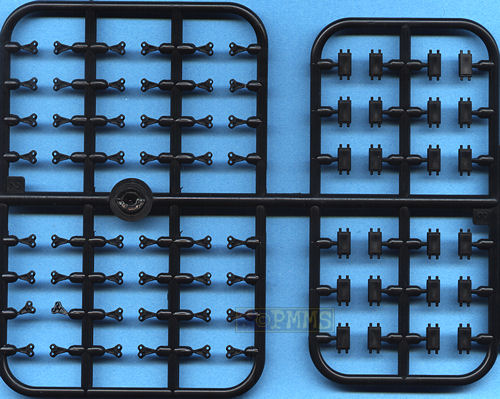
The kit consists of 290 parts in olive drab plastic, a small fret with ten etched parts, a metal 37mm barrel, decal sheet, short length of twine, a few vinyl poly caps and one sprue with 72 parts from their T-16 individual track link set (for the spare track links) as well as two full length T-16 vinyl tracks.
Also included is a full box sized poster of the box art image of the M5A1 which can be framed to decorate the model cave.
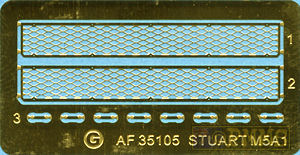
Etched and metal parts

The quality of the mouldings is good overall but there is a bit of fine flash present especially on the older parts and a few small pin and sink marks about the place. These are kept to a minimum and quite small and should be easy to eliminate while some of the parts are extremely fine and will require care to remove from the sprues and during assembly.
Many of the assemblies are multi-part for good definition and detail, an example being the hull MG which has three additional pieces for the ball mount and the main 37mm gun made up of 17 parts including the metal barrel and all the fuel filler caps, ventilators and periscopes being separate pieces.
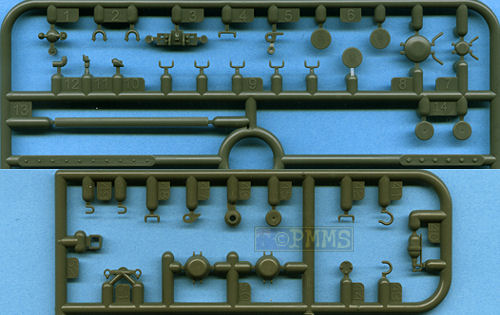
The sprue runners also include small bolt heads that you cut off with a sharp blade and add to the model as required for additional detail and these can come in handy for other detailing also.
Dimensionally the kit matches known measurements as well as the enlarged 1:48 plans in the Hunnicut Stuart book perfectly with any discrepancies well within accepted tolerances.
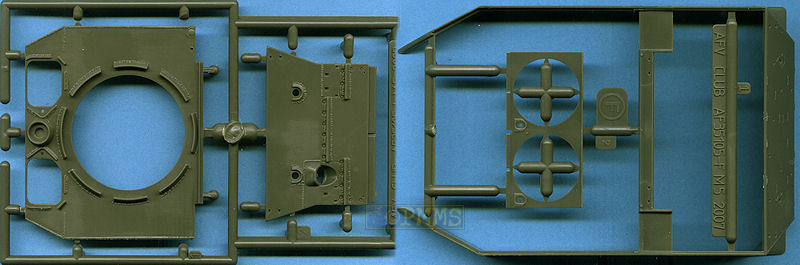
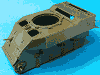
This is not the conventional tub but has six separate main parts that fit together to form the tub with these parts having detail on both sides most notably on the floor and hull sides. This includes the bogie, return roller and idler mountings as well as nice bolt head detail and weld seams which are well defined. On each side of the hull between the bogie mountings are what appear to be indented squares remaining from the moulding process but these are just very fine raised lines and can be removed very easily and quickly with the tip of a #11 blade without any trace remaining on the hull sides.
Fitting these parts together is paramount to the outcome of the kit and after cleaning some minor flash from a couple of the mating surfaces the fit was good overall and using the lower front plate (part B11), rear plate (part A13) and rear fan mounting (part F2) as supports you can get a perfectly square assembly without any real problems.
The separate lower hull escape hatch is a very snug fit into its opening and there are the additional bolt heads to be added to the final drive housings along with the inner bulkhead (part A23) that adds further strength to the tub assembly.
Adding the separate rear sponson covers will need a little care to get these as snug as possible to the hull sides with these including underside details to add more to the kit.
At the back are engine access doors in six parts that fit together across the rear hull and this will allow these to be shown open should someone come along with a resin engine for the insides as the fan bulkhead is also included.
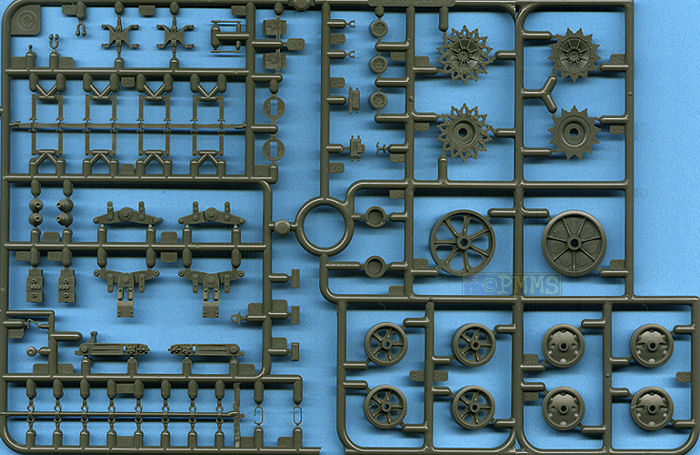
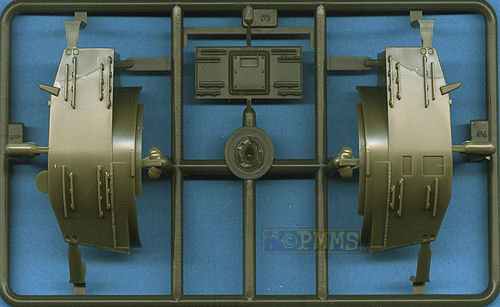
The kit has two alternate drive sprockets included, the earlier open fancy type and the later solid disc type and these are actually different sizes with the open type being large in diameter with 14 drive teeth while the solid type is smaller in diameter with 13 drive teeth and the kit sprockets include these features nicely.
The inner sprocket hub includes the rib detail but there are some sink marks on a couple of the hubs to deal with and the inner disc also includes rivet detail. There is a small poly cap that is trapped between the two sprocket halves as you assemble these allowing you to easily fit the sprockets to the axle stub as any time.
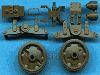
The two bogie units each side are from the M3A3 kit along with the same open spoke road wheels plus new solid dish road wheels with two styles included with different sized recesses for the grease nipples. Unfortunately these have open backs lacking in any detail and while it’s not easy to see the backs of the wheels after assembly it would be nice to have complete wheels?
Detail on the solid discs is okay but they lack the actual grease nipples which can be added from small pieces of sprue as well there should be small bolts around the inner rim which are also not included and again adding these from fine sprue would improve the overall effect.
It should also be noted that there are only four of each type of solid dish wheels which means you will have to use a mix of types for a full set. There are photos showing a mix of wheel types so this is not unusual but it would have been good to have a full set (8) of each wheels type.
If you wanted solid dish wheels with detail on both sides as well as the grease nipples and rim bolts included there is always the Formations resin set #F037 M5A1/M8 Solid Road wheels that have all these details for quick and easy replacements.
Assembly of the bogies is straightforward without any traps and images show a mix of the solid dish types is quite common, also note the different top track skids for the front and rear station bogies to ensure you position these correctly.
At the back are the new enlarged idler housings designed for the increased weight of the M5A1 and AFV club have again captured this nicely along with a choice of open idler or later type with plated over lightening holes.
One thing to watch is there is a small internal plastic spacer washer (part B21) that does not need to be fitted if you are using the individual link track from AFV Club but only if using the full length vinyl track included with the kit.
Again assembly of the idlers and fitting to the hull is very straightforward without any problems as are the other running gear components.
Included in the kit is the original full length vinyl T16 track that has the end connectors in the correct positions as well as nicely defined link detail although on both my tracks there was a large deformity in the same place on each track. This can easily be hidden under one of the road wheels if you use this track so is not really a problem.
If you wanted individual working track, AFV Club already have the two sets available that fit straight to this kit, they are set #AF35019 T16 Track and set #AF35020 T36E6 track.
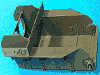
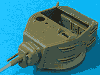
This consists of the upper shell with the hull sides and rear hull plates with the engine deck panels, side sponson covers, central hull roof and front glacis as separate parts with the fit of all these to the lower hull being very good depending on you assembling the lower hull perfectly square and even during the initial assembly.
Detail on the hull parts is very well done with the weld seams and bolts heads correctly depicted on the side walls as well as weld seams around the separate roof details and on the glacis that will come up well with careful weathering. The roof again has the turret ring separate which fits neatly into the recesses on the roof but take care as this only fits one way for the segments to line up correctly but it’s easy enough to work this out and there is a small arrow included on the part pointing to the front if you get caught out.
All other details such as the crew hatches with separate periscopes, hatch hinges and central ventilator cover as all separate parts for good detail definition.
On the engine deck the side sponson covers have separate fuel filler caps and after fitting the central engine deck there are the two intake openings with fine etched mesh to cover these as well as about 20 small bolt heads to be carefully cut from the sprue runners for the etched screens.
The fit of the engine deck panels was again very good but take care to align these level with each other as they can slip a little low if not careful?
The front glacis has excellent surface details such as the bolt heads and weld seams with the hull cal.30 machine gun provided in full along with workable gun mounting if you are sparing with the glue.
The plastic MG barrel has quite nice details but replacing with one of available metal barrels will improve the look considerably. I have used the new ABER barrels for this example and I just cut off the plastic barrel, drilled a hole large enough for the full cooling jacket to fit through the ball mount and added the metal barrel.
Other details added to the glacis are the headlights with commendably thin plastic bush guards as well as the lifting eyes with the fit of the glacis to the hull very good but there are no locating tabs so you must ensure you align plate level with the hull front lip and upper hull, which it does neatly in any case.
All the tools have moulded on tool brackets and the tail lights have different lens detail for the left and right lights so make sure you fit these correctly, the instructions have enlarged diagrams to show the differences and the two spare track racks on either corner have separate links and end connectors for good definition.
This is split in two halves with separate rear plate, front gun mounting, top plates and hatches as well as the separate turret ring fairing, this again has some small sink marks around it but a lot less than on the M3A3 ring and these will take a bit of effort to fill without compromising the surrounding detail.
Fitting the turret halves together can be a little tricky as there are no locating pins and the halves tend to slip all over the place as you try and glue them together but there is an easy way around this. That is to glue the rear plate (part L3) securely to one turret halve and this then acts as a secure footing to fit the other turret half in place, all very easy, see images.
The 37mm main gun is quite complete but there is quite a bit of excess plastic and flash to be removed from some of the parts especially the mating surfaces for the gun halves but after this assembly is quite straightforward if a little fiddly due to the small size of the parts.
The outer section of the barrel is aluminium and the fit to the inner plastic section a little loose so ensure this is lined up correctly as you glue this in place with the gun fitting though the gun mounting plate without any problems.
I again replaced the cal.30 barrel with a metal barrel for better detail definition but this is up the individual and the assembled gun mounting is a very good fit to the front of the turret.
There are additional detail items added to the inner turret walls as well as the radio set for the rear shelf which can easily be seen if the roof hatches are left open? It should be noted that the radio is the US type but there is not the British No.19 Radio set if you use those decal options.
The forward turret roof again has nice weld seam and separate periscopes with the plate fitting neatly to the turret without any trimming required, but the small real panel did need some minor trimming for a good fit but nothing excessive.
The two turret hatches can be shown open with the right hatch having a separate periscope and grab handles with the AA cal.30 MG having a metal mounting post and separate ammo box with the aerial added to the turret rear.
There are numerous grousers added to the moulded on brackets on the turret sides and rear plate and these are moulded quite fine with large sprue attachments and some effort and care will be needed when cleaning these up prior to fitting to the racks.
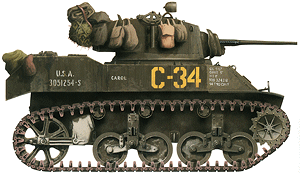
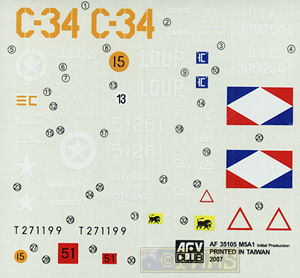
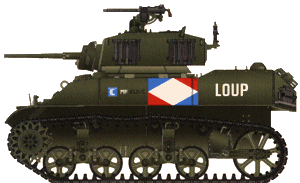
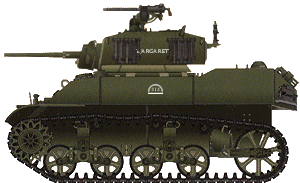
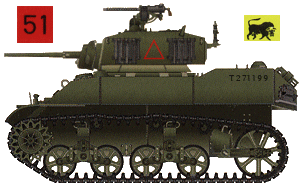
The decal sheet is nicely printed with good colour register and included some colourful markings for six M5A1s used by five different users as testament to the widespread use of the Stuart.
The markings included are:
 |

These are the usual exploded view drawings and as there are no really complicated sequences are quite easy and straightforward to follow.
The kit may have taken a while to arrive but will build into an impressive replica of the early M5A1 Stuart with the kit being dimensionally accurate and very nicely detailed along the way.
There is a bit of cleanup required on some parts but nothing to get excited over and the fit of most parts is very good with only a few major parts requiring some very minor trimming.
The detail on the hull interior could mean we will see a full interior to follow along the lines of the Sturmtiger interior AFV Club released for that kit but will also allow the fitting of any aftermarket interior much easier.
The kit will build into an excellent kit from the box and as with any kit there is scope to add those finer details for a standout model.
Highly recommended 8/10
Click on thumbnails for larger view
Detail Images
Close new window to return to review