

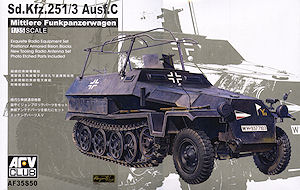
AFV Club continue to release kits in their Sd.Kfz.251 series and following the recent Sd.Kfz.251/17 Ausf.C Command Version (kit #AF 35117) they have released the Sd.Kfz.251/3 Ausf.C mittlerer Funkpanzerwagen which was essentually a standard Sd.Kfz.251/1 with additional radio equipment for communications between armour and artillery units. It was also fitted with a large rod frame antenna above the hull compartment which gave the vehicle a distinctive appearance. The sub-types, II through V carried different radio sets for different communications requirements with the externally similar Sd.Kfz.251/6 fitted with additional radio equipment again.
This kit is basically the same as previous Sd.Kfz.251Ausf.C versions from AFV Club along with the additional radio equipment from the Sd.Kfz.251/17 Ausf.C Command Version as well as the inclusion of the GG 400 Generator and new style Jerry Cans.
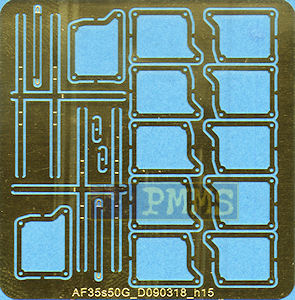
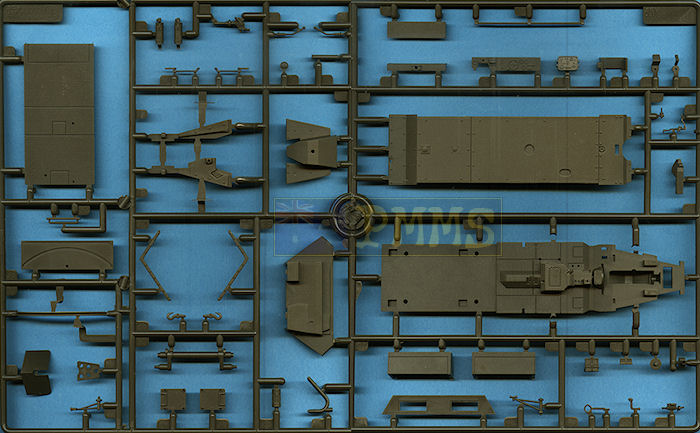
It consists of approximately 410 parts in olive drab plastic, a small etched fret with 18 parts, a set of soft vinyl tracks and the decal and instruction sheets.
The standard of moulding is again excellent with virtually no pin marks to be seen, this is especially noticeable on the hull sides, real hull panel and doors which have details on both sides but minor pin marks where they can’t be avoided. The details included on the parts is also very good with nice bolt head details on the hull and fenders as well as nicely rendered weld seams on the forward hull/engine compartment and the excellent tread plate pattern on the interior floor panels.
The new plastic parts are moulded extremely fine and care will be needed when removing these from the sprues to avoid damage but the resulting radio racks have excellent definition for plastic parts.
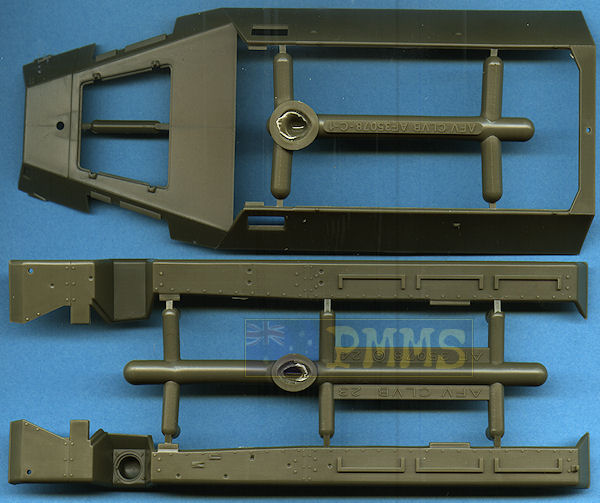
The lower chassis part has the engine oil pan included on the undersides and the central hump with the tread plate pattern on the top with separate rear floor section to allow good definition.
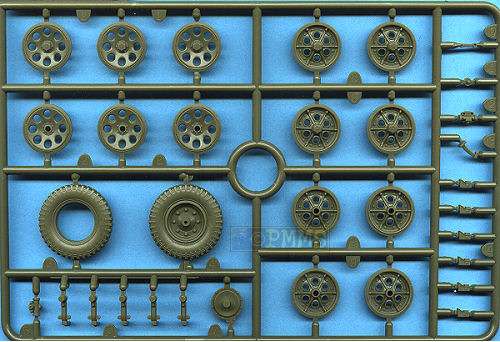
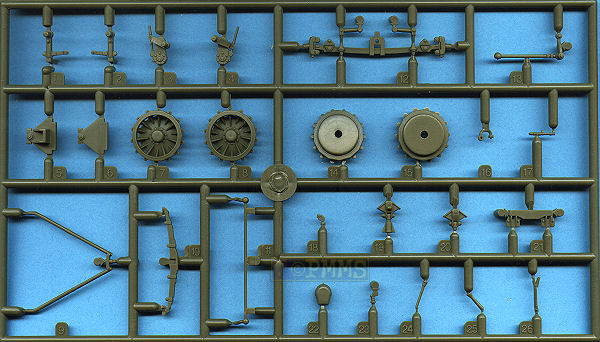
The road wheels from the previous kits have excellent details including the spot welds around the rims and on the drive sprocket the correct offset of the drive teeth. The front tyres have excellent tread pattern as well as good hub details on the wheels with the front axle having basic but adequate details that include the steering arm linkage on the left side.
On the outside of the side hull panels are the fender attachment flanges and the lower hull sides have excellent details on the axle mountings as well as recessed location of the bump stops with all the axles as separate parts which will allow you to animate the suspension if you wish?
At the back the towing hitch has been redesigned for a more refined appearance with separate retaining pin to add a little more detail back here.
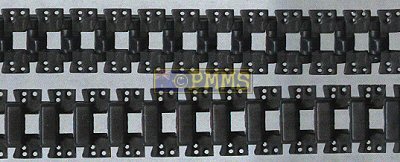
These are the same soft vinyl tracks from the earlier kits and have quite good details for the medium, although you may want to update to one of the separate individual track sets available.
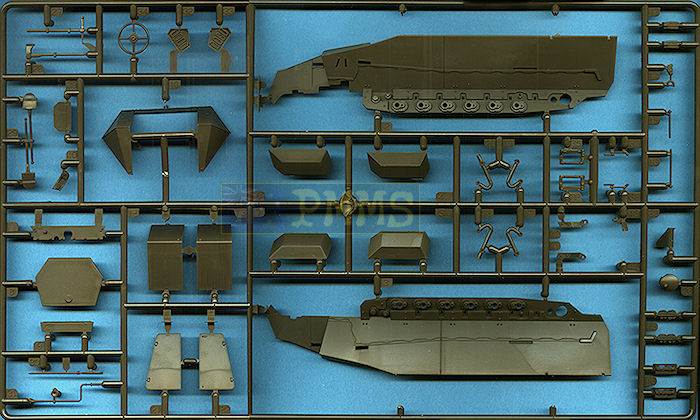
This is nicely detailed with the front engine compartment bulkhead in the correct position and a separate instrument panel with engraved dials as well as separate driver’s foot pedals and gear levers with the distinctive slanted steering wheel and separate radio and rack.
The two crew seats with two part lower sections and the back rests with good cushion detail on one side and the distinctive spring pattern on the back and as mentioned no pin marks to spoil the detail.
The front driver’s panel has separate vision port covers with each internal visor having three parts each for excellent detail definition; the two side vision slits also have two part internal armoured glass housings as well as hull cut-outs for the side vision ports.
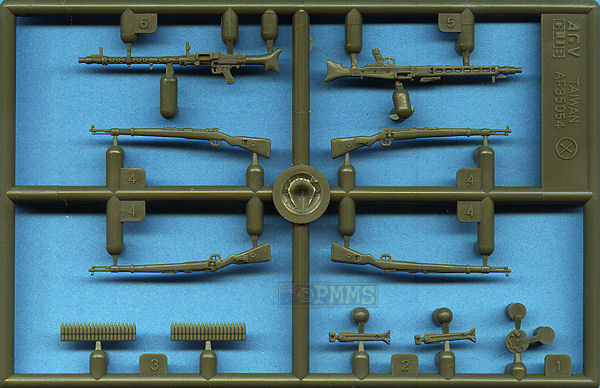
The hull top section (part UB03) is a separate part with the two padded head guards and on the underside but the fit to the hull will require some trimming as the fit is not the best at the side joins. You are also given two nicely moulded MG34s and MG42s in the kit but photos of the /3 Ausf.C show the MG34 mostly fitted so the MG42 can be consigned to the spares box.
Added to the side walls are the bolted V shaped join flanges and to the sidewalls the racks for the Kar98 rifles and MP40s as well as the rear bench seats and backrest/storage lockers. The rear right seat has to be left out for the radio rack but the instructions are not that clear on the seat placement as care is needed when studying the instructions here.
The rear doors are both separate with the large Ausf.C type hinges in three parts each and are the correct size with nice details that can be positioned in the open or closed position as you wish, while there is the fire extinguisher and ammo racks on the inner rear walls.
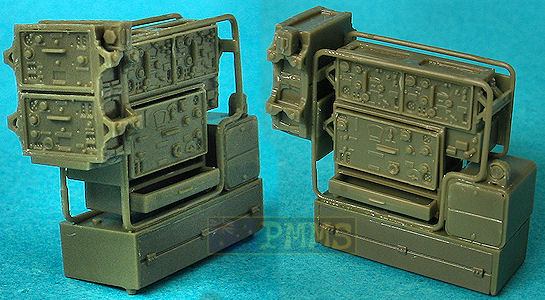
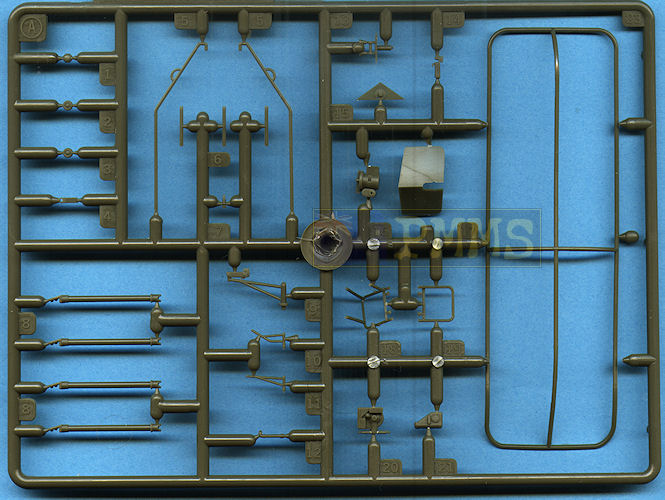
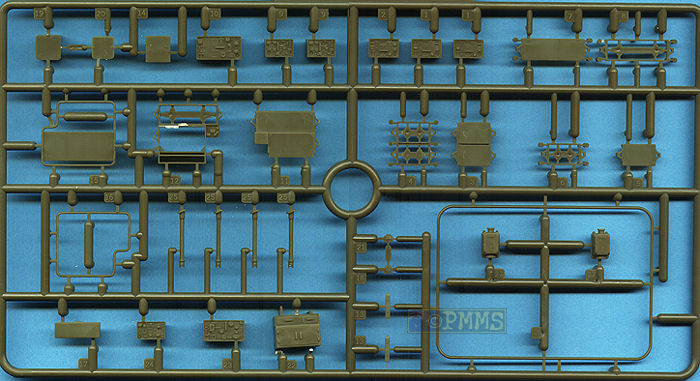
The large rack is made up of two halves that are moulded extremely thin and you will need to take care removing these from the sprues as well as the rod frames which are also very finely moulded with just thin mould seams to be removed. There are quite a few small plastic nodes attached to these frames and I found it easier to remove these while the frames were still attached to the sprues proper to provide support and then cut the frames from the sprues once the nodes have been cleaned up.
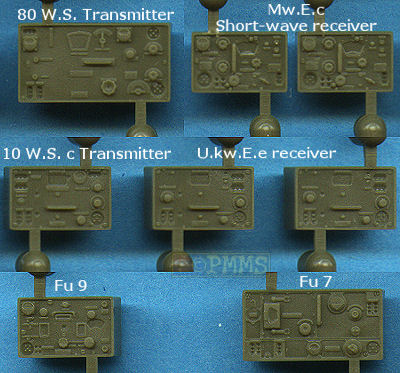
The radios which the instructions indicate to use are the Fu 9 set and two receivers (parts F9 and F10) and to fit the two small receivers (parts F9) into the rack the widths had to be reduced slightly at either and, this is only a small amount so test fit before removing too much plastic. The larger radio (part F10) is a good fit into the lower section of the rack is the small equipment drawer which you can show open or closed for a bit of added animation.
Added to the end of the main rack is a smaller rack with two additional radios and again the racks require careful removal from the sprues and in cleanup with the radios fitting snugly into the racks.
The assembled radio mounting and frames is positioned at the rear right side of the interior as indicated by in the instructions, note you have to open up two locating holes in the floor before gluing this in place.
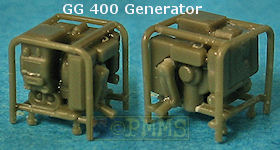
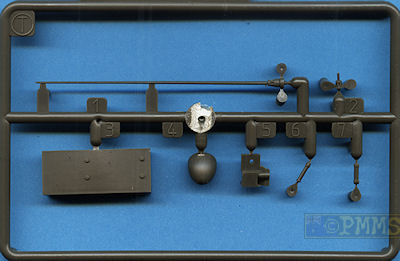
To add additional detail there is wiring that can be added to finish off the radios which can be added from thin wire and the kit also includes the small GG 400 generator made up of five parts plus two very thin rack parts that again require care during cleanup and assembly. The generator is usually stowed away and only used when recharging the vehicle batteries and not permanently wired up the radio rack and the inclusion of the generator is a very nice bonus.
As with the previous kits the upper hull is the same full length moulding with separate rear hull section that fits to the main hull easy enough but there are two locating lugs on the inside join which are quite exposed and you may want to trim these after the glue has dried for a better look.
At the front are separate engine bay doors as well a choice of separate welded or cast armoured intake covers which gives a subtle but nice choice plus the separate one piece nose plate.
The side fenders are separate parts and also have very nice bolt head and panel details with the two Ausf.C style head lights, the Notek light as well as a three part upper exhaust system and separate closed fender storage boxes. Added to the fenders are the pioneer tools which have the clips/brackets moulded on and could be improved by adding aftermarket tool clips if you wish?
The large rod frame antenna is moulded quite thin and care is needed removing from the sprue and during cleanup, there was some minor “bends” in the long side sections of antenna but these were easily coaxed back into alignment due to the fairly soft plastic used but care is needed.
Photos of the actual rod antennas occasionally show subtle bends so if the kit rods are not perfectly straight it’s not overly concerning. The four support posts have fine mould seams to be removed with small channels at the top for the rod antenna to sit into.
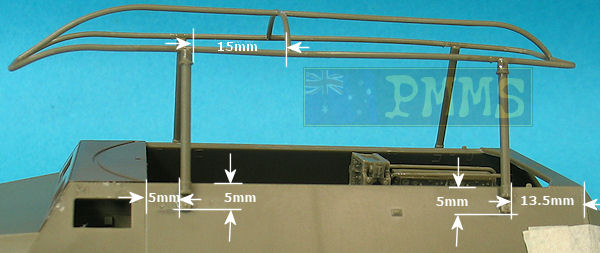
The main issue with the antenna is fitting these to the hull as there are no locating marks on the hull sides to indicate the correct location, nor is there any indication on the frame for the location of the support rods and you are left to basically work this out for yourself.
Indicated on the image below are the dimensions for adding the frame supports and rod antenna, marking the positions with a soft pencil will help with the correct placement.
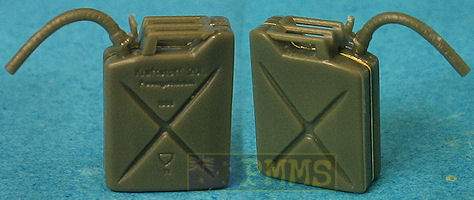
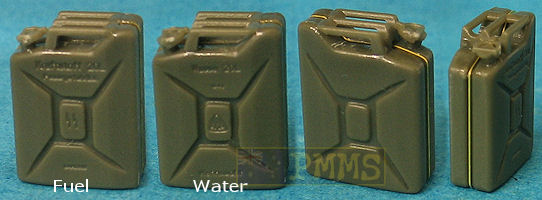
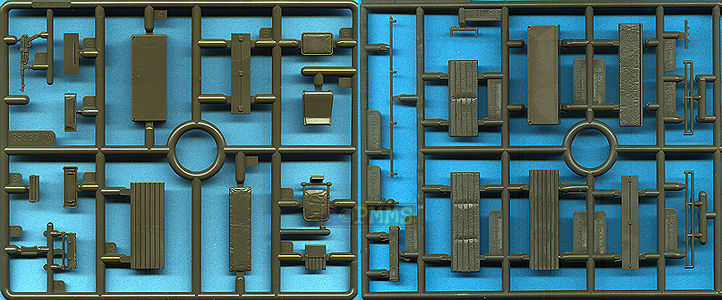
The kit includes a few additional items to use as required; these include new Jerry cans with thin etched central flanges trapped between the two can halves plus the separate filler cap and carry handles. There are three styles of cans included, the pre 1940 fuel can with embossed stencilling and the cross included on the sides. There is also post 1940 style fuel and water cans again with the appropriate embossing on the sides and a filler hose for one of the cans.
Pre 1940 cans
Post 1940 Fuel and Water cans
Etched jerry can racks are provided for the rear doors if you wish to add these as often seen on serving vehicles.
A very thin plastic boarding ladder is also included for the hull sides if required as well as a set of head phones with etched strap again to use if adding crew members.
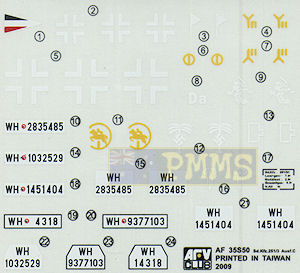
The decal sheet is well printed with thin carrier film and provides markings for five vehicles with a selection of balkenkreuz, unit insignia and number plates, the markings included are;
|
This is another excellent Sd.Kfz.251 Ausf.C kit from AFV Club with the distinctive large rod frame antenna to give a distinctive look to the model. Overall the level of detail is excellent with just a few fit issues along the way but nothing extensive.
The radio sub-assemblies are quite detailed but need a bit of care during assembly and adding the wiring will add to the overall appearance. The large rod antenna will also need care in fitting and the inclusion of generator is a nice bonus.
Highly recommended.
Click on thumbnails for larger view


Detail images

Close new window to return to review
See the Sd.Kfz.251 Subjects page for additional reviews of 251 related kits/update sets.
 SdKfz251 Ground Power Special GALILEO Publishing Co.,Ltd |
 Sd Kfz 251 Tank Power Vol.X Wydawnictwo Militaria No.224 ISBN: 83-7219-224-3 |
 Schutzenpanzer (Armored Personnel Carrier) Ryton Publications ISBN: 1930571291 |
 Sd.Kfz.251 1939 to 1942 Panzer Tracts No.15-2 Covers /1 to /10 |
 Sdkfz251 Osprey New Vanguard 25 |
 Sd Kfz 251 Tank Power Vol.VI Wydawnictwo Militaria No.215 ISBN: 83-7219-215-4 |