

M2/3A2 Bradley Running gear and new track - GW2
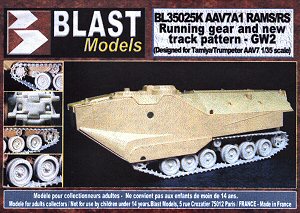
AAV7A1 RAMS/RS Running gear and new track - GW2
Blast Models 1/35 #BL35023K, 25K
Reviews by Terry Ashley
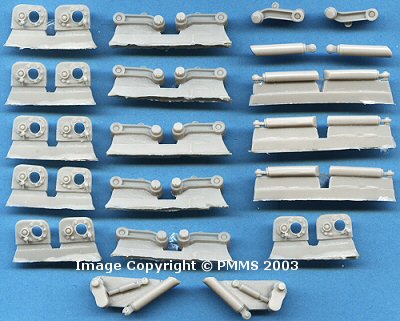
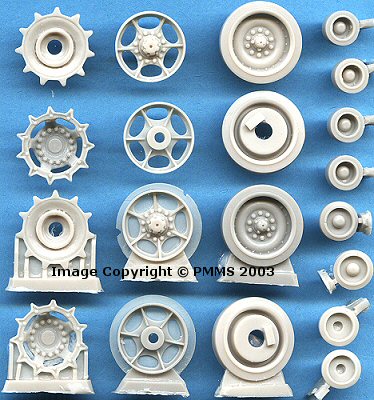
The M2/3 set consists of 54 resin pieces while the AAV7A1 set has 73 resin pieces with both sets having an additional 46 pieces for the new style track.
The parts are cast in a light grey resin and have nice details, the road
wheels in particular have excellent contours and bolt head detail including
the small bolts on the outer rim as well as the very nice recess around the
outer rim.
There are the usual casting blocks to be removed and due to the intricate
details on the drive sprockets and idler wheels you will need to take care
when removing the blocks. There is also some fine resin ‘film’ to
be removed but this is easy with just a light pass of the trusty Xacto #11
blade.
Unfortunately there were also some small air holes in a few of the parts such as on some road wheels which would provide a task to fill and also in my M2/3 set there was three outer idler wheel parts and only one inner part. Gilles from Blast Models is always accommodating in providing replacement parts if needed so this shouldn’t be a big hassle.
Each set has the road wheels, drive sprockets, idler wheels, return rollers, shock absorbers and track as common parts while the AAV7A1 set has additional axle arms and new hull suspension mounting parts included.
There is as you would expect some surgery needed on the target kits to accommodate the new parts with the AAV7A1 requiring the most alterations but nothing that is too taxing.
M2/3A2: (Click
for additional images of the set)
All that is required for this set is to shorten the axle stubs on the Tamiya kit
axles to receive the new wheels (as shown in the instructions) and reposition
the first return roller 4mm further back than in the kit. (The
instructions say to move this “forward” but should be moved
backwards).
 A new rear idler shock absorber and axle mount parts simply replace the kit
parts B69, B70 and you get the four shock absorbers to add to each hull side.
A new rear idler shock absorber and axle mount parts simply replace the kit
parts B69, B70 and you get the four shock absorbers to add to each hull side.
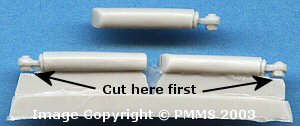
Just
a note here when removing the resin shock absorbers from their casting blocks,
make sure you cut through the casting point on the end attachment
before cutting off the main body otherwise the end section could snap off.
On the back of the road wheels is a small square notch which is designed
to sit flush on the axle arm to ensure the wheels are set at right angles
to the axle, a nice touch.
AAV7A1: (Click
for additional images of the set)
Firstly you have to remove all detail from the lower hull sides on the Tamiya kit to receive the new resin bits.
A full sized template is included in the instructions to show the location
of the new hull suspension mounting parts and by cutting this from the instructions
and lying on the bottom hull you can mark exactly where the new parts go,
this makes the job a lot easier.
After fixing the new hull suspension mountings in place drill holes to receive
the new axles, this will make a stronger join than trimming the axle stubs
to fit the shallow holes in the suspension mountings. There are the new return
rollers and shock absorbers to be fitted in place as well as the rear idler
wheel axle and shock absorber part to the rear hull. The square stub on the
back of the road wheels sits just on top of the axles stub for a stronger
join.
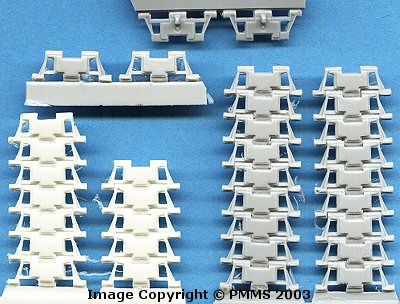
The Tracks:
Each set has the new style track in various lengths as well as individual
links and you use the longer lengths for the top and bottom track runs
while the individual links are used to fit around the drive sprocket and
idler wheels with the shorter sections used to join these up to the lower
track. There shouldn’t be any problems fitting the track and by sticking
the individual links onto a thin strip of masking tape you can easily position
this around the drive sprocket and idler wheels and add a small amount
of CA glue to hold the links in place (to themselves, not the wheels) and
then add more glue after removing from the wheels. Remember that this “live” track
does not have any sag so the straight lengths of track are perfectly okay
for the job.
Instructions:
The two sets have A4 sized page instructions with photos of the resin parts
being fitted to the kits supplemented with text instructions and I found
these very clear and easy to follow. The lower hull template in the AAV7A1
instructions really does make the positioning of the resin parts a non
event and a welcome inclusion.
Conclusion:
In all excellent update sets to bring the suspension and tracks up to current
standards for the two kits and as mentioned can be used on the existing
Tamiya Bradley and AAV7A1 kits or as an update set for the new ODS Bradley.
The work needed to fit the parts is nothing that should pose any problems
for
average modeller.
Recommended.
The sets can be purchased direct from Blast Models or from Mission Models in the US.
Page created 10 August 2003