

French H39 Hotchkiss
Bronco Models Kit No. 35001
Construction Review by Terry Ashley
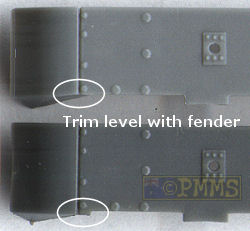
The fenders are in one piece per side which you attach to the top of the
lower hull tub prior to attaching the upper hull. The fit will require a
minor alteration at the front by trimming the inner fillet level with the
inside of the main fender to allow this to sit flush with the hull. The fillet
is quite thick at this point so there is plenty of plastic left after trimming
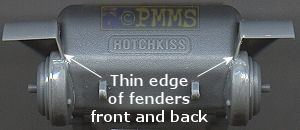
flush and I also thinned the outer edges of the front and back fenders for
a better scale appearance.
After the minor trimming the fenders fitted perfectly to the hull top cut-outs.
The two side visors (parts B10, B11) are position inside the forward hull without any problems and then the upper hull is glued to the lower hull with the fit here being very good and just the join line to the front hull section (part C11) requiring some minor smoothing out for a flush finish and if you ensure the upper hull is pushed hard against the front section when gluing the join line is quite small.
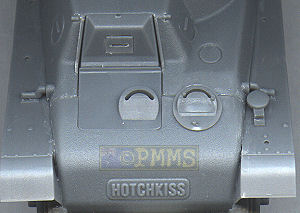
The two part driver’s hatch fits neatly in place but the upper hatch has a separate visor flap (part B14) that required a bit of trimming to fit and the vision slot had to be fully opened up with a sharp blade. There are no details on the inside of the hatches if you choose to show these open and the upper driver’s hatch is slightly narrower than the lower hatch and a sliver of plastic card each side may help to match the widths. The two small hatch bolts (parts B22) are very small and will need care in handling and I also opened up their locating holes a little for abetter fit.
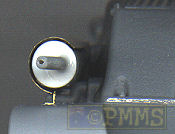
The separate hull front vent (part B26) should be positioned as far forward as the locating pin will allow as there is a bit of movement when fitting this.
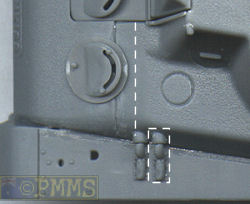
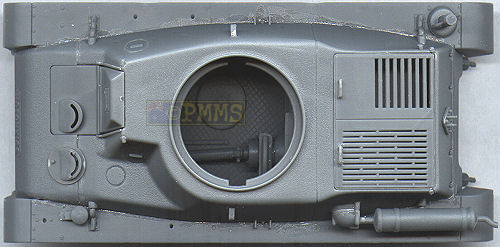
There are a couple of minor dimensional issues here in that the front fender
supports are positioned too far forward and should be about 2.5-3mm further
back as indicated in the image below. The hull join line should also be the
same distance further back so it passes above the hull vent and not through
it as is the case.
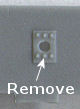
These modifications make take a bit of effort if you wish to correct them with
the hull mounted fender support being the trickiest. When fitting the separate
fender supports you should also remove the middle bolt from the bracket moulded
on the fender to allow the support to sit flush and meet the hull bracket correctly.
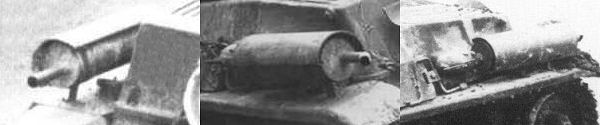
The other issue is that the rear fender mounted exhaust is the incorrect shape, the actual exhaust is basically a cylinder with a separate heat shield over the outside and the rear pipe is offset towards the inside with a small mounting bracket below the exhaust. The kit exhausts should have the ends flattened and the rear outlet pipe offset plus the addition of the heat shield from spare brass sheet or thin card.
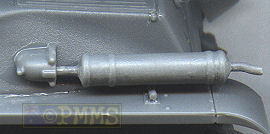
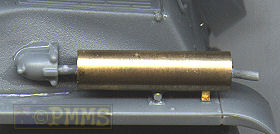
It should be noted that the Saumur H39 has a foreign exhaust pipe added and this may be where this confusion has arisen but as the exhaust is an even round shape it shouldn’t be that difficult to make and I am sure the inevitable etched update sets for this kit will included corrected parts.
The fit of the upper engine deck grills to the hull is very good not requiring any trimming and all the other smaller details are simply added as per the instructions with the tools having fairly basic clips/brackets moulded in place. Some of the locating holes may need opening up a little to fit the parts but that is all the trimming needed. The triangular bracket on the rear hull is way undersized but if you fit the spare road wheel or trench sled here the bracket is all but hidden.
Overall the hull assembly is good despite the dimensional issues with excellent surface details and good fit of the major parts as well as having the correct five recessed bolts at the hull rear but there is a bit of work needed.
Return to original H39 comparison review.
The Sprues:


Thanks to Bronco Models for the review kit.
Page Created February 20, 2006