
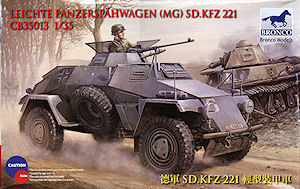
Leichte Panzerspahwagen (MG) Sd.Kfz.221
Bronco Models Kit No. CB-35013
Review by Terry Ashley
For defence against light tanks some also mounted the 7.92mm Panzerbüchse 39 anti-tank rifle as supplementary armament with the MG34 still in place on the turret mounting and the PzB 39 resting on its bipod mount. According to Panzer Tracts No.13 Panzerspäehwagen Armored Cars only 339 Sd.Kfz.221s were produced in two series by Eisenwerk Weserhuette AG from 1935 to May of 1940 with a few more for the SS and export to China.
After being replaced by the 2cm armed Sd.Kfz.222 in 1942 some Sd.Kfz.221 vehicles were refitted with modified turrets armed with 28mm sPzB 41 heavy anti-tank rifle to extend the service, which gave the vehicle a very distinctive appearance.
The initial kits released had an issue with the rear turret profile where the rear plate was slightly too wide resulting in the two rear side panels being too short but more on this later.
Bronco Models have now revised the turret shell profile with the rear and two two rear side panels more appropriately sized and now match reference photos well, the location of the side visors is also better positioned to remedy the only real flaw with the kit.
The new sprue C with the revised turret parts is available to anyone who has bought the initial kit from your place of purchase. The sprue itself is cost free but there may be a charge for postage and handling from the retailer.
With just 339 built there were quite a few variations on the turret visor arrangements with at least four different configurations seen in photos, the initial prototype with four vision ports, some with just two smaller visor covers on the side plates, with four smaller visor covers on the side and rear side plates (the kit configuration) and later types with four larger visor covers as used on the Sd.Kfz.222.
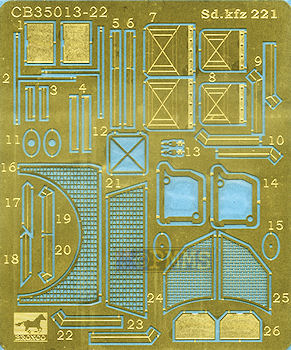
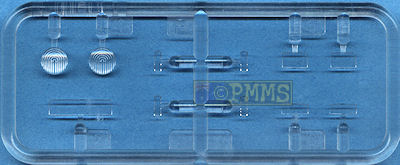
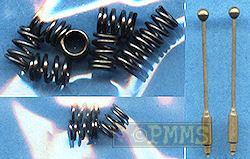
The kit consists of 211 parts in light grey plastic, 11 parts in clear plastic, 10 small springs (8 for the suspension and 2 for the gunner's seat) two formed brass fender width indicators and an etched fret with 40 parts as well as the colour instruction sheet and small decal sheet.
 |
  |
Standard of plastic moulding is very good with clean crisp details and no flash present and only a few very small pin marks to contend with, there are the usual moulding seams to be removed and on some of the smaller parts this will need care.
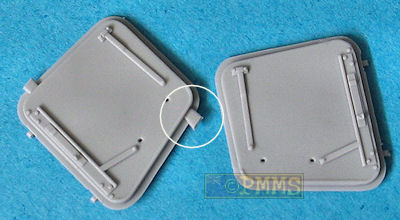
Care will also be needed removing some parts from the sprues as the sprue attachment overlaps the part detail, this is especially noticeable on the hull doors where the sprue attachment overlaps the outer door lip recess and you have to take care removing this to not damage the lip. The smaller visors also have this overlap as do some other parts and this adds a bit of work to the cleanup process to ensure the parts are not damaged.
Dimensionally the kit matches available data very well with the length, width and height equating to the dimensions shown in the Rayton Panzerspähwagen book to within fractions of millimetres and also matching the single side elevation 1:35 plan in the Panzer Tracts book to the same acceptable tolerances.
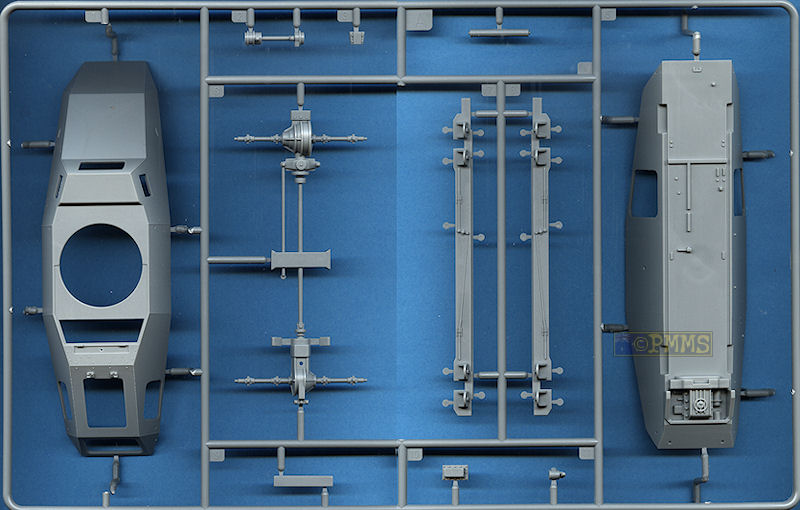
The kit includes interior detail for the driver’s station and Commander/gunner’s turret pedestal mounting as well as side wall storage to help fill out the insides if you leave the large hull side doors open.
There are a few cross member parts to be added between the chassis frames and as these are fitted you also need to fit the upper suspension arm along with the chassis frames at each station but there is no need to glue these at this stage.
The front and rear transmission/differentials are in one piece that fits neatly in place without any trimming needed with separate steering arms and rods along with the four suspension units added, note these have two real springs for each unit that give an excellent appearance but take care not to loose these as they are quite small and slippery.
Leaving the upper suspension arms unglued as mentioned allows for easier fitting of the wheels at the later stages in construction with the overall appearance of the suspension units being very good, a pity the wheels hide most of this after assembly.
Other details added to the lower hull include the four tow hooks, the front tube bumper and the front and rear lower armour plates all of which fit without problems.
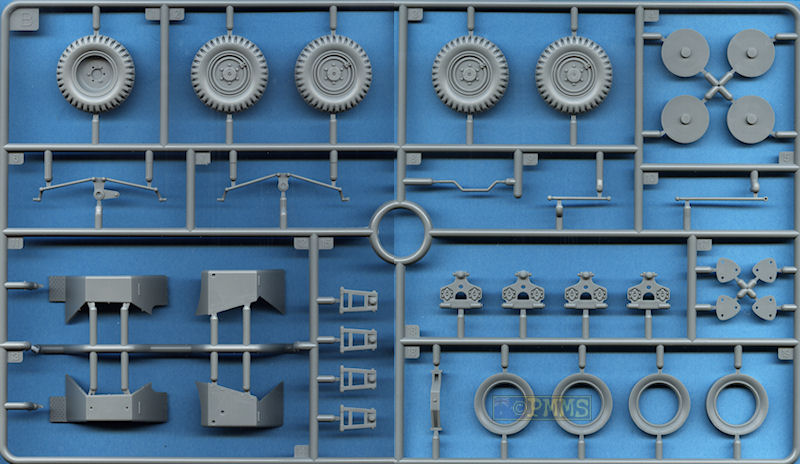
Each wheel is in four parts with the main wheel section having the full tyre with cleanly depicted tread pattern plus a separate inner mounting disc trapped in place with the inside tyre section, this allows the mounting disc to rotate freely so make sure you do not glue this in place.
You should also note there are two different mounting plates (parts B4, B5) that go on opposing corners to mate properly with the steering arms so take care not to mix these up during assembly to avoid fitting problems with the wheels later.
The outer wheel rim/hub detail is nicely done and again there are different wheels for the opposing corners (parts B2, B3) that go with the different mounting discs (B2/B4 and B3/B5) with the separate triangular hub cap for each wheel and these have thin mounting brackets with the hub detail still visible after the hub caps have been fitted.
A fifth spare wheel is also included with the same tread pattern as the main wheels and this is mounted on the right hull side.
Fitting the wheels will need a little care as you have to fit the upper and lower suspension arms onto the corresponding notches on the inner wheels hubs with the axle stub fitting into the wheel centre hole. The fit was a little loose with my wheels and you will have to make sure of the correct wheel alignment as the glue dries to avoid any problems.
The two side bolted flanges are included as separate parts and there are also separate wall panels that hold a good selection of personal equipment such as stick grenades, meal tins, gas mask can, water bottles, 1 x MP40 and a steel helmet. There are no ammo pouches or drums included for the MG34 ammo and as the Sd.Kfz.221 carried 1000 x 7.92mm and 192 x 9mm rounds these would have to be included.
The two side entry doors have additional internal latches and handles as well as separate outer hinges that allow the doors to be shown open if you wish to show off the interior details.
The upper hull shell has interior visor brackets, front driver's instrument panel which has the dials but no dial faces and some additional equipment added and the full interior should obviously be assembled and painted before proceeding to fit the upper and lower hulls parts together.
The rear top engine intake grill mesh is in two etched segments with the shape of the mesh matching photos of the actual mesh very well but there is a little work when adding these. The forward mesh segment just sits flush on top of the hull and lacks a little in depth perception while the rear mesh segment fits over the opening in hull top. This allows you to see right through into the hull insides and the actual vehicle mesh id hinged at the rear allowing this to be opened if required.
All the front visors are separate parts with clear vision blocks added on the insides, these also have separate rain guards for above the visors which incorporate the visor hinges and this allows you to position the visors open of closed as you wish. The side visors also have the small bullet splash guards underneath as separate parts while at the back all the engine access doors are separate parts that fit well to the hull openings. The two hull side hatches also have separate hinges allowing these to be positioned open although there is nothing inside but the option is there should we get an AM resin engine for the kit?
Before adding the remainder of the hull parts you join the upper and lower hulls together and there are small locating tabs on the inner edges of both to ensure proper alignment with the fit being very good without any trimming or filling required. There is a small lip between the two when joined but this should be there so don't be tempted to smooth out.
Other hull details include the side turn indicators which are very fine and require care in handling and the rear mounted exhaust pipes made up of six parts each with just the fine join line between the muffler halves to be eliminated after gluing.
The front head lights are also separate and have alternate clear plastic lenses or solid blackout slit covers depending on your choice with the early round horn added to the left side light stalk. The large left side storage box is a single moulding with moulded on latches and while it does the job okay will probably be replaced in the inevitable etched detail sets to come for the kit and there is the external fire extinguisher mounted just behind the storage box.
Also included for the hull sides are two multipart Jerry cans with etched central insert that seems to now be standard for kit Jerry cans and they also have separate pour spout and handles with engraved data markings for nicely represented Jerry cans. These have etched mounting frames to add to the hull sides but you should note these were not a standard fit on the 221 but mainly only seen on vehicles in the African campaigns but check references before adding the cans to be sure.
The fenders are moulded with quite thin edges and don't look over scale at all with the fit to the hull also good not requiring any trimming but ensure you get the fender contours between the upper and lower hull angles positioned correctly or it may seem there are gaps.
There are numerous etched parts added to the fenders for the underside support brackets, rear mud flaps and latches on the small storage boxes added to the rear of the front fenders. Other items added to the fenders are the fire extinguisher, two part jack with mounting brackets moulded on and the rear mounted boxes with the number plates and tail light.
The front pennant holder is an etched part and you get alternate plastic or formed brass width indicators for the front, the brass stalks need the small bend added and you can use the plastic items as guide for adding this. The small rear view mirror is added to the left stalk and a two part Notek light which requires the locating hole in the fender opened up as not all early 221s had the Notek light fitted.
All the pioneer tools provided have their mounting clips and brackets moulded on and again the inevitable etched sets will probably have these as separate items to add to the detail.
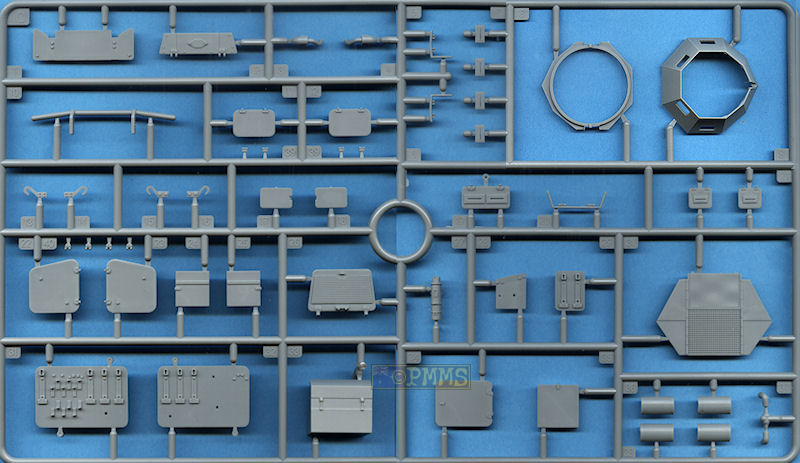
The four separate visors have additional clear plastic vision blocks added to the insides as they should and there are some raised ejector pins to be removed from the inner turret walls before assembly.
The top mesh guards are provided as fine etched parts but if you show the mesh covers open there should be inner wire braces added which can be seen in any reference photos of the turret mesh.
Also included is the full turret pedestal mounting which includes the ammo feed box and five part seat with real springs for the seat. The large V mounting braces are also included and the MG mounting and I found it easier to glue the assembled pedestal to the turret ring before fully assembling the turret later to ensued it is aligned correctly. While the basics for the pedestal mounting are provided there are additional smaller fittings that can be added if you have the references for this with the Ryton book having some excellent shots of the pedestal mounting both attached and separate to the turret.
The fit of the turret shell to the lower ring is quite good and the turret ring has two small notches that just "clip" over the hull turret ring to allow turret rotation. To remove the turret you just lightly press on one side of the turret and the clip pops out allowing the turret to be removed but take care as the pedestal and seat is a tight fit through the turret ring.
Another small issue is there is a small locating pin on the bottom of the pedestal that is supposed to fit into a corresponding indentation in the floor plate but this did not line up correctly on my kit although this is not really an issue as you can't see this after assembly in any case. Just cut off the small locating pin on the bottom of the pedestal and the turret with pedestal sits neatly in place but slightly offset from the floor moulded ring.
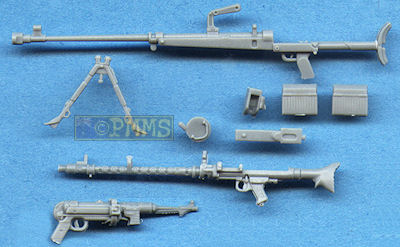
Armament provided is a nicely moulded MG34 with separate feed chute cover and ammo drum with the barrel having indentations for the cooling holes. While the gun is nicely detailed and is the correct scale length replacing the barrel with an available metal barrel will improve the appearance further.
The 7.92mm Panzerbüchse 39 anti-tank rifle is also nicely done with separate breech, ammo containers with front bipod and matches photos of the actual gun very well. There is a mould seam line to be carefully removed and the muzzle could be drilled out for a better appearance but other than that it's ready to add to the turret as required.
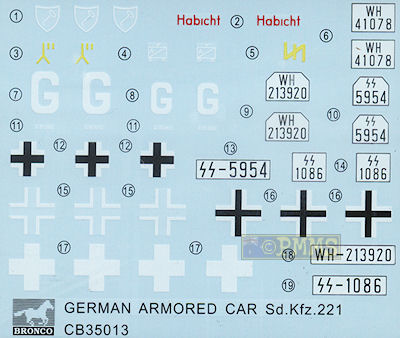
The decal sheet is nicely printed with good colour register and carrier film cropped close to the printed image to reduce silvering and includes a selection of balkenkreuz in four styles, unit markings and front and rear number plates.
The sheet has markings for four vehicles all in overall German Grey as follows:
|

There are as few small issues along the way but the turret shape issue with the initial release has now been corrected and Bronco are to be commended for addressing this issue before waiting for the next kit release.
The correct turret profile along with the well done suspension and lower chassis makes this an excellent kit of the early Sd.Kfz.221.
The interior has all the basics for the driver's station and turret pedestal mounting even though it's not easy to see after assembly it allows you to leave the hull side doors open in a diorama setting to show off the details.
Highly recommended
See the Sd.Kfz.221/222/223 Subject page for reviews of other items for the 4Rad Series.
Also see Paul Owen's review of the kit on Track Link.
Click on thumbnails for larger view


| Sd.Kfz.222 & 223 Heiner F. Duske Nuts & Bolts Vol.04  |
Panzerspaehwagen
Armored Cars Sd.Kfz.3 to Sd.Kfz.263 Panzer Tracts No.13 ISBN 0-9708407-4-8  |
| Panzerspähwagen Uwe Feist and Robert Johnson Ryton Publications ISBN: 1-930571-30-5 Hard Cover  |
German Light Reconnaissance Vehicles Schiffer Publishing Ltd. ISBN 0-88740-522-3.  |
| Ground Power Magazine #63 - 8/1999 GALILEO Publishing Co.,Ltd.  |
Thanks to
 for
the review kit.
for
the review kit. Please to help the reviews continue, thank you
