
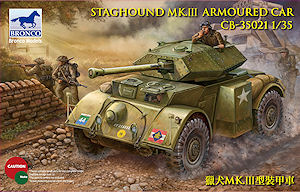
Staghound Mk.III
Armoured Car
Bronco Models Kit No. CB-35021
Review by Terry Ashley
The other main modification was two large storage boxes replacing the side mounted fuel tanks which were also a feature of other later production Staghounds.
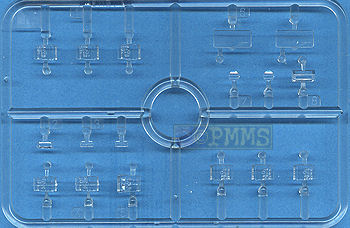
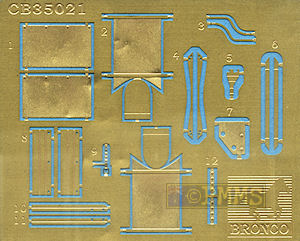
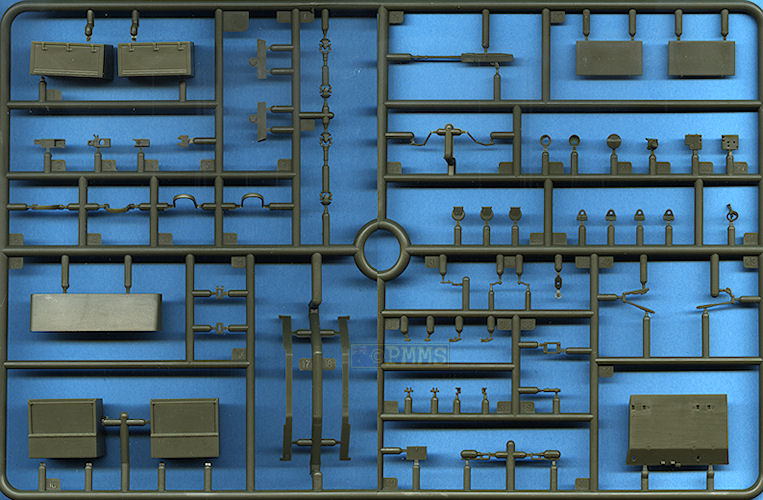
This consists of 296 parts in olive drab plastic, 17 in clear plastic plus a small etched fret and of course the decal and instruction sheets.
Dimensionally the kit matches well to the 1:48 plans in the Hunnicut Armored Car book blown up to 1:35 scale as well as the turret dimensions matching available data within acceptable tolerances.
Standard of moulding is very good over all with very few pin marks and virtually no flash with just the normal moulding seams to be removed. Many of the parts have the sprue attachment points that overlap the part instead of butt joining like many kits and this makes it easy to remove the sprue spur leaving the detail intact, this is especially helpful with many of the smaller parts.
The surface details are very well done with nice weld seams and other detail as well as many very finely moulded parts that will need care during cleanup and assembly with the etched parts are also cleanly etched with the usual bending lines where required.
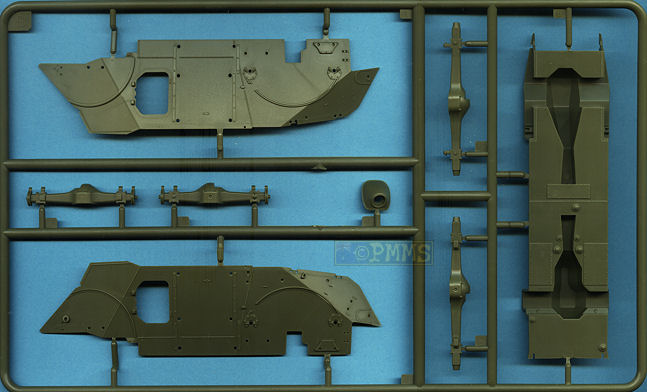
The side panels have separate entry hatches and the engine deck access doors are also separate parts in case an engine comes along later and the Driver’s visors are also separate allow them to be shown open or closed.
All other details are separate parts allowing for excellent detail definition as is the lower suspension and obviously the fit of the main hull parts is all important and these went together quickly and easily without any trimming or filler needed.
The only thing to watch is the location of the lower rear plate (part C9) as there are no locating pins and the angle is not clear with the instructions showing to fit this to the lower hull pan first off but I found it easier to glue the two side panels in place and then fit the rear plate between them.
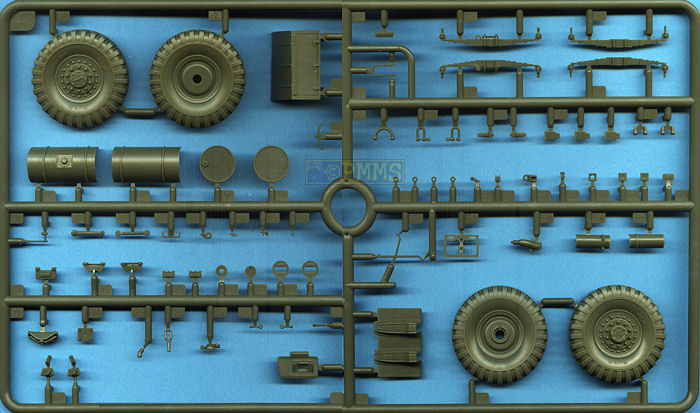
The suspension is fairly simple and has the large axles/differentials in two halves with just a small join seam to content with and separate diff housings and on the front axle the two wheel hubs with steering linkage. This is not designed to be steerable but it wouldn’t take too much work to reposition the hubs or even make them steerable for those wanting to go this far.
The four leaf springs are in two halves each and you should ensure the mating surfaces are smooth before fitting these together as there were a couple of raised pin marks on each that will stop them fitting together evenly if not removed. After joining the springs together there is a sizable join seam down the middle but this will be mostly hidden by the wheels after assembly if you didn’t want to fill these.
Once the axles and leaf springs are added to the lower hull along with the 2 new drive shafts (parts K12, K45) and numerous smaller suspension mounting parts added to the hull sides there are a number of additional suspension linkages to add between the axles and the hull sides. All these fitted without any problems if a little tedious but the detail definition once assembled is excellent.
The large wheels are moulded in two plastic halves in the conventional manner and have the correct hub detail for the front and rear wheels and also have 3 inner locating pins that ensure the tread pattern on the tyres lines up correctly which is a nice touch. The actual tread pattern is fairly simple on these military tyres and is nicely rendered along with the sidewall embossing and just adding the tyre valve would finish off the wheels nicely. Just watch as the hub detail is different front and back so make sure you fit them correctly which the instructions show.
The two side entry hatches have detail on the insides as well as a small pin mark to fill but as there is no interior included in the kit it would be best to glue these closed at this point.
Added to the hull sides are the large storage boxes which replace the fuel tank parts from the previous kits and these are made up of multiple parts with separate compartment doors if you wanted to show these open along with a couple of British style fire extinguishers to add to the box sides.
There are numerous other smaller fittings in the hull sides such as the tail lights and guards and all the tools which have fine etched securing straps provided for more nice detail definition as well as the 4 large fenders with very fine rear view mirror stalks on the front that will need extreme care removing from the sprues.
On the rear lower plate are the tow shackles and also two long brackets in etched metal but these are not present on all Staghounds so checking reference pictures would be the best to determine if needed?
On the new upper rear plate (part K44) are the large exhaust mufflers with separate armoured outlets with the mufflers made up of 7 parts each with again just fine join seams on the mufflers to remove before with the fit of the rear hull plate to the main hull being very good with no need for trimming or filler. There are etched muffler covers that need to be bent to shape around the mufflers and annealing these before hand will help in the process with four fine plastic securing brackets added to the covers.
Moving to the front we have the glacis which has the separate machine gun coaming but the hull MG is not fitted to the Mk.III and you get a small round cap to fit over the MG position.
Also added to the glacis are the two head lights that come with etched bush guards. Included on sprue D is a small jig for bending the etched guards to the right shape which is very handy as getting the correct bend otherwise would have been an adventure for sure.
Again the fit of the glacis to the main hull is excellent and fitted above this is the front and top Driver’s plate with separate front visors and also additional separate vision port covers which can be shown open if you wish. There are also inner clear parts for the windshields if showing the visors open.
The top driver’s compartment panel has excellent contours and weld seams around the three periscopes that are provided as clear parts with separate mountings and top covers allowing you to position the periscope at any angle or even leave them out if you wish.
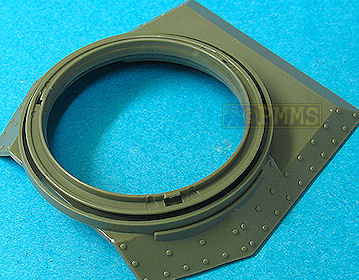
Finally there is the hull top plate and the surface detail on this is excellent with superb detail around the turret ring that includes the traverse teeth and the fine intake grills at the back with the engine access hatches as separate parts but again as there is nothing inside so these are best glued in place. The hatch hinges are all small separate parts as are the other fittings on the doors that again will need care removing from the sprues and during assembly with other items such as the two part fire extinguisher handle and front siren plus the cover over the intake grills added to the hull top.
You are provided with the two large engine inlet covers which are angled differently and checking what references there are will be needed as the instructions only show the parts as alternate with no indication which is the more appropriate to use?
There are also additional brackets to add around the turret ring to accommodate the new turret and you have to open out the locating holes for these into the hull top which shouldn't be a problem.
The four fenders are separate parts that fit neatly to the hull and have etched mud flaps and inner brackets along with extremely fine plastic rear view mirror mountings, so fine in fact that both in my kit were snapped even before I came to remove from the sprue and you may want to consider replacing these with thin wire for more strength and a perfectly round appearance. You can use the kit parts as guides to make the wire mountings.
As with the other parts the fit of the top panel to the main hull was excellent again not requiring any trimming or filler making the overall fit of the hull parts as good as you will find on any kit.
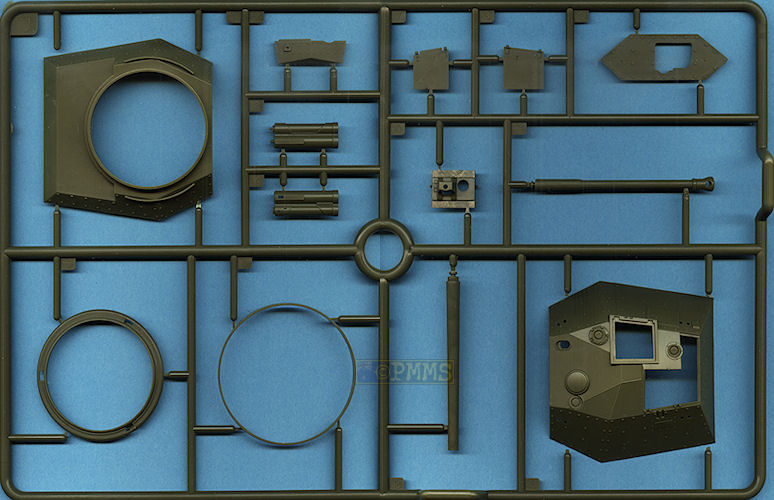
The turret has the upper shell and lower turret section with separate turret ring as well as the separate front plate.
As mentioned it is armed with the Ordnance QF 75mm Mk.V gun which fired the same rounds as the US M3 75mm gun fitted to the Sherman with the kit gun length matching available data exactly. The kit also includes another gun tube which appears to be the US M3 75mm barrel which wasn't used on the Staghound Mk.III but with a prototype Staghound Mk.IV so it's inclusion here could mean anything but you shouldn't use with this kit despite the instructions showing it as an option.
The dimensions of the turret match what data I have as well as to photos of the Staghound Mk.III turret with the details nicely done including the revised hatch layout and fine weld seams on the turret roof as well as the sidewall rivets. There is one area poorly done and that is the dome ventilator at the front left of the roof which doesn't have enough of a gap between the outer guard (also too short) and the ventilator dome and the appearance should be very similar the ventilators on a Sherman hull/turret. Cutting this off and replacing with a spare Sherman ventilator would improve the appearance of the ventilator dome.
The gun comes with a full breech and co-axial BESA 7.62mm machine gun with the 75mm breech made up of 8 small parts some of which have overly large mould seams and the locating holes for the smaller parts added to the sides of the breech will need to be enlarged to take the locating pins of the parts. This assembly is quite tedious as fitting the four main breech parts together is a little fiddly along with the mods needed to fit the smaller parts and as the end result can only be seen if the roof hatches are left open you can skip this if building the kit buttoned up.
The co-axial BESA 7.62mm machine gun is quite nicely done but the barrel flash suppressor needs to be hollowed out and it may be easier to replace with a metal BESA barrel for a better appearance and I did that by using one of the Lionmarc/Passion Models metal BESA barrels, but this is a personal choice and the kit gun will look okay once the muzzle is hollowed out.
The assembled gun mounting fits to the inside of the turret front plate held in place with two brackets that allow elevation, but this is quite loose and you will probably need to glue the gun in place at the required elevation to avoid problems.
This assembly is added to the front of the upper and lower turret halves which fit together without any problems and the top hatches are cleanly done without any pin marks on the inside as well as three very small fittings added such as the inner locking handle and care will be needed while fitting these.
There are separate hinges for the Commander's hatch as well as the inside supporting arms that attach to the inside turret walls and hold the hatches open at the correct angle and almost invite you to add a couple of figures to allow the hatches to be open showing off the inside detail.
There are separate two part periscopes in 3 positions as well as separate lifting eyes, 2 aerial mounts including a quite nice No.19 circular aerial mount which may need to be thinned some for a better appearance but it a good effort in plastic and there is also a small etched plate added to the top right of the turret front plate which you might went to add last to avoid any damage during the rest of the turret assembly.
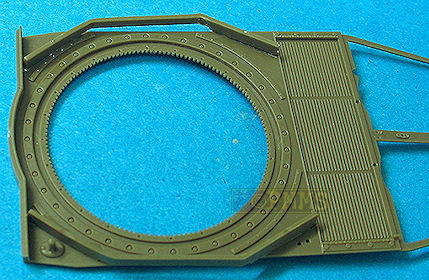
An additional turret ring is provided that fits around the base of the turret and fitting the turret to the hull turret ring will need a little care. There are three small notches around the lower turret ring much in the same manner as on many kit turret rings but there are no corresponding cut-outs in the toothed turret ring. You have to carefully 'clip' the three turret ring notches over the roof turret ring teeth to hold the turret in place and two clip in place easily but the third required a bit of coaxing but once in place holds the turret nicely allowing full traverse.
Three notches around the turret ring and turret ring teeth without cut-outs for the notches
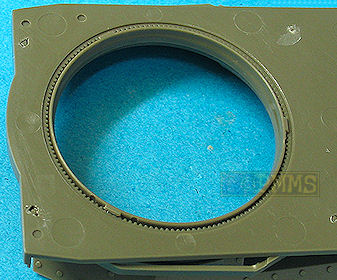
Underside view of the roof showing the turret ring notches clipped over the hull ring teeth
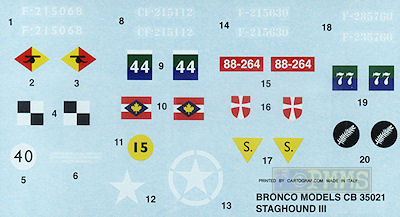
The decal sheet has markings for four Staghound Mk.IIIs although two are doubtful with the decals nicely printed with good colour register.
There are three view colour illustrations of the four vehicles in the instruction sheet giving paint schemes along with the decal locations.
The four schemes provided are:
|

The fit of the parts is also very good overall making for easy assembly as there is very little trimming or filling required on the parts assembled during the review adding to the appeal of the kit although the instructions need careful study before gluing.
There are some areas requiring care during assembly such as the gun assembly and mounting but these shouldn’t cause any real problems and while there is no interior other than the 75mm gun in the turret this kit should please most Allied modellers.
The inclusion of the equally well done Crusader III turret reflecting the actual modifications for the Staghound III turret adds another dimension resulting in a very different look to the kit.
Highly recommended 8/10
Click on thumbnails for larger view


Armorama Walkaround #1
Armorama Walkaround #2
PMMS Staghound Pics
Staghound Register
Toadman’s Tank Pictures
War Wheels.net
| Staghound T17E1 in detail Special No.9 Wings & Wheels Publications  |
The Staghound A Visual History of the T17E series armored cars in Allied service 1940-1945 Ampersand Publishing  |
Staghound Model Detail Photo Monograph No.29 Published by Rossagraph ISBN: 83-89717-26-3  |
Thanks to  for
the review kit.
for
the review kit.
