

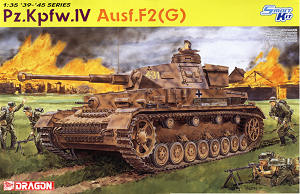
Introduction:
Just as the Panzer IV Ausf.F was a significant redesign from the Panzer IV Ausf.E with 50mm frontal and 30mm side armour, new hull MG ball mounting, drive sprockets with wider 40mm tracks, idlers, rear muffler and other details so Dragon have done a major redesign of their previous Panzer IVs for this kit of the Panzer IV Ausf.F2(G).The initial Panzer IV Ausf.F retained the same 7.5cm L/24 gun from the Ausf.E but was soon updated with the 7.5cm KwK.40 L/43 gun with single baffle ball muzzle brake and redesignated Ausf.F1 for the L/24 armed vehicle and Ausf.F2 for the L/43 vehicle, this was also referred to as the Mk.IV Special by the British when first encountered in North Africa.
In June 1942 the order was given to re-designate all 7.5cm KwK.40 L/43 armed vehicles as the Pz.Kpfw.IV Ausf.G and initially retained the same features as the F2 which is the reason Dragon have labelled this new kit Ausf.F2 (G) to basically cover all bases.
The Ausf.G underwent numerous changes during its production run and the kit includes a number of additional parts applicable to the early production Ausf.G including the early double baffle muzzle brake but these is not used as the turret side visors limit the kit to the F2 and initial Ausf.G after re-designation.
The Kit:
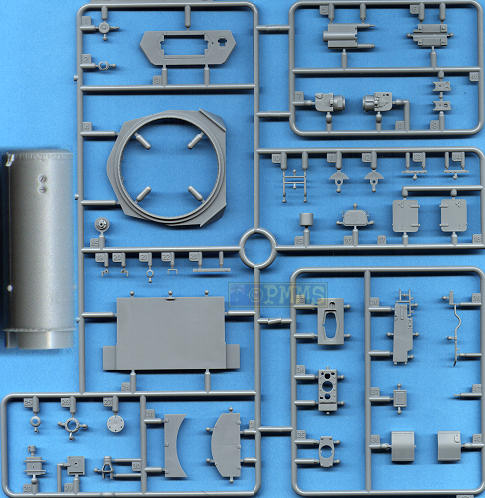
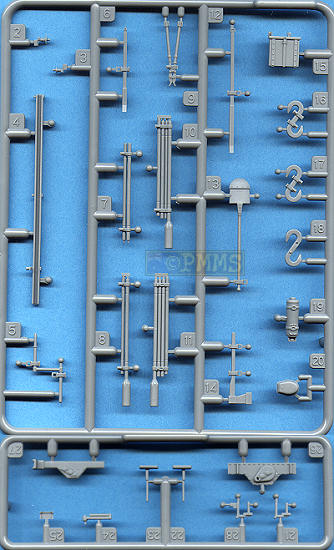
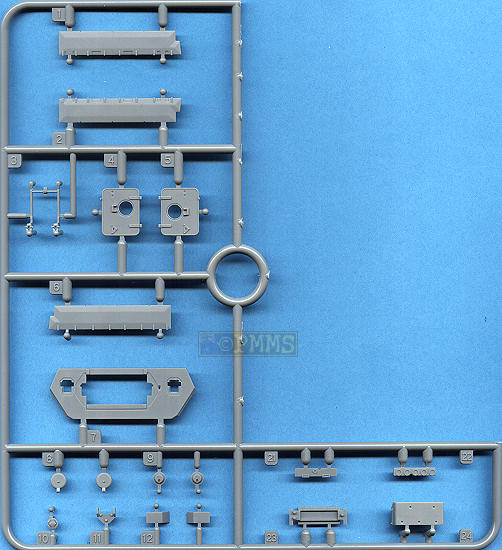
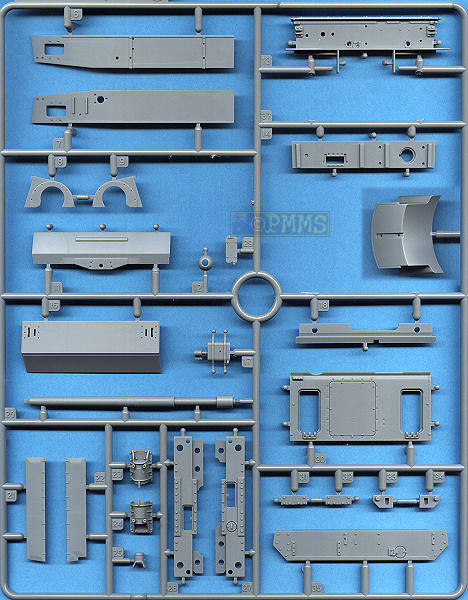
This is virtually completely new apart from the hull MG34 machine gun which comes from the recent Panther kits and along with this Dragon has corrected many of the niggling issues with the previous Panzer IV kits such as the gun housing size, muffler width, hatch lock opening and other small details which are all correctly depicted in this kit.Contents of the kit are:
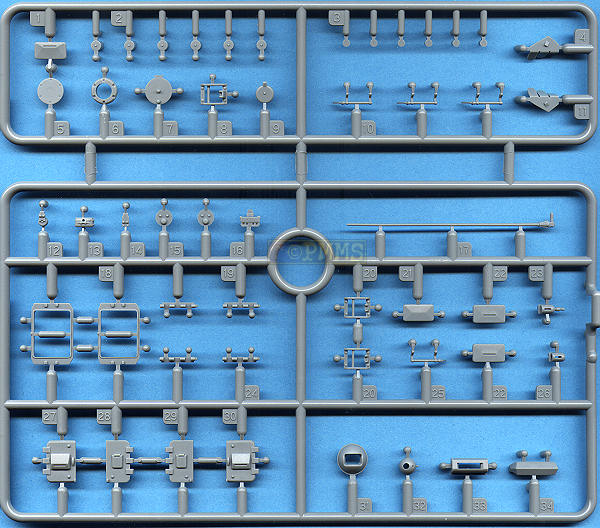
- 505 parts in light grey plastic
- 108 individual links “magic track”
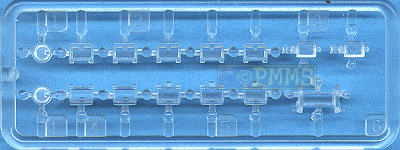
- 15 clear plastic parts
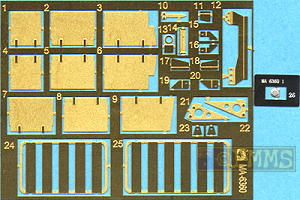
- 1 small etched fret with 26 parts
- 1 length of braided steel wire
- Decal and instruction sheet.

The standard of plastic moulded is again superb with very clean and crisp mouldings and virtually no pin ejector marks to be seen after the parts are assembled, this is again due to Dragon’s extensive use of small knockout ‘nodes’ on most of the parts. This does require a bit more cleanup of the parts and care with the smaller parts where the nodes are sometimes larger than the part but the end result is very clean and blemish free parts so the little extra effort is worth it. Those few pin marks present are quite shallow and easy to remove and as mentioned are there aren’t many in any case.
The quality of the etched parts is also very good and on a par with contemporary etched sets with clean etchings and the usual engraved bend lines to help in the process.
Dimensionally the kit measures out very well using the plans available in the references listed below, there were a few minor discrepancies but when comparing the kit parts to available period photos using the Mk.1 eyeball the plans were found wanting with the kit parts matching better, most notably the muzzle brake which must be one detail most often shown wrong in plans, not just this one but many others.
Lower Hull:
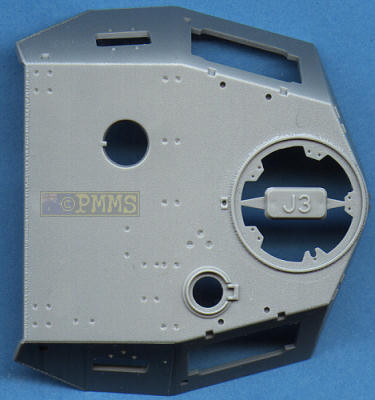
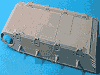
The lower hull is a conventionally tub with the floor and two sides which have small triangular braces on the inside to ensure the walls remain square with the front plate and three segment rear plate panels are separate parts for better detail definition with the fit of these panels being spot on without the need for any trimming or filler.Detail on the hull is excellent and includes the underside panel and bolt head details with the side channels between the suspension bogie mountings included but still with good detail definition while on the inside is a large support bulkhead positioned about where the engine compartment firewall would be but has no detail and is designed for the support the upper hull when fitted.
The side walls have the return roller support posts, idler wheel support brackets and final drive mounting plate detail plus a small separate front section with part of the final drive mounting and also the small rivet heads on the inside hull overhand. There is a small join line when this part is fitted but will mostly be covered when the final drive housings are attached.
The final drive housings are separate parts for good detail definition without any of the internal detail from previous kit but most would have built the final drives in place in any case. There are three part front drive guards to allow good definition of the bolt heads and the guards are easy to fit in place.
Along the left hull side are two separate fuel filler cap doors but as there is no internal detail it’s best to glue these closed which again most would have done previously.
At the front is the tow shackles made up of four parts each with separate securing pins and added between the tow shackles is the two part spare track rack with additional track links provided to use here on sprue F and at the back are the lifting eyes added to the rear hull sides.
Rear Hull:
The rear hull plate is completely redesigned and is in segments with the upper part and two separate lower segments, one for the initial F2 and the second for the early G with the addition of the cooling water exchanger port which makes for fitting the desired panel very easy but you would use the initial F2 panel (part E26) for this kit.The locating pins for this panel and for the separate idler mountings that have excellent details included are quite large which make for very precise and positive locating of the parts and they will hold together without glue such is the good fit. The small rectangular starter crank port cover is also separate again to allow the later style cover supplied (but not used) to be fitted easily.
The main exhaust muffler is in four parts with separate lower exhaust pipes and upper outlet pipe and these fit together very well with the muffler also the correct size in diameter and width and when fitted in place the two pipe covers that have very subtle weld seam details are again easy to fit in place.
Added next to the muffler is the small early style auxiliary engine muffler that again will hold in place without glue as well as the separate cooling water drain with separate cap as well as three alternate lower tow pintle brackets that includes one with the added trailer hitch bracket for a good choice and checking references will determine which is most appropriate.
All the details are in the correct positions and the assembled rear panel has excellent detail and fits snugly to the hull tub and you may want to put the final touch of adding fine etched chain to the cooling water drain cap (chain not included).
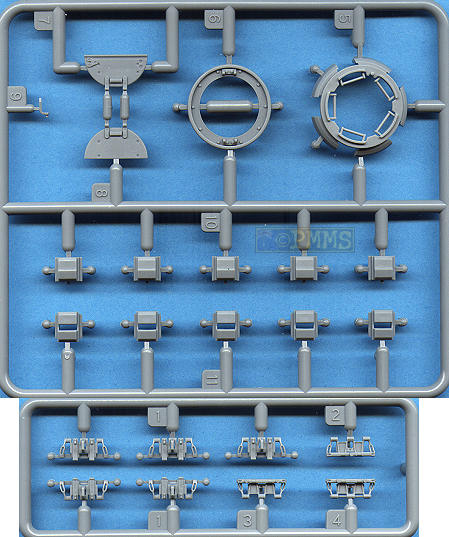
Suspension/Running Gear:
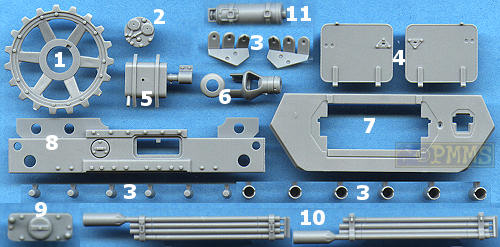
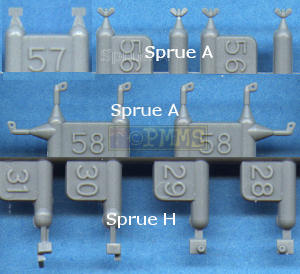
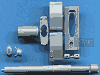
The suspension bogies are far simpler non-articulating assemblies from those in the previous kits made up of just four parts each, the hull mounting bracket that has the bolts in the correct position, the axles and leaf spring in one part, the end cap and central round retaining cap. These assemble easily and while they are simple affairs still retain very well defined details due to the use of directional moulds with just the usual fine moulding seams to be removed before assembly.The two part bump stops for each suspension unit are the correct style and fit easily into place as does the idler axle but you may want to leave this unglued to allow for adjustments when fitting the tracks.
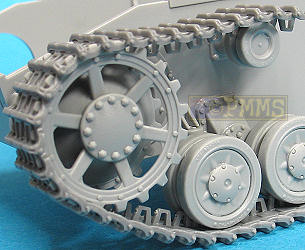
The new Ausf.F style drive sprockets are nicely done in the usual inner and outer sprocket disc with bolt head details on both sides and you are provided with both the 38cm and 40cm outer sprocket but of course you will use the 40cm sprocket for this kit. The separate sprocket hub cap has excellent definition on the hex retaining bolts and the cap fits neatly to the sprocket disc.
At the back is the new tube style idler wheel for the Ausf.F with the usual inner and outer wheel with nice hub details but there are fine moulding seams on the all the tube segments that will need care when removing.
The redesigned road wheels have just the two wheels with separate hub caps and these represent the wider 90mm wheels applicable for the 40cm track used and again while being a simpler design has excellent wheel rim details including the fine weld beads around the outer rim and fine embossing on the sidewalls that has the “Continentau” name and wheel specifications included.
Also the small two part return rollers include fine embossing on the rubber sections and look very good when fitted for an overall excellent representation of the Panzer IV running gear.
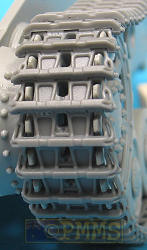
Tracks:
Included in this kit are individual link “magic track” that represents the initial 40cm style and the detail definition on the links is very well done with open outer link and guide teeth with just two very fine pin marks on the inner face that is not very prominent if you wanted to ignore these as the wheels cover most of them.The tracks supplied are actually handed as they should be but and the left side links are in a darker plastic than the right side links in the same colour plastic as the rest of the kit but the instructions don’t actually tell you which is right or left, leaving you to work this out yourself. Just for your reference the longer pin extension goes the outside with the shorter pin extension to the inside of both sides, hence the handed tracks.
Assembling the tracks is fairly easy but there are not designed to be workable but just are just glued together and strangely you no longer get the assembly jig included with the previous kits so you will have to judge the amount of sag yourself.
Upper Hull:
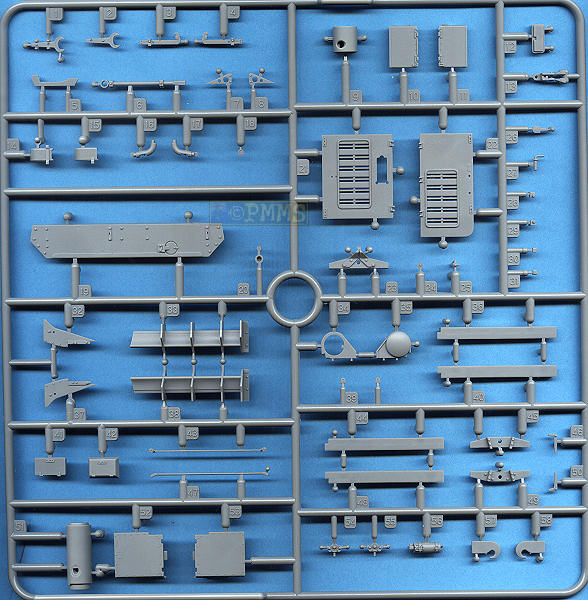
Again this is redesigned to not only take into account the straight driver’s plate but also corrects the contours of the driver’s and radio operator’s hatch bullet splash guards and the position of the engine cooling filler cap of the left engine bay door both of which along with other detail position is correct on this hull.There are again separate side panels, front and rear plates, engine deck doors as well as two part side engine intakes with added etched covers plus the separate driver’s and radio operator’s hatches with separate signal ports and these have inner details with no pin marks to mar the detail. Also hidden on the sprues are the lock clasps for the hatches but these are not identified in the instructions and apparently you have play ‘hide-n-seek’ to find them for those who like games. Why they are not identified is beyond me, I thought that was what instructions were for?
The small lifting eyes added to the hull sides are made from two very small parts that includes the two attachment bolts on the base and while quite fiddly to assemble have very good detail definition when fitted in place.
On the front plate is a two part driver’s armoured visor with inner detail as well as the new round hull MG cover with the full MG34 and mounting from the Panther kits and this assembles into a detailed little sub assembly. The MG barrel has the muzzle slightly hollowed out but the flash suppressor is a little too small if you want to get picky but will be perfectly adequate in most cases and replacing this with a metal barrel will add just that bit extra, the choice is yours. (See detail images below)
Along the sides both visors are again separate parts with internal three part visor brackets and armoured glass which allows these to be positioned open or closed and the other details include the jack block and tools with moulded on tool clips. Also included on the sprues are very small finely moulded wing nuts to use on the various tool clips but these again are not identified in the instructions and you will need to take care removing them from the sprues and in fitting.
For the upper rear hull panel there is two alternate parts provided but you can actually depict this in one of three configurations, with just the mounting brackets for the smoke candle rack (part E35), or open up the locating holes and add the four part smoke candle rack as fitted to the F2 and initial Ausf.G on the other panel (part H19), the third configuration in the plain panel (part H19) used on the Ausf.G after the smoke candle rack was no longer used. Also included are the two L shaped steel cable racks and its worth noting the small round fan release port cover is also in the correct position on both panels.
The separate engine access doors have nice hinge detail with separate grab handle and inner etched intake louvers with the doors fitting very snugly to the deck openings.
The side intakes have alternate mounting brackets and you can use these as you see fit as there is not a lot of difference but it’s good the choice is offered with the fit of these also being very good with a further choice of plastic or etched intake covers but the choice here is very simple as the plastic covers are overly thick.
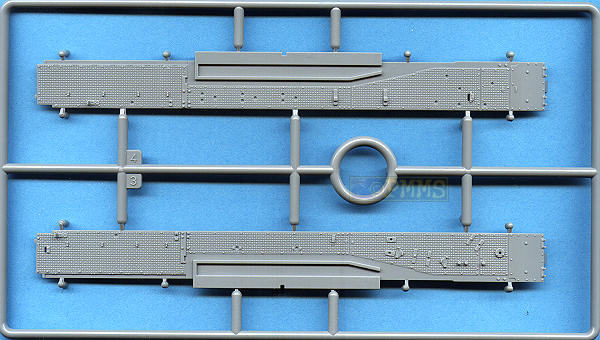
Added along the sides are the full length fenders with excellent tread plate pattern on the top and bottom with this raised on the top and indented underneath as it should be and these again fit neatly to the hull sides.
The numerous tools and other fittings on the fenders are separate parts with the tools moulded with their clips and you can add more of the small wing nuts of you wish. Other items include the early style fire extinguisher, front Notek light and rear tail lights and position keeping light which has a small etched cover added while the jack is made up of 7 parts for a nicely detailed and the additional large fender support on the front right is provided as a simple plastic part or in etched metal for better definition.
Turret:
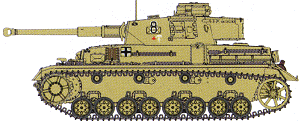
Again this is newly designed with the upper turret shell, lower turret ring and front plate as separate parts with all the hatches, ventilators and port covers as separate parts for good definition as well as newly designed Commander’s cupola and of course the L/43 gun.This has the barrel in one piece extending from the muzzle brake right back to the breech which is in five parts with alternate breech blocks included that have minor differences in detail and again it’s good this have been identified but is hard to see after assembly.
The new square gun housing is as mentioned the correct width and length with nice weld seam detail included on the housing and around the join to the gun shield and co-ax MG armoured jacket. You are actually provided with two MG jackets, one with the MG34 muzzle included and one without the barrel featuring hollow jackets cut-outs and this allows you to easily add a metal barrel if you wish and is a nice inclusion.
A special mention is required for the gun collar (there is only one in the kit) which includes the two flush screws in three positions around the collar as well as the corresponding small notches but take care when removing the sprue bur so as not to damage the weld seam that sits right under the scar. There is also three very fine mould seam lines on the collar to be removed which is easy to do but take care not to damage the small raised notches in the process.
The collar can be rotated in the gun housing to alter the orientation of the flush screws as this can be seen in different positions with one having the screws along the top centreline and the other with the screws along the lower centreline.
The most common orientation I have seen is with the screws along the lower centreline (see detail images) but again it’s good this choice is offered and you can fit the collar as you wish.
The two part single baffle ball muzzle brake will need the join seam eliminated and remember not to glue this in place until the barrel is slipped through the gun housing as it won’t fit with the muzzle brake in place and the fit of all the parts here was again very good not requiring any filling.
The inner gun mounting parts also fit snugly for very precise location and you can add the gun breech and three part gun guard after the gun housing is attached to the front turret plate. This has the two visors as separate parts with inner bracket details that will allow the visors to be shown open if you wish and also included in the kit is the later turret front plate with the right visor eliminated but this should only be used for the later turret with the side visors also eliminated.
Speaking of the turret side visors these are separate parts with extensive inside visor mounts made up of 4 parts plus the clear glass for nicely detailed little assemblies and of course the visors can be shown open if you wish.
Also on the inside is the Commander’s seat in 2 parts and a well defined roof ventilator and it’s a shame this can’t be seen after assembly unless you look through the open side doors from a low angle.
The side doors have an inner frame added from inside the turret and separate outer hinges on the outside with the doors themselves having nice details and no pin marks to contend with and these again can be positioned open or closed but watch the rain guard added above the doors as the instructions call this as part A39 but should be A37 and this part is also a little on the thick side and could do with thinning for a better appearance.
On the top is the separate ventilator cover and signal port as well as the hatch grab handles and on the back the two pistol ports and two part lifting eyes. Also added to the turret rear is the one piece turret storage box with additional mounting brackets and two part top hatch cover.
Finally there is the Commander’s cupola with the main cupola shell and the five visors provided either open or closed with additional clear glass for the inside and the visors easily slip into place and the top hatch ring is then slipped into place and the two hatches added for a very good looking cupola assembly. The small vane sight in front of the cupola is provided as a plastic or etched part and again the choice is simple here.
The assembled turret just sits on top of the hull so take care when handling the assembled mode as there is nothing to hold the turret in place unless you glue it in the desired position?
Decals:
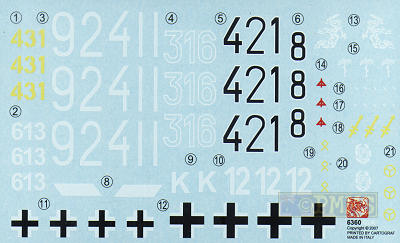
The single decal sheet has a selection of turret numbers, unit markings and balkenkreuz for 7 vehicles for a good variety on markings;
|
|
Clear parts
Conclusion:
Contrary to what some might think I am pleased to say that Dragon have done a bang up job with this kit that has very good attention to details, some nice detail choices and despite over 600 parts is relatively easy to assembly while retaining excellent details and is fundamentally accurate in all dimensions.As with any kit there is scope for adding finer details to enhance it even further but will not only build into an excellent kit of the Ausf.F2/G it will also form an excellent basis for the later Ausf’s to follow from Dragon.
The biggest let down is again the instructions issues with some parts incorrectly numbered and other parts not included so you have to play some sort of game to work out what they are and where they go. Wouldn’t it be better to tell people where everything goes and leave it to them to decide if they want to include the optional parts, at least they will know what they are?
That aside the kit is very good and easily the best Panzer IV Dragon have released so far and let’s see the later Ausfs as it can only get better.
Highly recommended 9/10
1. Early 38cm drive sprocket (?). 2. Later bogie cap. 3. Smoke grenade launchers and grenades.
4. Later crew hatches without signal ports., 5. Later Aux. muffler. 6. Early double baffle muzzle brake.
7. Later turret front plate with right vision port deleted. 8. Later lower rear plate with cooling water port added.
9. Later rear hull port. 10. Additional L48 barrel cleaning rods. 11. Later style fire extinguisher.
Selection of fine wing nuts included to use as required but no indication is
given in the instructions as to exactly where? Tool brackets being the obvious choice.
Also additional hatch clasps also not shown in the instructions.
See the Panzer IV Subjects page for
reviews of additional kit and update sets.
The Sprues:
Click on thumbnails for larger view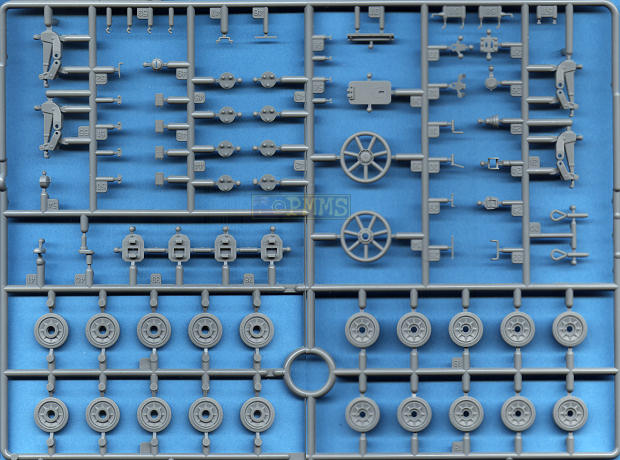


Detail Images

Close new window to return to review
| Panzer Tracts No.4 Panzerkampfwagen IV Thomas L Jentz Hilary Louis Doyle  |
Pz.Kpfw.IV AusfF2/G AFV Super Detail Photo Vol.5 Published by Model Art Co.Ltd. 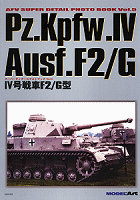 |
Armour PhotoGallery #1 PzKpfw IV Ausf.G Sd.Kfz 165 Hummel Sd.Kfz 166 Brummbär 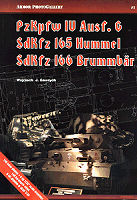 |
| Achtung Panzer No.3 Panzer IV  |
Ground Power No.106 March 2003 Ausf.G GALILEO Publishing Co.,Ltd 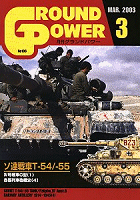 |
Ground Power No.107 April 2003 Ausf.G(2) GALILEO Publishing Co.,Ltd 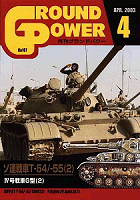 |
| Ground Power No.109 June 2003 Ausf.E/F GALILEO Publishing Co.,Ltd  |
PzKpfw IV Ausf.A
to J Tanks in Detail 1 Ian Allan Publishing.  |
Panzerkampfwagen IV Medium Tank 1936-45 Osprey New Vanguard 28 ISBN: 1855328437  |
Thanks to my credit card and the excellent service from![]() for
the review kit.
for
the review kit.