

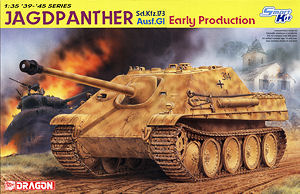
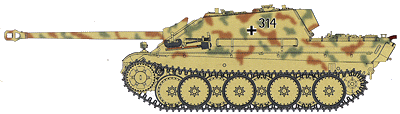
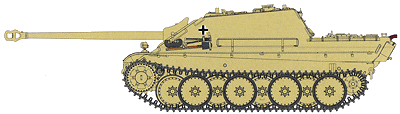
The kit best represents a vehicle produced in July 1944 as it features the early cast Geschuetznische (gun collar) without the exposed securing bolts and monobloc (one piece) gun tube, the single driver’s periscope and the rear exhausts with two additional cooling pipes added to the left exhaust.
There is a small issue in that all production Jagdpanthers up to September 1944 should have Zimmerit applied and you will have to add this to the model, either yourself or using one of the Zimmerit sets from ATAK or Cavalier. It’s a pity Dragon couldn’t have included this as they have shown on the recent King Tiger kits they can depict Zimmerit quite convincingly in plastic and this kit simply can’t be built accurately without Zimmerit added.
There are parts included in the kit for the later sectional barrel and smaller muzzle brake but only half of what is needed, I guess Dragon don’t want to give you all the options here when another later Jagdpanther is coming? There are also other parts included for the later Ausf.G2 including some exhaust parts, engine deck intakes as well as later glacis MG mounting so it doesn’t take much to see this kit is on the way.
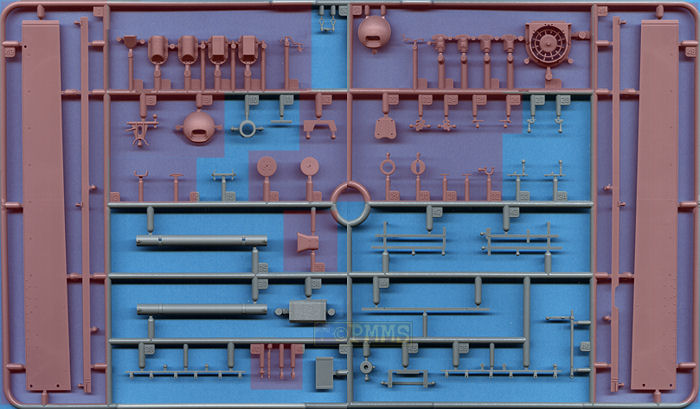
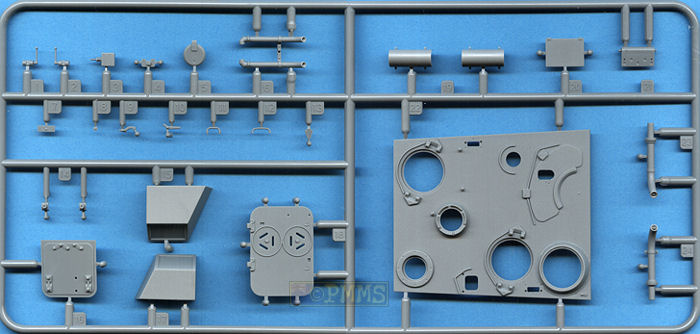
But we are looking at this kit here so lets get on with it; about half the sprues are from the recent Panther Ausf.G kits (#6268 and #6370) with the other half new for the Jagdpanther which means there is plenty for the spares box including a couple of steel road wheels left over.
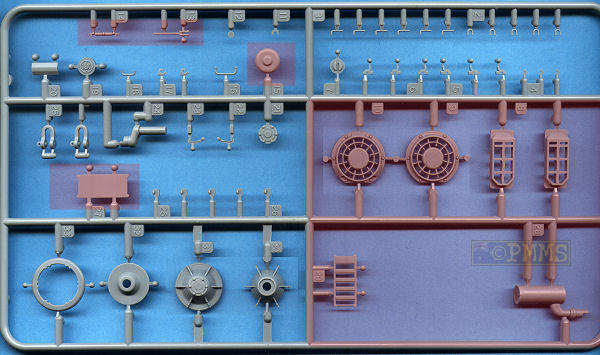
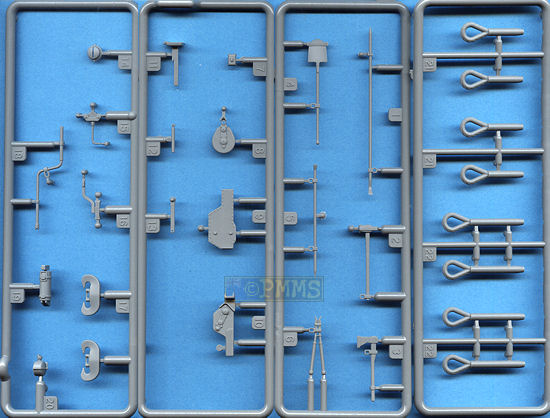
Metal and Etched parts

The standard of moulding is again excellent with the only cleanup needed being the usual fine moulding seams on the parts and the many small plastic ‘nodes’ on the parts which help keep pin marks virtually non existent but do require care when removing from the smaller parts. The extensive use of slide moulds results in some excellent details on many of the parts from the larger hull and mantlet to the very small making for a very detailed model out of the box but as with any kit there are areas that can do with a little attention.
Dimensionally the kit matches available 1:35 plans in Panzer Tracks 9-3 Jagdpanther perfectly with any discrepancies well within acceptable tolerances for printing etc. It’s interesting that the plans in the Achtung Panzer book differ in a few areas and while these are excellent references some data is a little dated with new information coming to light all the time.
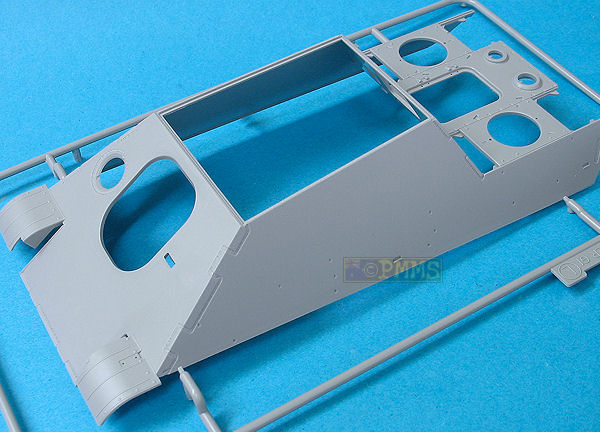
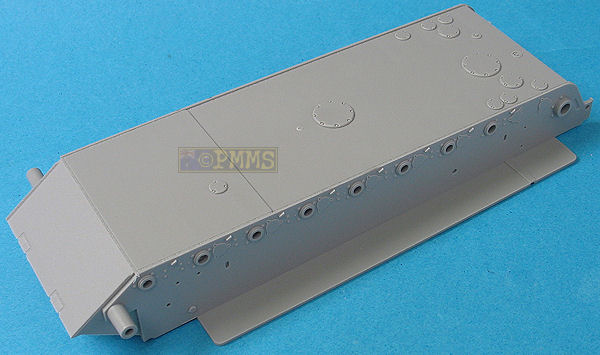
The details on the tub underside includes all the access panels and the weld seams while along the sides are the axle mounting brackets all with crisp well defined details.
The front section with the tow shackle mounting and final drive guards is new for this kit but doesn’t have the flame cut texture that was on the Panther G parts but still has the inside bolt head details.
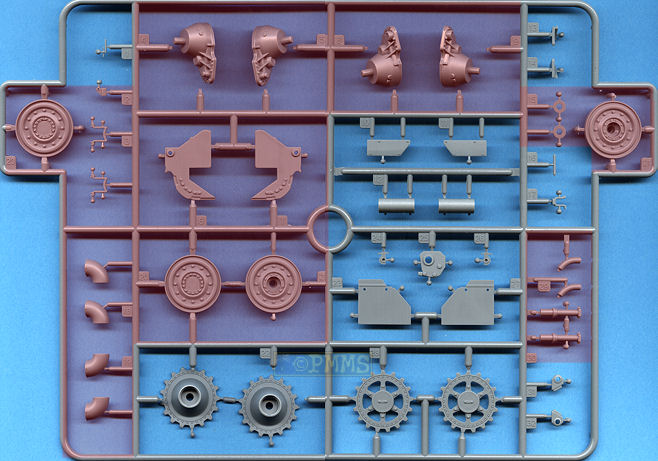
There are also new final drive housings with separate return rollers provided but the older Panther G housings are still included so make sure you use the correct ones for this kit (parts H7, H8).
The axles have the torsion bar attached which you slip through the holes in the hull sides with inner brackets allow the axles to flex with small stops so they sit in the neutral position for a good sit and allowing the axles to flex for articulation. The ends of the torsion bars are glued in place in the bracket on the opposite hull wall and if you want the axles raised above neutral simply cut off the small stop.
There are again the three different styles of axle arms as with the previous kits and you should take care to add these at the right stations as the instructions are a little confusing here. Also note on the second axle arm there is a raised seam down the middle which should be there so don’t be tempted to remove this like the fine moulding seams on the other arms. There is also an additional small detail part added to the station 3 axle and shows the good attention to detail on the suspension.
The instructions again have an overhead plan view showing the locations of the two styles of torsion bars securing brackets plus left and right plan views showing the placement of different style axle arms which helps positioning these correctly but you will still have to take care to fit the right part in the right spot.
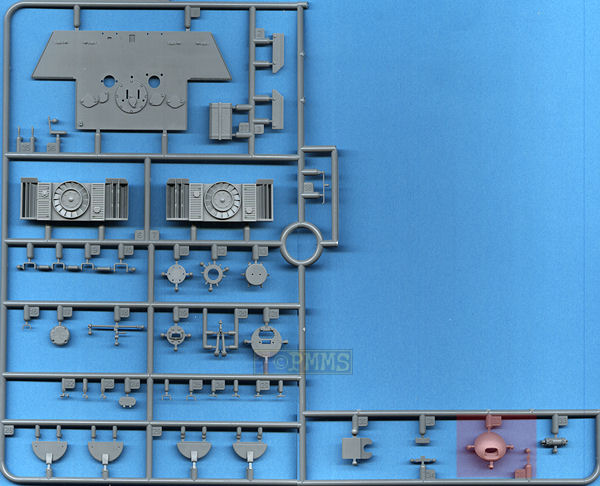
On the inside are two well detailed fan and radiator panels that fill the void beneath the engine deck grills nicely but obviously these will have to be painted before the final fitting of the upper hull.
Added to the rear hull side is the separate track pin guide used to push the pins back into place as they pass and the idler wheel axle is also separate and can be positioned forward or back and it’s best to leave this off until adding the tracks to allow for any adjustments required for a good fit of the tracks.
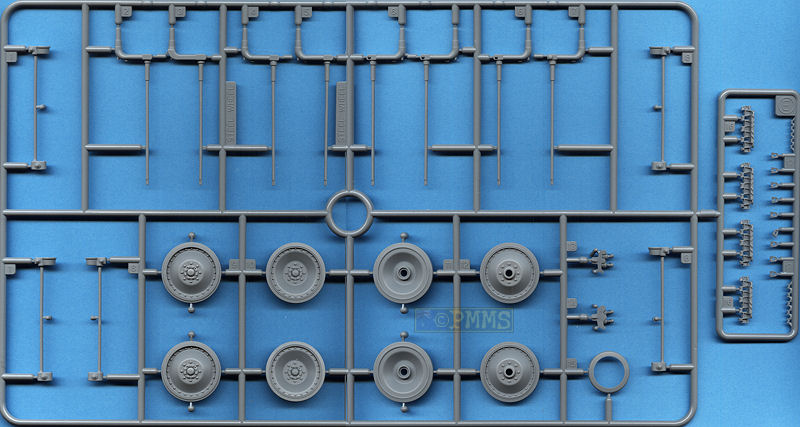
The road wheels provide are the 860mm rubber rimmed wheels with the correct 24 rim bolts nicely rendered as are the rim contours but again there is no embossing on the rubber sections as there has been in a number of other recent Dragon kits. All the wheels have details on both sides except for those joined closely together on stations 1, 3, 5 and 7 for good detail definition.
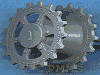
The two part drive sprockets have excellent details on both sides of both sprockets which adds to the good effect of the assembled sprockets but there should be casting numbers on the inner hub while the four part idler wheels again have excellent details due to the breakdown of the parts and depict the larger 665mm idler very well but both could do with cast texture added for a better appearance.
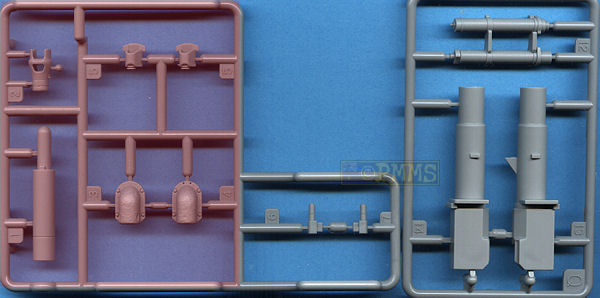
On the rear hull panel which is new for this kit there is nice flame cut texture along the top edge but watch as there is two sprue attachments that will need care removing to not compromise the texture, there is also a weld seam along the sides that mates to the upper hull sides when attached for good detail definition here. Added to the panel are the earlier muffler pipes with cast armoured guards that have nice surface texture but choosing the right guard could do your head in.
There are two new sets of guards included in the kit and the instructions indicate parts Q3, Q4 but the illustrations show parts T6, T7? On checking reference photos it would seem that parts T6 and T7 are the more appropriate for the version kitted and the main parts layout diagram also shows parts Q3, Q4 as not being used.
You should also watch the positioning of these as the left guard (part T7) has two small notches for the additional two cooling pipes either side of the exhaust pipes which have the ends slightly hollowed out with inner louver detail.
The 8 part jack assembles into a nice replica but the mounting clips are plastic and a little on the thick side and could do with thinning or replacement with etched brackets to improve the look while the jack is mounted vertically between the exhausts which is correct for this Jagdpanther version.
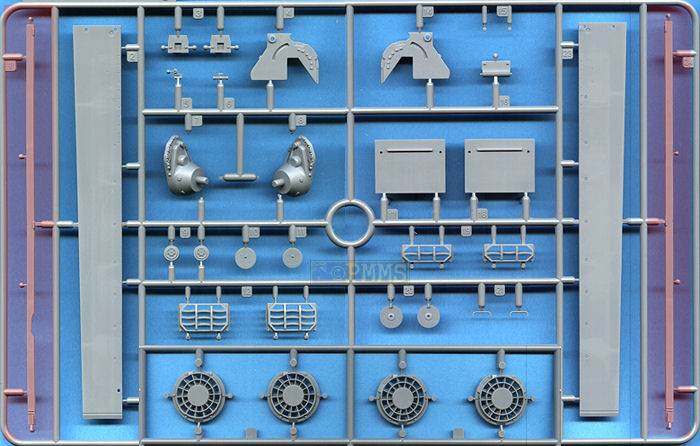
Other rear hull details include the towing shackles and two large storage boxes with nice lid details and convoy light correctly added to the left box. These are standard Panther storage boxes which are okay for this version but they should be attached to the hull with two clips each that fit over the upper hull plate and these will have to be added and any spare etched fret brass would do for this job.
The links are designed to simply be glued together and are not workable but should be adequate for most applications with additional “normal” moulded track links with separate guide teeth to use around the drive sprockets to ensure a better fit. You have to use these links around the drive sprockets because the tooth holes in the “magic track” are too small to fit the sprocket teeth but this obviously will not be an issue on the final track runs not around the sprockets.
The other thing to note is there are actually left and right handed tracks on the Panther with different end pins on each but Dragon only give you the right handed track which means you still don’t get this important Panther track detail.
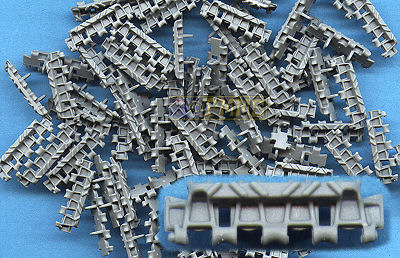
Also the instructions don’t tell you how many links to use per side and the normal number is 86 links per side but obviously you will need enough for the runs to mate so you can also play it by feel when fitting them together.
The surface detail on the hull is very well done with excellent weld seam texture on all the hull interlocking panel joins and around the roof outer join but most of this detail will be covered when you apply the Zimmerit to the glacis and hull side panels but it’s nice to see it the detail included.
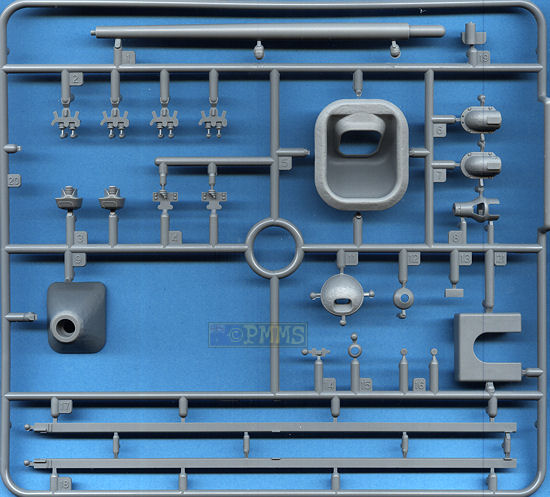
Added to the glacis is the new machine gun ball mounting for the complete MG34 from the previous Panther kits and it’s a shame this is completely hidden apart from the barrel after assembly. The large cast Geschuetznische (gun mounting collar) has subtle cast texturing but extreme care is needed when removing this from the sprue as the attachments are quite large and fill the recess at the sides. As the edges of the collar are very thin it is easy to damage these removing the excess plastic from the underside recess and you must take care here.
You will also note around the cast collar opening is a very faint outline for the larger cut-out required for the later bolted gun collar and under normal circumstances this would have to be smoothed out but it too will be covered by the Zimmerit coating required so is not really a problem.
On this particular Jagdpanther version the second driver’s periscope opening is covered with a welded plate and this is provided as a small etched piece which is still visible in most photos after the Zimmerit coating is applied.
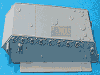
Moving back to the engine deck there are two new sets of circular cast intake covers provided and as the original Panther G covers are also still in the kit that makes 4 sets of intakes to choose from but you should use parts H13 for this version as parts H22 are more applicable to the later Jagdpanther versions. These intakes also get finely etched mesh screens which is all the etched detail included and are really the only essential etched parts required so it’s nice to see their inclusion.
All the intake covers on the rear engine deck and the separate engine access door are also separate parts for good detail definition as are the four side louvered intake grills which also have etched mesh screen covers to finish off nicely.
Added to the hull sides are the pioneer tool racks with separate tools that have moulded on clips and brackets but these are quite finely done for plastic and there is also the spare track racks, wooden jack block and five part barrel cleaning rod cylinder for the left side. This will need the join seam removed before added the additional detail and the mounting brackets but the fit is good making the job a little easier.
The headlight on the front left fender is made up of 4 parts that include the wire ducting for another nicely detailed sub-assembly and this fits neatly to the fender mounting bracket.
On the rear of the superstructure is the large entry door with a three part hinge with separate outer grab handle and three latches added on the inside, there are no pin marks on the door if left open but there is nothing inside other than the rudimentary gun breech. There is also the small hatch on the right side with separate hinge and inner latch as well as the upper aerial mounting pot.
The roof panel as mentioned is separate and required some minor trimming for a good fit but nothing too get excited over with all other details as separate parts. These includes the central ventilator that also has the water tight cover with extremely small wing nuts to add if you use this, but note this cover is not fitted under combat conditions.
The Commander’s and Loader’s split hatches are also cleanly moulded without any pin marks and have the two outer key holes as well as inner grab handles and latches for nicely detailed hatches while at the front is the Commander’s periscope which has the circular plate separate and a clear plastic periscope. The forward small hatch is also separate and you get a nicely detailed binocular sight made up of three parts to add if you wish?
The right rear revolving periscope is also in clear plastic with separate cover and you can fit this at any angle you wish while the left side fixed periscope is also in clear plastic with separate cover.
The close defence weapons port has alternate parts with the port closed or open with the small mortar fitted inside the roof if you use the open port for a nice bit of detail.
One issue with the roof is the sliding sight cover on the front left corner of the roof is fixed in place as it’s included with the roof moulding with just the sight opening which means you can’t show the barrel traversed.
On the real Jagdpanther the barrel can be traversed 12° left and right but after assembling the rudimentary inner gun breech this is fixed inside the gun mantlet in the neutral position and can’t be traversed anyway so the fixed roof sight cover just corresponds to the fixed barrel.
The monobloc gun tube itself is in one piece with just fine moulding seams to be sanded smooth and the initial larger muzzle brake is also in one piece with a separate inner grommet and end cap, both the barrel and muzzle brake are the correct dimensions in length and diameter.
After fitting the gun collar to the glacis you then attach the assembled gun breech from inside trapping the barrel mounting posts between the breech and glacis and you have to make sure not to glue the pins on the barrel mounting (part T20) if you want the barrel to elevate.
The barrel fits inside the mantlet that also has subtle cast texture like the gun collar and then this is attached to the inner gun mounting to finish the barrel assembly.
Finally the fit of the upper and lower hulls is very good not requiring any additional trimming.
As mentioned these have reverted back to the annoying photo type instructions that are just not easy to follow but there are some additional exploded view drawings included to explain the more complicated assemblies which does help out more.
|

If not then the kit will build relatively easily to give you a nice Early Production Jagdpanther from the box but the lack of gun traverse may be an issue for some but again if it doesn’t bother you it won’t be. As with any kit there is room for additional detailing but nothing out of the ordinary and we await the later version to follow.
But there is one thing you can’t get away from and that is you will have to add Zimmerit as all vehicles of the type built from this kit would have it applied.
Highly recommended 8/10
Click on thumbnails for larger view


Detail Images
Click Browsers BACK button to return to page
The Panther/Jagdpanther has been covered in many publications over the years but some earlier references have information that has been outdated as more accurate information has come to light.
|
 Panzer Tracts No.9-3
  Achtung Panzer No.4