
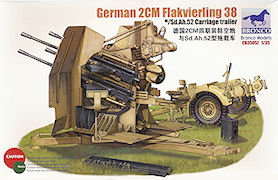
German 2cm Flakvierling 38
w/Sd.Ah.52 Carriage Trailer
Bronco Models 1:35 Scale Kit No. CB-35057
Kit review by Terry Ashley
Technical Advice by Jon Bailey
The Gunner fired the weapon by way of two foot pedals; each pedal fired the two diametrically opposite guns allowing the other two guns to be reloaded for continuous firing. It could also be fired in automatic or semi-automatic mode and all four guns could be fired at the same time by depressing both firing pedals.
The mount was fitted to a triangular base and was normally transported on an Sd.Ah.52 trailer as well as fitted to vehicles such as the Sd.Kfz.7/1 half-track and Panzer IV based Wirbelwind plus some one off installations.
As well as Army use, the Flakvierling 38 was also used by the Kriegsmarine fitted to U-boats and ships as well as on trains and fixed installations such as around harbours and on flak towers.
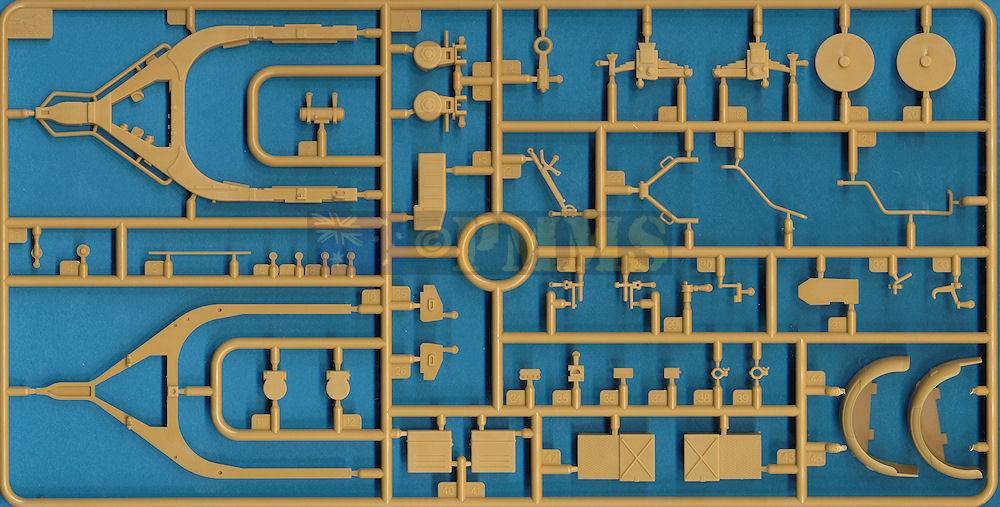
The kit gives you the full Flakvierling mounting on the triangular base as well as a detailed Sd.Ah.52 trailer plus a few magazine boxes and spare barrel cases with the ability to build the kit in firing or travel configuration.
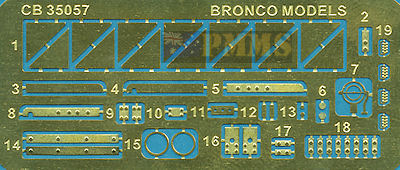
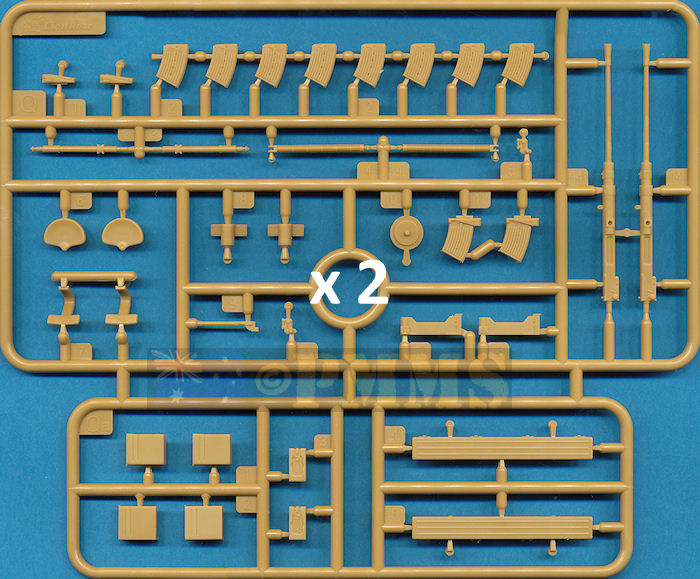
The kit consists of 197 parts in light beige plastic and further 50 etched parts along with the instruction sheet.
Dimensionally the kit matches well with the available 1:35 plans in the books listed below; these are mostly showing the Flakvierling on mobile mounts such as the Wirbelwind and Sd.Kfz.7/1 so not all the features are measurable, such as the triangular base. Those features than can be checked were mostly within acceptable tolerances given there were also some minor differences between the plans themselves which doesn’t make things easy.
Standard of moulding is very good with few if any pin marks visible after assembly and only the odd bit of fine flash with the normal mould seem lines and the many plastic nodes being the only cleanup needed on the parts. There are some quite small and fine parts that need the usual care in cleanup and assembly but the level of detail definition as result of these parts is very good overall.
At the front is a three part recuperator housing with the circular ribbing moulded on and two small etched parts added for detail. The join seam between the two recuperator halves (parts P10, P11) will need some filler with the assembled recuperator housing fitting to the front of the carriage without any problems.
The large locking lever (part P20) can be left off until later in the assembly for ease of handling and the front flap for the spent shell collector box is in two halves and again the inside join seam will need some filler if you are going to have the flap in the open position. The flap is designed to open and close which it does nicely allowing you to alter the position at any time depending on the final configuration of the model.
At the back of the carriage is the gunner’s position with lower firing pedals moulded with the foot plate, this makes the pedals a bit chunky and you may wish to trim these at the back for a better appearance? The seat rest and traverse gear drive shaft are in one piece with the gunner’s seat and backrest as separate parts, the drive shaft ends fit into the foot plate and underside of the traverse gear housing without any problems.
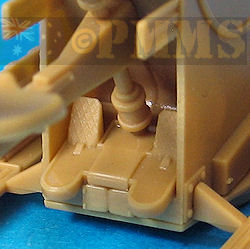
The traverse gear housing is in two parts with the two small thumb knobs included along with separate traverse hand wheels with the assembled gear housing attached to its mounting plate which in turn is attached to the upper carriage while aligning with the top of the traverse gear drive shaft.
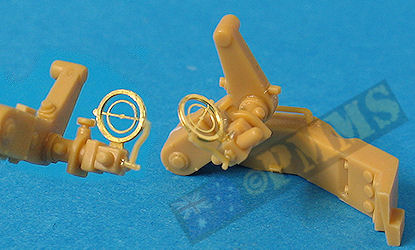
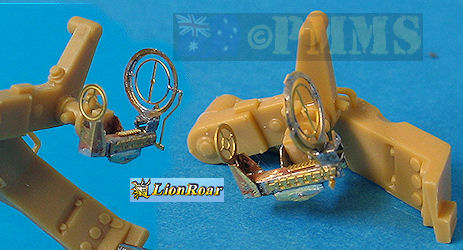
The main sight bracket is a one piece moulding with clean detail on both sides and this is attached to the upper carriage recess next to the battery box with the stop handle (part P37) also attached to the upper carriage. The smaller L shaped sight bracket arm is attached to the main bracket by way of the small locating pin but this is not designed to move so you have to decide on the final elevation of the guns when gluing in place.
Added to the bracket arm is the gun sight (part P25) with moulded on solid plastic sight ring or a three part etched ring that provides far better detail, this requires you to cut off the plastic sight ring to take the etched part. Unfortunately the sight provided in the kit doesn’t represent any known Flakvierling 38 sight I have seen in any references or photos.
Early versions of the Flakvierling 38 had the Flakvisier 40 sight (also used on the FlaK 38) with distinctive square sight housing; later versions had the Linealvisier 21 or the revised Schwebekreisvisier 30/38 sight.
As mentioned the sight provided doesn’t represent any of these apart from the ring sight itself and one option is to replace the kit sight with the etched Schwebekreisvisier 30/38 sight from the Lion Roar Flakvierling 38 update set #LAS35008 . This also is not perfect missing the eye guard and being a little oversized but does give a better representation of the sight than the kit sight does.
The small gunner’s shield with separate sight door is added to the top of the carriage.
Overall 2cm FlaK gun
Added to the guns are a choice of magazine bracket with or without a magazine and two part sleighs, these are different for the top and bottom on either side so check the instructions for the correct numbered part. The sleigh gun attachment bracket is also separate for good definition between the gun and bracket and these are attached to the circular gun cradle along with the recoil cylinders and the curved front gun shield.
Detail on the cradle is very well done and includes the two fine firing levers and engraved elevation quadrants around the curved lower cable drum bracket on the left side but the three rectangular holes are not opened out as they should be, and hollowing these out will improve the appearance. Also the two small deflecting pullies on the rear edge of the left side cradle are missing, but it should be fairly easy to add these with plastic card discs.
When fitting the gun cradles to the Upper Carriage there is a central bushing (part P16) with square locating lugs that slips into the carriage and joins the two cradles to ensure they align correctly.
After attaching the Gun Cradles to the Upper Carriage the left side Cradle is attached to the sight arm by way of the connecting rod (part P28) but this along with the sight arm are not designed to move. Therefore you have to decide on the gun elevation required as you glue the connecting rod in place as mentioned above along with gluing the sight arm in place.
If you wanted to have the guns elevate the pivot points for the sight arm and connecting rod would need to be altered with pins added to allow movement which shouldn’t be a huge task for the average modeller.
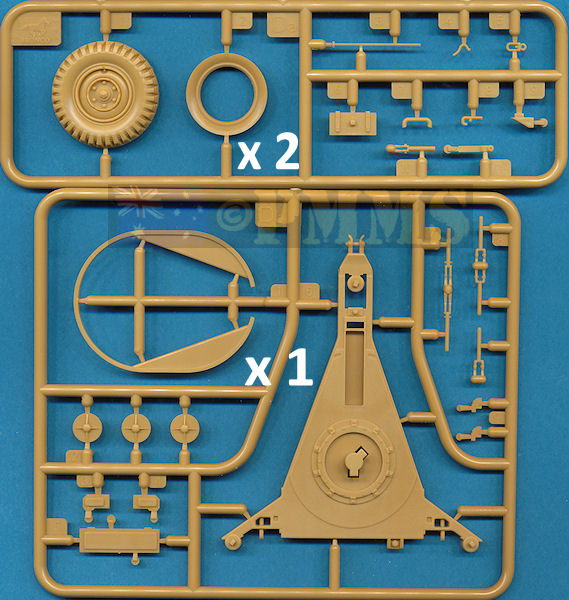
There are also numerous small etched parts added for the bolt heads on the Base ‘legs’ and the levelling shaft housings to finish off the Base. The circular central turntable has the securing notch bracket that fits into the corresponding cut-out in the base of the Platform allowing the gun mounting to rotate freely.
The magazine racks have the small square wood pads on the bottom and rear plates with the triangular segments as etched parts for excellent definition; this allows you to add any number of 20 round magazines provided to the racks as required.
Omissions from the Platform are the rectangular box and bent rod tubes on rear of the magazine racks, the two foot rest posts at the front and the brackets for securing the outer walk boards when in the travel position. Most of these items are included in otherFlakvierling kits and their omission here is quite puzzling.
The two Loader's seats have separate back rests and mounting posts that are fixed in the raised firing position and if you wanted to have the gun in travel mode minor alterations would be needed on the seat post mounting bracket.
Fitting of the Upper Carriage to the Platform is very precise and will hold in place without glue such is the good fit, you would of course glue the assemblies together to avoid and embarrassing incident, but it does allow you to temporarily fit the two together to test fit other components along the way.
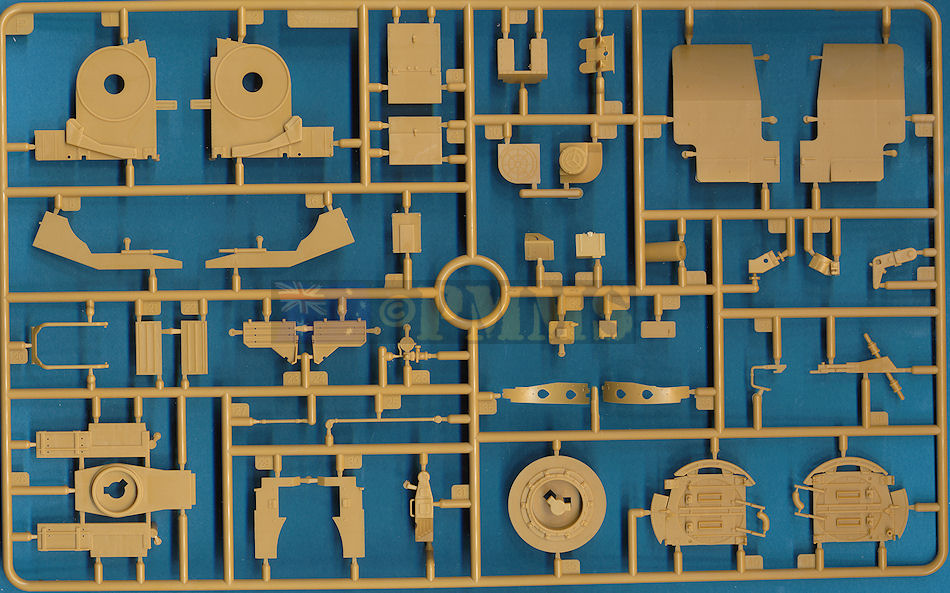
The plastic shield/mounting plates are moulded a uniform thickness (or should that be thinness?) with fine rivet, bracket and latch detail on both sides as well as being completely free of any pin marks for nice looking plastic shields.
The inner shields are in one piece which means you have to cut off and reposition the top folding section should you want the shields in the travel position, also note the inner shield panels are fitted at an angle of about 70 degrees to the main shields which is not that clear in the instructions.
The pin on the bottom of the inner section fits into the tube couplings on the platform for easy fitting. The square armoured box over the front deflector box is in three parts with alternate front plates in the open or closed position depending on your choice.
Also included are two spare barrel cases with the barrels and other detail moulded into the lower section with the lids as separate parts allowing you again to build them open or closed.
The detail on the magazines and ammo boxes is very nicely done with the magazines having a round moulded into the top of the magazine for a good appearance if displayed on their own, note you get magazines with the bracket moulded on for fitting to the guns as mentioned above leaving all the 16 magazines provided to populate the model.
The large trailer chassis has the upper U shaped section and lower section as separate parts, this does leave join seems to be filled on the underside of the trailer chassis but as these are out of sight after assembly you may wish to save yourself some work.
Added to the underside of the chassis frame is the forward stand which can be glued in the raised or lowered position depending if the trailer is being towed or free standing.
Other details include the brackets and brake lines as well as the two suspension/axle units that fit precisely to the frame; one impressive feature is the inclusion of the two main compressed air lines from separate air tank to the three part regulator mounted on the frame side. An additional line can be added to the top of the forward A frame connecting the left and right sides from wire you provide yourself with the instructions showing where this is fitted.
On the upper side of the frame is a finely moulded hand brake on the left rear that has a separate actuating rod for excellent detail definition as well as the forward tread plate and tow hitch. Take note of the two angled fender supports as one (part A37) has a cut-out for the hand brake rod so this has to fit on the left side as indicated in the instructions.
The two winch assemblies at the end of each frame arm are made up of 8 plastic and 2 etched parts each again for excellent detail and also give you the easy option of showing the winch winder handles and hook deployed in a diorama attaching the gun platform to the trailer.
One small note is the two part hook (parts Da5, Da8) which has the hook on part Da8 fed through the ring on part Da5. This is not going to happen folks as the hooks are square in profile and the fit is very snug leaving no room to move while trying to fit through the ring. It’s best to cut off the end of the hook leaving just the L shape, fit this through the ring and then reglue the end of the hook.
The two one piece fenders have a very good rounded profile with additional small parts for the tail light/reflectors and fine hooks, all of which need care in fitting.
On top of the fenders are the two storage boxes with recesses in the fenders to ensure precise location, the only thing to note is these boxes were not always fitted to the trailer but have to be here due to the recessing in the fenders. Also included are two additional boxes (parts A40, A41) added to the end of the ‘standard’ boxes, but these are in fact 3.7mm ammo boxes and wouldn’t normally be used with the flakvierling trailer.
The wheels/tyres are also very well done with good crisp detail on the tyre tread and rim/hub detail including the air valve stem and these have the rear axle detail on a disc trapped inside the wheel by the separate rear tyre sidewall section allowing the wheels to rotate freely.
Overall this is a superb rendition of the Sd.Ah.52 trailer with no problems in assembly and easy fitting of the gun triangular base for travel configuration.
Included are two full colour illustrations of the gun and trailer in overall German Gray and Dark Yellow with no other markings provided as well as the various paint colours used given for Mr.Hobby, Hobby Color, Humbrol and Tamiya.
| Option 1:
Overall Dark Yellow.
Option 2: Overall German Gray  |
Probably the standout feature of the kit is the superb rendition of the Sd.Ah.52 trailer which is basically a kit within a kit and quite easily the best trailer of its type available in plastic. Bronco thankfully will be releasing this as a standalone kit (CB-35079) very soon.
Rating: Flakvierling 38: 7.5/10
Flakvierling 38 with Sd.Ah.52 trailer: 9/10
Click on thumbnails for larger view
Detail and assembly images


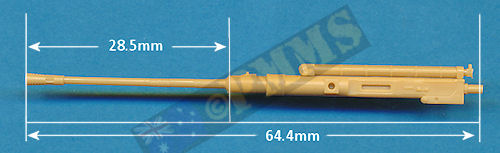
 2cm
FlaK38
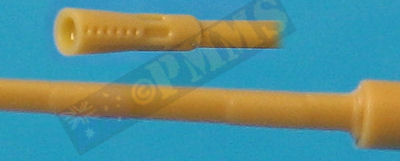
2cm
FlaK38Muzzle Reference images
| TM-E9-228 2cm Flakvierling 38 Four barrelled mount Easy 1 Productions  |
2 cm Flakvierling 38 Nuts & Bolts Vol.27 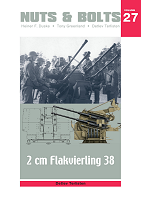 |
Flakpanzer IV Wirbelwind (Sd.Kdz. 161/4), Ostwind & Kugelblitz Nuts & Bolts Vol.25  |
| Flakpanzerkampfwagen IV and other Flakpanzer projects from 1942 to 1945 Panzer Tracks No.12-1  |
German
20mm FlaK in WWII 1395-1945 Schiffer Military History ISBN: 0-88740-758-7  |
Sd.Kfz.7 in detail Special Museum Line No.36 Wings & Wheels Publications ISBN 80-86416-60-7  |
| Halbketten Zugkraftwagen 8t Sd.Kfz.7/1/2 AFV Super Detail Photo Vol.9 Published by Model Art Co.Ltd.  |
Flak
at War Trojca Publications Waldemar Trojca, Karlheinz Münch ISBN: 83-60041-15-6  |
German Anti-Aircraft Combat Vehicles Revised Edition Ground Power Special Feb '08  |
Thanks to my credit card and
 for
the review kit.
for
the review kit. 