

WWII German Rheinmetall
12.8cm K44 L/55
High Velocity Anti-Tank Gun
Great Wall Hobby 1:35 kit #L3523
Review by Terry Ashley
Technical Advice by Jon Bailey
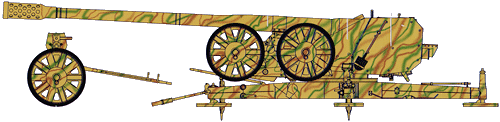
Only the prototypes were built and none were used in action although approximatelty 50 barrels were produced and fitted to available French and Russian carriages.
Fitting with the dual purpose design, the gun would have had different designations depending on the service role, with field artillery units the designation would have been 12.8cm K44 L/55 while if used in with anti-tank units 12.8cm PaK44 L/55.
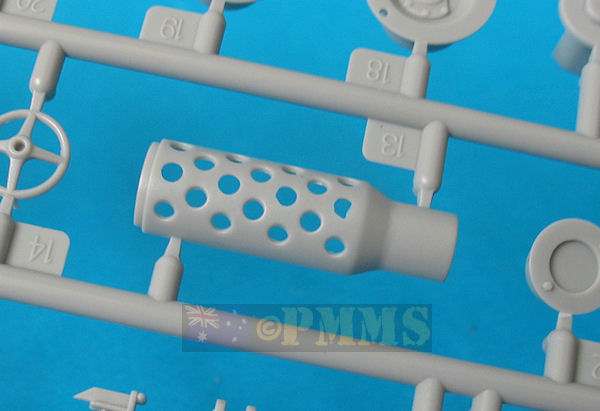
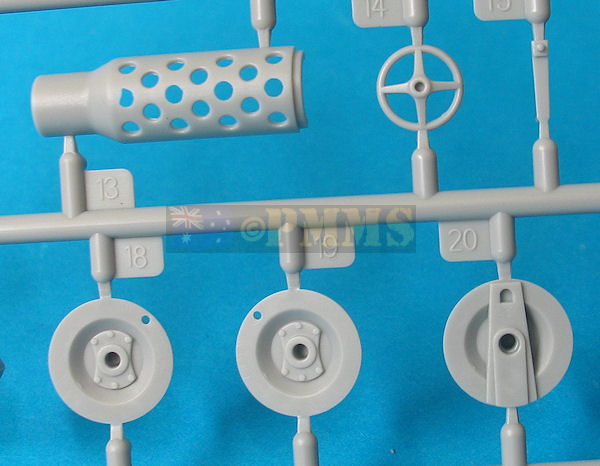
The long L/55 monobloc barrel tube was fitted with a large perforated muzzle brake with the Rheinmetall and Krupp muzzle brakes differing in size and the number of perforations (Krupp with more). The manually operated breechblock was the horizontal sliding type with two recoil cylinders mounted inside the gun cradle and the two equilibrators mounted either side of the gun cradle.
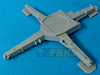
The gun had a cruciform platform with folding side outriggers which was permanently mounted on a gun carriage fitted with torsion bar suspension which was jacked up in the firing mode. This allowed a full 360° traverse with the elevating and traversing hand wheels fitted to both sides of the carriage, and a seat for the gunner on the left.
The Krupp gun was fitted with a single gun shield, while the Rheinmetall gun had a spaced armour gun shield with both being angular in appearance with the sides swept back towards the rear and an additional detachable dolly was fitted of the cruciform platform for towing.
With a weight of 11 tons the gun was considered too heavy for a towed weapon and was never put into production although a modified version of the 12.8cm gun without muzzle brake was used in the huge JagdTiger.
As information on this gun is quite thin on the ground I don’t have any plans to check dimensions but comparing the parts to the available photos of the Rheinmetall 12.8cm K44 Great Wall Hobby have captured the details very well overall.
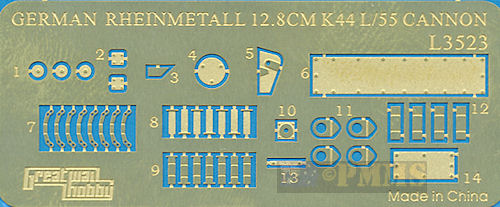
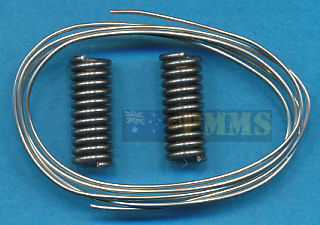
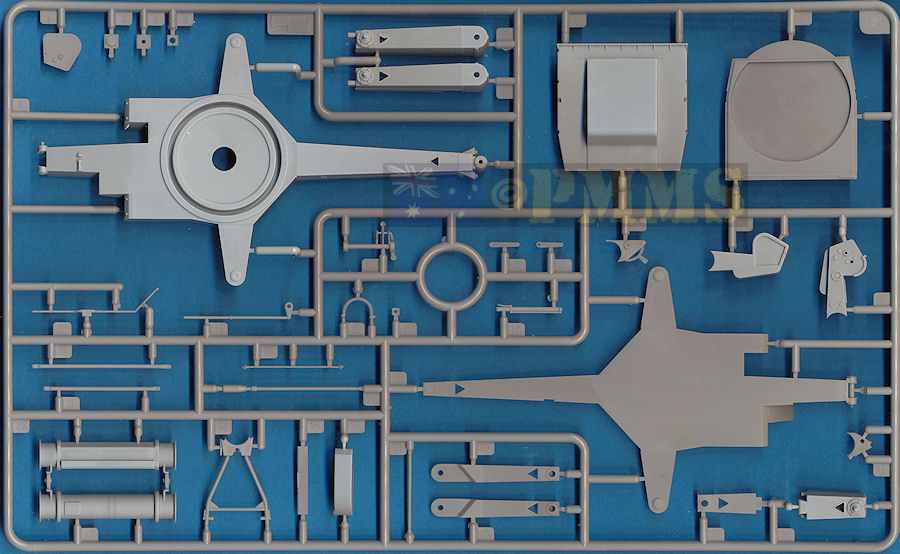
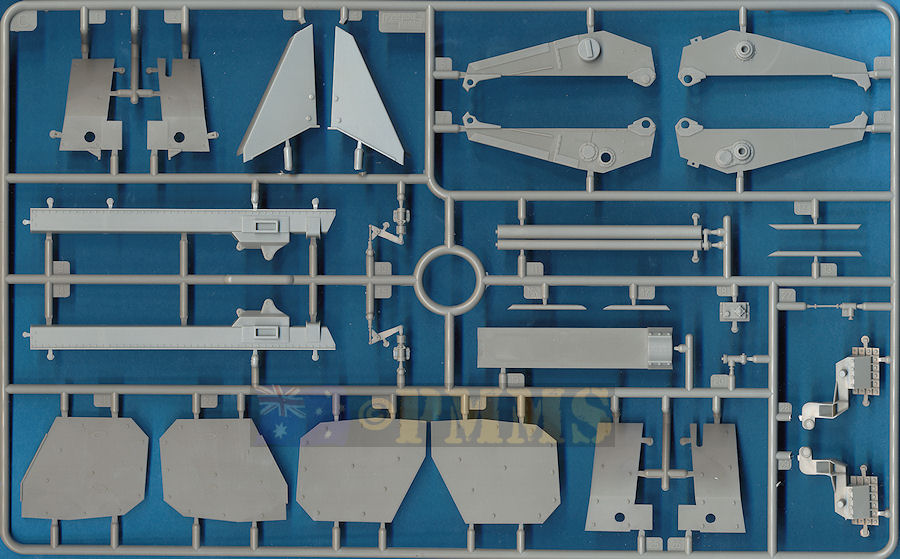
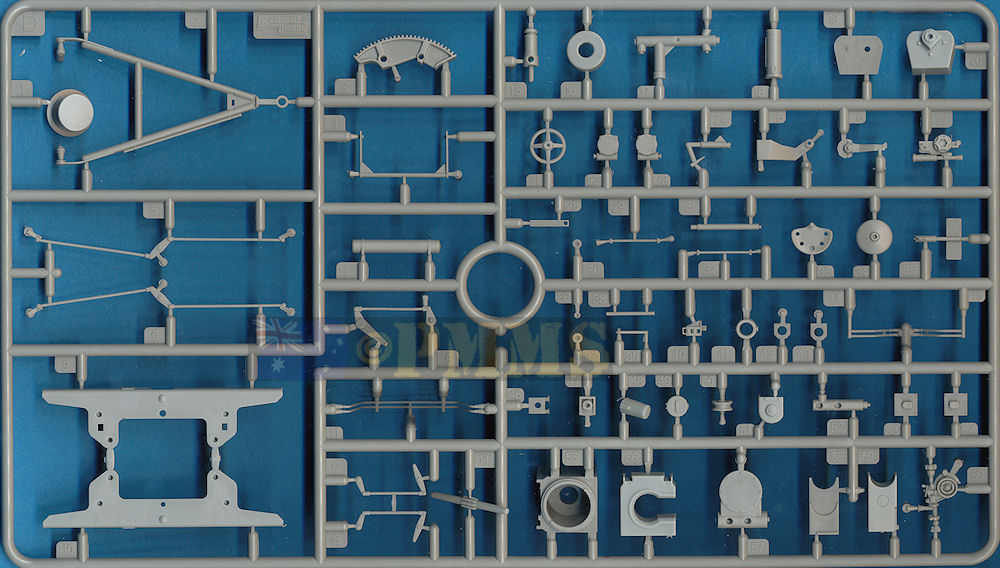
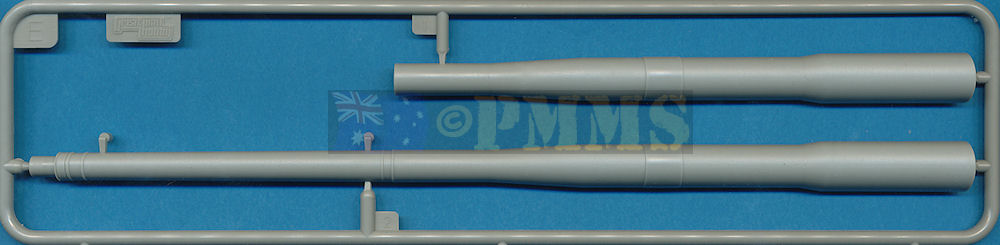
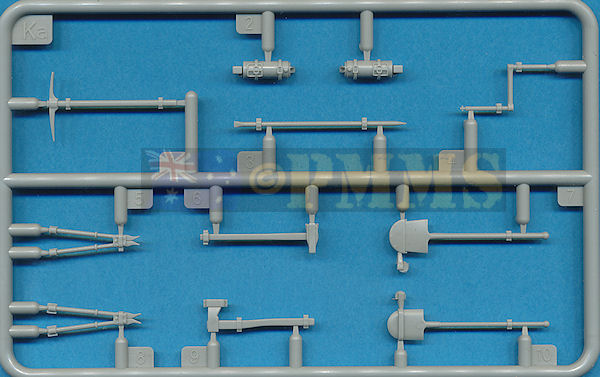
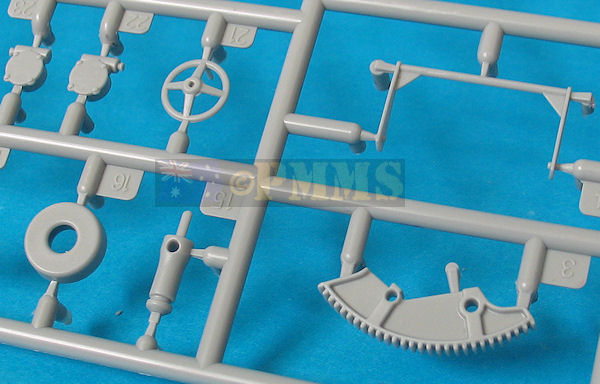
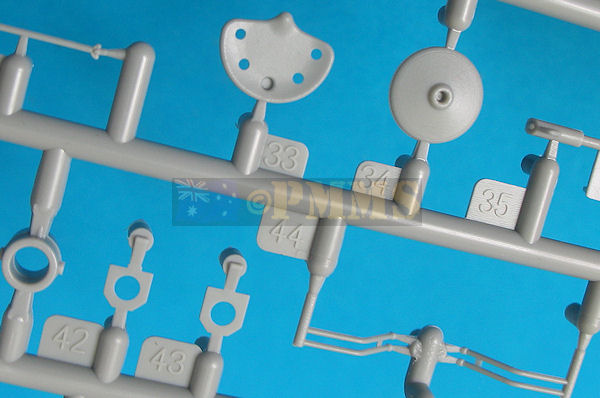
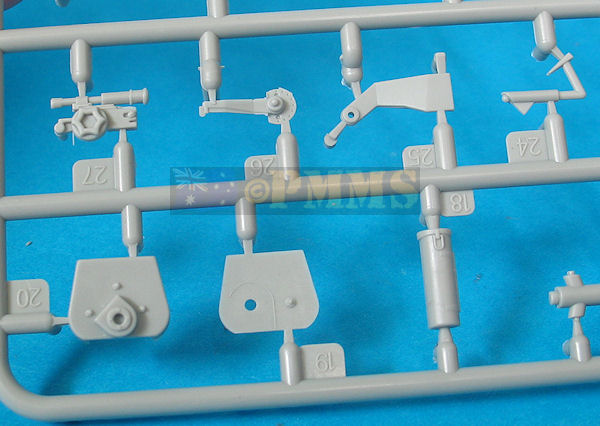
The kit consists of 175 parts in light gray plastic on 6 sprues plus an etched fret with 42 parts and two metal springs, a length of soft wire and a 7 page instructions booklet.
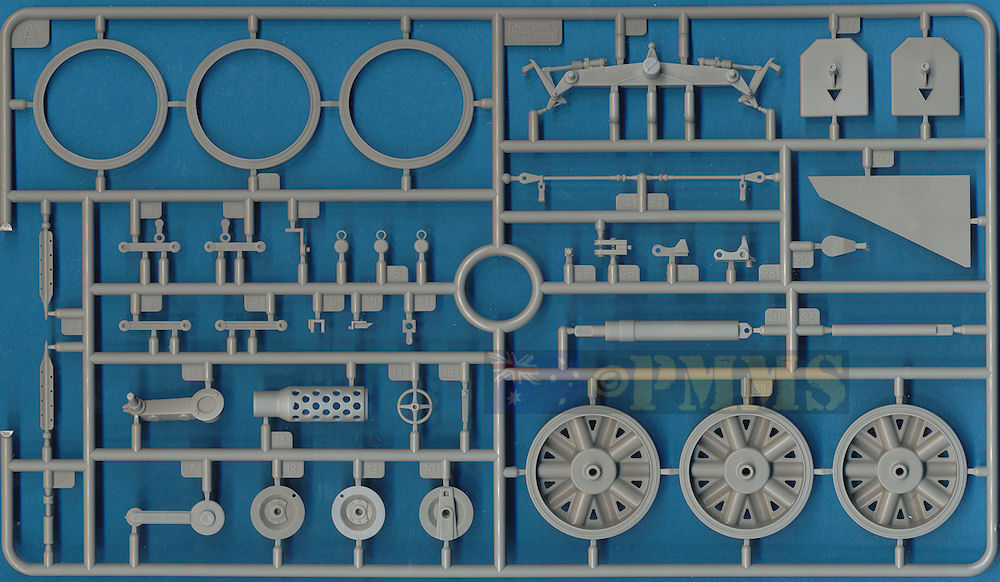
The standard of moulding is excellent overall with only some very fine flash on a few parts plus some annoying sink marks on the large gun breech. There are some pin marks but the majority will be hidden after assembly and of course the usual fine moulding seams.
Take care when removing these as there are numerous very small and finely moulded parts requiring care and the seams along the outrigger legs double as the weld seams, the rest of the detail is also very well done with rivet and bolt head detail nicely done as are the breech and gun mounting assemblies.
In keeping with the proposed dual role for the gun the kit includes a choice of sights, one for the indirect artillery role and the other for the direct anti/tank role as well as the option of firing or travel modes for the wheel bogies.
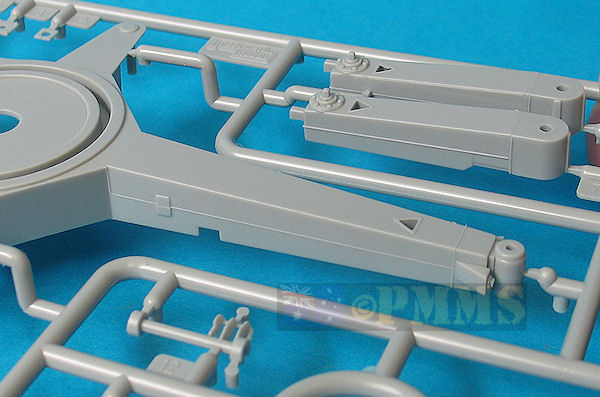
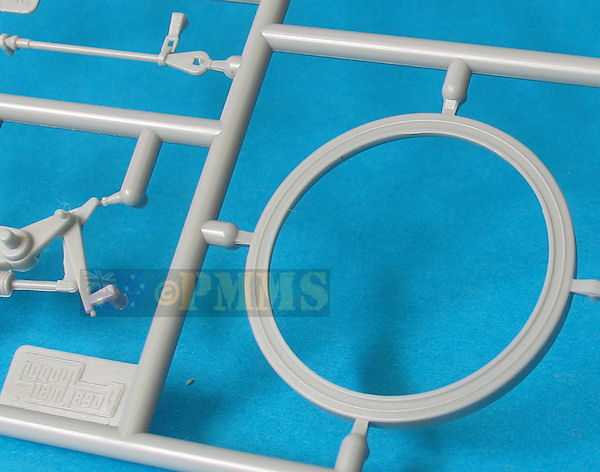
The lower turntable base plate of the gun mounting is attached to the base by way of a large underside bushing (part D1) which is a nice tight fit and didn’t require any glue to hold in place removing any chance of accidentally gluing the turntable.
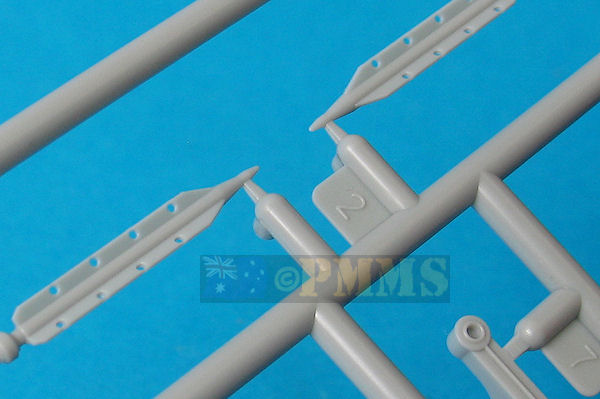
Most of the etched parts are added to the Cruciform legs and you have to remove small sections of the mould seams to fit some of the brackets with the instructions having plan views of the legs showing the position of the parts.
The outrigger legs have separate bases that are different for each leg so check the part numbers and the outriggers are trapped in place over the large pins on the main base by way of the underside Cruciform base plate. This allows the outriggers to be folded for travel or extended for firing without any problems.
The forward section of the main leg can be glued in the down or folded position as required but of you wanted this to be movable a hole can be drilled through the hinges and a wire hinge pin added without much trouble as the hinge is quite large.
The star securing stakes are provided with the holes in the stakes cleanly rendered and the stake mounting brackets are in etched brass and you can mount the stakes in the brackets or into the star holes in the base legs depending if in travel or firing modes.
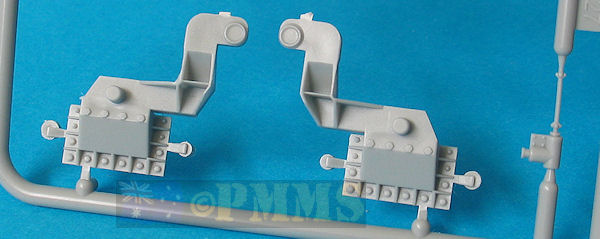
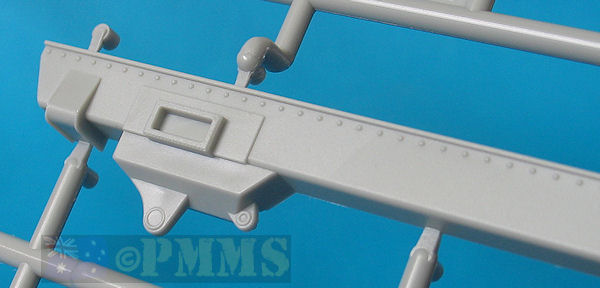
The main bogie crossbar is in two parts that form the “chassis” that all other parts are attached but the fit of the two halves was not the best leaving quite a mismatch along the top. This thankfully is a flat surface so cleanup of the join was quite easy to shave smooth with a #11 blade.
The two suspension units have four swing arms and the large metal springs supplied and apart from being a little fiddly to fit all the parts together while trapping the spring the resulting units are quite impressive and actually articulate if you don’t glue the swing arms in place. The pressure needed to compress the spring is way more than you will ever exert on the model so the choice is yours if you glue the swing arms or leave free.
Note that the top arms (parts A3, A4) are attached on opposite sides at either end of the bogies as this is not clearly shown in the instructions although it should become clear if you try and fit these the wrong way around.
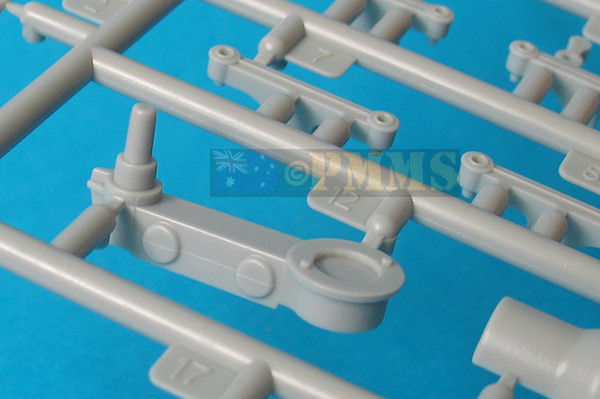
All the smaller parts only needed the moulding seams cleaned with the good fit allowing quick and easy assembly, the A frame towing arm needs to have the end holes drilled out to fit if you want this to be movable.
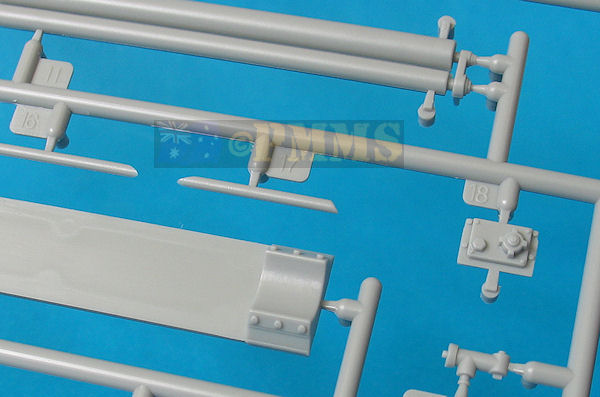
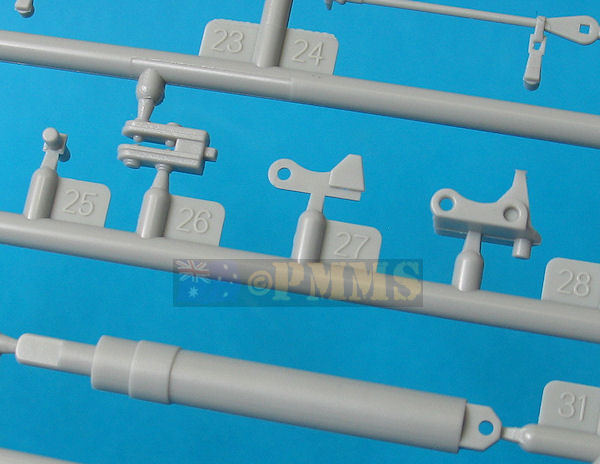
Included in the kit is a long length of soft wire to use for the various air hose lines from the chassis mounted air tank to the brakes and base when attached. The instructions show where to attach these lines but the line from the bogie air tank to the cruciform base leg obviously can’t be added till you attach the bogie to the base later.
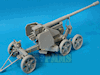
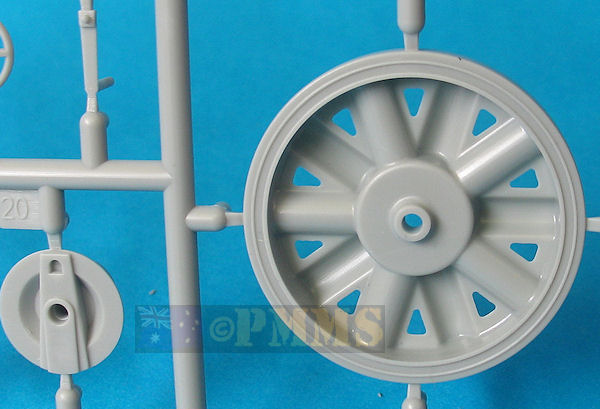
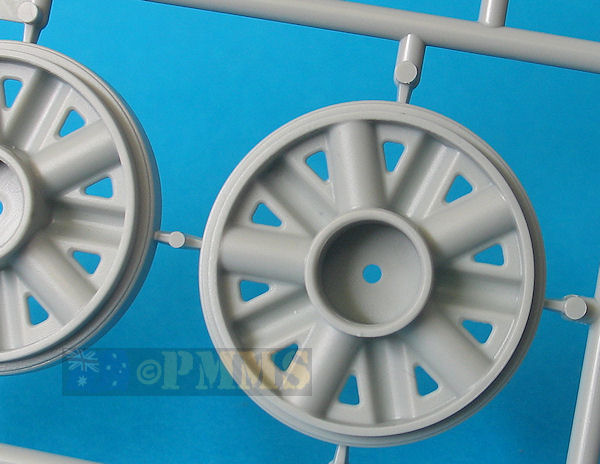
The large wheels are cleanly moulded with the inner rubber tyre section separate for good definition and also to leave the required gap between the tyre segments on the wheel. The wheels have the small outer hub cap and eye separate with the wheels fitted to the inner hub/brake units with central guide pin. This pin was slightly too long and needed to be shortened by about 1.5mm to allow the outer hub cap to fit properly with this being the only trimming needed on the bogies assembly.
The two main dual wheel bogies are far simpler affairs with just the two wheel spars and large axles that allow the bogies to be fitted in the travel or firing positions plus a couple of fine actuating bars.
The mould seams take a bit to remove from the finer details on the spars and actuating bars and the usual care is needed.
You also need to take care when removing the wheel spars (parts D9, D10) from the sprues as there are very small star hand wheels on the extremities that are aligned with the sprue attachment point and it is very easy to cut off the hand wheels without noticing if not careful?
If you want to be able to change the bogies from travel to firing mode don’t glue the axles to the spars, the fit is tight enough that will hold in place without glue in any case.
The two main axles are in two parts and have fine mould seams to be removed with the large angled stubs that fit into the two part mounting bracket (parts B22, B23). Before gluing the bracket halves together make sure to trim out the big moulding pins on the inside otherwise the axle stubs will not fit into the brackets later. You also want to make sure the join on the two bracket halves are glued securely as a bit of stress is generated when you insert the axles.
More of the air hose leads are added from the wire provided to the spars and again the instructions show where to attach these.
Also added to the axle mounting bracket is the winch unit which assembles without any problems and there is a large etched strip added for additional bolt head detail. This is easy to fit by attaching one end securely with cyanoacrylate and then flatten it around the unit progressively.
There are locating points marked on the axle mounting bracket for the winch assembly and other details added to make for trouble free assembly and this completed sub-assembly is attached to the front of the gun mounting. I found it easier to securely glue the axle mounting bracket assembly to the gun mounting before attaching either to the base gun mounting plate but I guess this is up to the individual.
The wheels are the same as for the travel bogie and again needed the central pin shortened as described above and these are then glues to the dual bogie axle stubs.
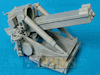
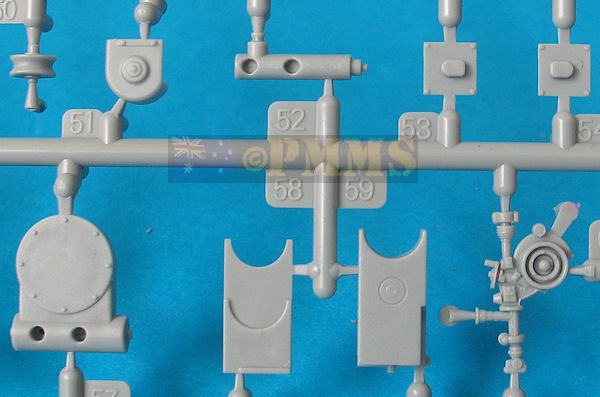
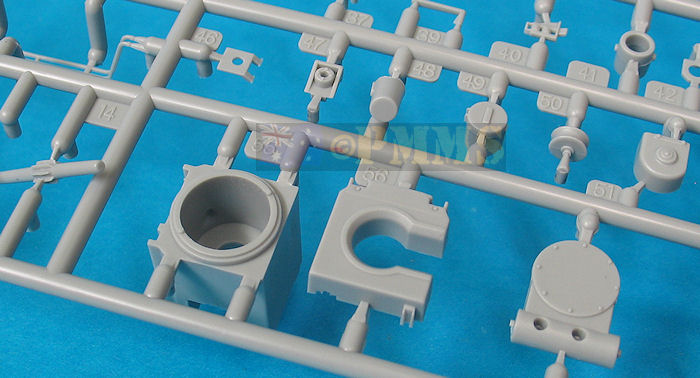
The gun cradle is in two halves with cleanly rendered rivet detail and trapped between the halves is the elevation arc, there are two small pin marks on one side of the arc but these are hidden after assembly so not a issue.
After joining the two cradle halves together there is the central join seam to be eliminated, this is easy for the outside seam but the inner seam is more difficult. The easiest method is to add a section of thin plastic card along the bottom of the cradle trough to cover the whole area giving a smooth finish.
Inside the cradle and attached to the bottom of the breech are the two recoil cylinders but these are hidden after assembly unless you have the barrel in recoil. Also attached to the breech is the barrel slide with the front barrel support that has the six bolt heads moulded on. This does result in the lower edge of the bolts being bevelled due to moulding constraints and replacing these will improve the bolt head definition.
Another issue with the barrel slide in common with all artillery kits is there is no lower lip to hold the slide in place; this lip can easily be added from thin card to again improve the detail.
The long barrel tube is in two parts, one three quarter part with the full forward tube and half of the rear section plus the other quarter section, the usual join/moulding seams need to be cleaned up. The large muzzle brake is also in two halves with the perforation holes included plus a separate end cap. The perforation holes have some minor flash to remove and those near the join need to be opened up a little due to moulding constraints, but this isn’t a big problem using a sharp #11 blade.
The perforation holes are on two sides only with the top and bottom of the muzzle brake solid as it should be, you must ensure to fit the muzzle brake aligned correctly with the solid sections at top and bottom as there isn’t any location notch on the join to ensure this alignment.
The barrel fits easily into the large hole in the breech and rests on the barrel support on the slide for a trouble free assembly, you may want to leave the barrel off until final assembly for easier handling and this easy fit makes this easy.
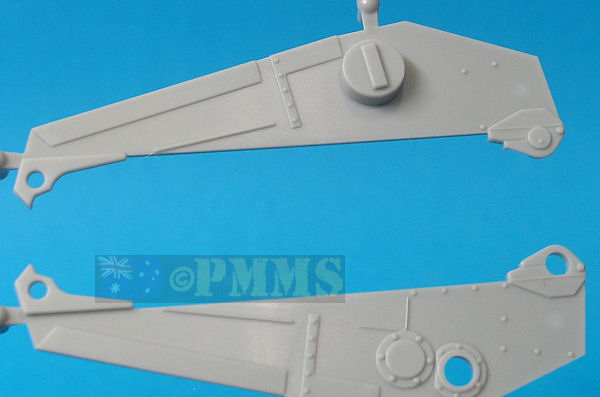
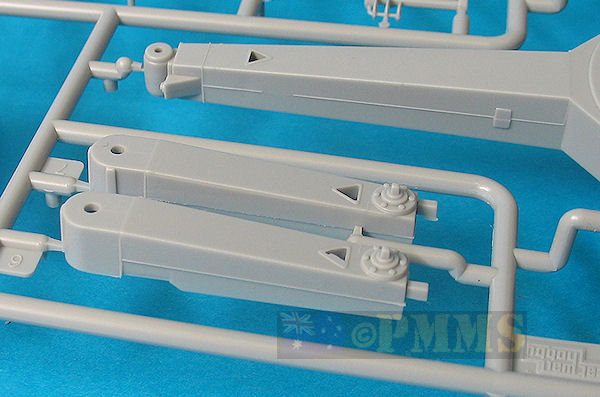
The carriage sides are in two halves each side with nice crisp detail on the outer side, the two halves are sandwiched together while trapping the equilibrator piston brackets to form the full carriage side panel. There is a fairly prominent join line between the two carriage halves that you may want to eliminate but it is all but hidden when the shields are attached if you want to save a bit of work. One thing to watch is to ensure the inner faces of the parts are perfectly smooth before joining together as there were a couple of raised pin marks on mine that needed to be removed for a flush fit.
The equilibrator cylinders are moulded integral with the end of the pistons in the neutral travel position along with separate pistons should you want to change the elevation of the gun. But to use these separate pistons you have to cut off the moulded on piston ends and drill a 3mm hole 20mm deep into the cylinder to take the full pistons.
This can be a tricky task drilling such as large hole in a small part and it’s best to drill the hole in steps, first drill a pilot .5mm hole then in steps drill 1mm, 2mm, 2.5mm and finally the 3mm hole. This may seem time consuming but trying to drill the 3mm straight off with so little clearance will result in tears.
The carriage mounting plates (parts C28, C29) with excellent bolt head definition on the outer sides are attached to the side of the gun cradle and the large trunnion pins fitted to the carriage side as these are glued to the gun carriage base. The tops of the equilibrator cylinders are also fitted to the arms on the mounting plates in the same process. If you have made the equilibrator pistons movable as above you should flatten the ends of the cylinder locating pins with a small heated screwdriver head instead of just gluing in place.
Also trapped between the carriage sides is the small elevation sprocket and rear bracket but as all the parts are quite large they are fairly easy to handle during this process.
The fit of all the major carriage parts was very good not requiring any trimming or filling other than what is mentioned above
Added to the carriage sides are numerous small parts that need care in cleaning up the moulding seams, these make up the elevation and traverse assemble and the gunner’s seat and controls and other smaller attachments to the carriage base. Again there were no fit problems but take care to get the hand wheels aligned as the glue dries.
Also fitted are the sight mounting bracket and the alternate sights for your choice of artillery (parts D26, D60) or anti-tank role (part D27). It should be noted that the actual sighting units are very fragile devises and were only fitted when the gun was in action, in the travel mode the sights would be removed leaving just the mounting bracket visible and the sights stowed away.
The gun shields are very well done for plastic shields with each plate of the spaced shields moulded commendably thin with small spacer pins to leave the actual space between the shields when glued together. The only pin marks are on the inside faces and completely hidden when glued together.
Joining the larger angled sides to the smaller front plates is also very straightforward due to the attachment strip on the inner side plates that slips between the two front plates for a precise fit at just the right angle. The fit of the two triangular equilibrator covers is equally good as is the inner support bars, just watch the numbering of these bars as they are different either side but other than that the shields units go together very well for blemish free sub-assemblies that fit precisely to the carriage sides.
Added to the shields are the pioneer tools and barrel cleaning rod, these come with brackets and clips moulded on but you also get small two part etched tool bracket clips to use for better detail definition. This requires you to cut away the moulded on clips from the tools which isn’t a big job considering the improvement in detail as a result of using the etched clips.
The shields are added to the sides of the gun mounting and there are precise locating lines provided and there shouldn’t be any problems fitting the shields, you may want to leave these off until after painting as they enclose the gun mounting controls quite closely.
Final assembly depends on your choice of firing or travel modes as well as building the gun for the artillery or anti-tank roles.
Depending on the chosen configuration you simply fit the appropriate sight and position the wheel bogies accordingly, the fit of all the components is very good and again there shouldn’t be any problems.
This is especially the case where the arrows showing where parts go cross each other and it can be a little confusing such as when fitting the smaller items to the gun mounting base.
Due to the many small parts there is a bit of cleanup needed on the smaller parts and minor work if you want some parts movable such as the equilibrator cylinders.
As with any kit there is scope for additional detail to be added and this is no exception but the kit will build into an outstanding model with the etched parts adding that little bit extra.
Highly recommended.
Click on thumbnails for larger view
Detail Images

Sprue detail images

Close new window to return to review