
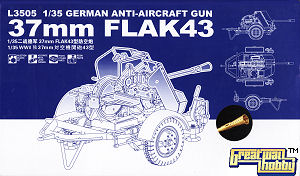
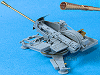
German Anti-aircraft Gun
37mm Flak43
Great Wall Hobby 1:35 set #L3505
Review by Terry Ashley
The multimedia kit contains:
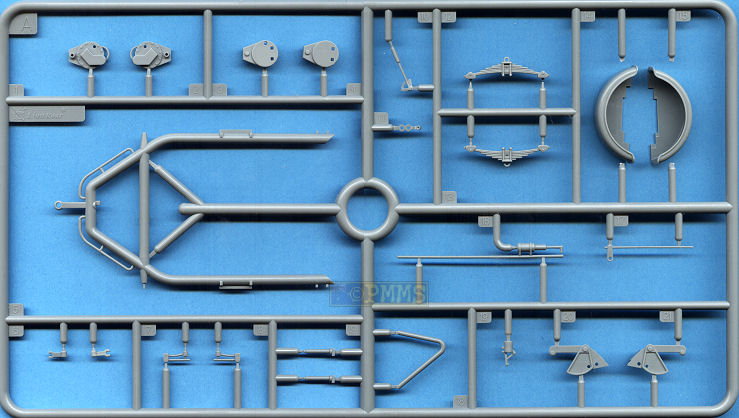
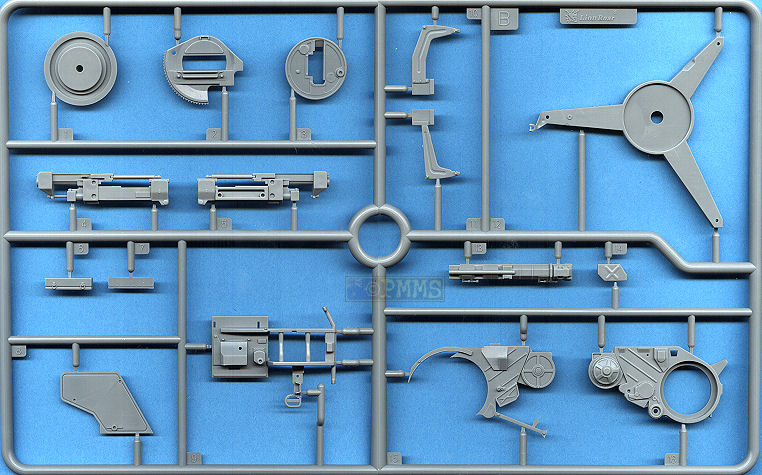
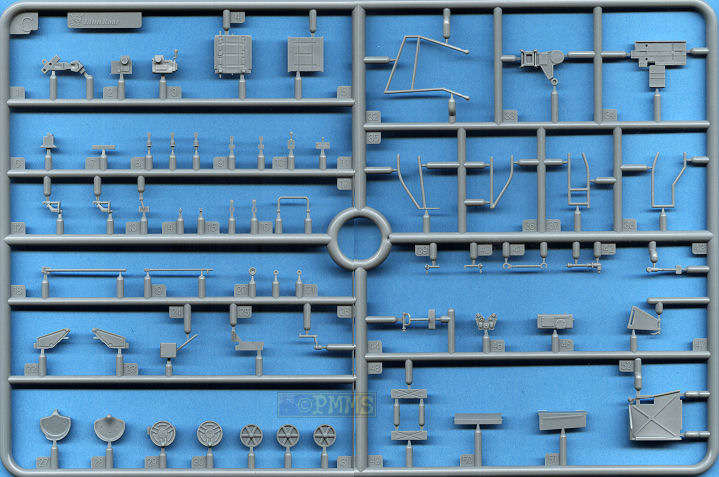
98 parts in light grey styrene
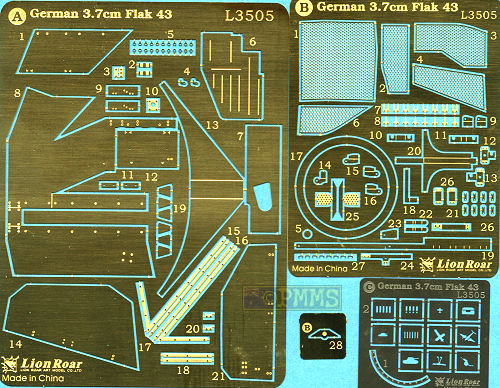
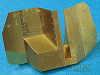
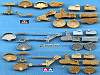
4 etched frets
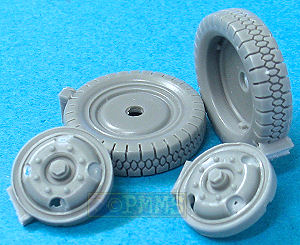
4 resin parts for the wheels
2 lengths of brass wire
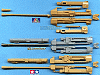
1 turned brass 37mm barrel
The quality of the plastic parts are excellent overall with clean well defined details with hardly any apparent flash and only a few pin marks mostly hidden after assembly with the parts being on par with other mainstream plastic kits of today. There are a few small sink marks on some parts as well as the usual moulding seams on the parts to be carefully removed, especially on the smaller parts.
A quick note on the plastic used as this is quite soft which makes it easy to work with but you need to take care not to remove too much plastic while cleaning up the sprue attachment bur or the mould seam lines. Many of the smaller parts have the sprue attachment that overlaps the part making it easier to remove without damage to the part but care will still be needed during cleanup.
The resin wheels are also cleanly cast with well defined details and just the small casting blocks to be removed and some fine resin film in the rim holes while the metal and etched parts are the same excellent quality we have seen from previous Lion Roar sets.
Dimensionally the kit measures up well against the available plans in the Panzer Tracks No.12 Flakpanzer and Nuts and Bolts Vol.13 Flakpanzer IV with the barrel, which is the same as came in the set #LB3514 being the correct length with the other sizes being within acceptable tolerances.
There are a couple of other Flak43 kits available, the Italeri kit #363 and the Flak43 included with the Tamiya Mödelwagen (kit #35237) but unfortunately not available separately and I will include some comparisons with these kits to see how this new Lion Roar kit stacks up.
The first thing noticed when comparing this kit to the Tamiya Flak43 is the part breakdown and detail are remarkably similar with just a few very minor detail differences plus the inclusion of additional etched and metal parts in the Lion Roar kit which also includes some parts in etched brass that are plastic in the Tamiya kit, most notably the shields.
I won’t mention much of the Italeri kit but leave the images to speak for themselves as it really isn’t up to the standard of the Lion Roar and Tamiya kits but does include the trailer which the Tamiya kit doesn’t as mentioned above.
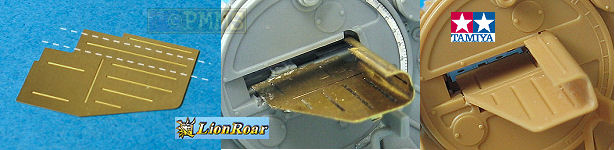
This is not as easy as first thought due to the hole for the barrel as this area tends to bend first and its best to anneal the shield through a candle flame to make bending easier. The instructions don’t actually give any indication of the correct profile curve of the shield and I used the Tamiya kit shield as a guide to get the right curve. There are also no locating marks for fitting the shield to the supports and you have to line this up allowing the barrel to fit through correctly.
The metal barrel which is the correct length with cleanly machined flash suppressor fits neatly into the front of the gun receiver and you can add this at any time but I left it off till later so it didn’t get in the way during construction. See full barrel review for additional details.
The main gun mounting is in two halves like the Tamiya kit that traps a small pin for the sight mounting and you should be careful not to glue this while fitting the halves together. There were no problems with the fit and added to the mounting is the two part circular gun rotating mount which is fitted from either side of the main mounting allowing it to rotate and again there were no problems fitting these parts.
Added to the mounting is the large side shield moulded nice and thin without any pin marks to contend with as well as five small etched fittings added to the shield that will need care due to the small size. These are small plates with even smaller etched U fittings but unfortunately these were a little too small to fit into the holes in the etched plates and you may want to replace these with thin wire for a better appearance, but we are only talking plates about 2mm long here so it’s very small detail.
The lower gun platform has a separate central plate with nicely embossed detail which is an improvement over the plane detail on the Tamiya part. There are additional small details added to the platform including the gun travel lock that can be positioned in travel or firing mode depending on your choice for the model?
Probably the biggest problem with the kit is the fit of the gun mounting to the cradle as the rear mounting is not angled as it should be as with the Tamiya kit but has been altered on the Lion Roar cradle to be upright. This results in the gun mounting being at an angle and you need to trim this back to the angle as on the Tamiya part for the Lion Roar gun mounting to fit correctly.

Modification required to the Lion Roar lower carriage to fit the upper carriage correctly.
Note; enhanced detail on LR carriage.
Added to the gun are the left side ammo feed tray and the side mounted box made up of 7 parts that fit together perfectly without any gaps but mounting this on the cradle will need care as there are only two small mounting points.
On the right side is the lower tray but the instructions show to fit the end section (part C51) at the incorrect angle and it should be fitted straight onto the main tray and not folded over as illustrated. There is also the traverse and elevation hand wheel mounting which has two of the smallest plastic parts for the star fasteners you are likely to find and extreme care is needed when handling these or they will disappear.
There is a nicely detailed main sight that will move with the gun when elevated if you are careful with the glue as well as the two gunner’s seats that fit together without any problems although these assemblies will need care as the parts are quite small.
The side spent shell exit chute is supplied in embossed brass and bending this to the correct shape will pose a few problems and again annealing the part before hand will make things easier.
The main problem here is there are embossed lines on the chute but the actual bends have to be between these embossed lines as well as the curves being quite rounded and the natural tendency is for the part to bend with the embossed lines.
I made a small plastic card jig with the right curves and used this to bend the etched tray around to form the chute but again there is no indications given in the instructions for bending this and I used the Tamiya part as a guide to get the correct bend contours. Added underneath the chute is the etched support which is missing from the Tamiya kit.
Brass Lion Roar ammo schute requiring careful bending
with Tamiya part used as guide.
Also note fine elevation numering on Lion Roar gun
After bending the main central shield section I soldered the inner curved channels and right side panels for greater strength but fitting the side angled panel (part A1) was a little tricky as there are no locating ridges or the like to hold this in place while soldering.
The get this in place I spot glued the panel in place with two small dabs of cyanoacrylate (super glue) and then soldered in position without any real problems and added to the insides of the panels are thin etched bolted strips for added detail.
The side foldable shield sections and the sight doors have workable hinges according to the instructions but it is best to decide if you are building the kit in firing position with extended shields or travel mode with folded shields as these can’t really be made workable as the two plastic securing latches (parts C39 and C40) don’t fit without modification and lining up the shield hinges as well as getting the shields to sit evenly is quite a challenge.
The hinges for the sight doors are extremely small and while you can assembly those to be workable fitting the doors and the shields while retaining the movement is another challenge to say the least and gluing these in place will save a few headaches.
Added to the outside of the shields are 16 extremely small eyes and these have small holes pre-drilled though the shields which does make fitting easier but if you leave the pin on the eyes too long they will protrude through the back of the shields. But these eyes are extremely small and you probably wouldn’t notice this inside the shields once fitted to the model in any case. Thankfully Lion Roar also give you a few spare eyes for any attrition along the way seeing as they are so small and easily lost while handling.
Added to the shields is additional small etched detail such as the gunner’s foot rests and these require careful bending at the metal is very thin for these parts and easily distorts while being bent to shape so take care.
Once assembled the shields fit easily to the lower cradle mountings but you might want to leave these off until painting of the main gun is complete.
There are a couple of small issues with the shields, the curve at the front right is a little sharp even though the engraved bending line behind is about 1.5mm wide which does allow for a more rounded bend but using a rod or similar to bend this will help with the curve. Also at the right of the lower front there should be a lip where the front and side panels meet but this is not on the kit and would be hard to add given the way the panels bend with each other.
The final item for the gun is the large mesh spent shell container fitted to the right side during firing and this has plastic frames to which is added very fine etched mesh and annealing this with a candle flame will allow a less rigid and more realistic appearance once assembled.
Conspicuous by their absence is any 3.7cm ammo rounds either in plastic or metal which does leave the gun a little impotent and I can only image Lion Roar will release a set of brass rounds separately as they did for the Nebewerfer ammo packs?
Also included in the kit is a small etched stencil with various kill markings that can be added as you wish using an airbrush.
Just a quick note, these is nothing to actually attach the gun to the platform permanently and it just sits there which does allow easy traverse but will come adrift if you tip the model so beware when handling the model after assembly.
The main wheels are in resin which allows for excellent tread pattern to be included with just a small casting block to be removed and the resulting scar can be positioned at ground contact to hide out of the way. The wheel rims are separate resin parts that need some fine resin file removed from the lightening holes but have excellent hub detail and fit neatly into the resin wheels.
Attaching the wheels to the stub axles will need the resin axle mounts drilled out to fit the axle stubs but that’s the only additional work needed to fit the wheels.
There is also the lack of precise bending angles for the etched gun shields as mentioned above and not everyone will have the Tamiya kit handy to use as a guide for the right angles and contours as I did.
But overall there shouldn’t be any real problems providing you study the sequences carefully before hand with the placement of the etched details on the shields being the most confusing in parts.
Some of the assembly is a little tricky and experience working with fine etched parts and soldering will come in handy when assembling the shields in particular and you will need to invest a bit of work but the end result looks quite impressive.
Highly recommended 8/10
Metal parts

Resin Wheels
Click on thumbnails for larger view
Detail images
Close new window to return to review
Prime Portal 3.7 Flak43 walkaround
Thanks to Lion Roar/Great Wall Hobby for the review kit.