

| The Set: |
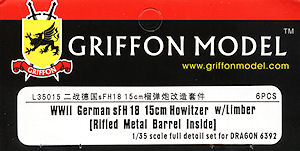
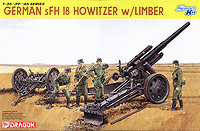 This update set from Griffon Models like the Voyager Model set #PE35207 is designed for theDragon sFH-18 150mm Howitzer w/Limber (kit #6392) and while the Voyager Model set could be termed a basic update set, this Griffon Models set is far more extensive and not only includes the etched parts but also a replacement metal barrel with fine rifling and a small decal sheet with a selection of stencilling for the Dragon kits 150mm ammo and the etched ammo boxes in this set.
The set contents include:
3 x larger etched frets
3 x smaller etched frets
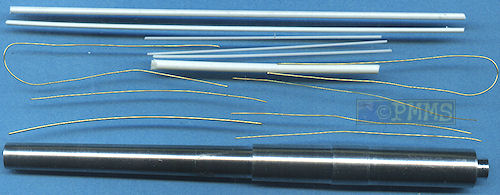
1 x turned aluminium barrel with fine muzzle rifling
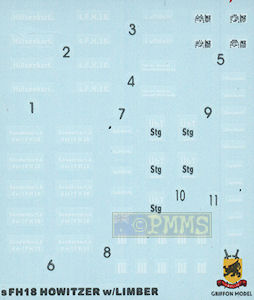
1 x decal sheet
1 x copper wire 0.2mmx50mm
3 x copper wire 0.3mmx50mm
2 x copper wire 0.3mmx100mm
3 x ABS rod 0.5mmx50mm
1 x ABS rod 1mmx100mm
1 x ABS rod 1.5mmx100mm
1 x ABS rod 2mmx50mm
1 x 7 page A4 sized instruction sheet.
Stencil decal sheet
Due to the quality of the Dragon kit to start with most of the parts in the set are for the smaller detail items on the kit with the largest part being the limber which has basically the whole chassis frame and spade extensions replaced with etched parts as well as the trail arm spades and the replacement metal barrel.
There are numerous small moulded on details that have to be cut from the kit parts beforehand and you should study the instructions before each step to see if any trimming in needed. As the updates are quite extensive I will go through the Dragon kit instruction steps to indicate the updates provided for each as just about every construction step gets some form of update.
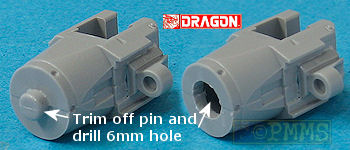
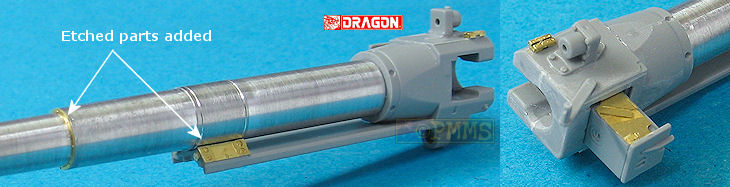
| Step 1 Barrel and Breech: |
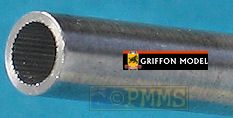
The new barrel has the muzzle drilled out to a depth of 15mm and includes very fine rifling for the first 10mm to improve the look but other than that is dimensionally similar to the Dragon metal barrel supplied.
Modifications to kit breech to take the metal barrel
Assembled barrel on the Dragon kit, note additional etched details on the breech block
| Steps 2 and 3 Gun Cradle and Recuperator: |
The calibration slide on the side of the cradle is also replaced with finely engraved measurements included on the etched part as well as the locking lever on the left of the cradle.
| Steps 4 and 5 Trunnions: |
The right trunnion has a number of smaller brackets and the side mounted tube case brackets replaced with fine etched parts for added detail definition.
| Step 6 Main Wheels: |
These assemblies are quite intricate and detailed requiring care and patience during assembly but will provide a real lift in detail definition
| Steps 7 and 8 Lower Carriage Base: |
The tail light mounting brackets is also an etched part with the tail light itself also made up of a couple of etched parts.
| Step 9 Spade Assemblies: |
| Steps 10 and 11 Trail Arms: |
These include all the tool and equipment brackets, the side foot plates with nice tread plate pattern included as well as the two square storage boxes on each arm also replaced with etched parts with separate lids that can be shown open if you wish. The shovel also gets a new two part spade in etched that you add to the kit handle after the plastic spade is removed.
The details here are more extensive than for the Voyager set with just about every clip, bracket and tie down replaced and the actual small tool securing straps have two parts each so you can fit the strap though the buckle or leave open if the tool is removed in a diorama scene.
Obviously many of these parts are very small and intricate requiring more care when fitting but the level of detail is again very good.
| Step 12 Transport Limber: |
This is made up of many small and not so small parts that all require some bending to shape before hand and careful study of the instructions will be beneficial to avoid any problems.
Additional details are added using the thin wire provided to form springs that fit into the chassis frame as well as small lengths of etched chain.
The central mounted storage box is also entirely replaced with etched parts with additional small lid clips and the large Y towing frame (kit part E20) is also completely replaced with etched parts with just the towing hitch remaining from part E20.
The two large perforated plates that are stowed on the limber during transport and attached to the trail arm spades during firing are also completely replaced with etched parts for greater detail definition but you have to cut the four long mounting pins from the kit parts to be used with the etched plates.
Added to this are the suspension leaf springs made up of 9 parts each that you fit together to form the springs added to the kit axles which are one of the few remaining kit parts in the entire assembly, the others being the top trail mounting bracket and pin (kit part E9) and forward bracket (kit part E13).
The length of etched chain is used to attach the limber to the trails during transit and add further fine detail with the limber being basically a kit within a kit such is the extent of the brass and other parts provided replacing almost all the kit parts.
| Additional parts: |
Click for larger views
Close new window to return to review
Instruction sheet in .pdf format
3.2MB
| Instructions: |
As usual you should study the instructions carefully before assembly to avoid any traps but overall I found them easy to follow if care is taken.
| Conclusion: |
The almost entire replacement of the wheel brake assemblies, the large trail arm spades and the limber especially will need care as there are many very small parts and the sub-assemblies quite intricate but nothing that should be too taxing for anyone buying this update set in the first place.
Highly recommended 8/10
See the sFH-18 150mm Howitzer subjects page for additional reviews.
| References: |
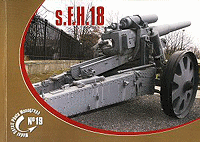 |
s.F.H.18 |
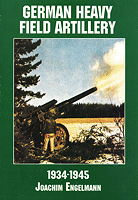 |
German Heavy Field Artillery
|
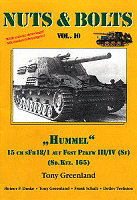 |
Hummel Sd.Kfz.165 |
 |
Ground Power No.70 |