
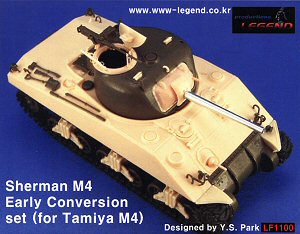
Sherman M4 Early DV
Conversion Set (for Tamiya M4)
Legend # LF1100
Review by Terry Ashley
 Following the previous two conversion sets for the M4A2 early DV #LF1096 based
on the Academy M4A2 or M10 kits and set #LF1097 based on the Italeri M4A1 kit
comes two new sets for the M4 Early DV Conversion with set #LF1100 based on the
Tamiya M4 (Kit#35190) and set #LF1101 based on the Italeri M4A1 (kit#225).
Following the previous two conversion sets for the M4A2 early DV #LF1096 based
on the Academy M4A2 or M10 kits and set #LF1097 based on the Italeri M4A1 kit
comes two new sets for the M4 Early DV Conversion with set #LF1100 based on the
Tamiya M4 (Kit#35190) and set #LF1101 based on the Italeri M4A1 (kit#225).
We will look here at Set #LF1100 M4 Early Conversion while Set #LF1101 for the Italeri M4A1 is more comprehensive as it includes the turret and transmission cover parts from Sets #LF1096/1097 plus other parts while set #LF1100 uses the turret and transmission cover parts from the Tamiya kit but all other parts are the same.
Set #LF1100 consists of 91 parts in the usual light cream resin from Legend with an additional metal 75mm gun barrel, there are no other etched parts included in this set.
The quality of the resin casting is excellent with crisp well defined details without any blemishes of any sort and only the casting blocks to be removed which will take some care as they are quite large and intrude onto some parts as well but thankfully the resin used is softer than some other resin and is easy to work which does make the clean up task easier. As well as the casting blocks there is also fine resin film inside the hull and turret openings and again this is easy to remove.
There are numerous fine small parts included and it is usually easier to clean these up while still attached to their casting blocks for added support and care is needed when removing these small parts so they don’t disappear in the dreaded carpet black hole.
The set utilises many parts from the donor kits such as the lower hull, rear hull panel, some engine deck parts, running gear and smaller details items and some minor modifications are required to the kit parts to fit but we will get to these shortly.
The instruction sheet parts payout photograph shows two sponson filler strips but these were not included in my set but they do say for set #LF1100 so I can only assume they should be there, a question on quality control here which I’ve not encountered with Legends sets previously.
Upper Hull:
The main upper hull casting is very well done being perfectly square without
any warping with well defined raised weld beads around the upper deck and
on the glacis and correct shape for the radio port and rear hull angle. The
front crew hatch fairings are nicely done with the front vision ports having
separate armoured flaps and fine castings numbers on the upper fairing and
drainage holes in the fuel and ventilator splash guards are represented by
fine indented holes and the upper surface has a very subtle casting texture.
The rear hull uses the engine intake cover (part F4) from the Tamiya kit but care will be needed when removing the large casting blocks from the rear hull to ensure you don’t alter the contours by removing too much resin.
There are two round style air cleaners to add under the hull overhang to replace the square air cleaners in the Tamiya kit for the earlier version and you have to modify Tamiya parts F21, F22 to fit the new resin hull but this is very straightforward.
The tools from the Tamiya kit are used and these could be improved by using etched brackets or replacing with the nice tools sets from either CMD or Formations.
Other Tamiya kit parts used are the rear ventilator cover and fire extinguisher handle, head and tail lights and guards plus the lifting eyes front and rear.
The hull crew hatches are very well done and represent the early hatches without the spring supports and include nice internal detail as well as separate periscope parts and pad lock brackets (these are very small parts and need care when handling) with the grab handles made from the wire included. The fit of the hatches to the hull openings is very good if you want to show these in the closed position?
The fit of the new resin hull to the Tamiya lower hull/transmission cover is very good and didn’t require any trimming or other adjustments other than those described for the kit parts F21/F22 but you will have to make some sponson fillers from plastic card if they are missing from your set as they were with mine.
Suspension Bogies:
Included from the earlier sets are the early M3 type bogies used on these
early Shermans and are designed to use the Tamiya kit return roller
and road wheels with seven resin parts for each bogie unit and this makes
for
some fiddley assembly.
This is not helped by the basic instructions which just show the fully assembled
units with part numbers shown but unfortunately they don’t show the
actual assembly sequence and having a part incorrectly numbered doesn’t
help either.
 I have included an assembly guide here to hopefully help with the assembly
and this starts with cleaning up the parts which is straightforward but watch
the smaller parts 45 and 46, part 45 is shown fitted inside the return roller
in the instructions but in fact should be positioned between the suspension
arms to rest the volute springs on.
I have included an assembly guide here to hopefully help with the assembly
and this starts with cleaning up the parts which is straightforward but watch
the smaller parts 45 and 46, part 45 is shown fitted inside the return roller
in the instructions but in fact should be positioned between the suspension
arms to rest the volute springs on.
Firstly attach the rear bogie plate (part 42) to the front section (part 41) ensuring they line up parallel. Next fit the return roller bracket (part 26) along with the Tamiya return roller to the top of the front bogie unit (part 41) ensuring the bracket is positioned as far to the front of part 41 as possible (some trimming may be needed?) and add the volute springs to the underside of the bogie unit.
Next attach the pin (part 41) to the back of the front suspension arm (part
33) and position the Tamiya road wheels over the stub axles (note the axles
don’t go all the way trough the wheels as with the Tamiya kit) and glue
the rear suspension arm (part 34) to the central locating pins. The arms bow
in a little and you will have to hold the front and rear arms together till
the cyanoacrylate cures and finally just glue the suspension arms into the
upper bogie units ensuring the wheels are lined up evenly.
The fit of the bogies to the Tamiya lower is very straight forward without
any modifications required.
The Turret:
This set uses the Tamiya kit turret for the basis with new parts for the gun
shield and early rotor shield without collar guards as well as new early
style Commander’s hatch with the ring having fine casting numbers and
inner pad and latch details along with separate periscopes and latches on
the doors with the grab handles from the wire supplied. Two open periscopes
are also provided while the rest of the turret uses the kit parts.
The fit of the new gun shield was excellent and didn’t require any trimming to fit to the Tamiya turret as did the new turret hatch which makes this very easy.
The instructions:
These are the usual full colour photos of the assembled sub-components with
the parts called out by number corresponding to a parts layout photo showing
the parts still on their casting blocks which makes identification easy.
For most cases the instructions are easy to follow but as mentioned above the
section on the bogies was a little vague and you will need to take care with
these.
Conclusion:
This set is nicely cast with excellent details to represent the early DV M4
Sherman with the fit of the resin parts to the Tamiya kits being very good
and makes the whole exercise straightforward.
The set will build into an excellent M4 DV Sherman but you will have to find your own markings as none are included in the set and you may want to use etched parts to add the head light guards and tool brackets for a more refined appearance.
Highly recommended.

References:
| SHERMAN A History of the American Medium Tank R.P.Hunnicutt. Presidio Books ISBN 0-89141-080-5  |
Modeler's Guide to the Sherman MMIR Special. Ampersand Publishing Company, Inc  |
| M4 Sherman Wydawnictwo Militaria 13 ISBN 83-86209-09-7  |
M4 Sherman Vol.II Wydawnictwo Militaria 99 ISBN 83-7219-057-7  |
Page created 3 April 2005