

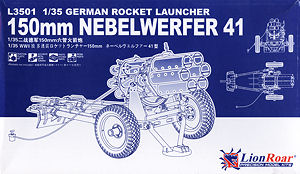
The Nebelwerfer 41 was a rocket-launching artillery piece with six barrels, each firing a 75 pound 150mm Wurfgranate 41 (rocket grenade) out to a range of about 6800 metres (about 4.2 miles).
The Nebelwerfer 41 utilized a modified carriage and wheels of the light 3.7cm PaK 35/36 anti-tank gun to ease production.
The first thing to make clear with this kit is it is not for the fainthearted or inexperienced modeller as the assembly of the rocket tubes in particular will require care and patience as the barrel tubes need to be aligned in a couple of directions at the same time while slipping them through the large etched mounting plates, more on this below.
The full multimedia kit contains:
112 parts in light grey styrene
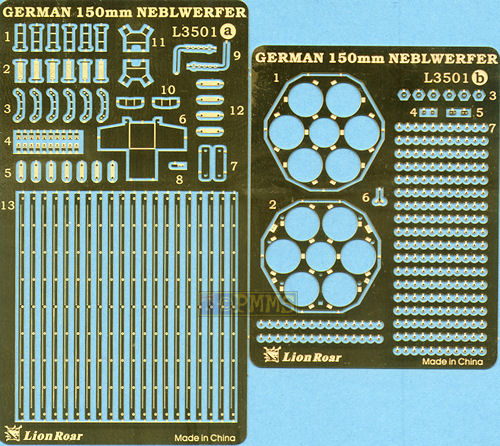
2 etched frets
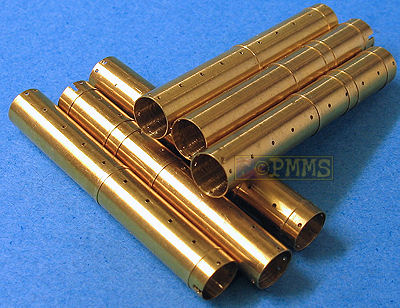
6 formed brass tube barrel
2 resin wheels
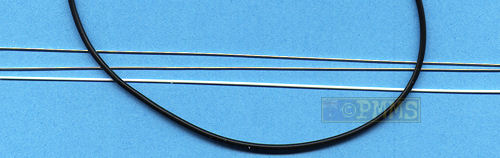
2 lengths of plastic wire
1 length of plastic rod
1 length of flexible plastic tube
The quality of the plastic parts are excellent with clean well defined details without any apparent flash and only a few pin marks most hidden after assembly with the parts being on par with other mainstream plastic kits of today. There are also many very fine parts that will need care in removing from the sprues and during assembly.
The resin wheels are also cleanly cast with well defined details and just two small casting blocks to be removed while the metal parts are the same excellent quality we have seen from previous Lion Roar sets.
Once the three rails per barrel have been bent they have to be glued inside the tubes aligned with the rows of fine holes and then the small etched rivet heads glued over the outside of each locating hole to form the rivets. These rivets are extremely small and obviously care will be needed when removing from the frets and adding to the tubes to ensure they all line up evenly.
The barrels are then fitted through the two large mounted plates and these plates have small indentations to take additional small etched fittings and also have to be aligned correctly as they are no symmetrical with the instructions giving you a diagram showing the right alignment.
The next thing to note is there are two different types of barrels with the two top barrels having slightly different features then the bottom four and again you have to take care to fit these in the correct position and careful study of the instructions will be needed.
When fitting the barrels through the two mounting plates care is needed as they can twist on their axis and you must check the alignment from different directions to ensure they are even, added to this is the fact that there are five small attachment rivets between the ends of the barrels to hold them in place. Small locating holes are included in the barrel tubes for these rivets which you must also align properly at the same time as fitting through the mounting plates. The thin plastic rod provided is used for the five rivets so you don’t have to be too precise when cutting this to length as you can trim this later.
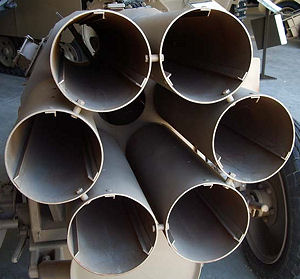
Thanks to Vladimir Yakubov for the image
Added to the barrels are many fine plastic parts for the firing pins (electrical) and mountings and the thin wire is used for the shielded wiring from the firing pin mountings to the nicely detailed junction box mounted on the right side of the barrel assembly.
The instructions give a few diagrams showing the wiring locations and careful study of the diagrams will be needed and referring to additional reference pictures would be of assistance in getting them in the right positions. The Allied & Axis volume listed below has numerous close-up shots of the wiring which should answer most questions.

Thanks to Vladimir Yakubov for the images
The barrel mounting cradle is a fairly simple affair that allows the barrels to elevate and this includes the two elevation and traverse hand wheels as well as the sighting box added to the left side of cradle plus the plastic tube used for the remote firing cord which is attached to a small firing box.
That all may sound quite daunting but with care will build into the most highly detailed Nebelwerfer barrel assembly available today and is well worth the effort.
The resin wheels have very well done rim detail on both sides and the tread pattern is also very well defined and while not the most common tread pattern seen in many photos of Nebelwerfers or 3.7cm PaK guns which use the same wheels it is one of the various tread types used.
On comparing the resin wheels to photos the rims details appears correct with the small rim hole and indent for the valve stem but the tread pattern is too wide and too square at the shoulder giving and overall appearance the wheels are too wide.
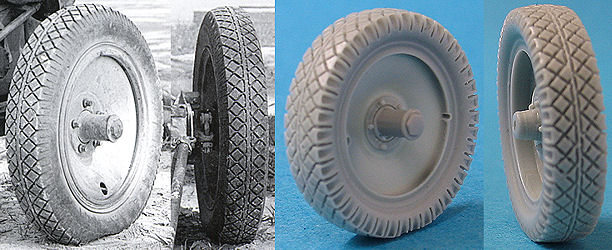
Images of real wheel courtesy Allied & Axis
The only minor issue being the wide wheel tread pattern but other than that this is one of the most complete kits available but is not for the inexperienced builder.
Highly recommended 8/10
Also see reviews:
L3502 150mm Nebelwerfer 41 Rockets
L3503 210mm Nebelwerfer 42
L3504 210mm Nebelwerfer 42 Rockets
Etched parts
Metal rocket tubes
Resin Wheels

wire, rod & tube
Sprues
Click for larger views
Close new window to return to review
 |
Allied & Axis No.14 |
On the net: 15-cm Nebelwerfer 41, by Vladimir Yakubov
Thanks to Lion Roar for the review set.