
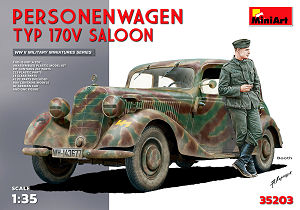
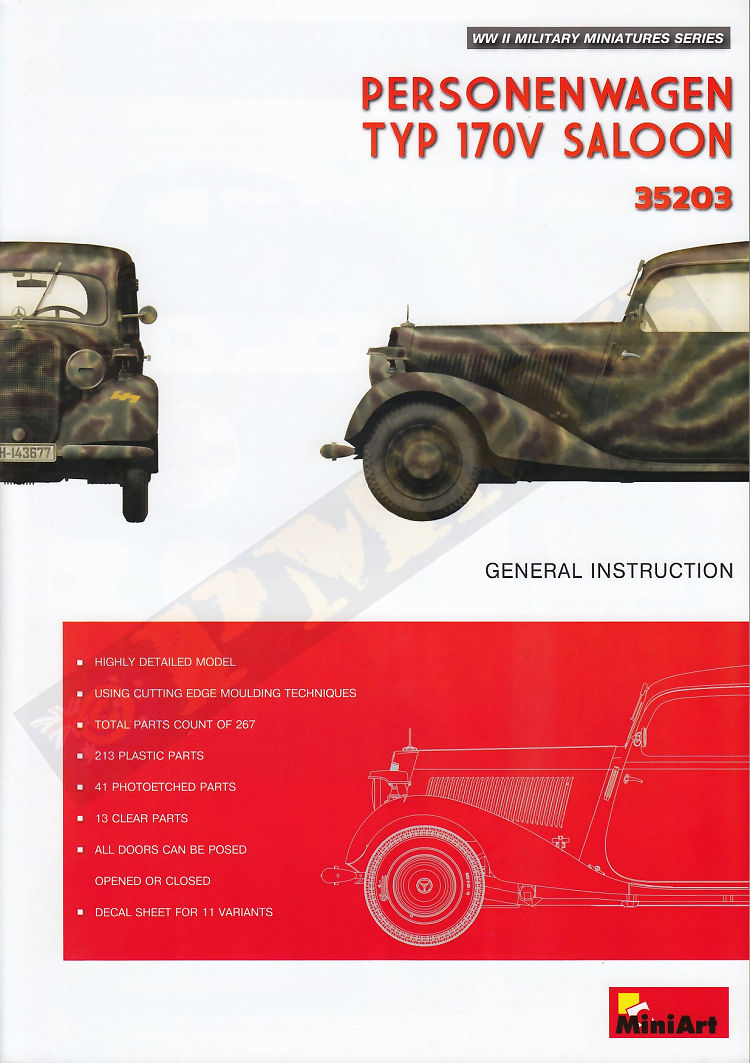
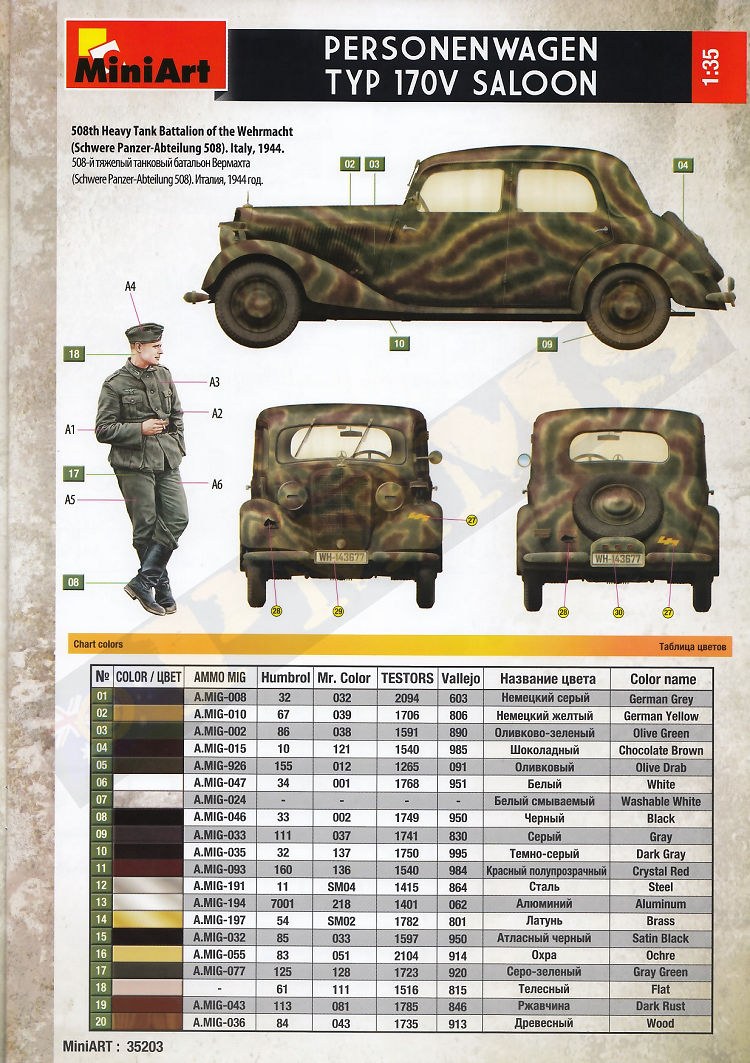
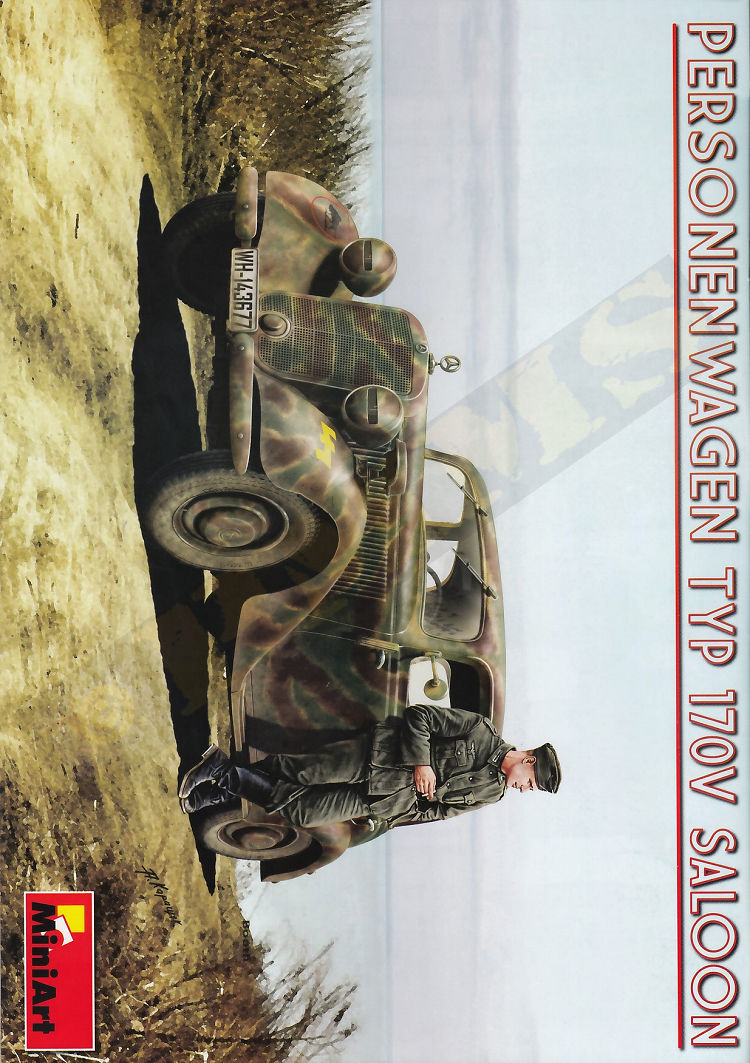
Personenwagen Typ 170V Saloon
Miniart 1:35 Scale Kit #35203
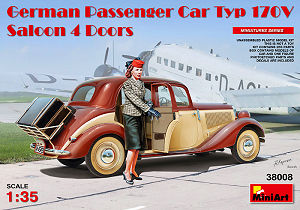
German Passenger Car Typ 170V Saloon 4 Doors
Miniart 1:35 Scale Kit #38008
2 in 1 Review by Terry Ashley
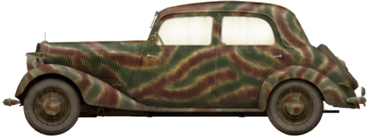

The 170V was a rear wheel drive car powered by a 1.7 litre four-cylinder petrol engine with a four-speed manual transmission and was available in various body types, the most common being the 2 or 4 door hardtop Saloon/sedan, a four-door 2-seat "Cabriolet A" or two-door 4-seater "Cabriolet B" with a foldaway canvas roof and 2-seater roadster with open top. The 170V featured a large luggage rack on the back along with the externally carried spare wheel.
There were also special body types produced such as a small commercial type, either as a flatbed truck or with a box-body on the back along, the various types were often adapted for use as ambulances or police vehicles, and numerous military uses such as officer and staff cars.Note, this is the exact same kit as kit 35203, the only difference between the two being the paint schemes/markings offered (Civilian v Military) and a single figure is each, a civilian Woman or German Wehrmacht Driver.
With that in mind all the comments here (apart for the markings/figures) applies equally to both kits, 35203 and 38008, sort of a 2 in 1 review.
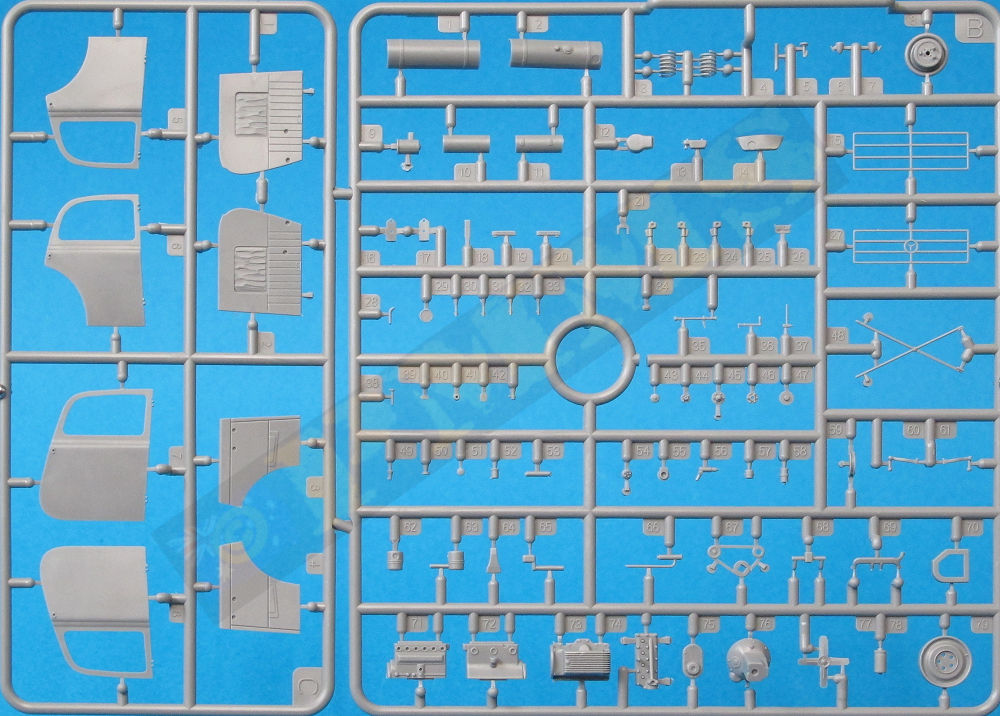
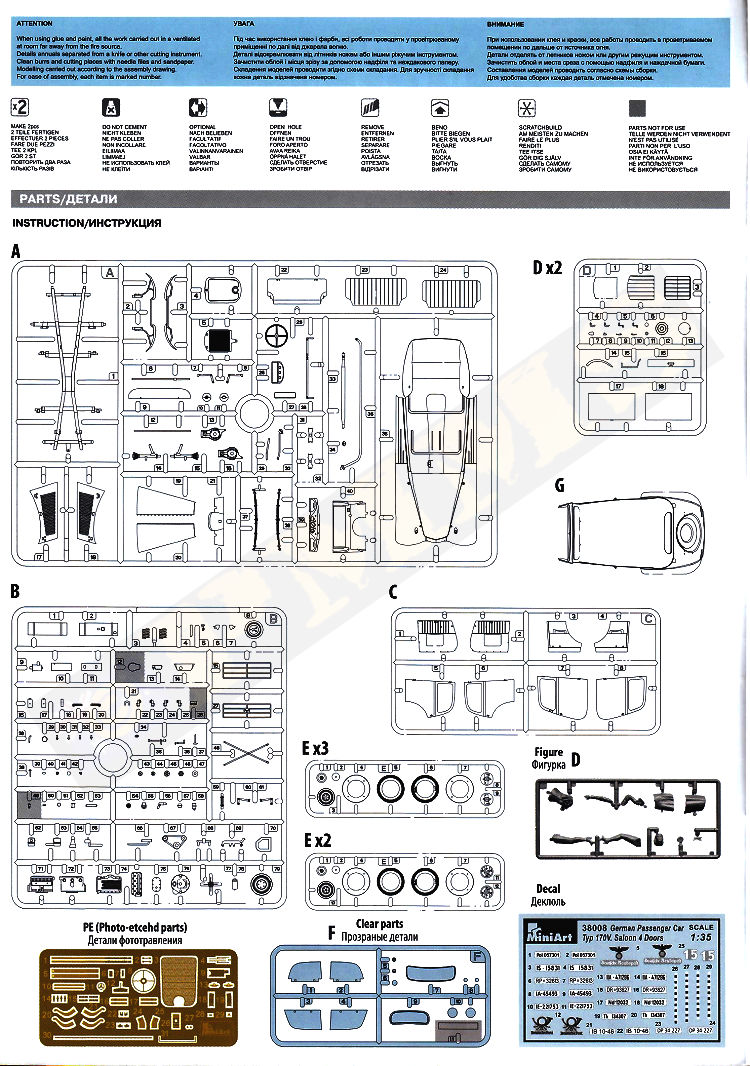
The kits are moulded in the standard Miniart light grey plastic with a small fret of etched parts and includes a detailed engine/chassis and interior with markings for eleven different paint schemes in both kits.
Both kit parts the same unless noted:
203 parts in light grey plastic (for the 170V)
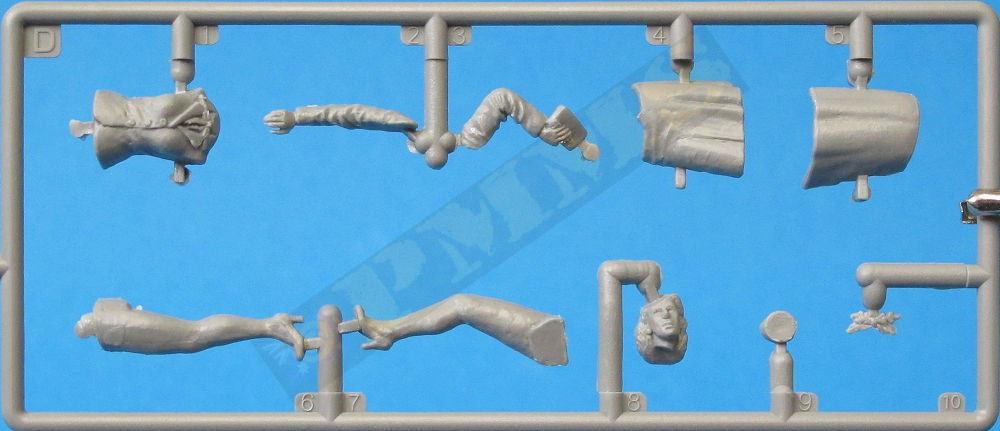
6/10 light grey plastic figure parts, (6 parts kit #35203, 10 parts kit #38008)
49 etched brass parts
14 clear plastic parts
1 decal sheet
1 sixteen-page colour instruction booklet
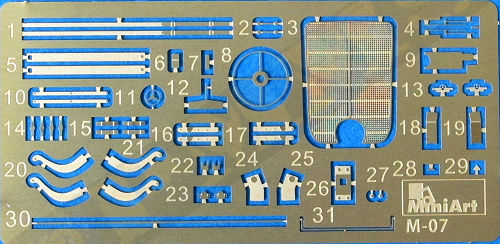

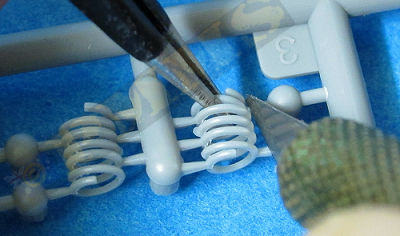
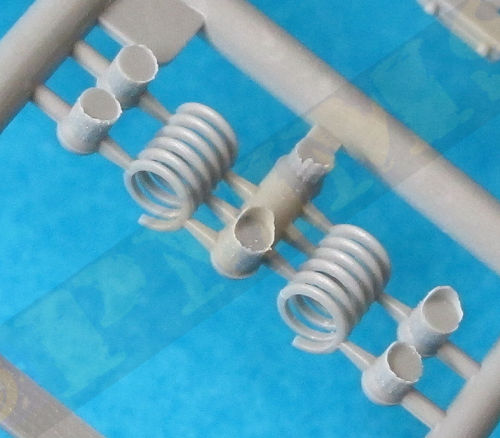
The standard of moulding is excellent with clean crisp details and no apparent pins marks visible after assembly, there is the odd fine flash on some parts but virtually none existent. The only clean-up being the fine mould lines and the many small plastic 'nodes' on the parts and these will need care removing, especially from the many very finely moulded and smaller parts in the kit. One notable feature is the rear suspension coil springs are moulded individually in plastic and removing these from the runners and cleaning up posed quite an exercise, more of these below.
While having 203 parts for a fairly small car means this kit isn't really for the novice builder as there are many very fine and small parts to deal with (both plastic and etched) the instructions are mostly very clear in the assembly sequences which will help as some assemblies such as the suspension get quite busy in places.
As well as the spring coils mentioned some of the longer thin parts need extra care cutting from the runners as they tend to break quite easily, not that the plastic is brittle but due to the thin nature of the parts and stresses imposed while cutting and during clean-up. Also, some of the PE parts are also extremely small and cutting these from the fret without damage will be quite a task as well as filing the remaining bur after removal, the round MB star hood ornament and windscreen wipers being two examples where extreme care and patience are needed.
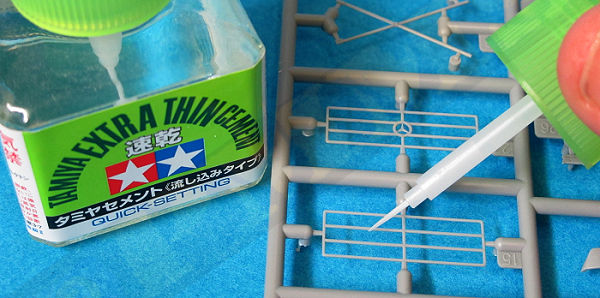
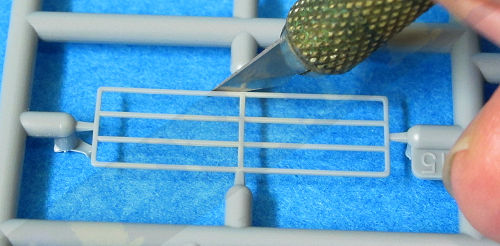
this will fix any invisible cracks before you begin. Next use a very sharp scalpel type blade (not a #11 blade as this is too heavy for this purpose)
and very lightly cut close to the part, four or five light cuts is better than one heavy one to reduce the risk of breakage.
Also, while cutting hold the runners firmly to reduce the sprue flexing as you cut, this again helps reduce the stresses imposed on the part.
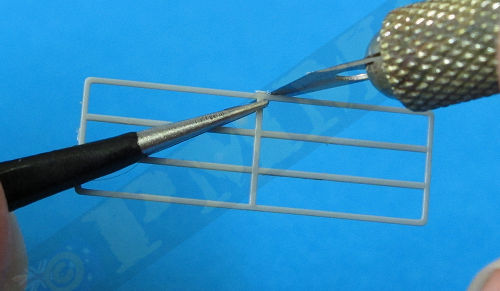
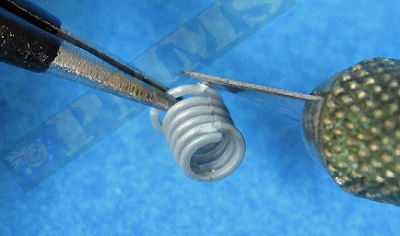
To clean-up the remaining cut bur hold the part firmly in tweezers close to the trimming point as you trim,
I tend not to sand these small parts as that again puts too much stress on the parts.
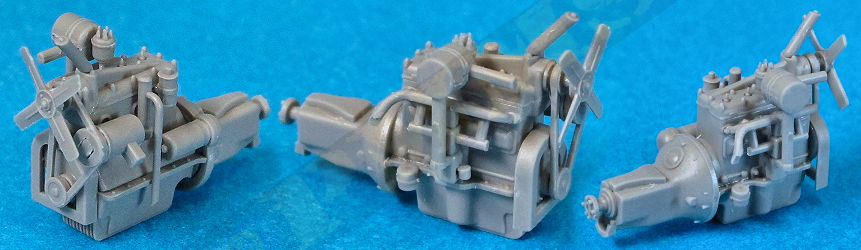
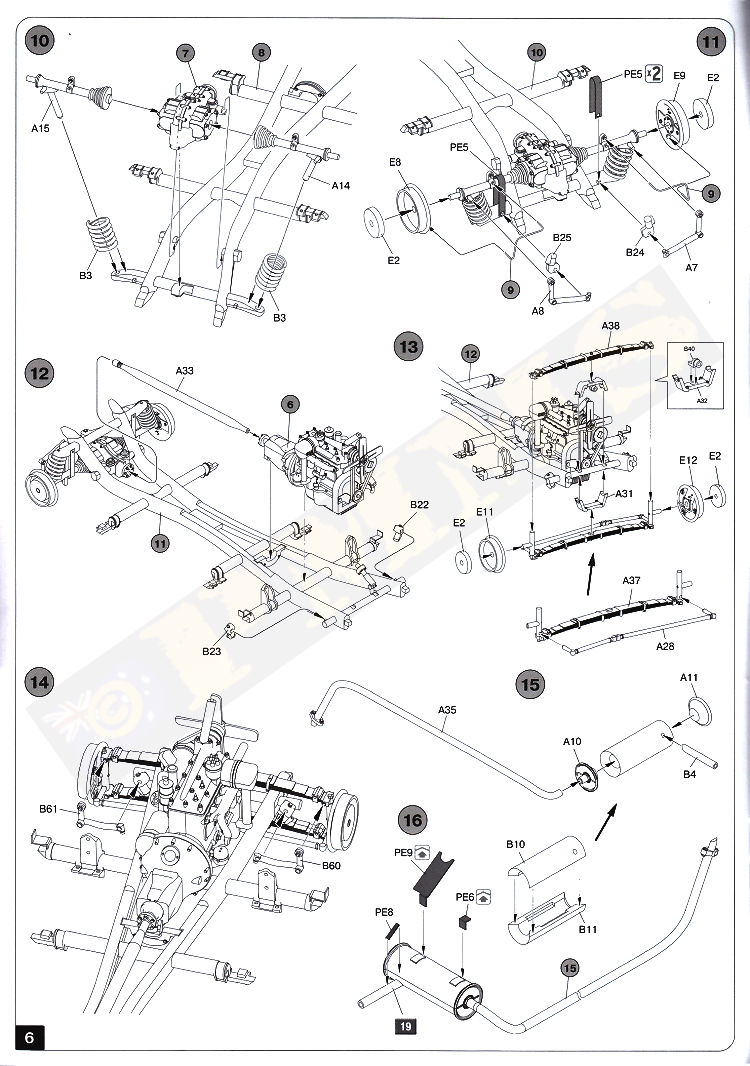
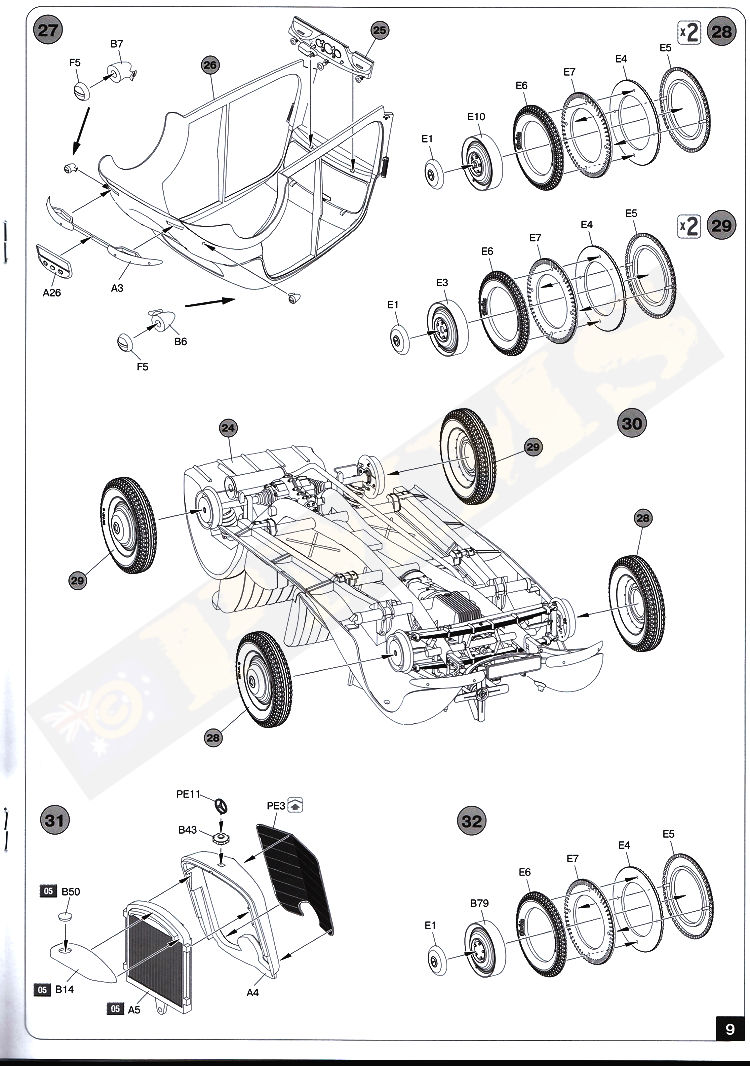
The rear mounted transmission and drive axles are added along with the plastic spring coils as mentioned above, when removing these from the sprue runners it's best to hold the coil firmly with tweezers close to the join and cut carefully with a sharp blade, the same when cleaning up, hold the coil being worked on with tweezers as it's all but impossible to clean these up by just holding them, they are springs after all even if plastic.
When fitting around the drive shaft piston (parts A14, A15) the coils have no positive locating point and you may want to glue these at either end to sit centrally over the shafts. When attaching the PE retaining brackets (PE5) gluing the one end over the small notch with cyanoacrylate first and let cure, that will make bending the brackets around the axle shaft far easier that trying to bend to shape before fitting.
The instructions give you 1:1 diagrams to make brake lines from 0.2mm wire, but this wire isn't included in the kit so you will need to source this yourself. The remaining small suspension parts all fit without any issues you just need care due to small size of some parts.
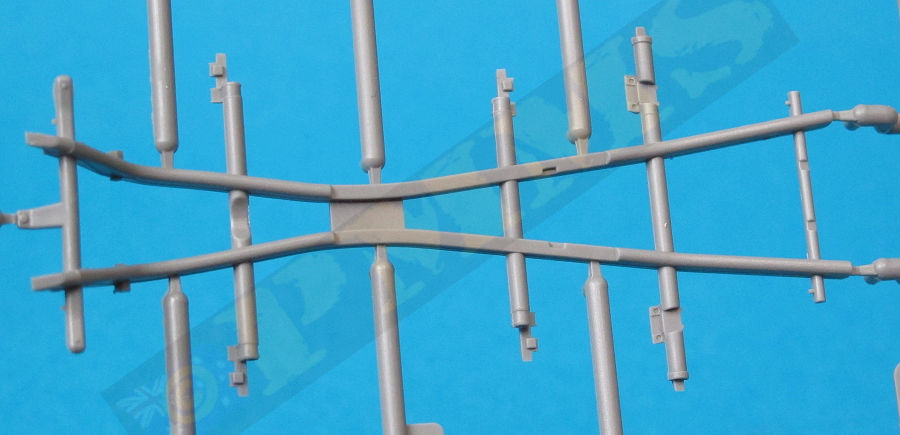
The front suspension with the two diagonal leaf springs also have some quite small parts but assembly was straightforward without any problems providing you take care and get each part aligned okay as you go, the front steering is fixed in the neutral position and it would take a little work to animate these if you wished, the small size of the parts will make this a little tricky also.
The assembled engine and driveshaft fit precisely into the frame chassis without any issues along with the long exhaust pipe and muffler, although fitting the muffler on the two delicate PE mounting brackets to the back of the chassis frame will be a bit of fun because in this instance the instructions are a little vague. The front bumper bar is added and again ensure this is aligned evenly with the chassis when fitting.
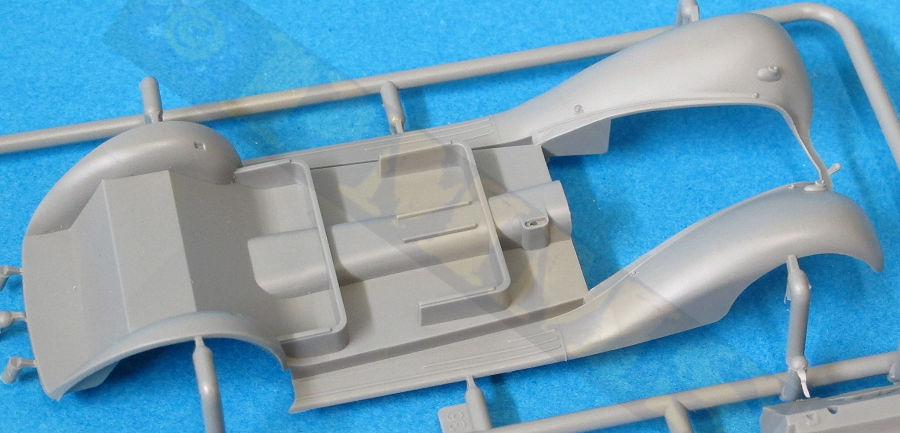
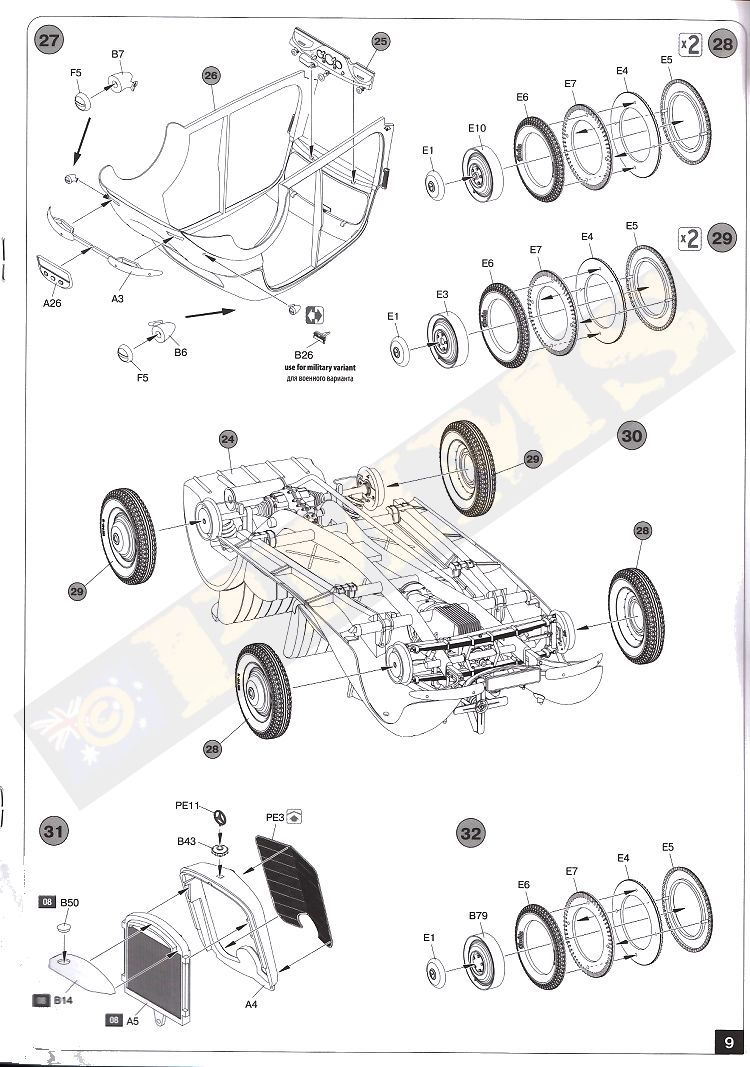
The assembled chassis frame, suspension and engine then is attached to the underside of the large lower body moulding (A36) and the fit again is excellent with a good snug fit. The lower body has the central body pan with nice underside details as well as the large front fenders and rear section with inner wheel well walls all included in the one large moulding with the only clean-up being some moulding stubs on the underside easily removed, the pin ejector marks on the underside of the fenders are well out of sight after assembly.
This whole sub-assembly is probably the most intricate in the kit with numerous small and delicate parts but all fitted without any issues with the detail and finesse of the parts making for a very detailed sub-assembly.
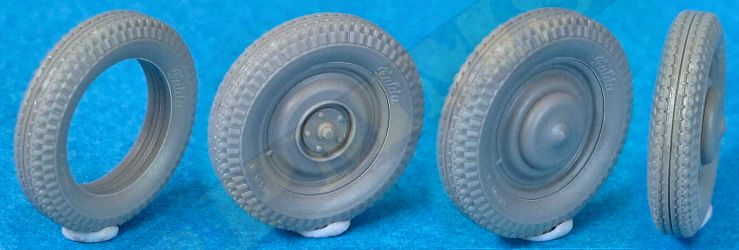
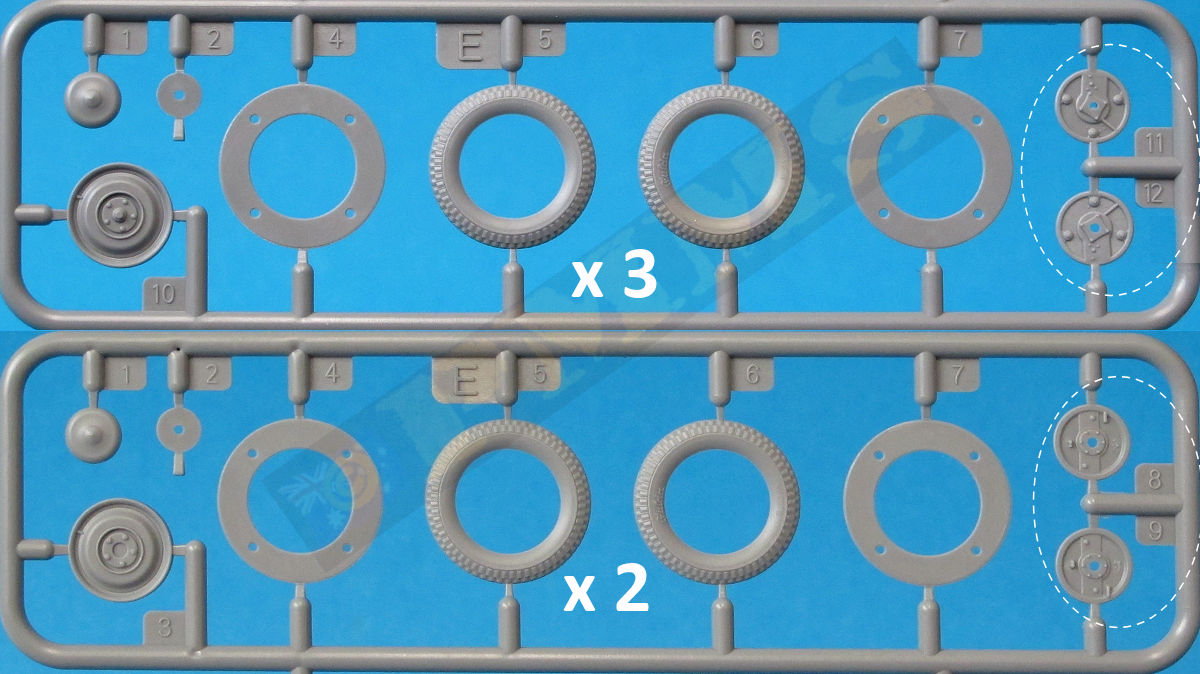
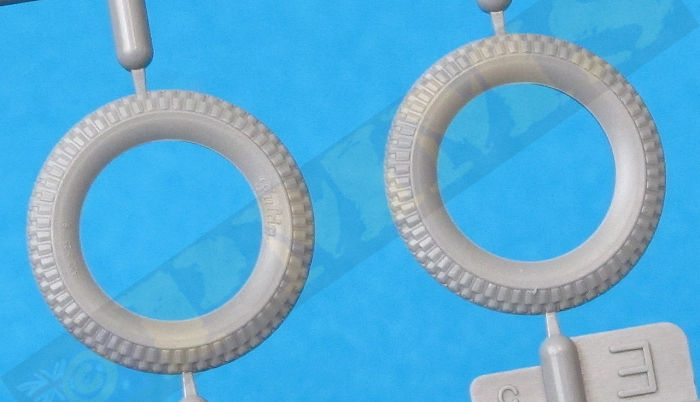
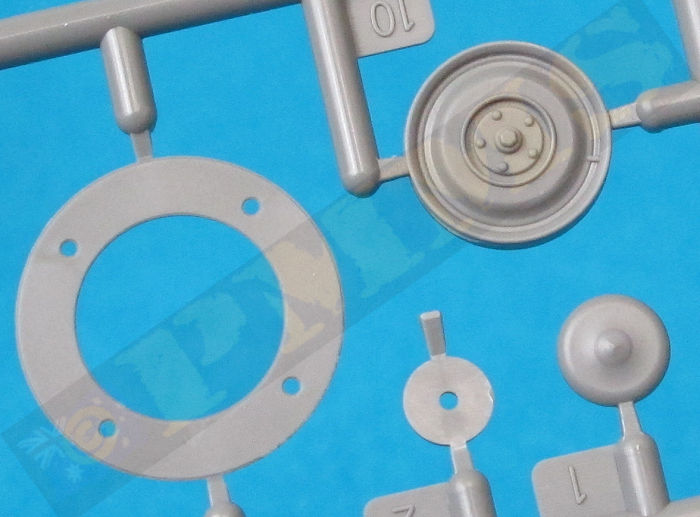
The fit of the rim inside the assembled tyre is very snug as is the hub cap for an excellent fit overall, the assembled wheels are simply glued to the axle stubs noting the different style hub detail for front and rear wheels, this is only noticeable if the hub caps are not fitted.
The two front seats have the backrest as a separate part that is attached to the base via the four PE hinge parts per seat (PE16, PE17, PE20, PE21), you first attach the lower brackets (PE16, PE17) to the sides and then attach the hinges (PE20, PE21) to the backrest sides, from there you join the hinge to side bracket ensuring the backrest is aligned evenly, this gives a nice gap between the cushion and the backrest as there should be for a good appearance.
The rear bench seat has the base cushion attached first and then the backrest fits over the wheel well sides via a small locating notch to get the correct position.
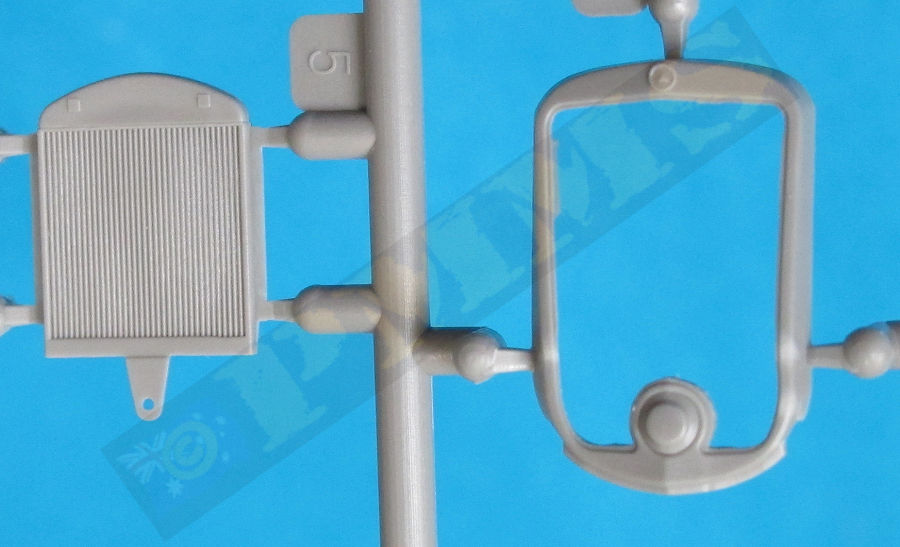
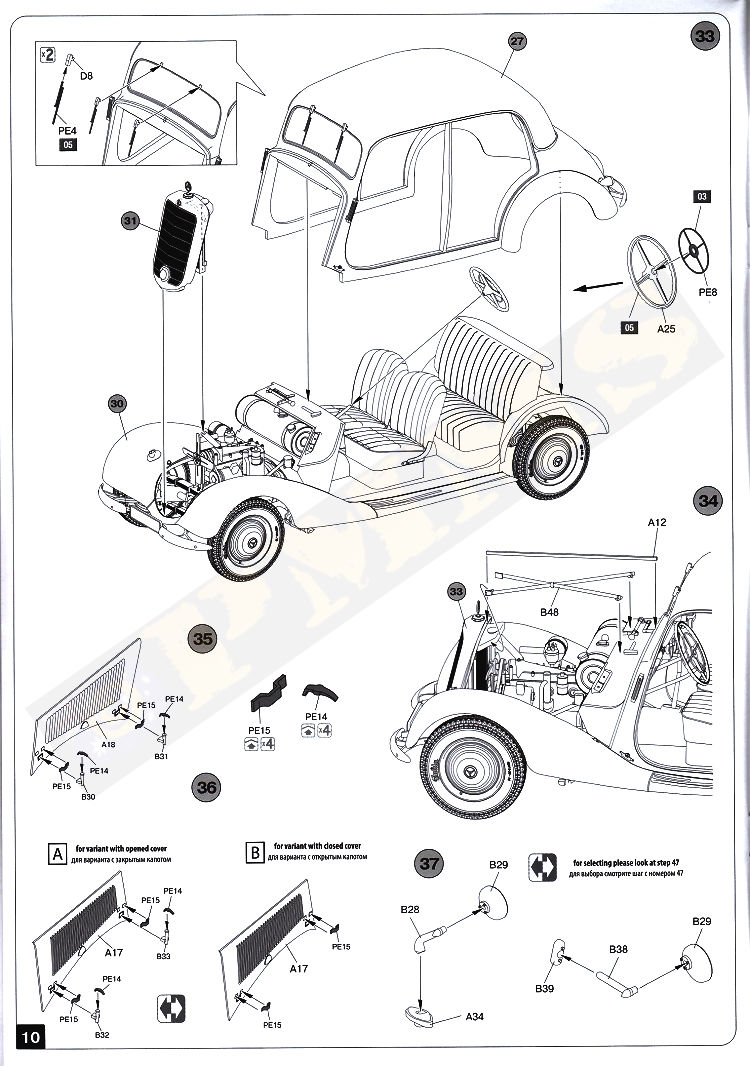
At the front is the radiator grill frame (part A4), this has the grill mesh in PE (PE3) and needs to be bent to the angle of the frame, I did this by holding the part centrally between two small steel rulers, this gives you a slightly less sharp bend than you get from a PE bending tool, test fit the mesh to make sure you have right angle before gluing.
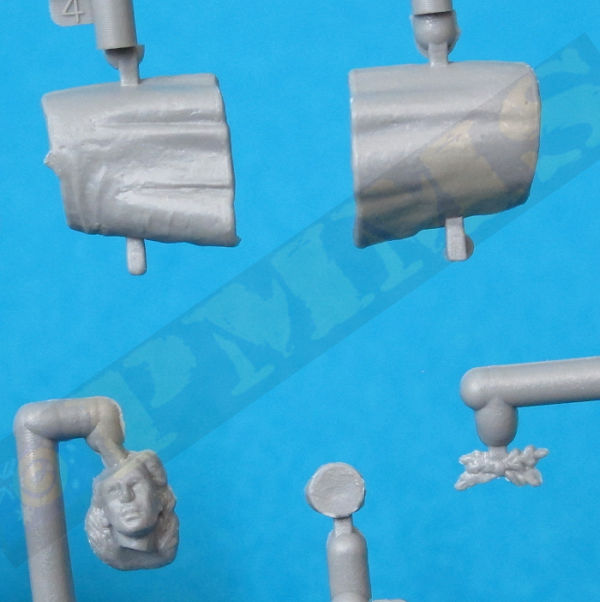
Added to the top is the radiator cap (part B43) and small PE MB Star (part PE11), this again will need care removing from the fret without damage, this is just butt joined to the top of the radiator cap and you may wish to leave this off till last as it just sticks out asking to be snapped off during the remaining assembly.
When attaching the grill frame to the lower body it's best to temporarily fit one or two of the engine hood panels, this will ensure the correct alignment of the grill frame with the hood panels.
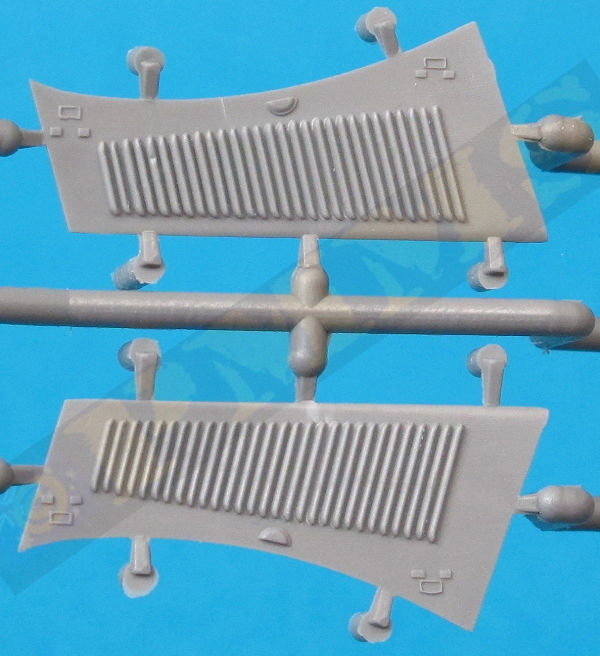
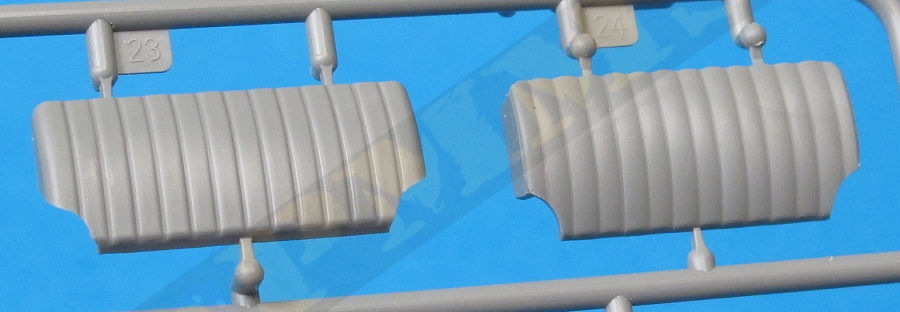
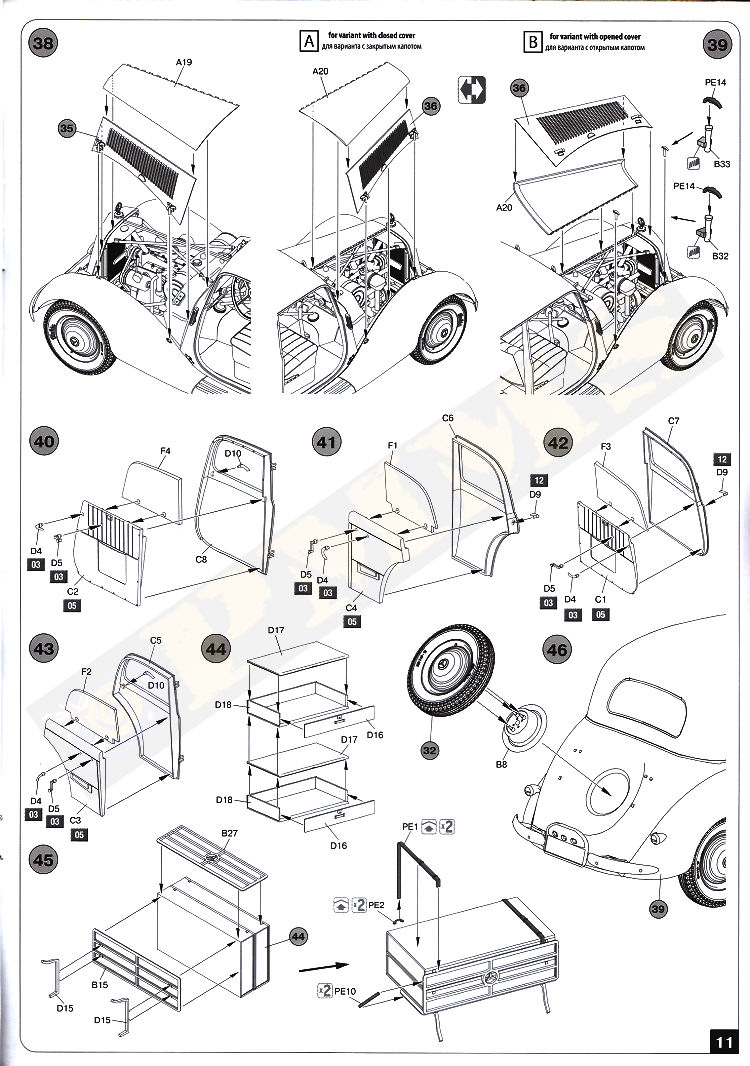
The engine hood is in four parts with nice side louver detail that has openings between the grill slats for a good appearance. The panels can be fitted closed or open as you wish to show off the detailed engine, there are also small PE and plastic hood clips to add as required with different clips used for the open hood as opposed to the closed configuration so check the instructions for the appropriate clips to use. Note, there are some quite large pin marks on the inside of the hood panels but these are hidden if closed up and if open the top panel folds over the side panel hiding the marks between them so you shouldn't need to spend time eliminating the pin marks.
The inner X brace (part B48) and hood hinge support (part A12) are added between the firewall and radiator but if you are leaving the hood panels all closed these parts can left off to ease the assembly a little. The fit of the hood panels in the closed position is very good without any gaps to worry about.
The two front head lights have clear 'glass' with nice embossing detail but you should note the correct orientation for this as the instructions don't show this, see the images for the correct fitting. The head lights fit to the small mounting stubs on the fenders making sure they are lined up evenly in the process.
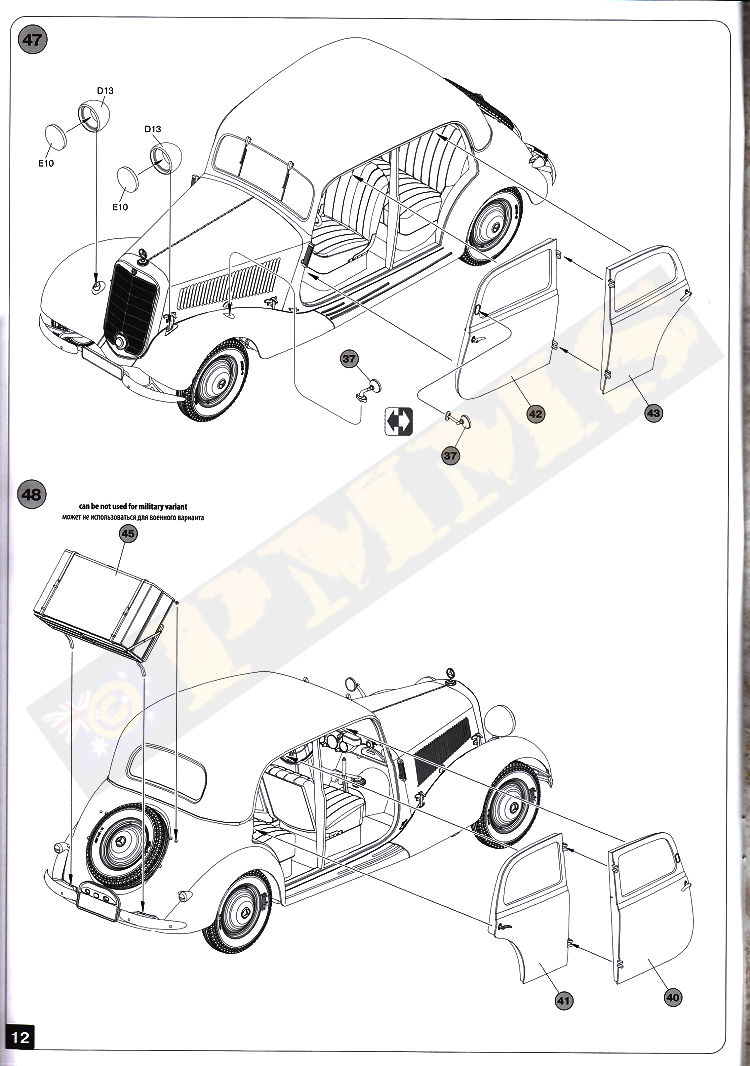
The nicely contoured main body is also one large moulding from the A pillar back with cut-outs for the four separate doors and the windscreen and rear window. The four doors have separate inner panels that trap the clear windows on small pins to hold in place, this means all are fixed in the fully closed position but it is easy enough to cut the clear window 'glass' down if you wish to show them open, you can also pose the doors open if you wish. The doors also include separate small doors handles inside and out plus the window winder handles, the fit of the doors is very snug to the body when closed. The only minor issue with assembling the doors is some of the holes in the clear 'window' parts had to be enlarged slightly, this entailed just running a #11 blade around the outer edge of the hole so easily done.
If showing the doors open you can only open them a small way as the central door contours prevent them opening fully without pulling either the top or bottom hinge join apart, this is due to the bottom hinge not extending out from the body far enough to allow the door to clear the body/door contours when open and extending the lower hinge with a section of plastic card will solve this issue without too much trouble.
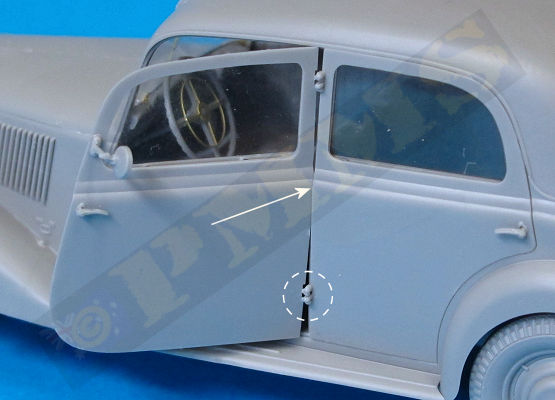
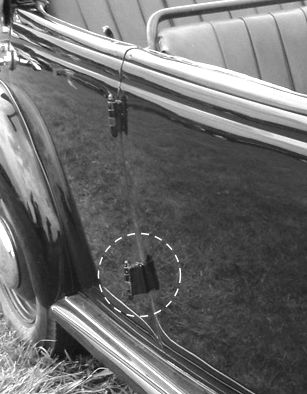
Reference image of the door hinges, this is of a 2-door but the hinges are the same as on the 4-door.
Included are two style of outside rear view mirror, one mounted on the front left fender and one mounted on the driver's door frame, all reference pictures I have seen show the door mounted mirror so this may be the best option to use? The mirror is made up of three small parts, the mounting base, stem and mirror itself and being mostly round in shape they are quite slippery little suckers so take care when fitting.
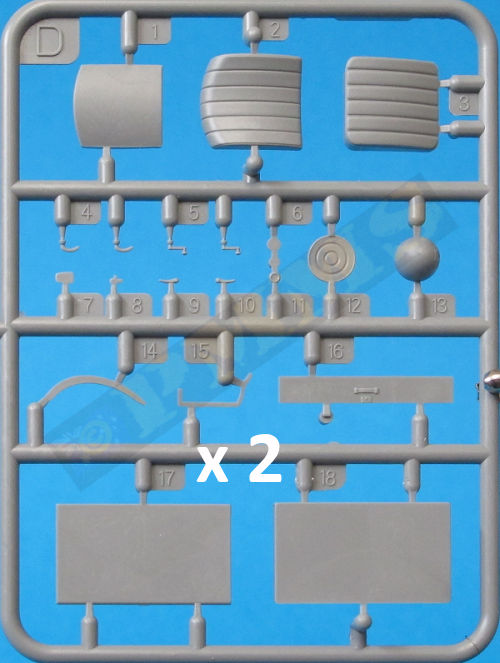
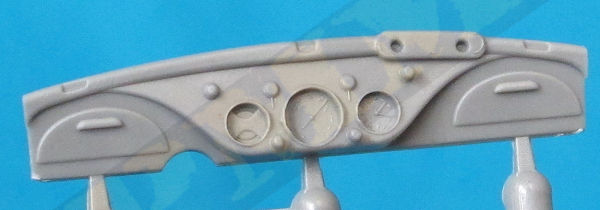
Inside, the instrument panel has excellent engraved details as well as some very small details added, the two very small windscreen release knob sub-assemblies in particular have three parts, one in plastic and two in PE (D11, PE22, PE23) and each is about 1mm in size so care is needed in handling and assembly. The parts PE23 have small 'wings' that need to be bent at right-angles and holding the part in a pair of pointed tweezers while bending the edges around the tweezer jaws is the best option.
One thing you need to take care with when working with such small parts, especially PE parts is the dreaded "ping into lower Earth orbit" when holding the part with tweezers, working low and well over the bench will hopefully reduce the scatter distance should the "ping" hit.
The three central dials have clear plastic 'glass' faces but these are quite thick and replacing the thinner clear sheet disks or even using white glue (or similar) to simulate the glass would give a better appearance and also show off the finely engraved dial faces better.
The clear windscreen has a PE rear-view mirror and small plastic wiper motor added to the inside, I drilled a small 0.02mm hole for the rear-view mirror post as trying to butt glue the post to the screen with cyanoacrylate was going to end in tears. The fit of the windscreen into the body was quite snug and the instrument panel was also a good fit to the inside of the body. After fitting the windscreen, the wiper blades can be added, these are extremely fine etched parts and care is needed removing these from the fret without damage, I glued the wiper blades to the windscreen with white glue mating the ends to the small plastic bases (parts D8) that fit into the recesses in the roof line. Leaving the blades off until after painting is done would be a good option.
Added at the back of the body is the rear window which is an excellent fit along with the rear bumper bar and central number plate plus the two small tail lights, these have clear lenses added and due to the shape of the light are again quite slippery to hold while fitting so take care. Note; for the military Personenwagen (Kit 35203) there is the two-part plastic NOTEK light with PE mounting brackets for the front left fender and the rear mounted convoy light that replaces the civilian style tail lights. The instructions in the Personenwagen kit still show the civilian tail lights but you should just leave these off and use the convoy light. The civilian (kit 38008) still has the NOTEK and convoy light parts included so you can easily make a military car from this kit if you wished, you just need some appropriate markings.
There is also the spare wheel mounting (part B8) added to the rear boot (trunk) with three small pins that fit into the rim holes on the spare wheel along with a separate hub cap, but note you should leave off the hub cap when fitting the large luggage rack as the hub caps prevents the rack from sitting evenly on the back. The spare wheel itself is the same as the main wheels with the segmented parts sandwiched together and separate wheel rim.
The rear luggage rack consists of two boxes stacked on top of each other with three parts each, the fit is good with bevelled edges on the front panel for seamless fit. Added to these are the two fine rack frames, care is needed removing these from the runners to avoid breakage and using the tip shown above will help here.
You have to fit the frames centrally as there isn't actual locating pins while the two 'legs' have small locating lines on the racks to get these in the correct position. Added to the assembled rack are two etched side braces (PE10) and the etched straps (PE1). Two small tie-down cleats (PE2) are provided to be attached to the rear boot lid, these while quite small have engraved bend lines are actually quite easy to bend to shape using a couple of pairs of needle point tweezers to hold the cleats while bending.
As mentioned above you must leave off the spare wheel hub cap for the luggage rack to sit even across the rear of the car but other than this everything fitted without issues.
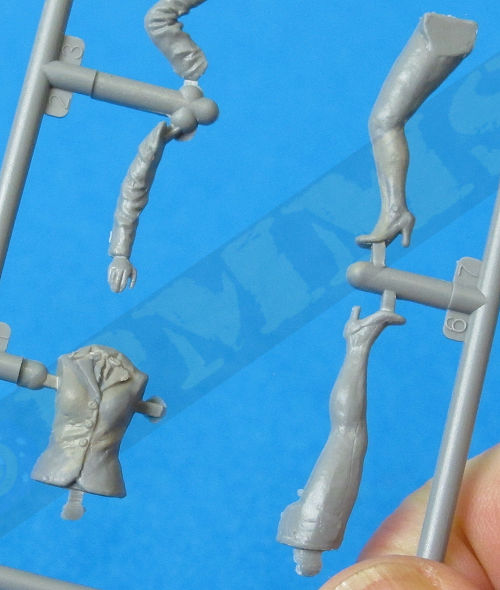
Kit 35203 has a six-part German Army driver figure wearing the standard tunic and field cap, the details on the figure are fairly basic and there are substantial mould lines to be removed with the join between the leg sections needed to be filled at the back. The uniform details while a little basic and standard fair are okay for their purpose and the figure should be presentable once painted. He is posed leaning against the car and just adding a cigarette from thin stretched sprue will finish it off nicely.
Kit 38008 has a ten-part standing Civilian Woman figure with just the usual mould lines to be removed before assembly. This is very straightforward, the only thing to note is to attach the legs to the torso and then fit the two halves of the skirt around the legs as you can't get the legs up into the skirt if assembled first. You can paint the figure as per the instructions or any colours you like really.
With the similar instructions, you have to watch as both the luggage rack and the standard rear taillights aren't fitted to the Personenwagen (kit 35203) but the instructions still show them being attached along with small additional diagrams showing the rear convoy light in step 27 and the NOTEK light in step 47 and just a brief notation not to fit the civilian taillights or luggage rack.
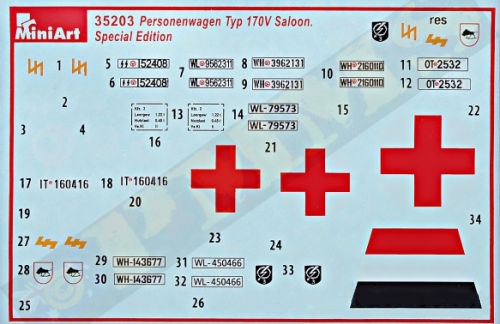
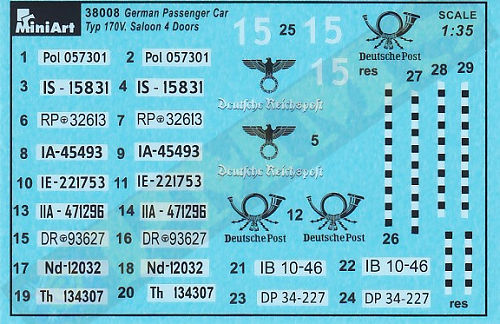
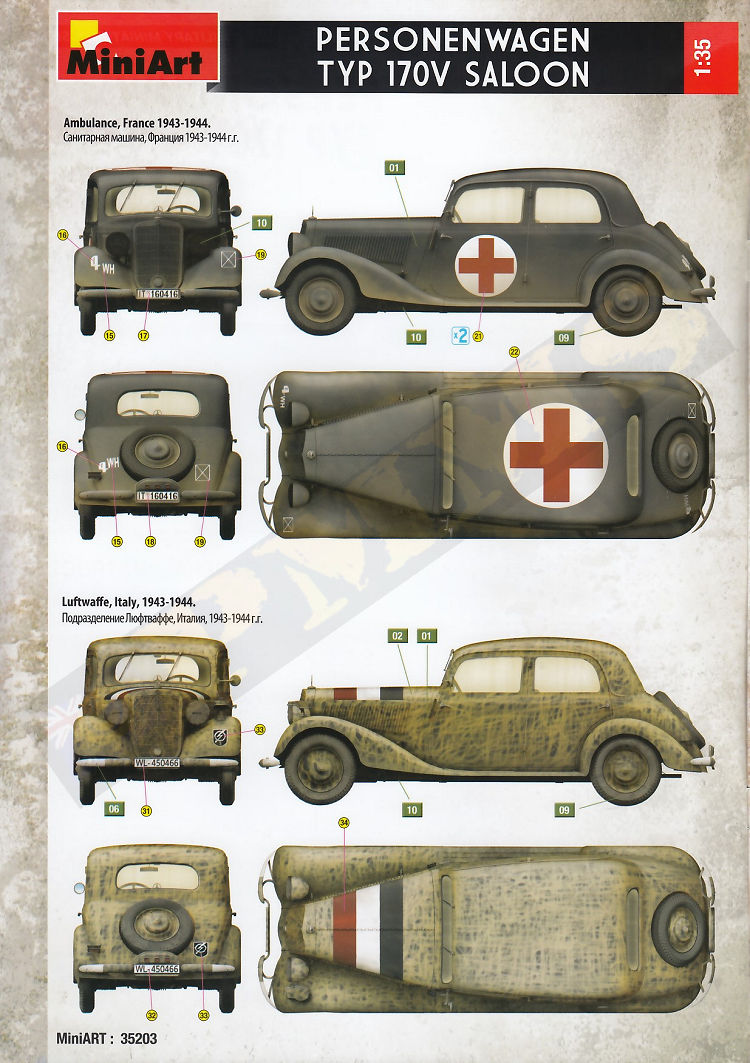
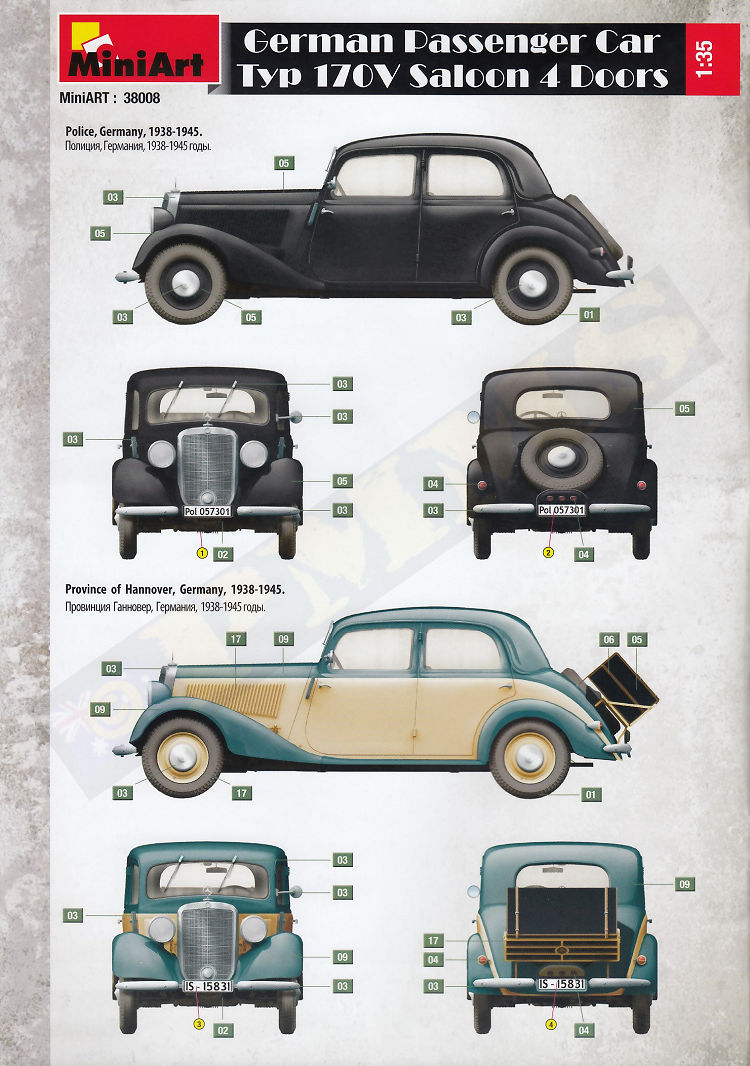
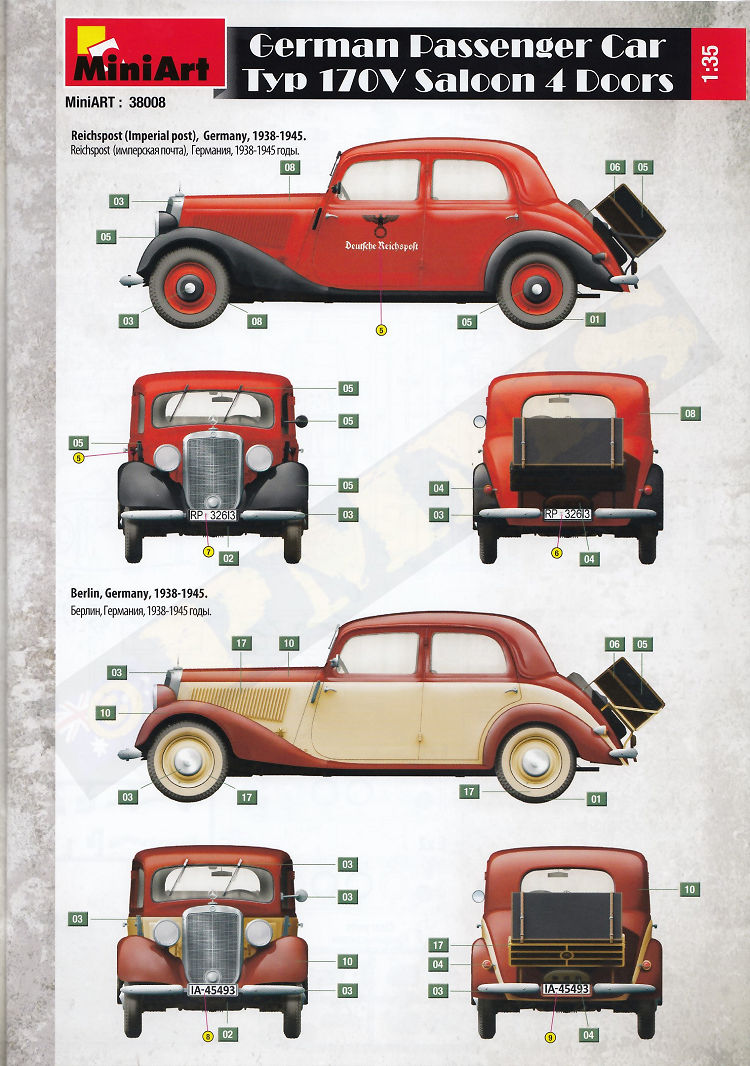
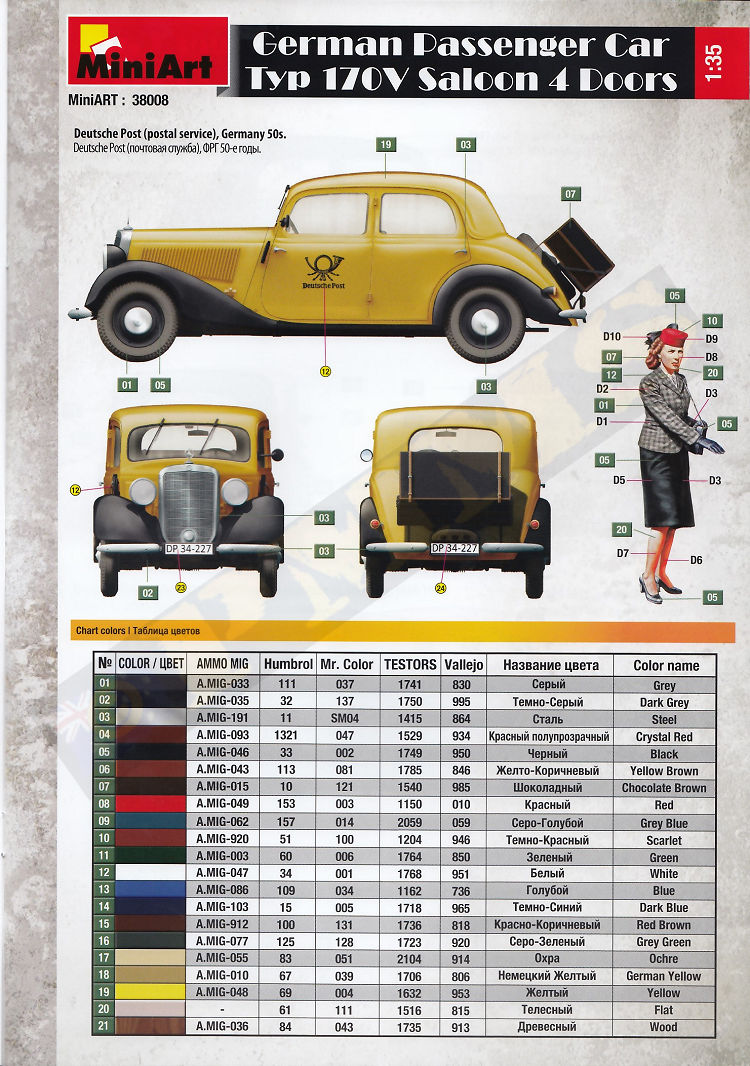
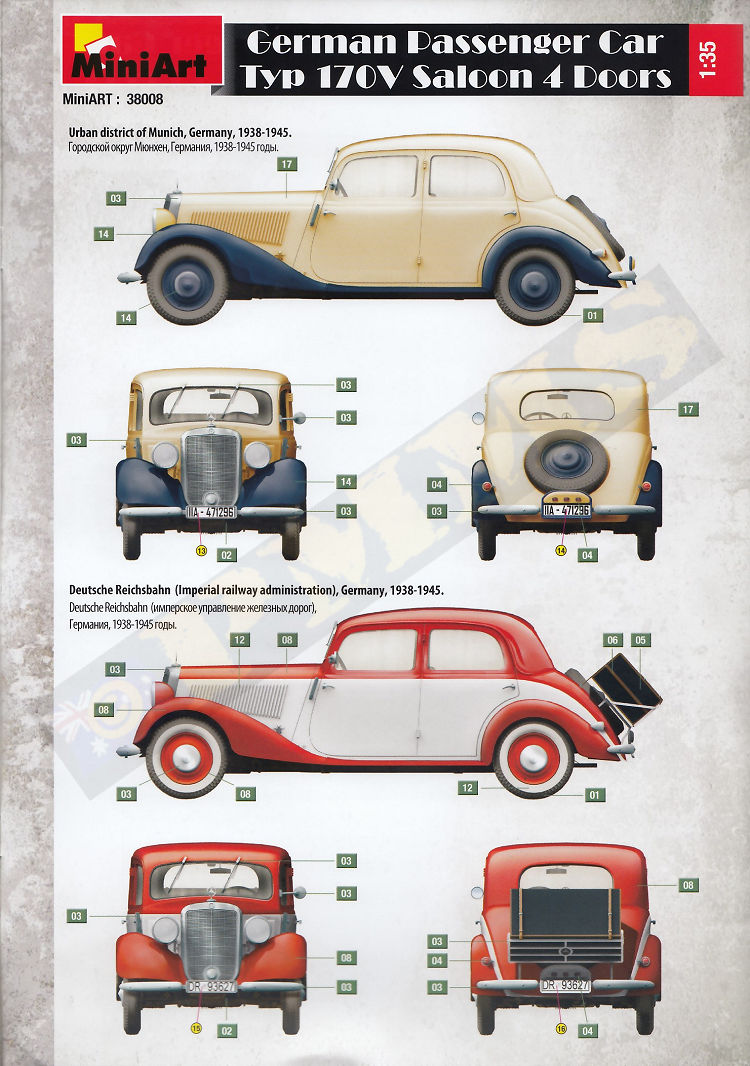
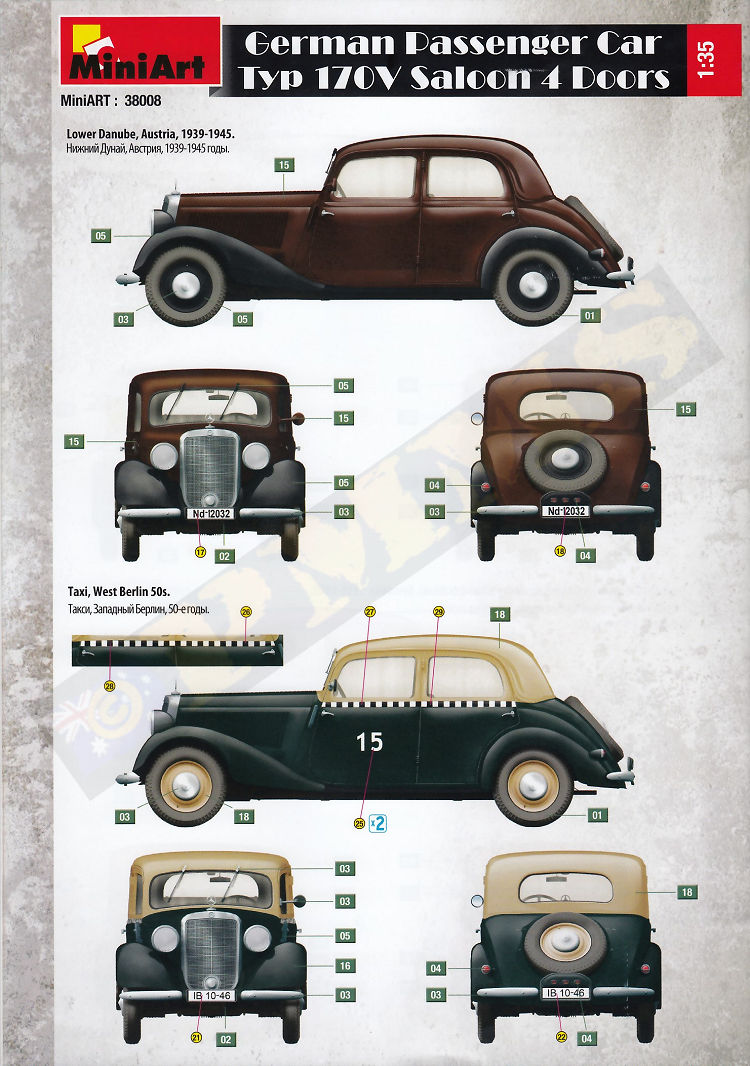
Each kit gives a choice of eleven finishing options with the nicely printed decal sheet giving the different number plates along with a selection of Service unit insignia as well as Red Cross and Allied star for the applicable schemes in kit 35203 and the number plates and door logos for the Postal Service and Taxi markings offered with kit 38008.
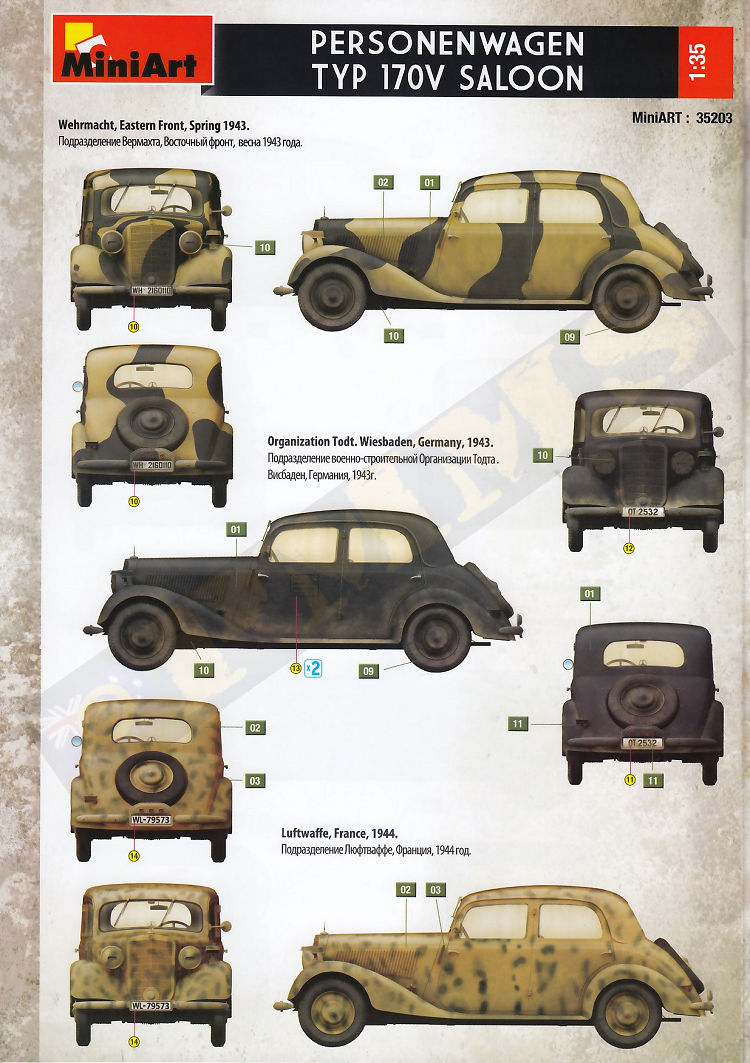
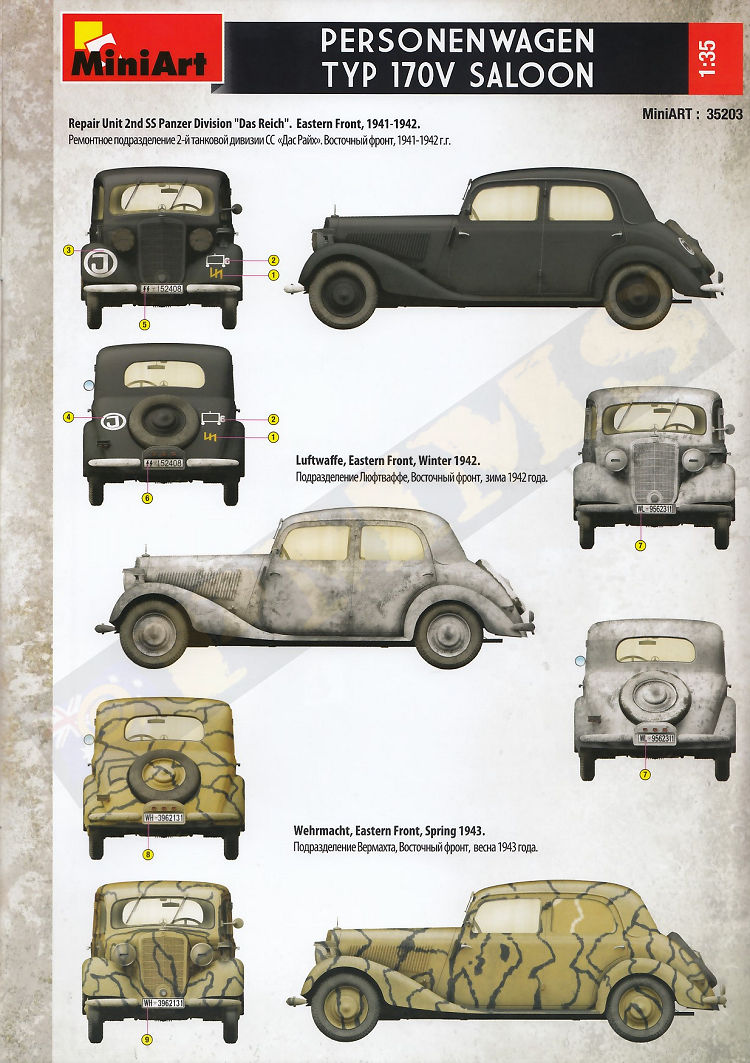
The paint schemes for the civilian car gives a good representation of the styles at the time but you could paint them any way you choose really, the Personenwagen gives a good selection of one colour and camouflaged schemes to choose from with Wehrmacht, Luftwaffe and SS Tank units featured plus captured cars used by the Russian and US Army.
A colour chart lists paint numbers from Ammo/Mig, Humbrol, Mr.Color, Testors and Vallejo, you should also note that the bumpers, hub caps and radiator frame are chromed on the civilian car (as opposed to the 'steel' called out in the paint guides) and using a polished metal paint finish on these parts will enhance to final look.
The eleven options are:|
Kit # 35203 Ambulance, France, 1943-1944 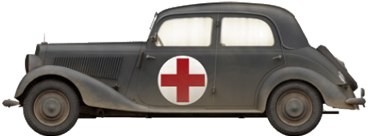 Luftwaffe, Italy, 1943-1944 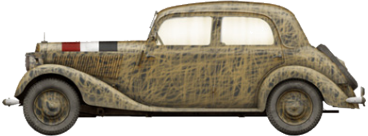 Schwere Panzer-Abteilung 508, Wehrmacht, Italy, 1944 Captured car from the Red Army, Berlin, 1945 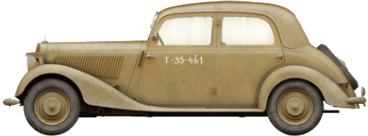 Captured car from US Army, Munich, Summer, 1945 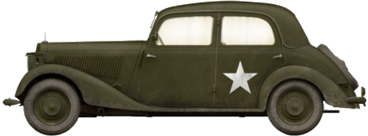 Wehrmacht, Eastern Front, Spring, 1943 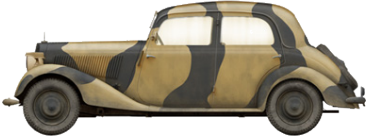 Organization Todt. Wiesbaden, Germany, 1943  Luftwaffe, France, , 1944 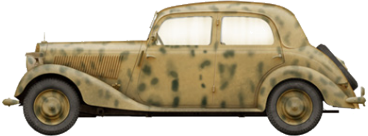 Repair Unit, 2nd SS Panzer Div. "Das Reich" Eastern Front, 1942 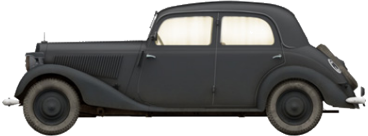 Luftwaffe, Eastern Front, Winter, 1942 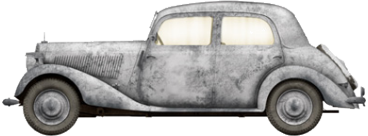 Wehrmacht, Eastern Front, Spring, 1943 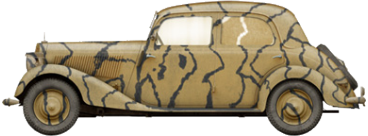 |
Kit # 38008 Police, German, 1938-1945 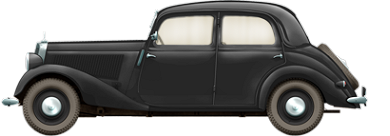 Province of Hannover, Germany, 1938-1945 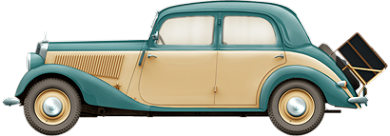 Reichspost (Imperial post), Germany, 1938-1945. 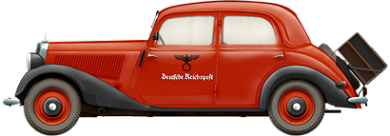 Berlin, Germany, 1938-1945. Deutsche Post (postal service), Germany 50s 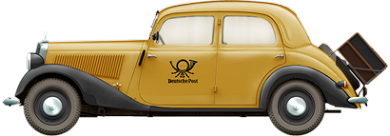 Province of Brandenburg, Germany, 1938-1945 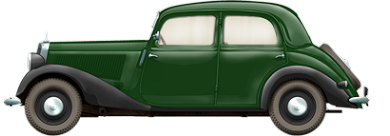 Urban district of Munich, Germany, 1938-1945. 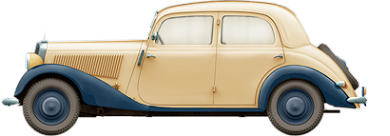 Lower Danube, Austria, 1939-1945. 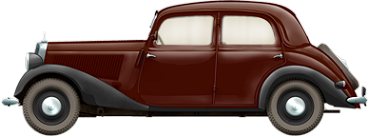 Thuringia, Germany, 1938-1945. 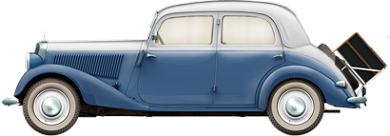 Deutsche Reichsbahn (Imperial railway admin) Germany, 1938-45. 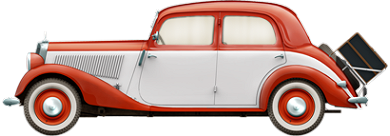 Taxi, West Berlin, 1950s  |
The finesse of the parts enhanced with the numerous etched parts will result in a very detailed and quite impressive model for its size and could serve as a diorama centrepiece or added with other vehicles/figures for and even more impressive diorama setting. Just note the kits aren't really for novice builders but anyone with good basic skills with both plastic and PE shouldn't have any issues with building the kits.
The choice of eleven finishing options is also a bonus and should cater for just about scenario plus the added figure gives good context to the Military and Civilian nature of the two kits.Rating 9.5/10
Click on thumbnails for larger view


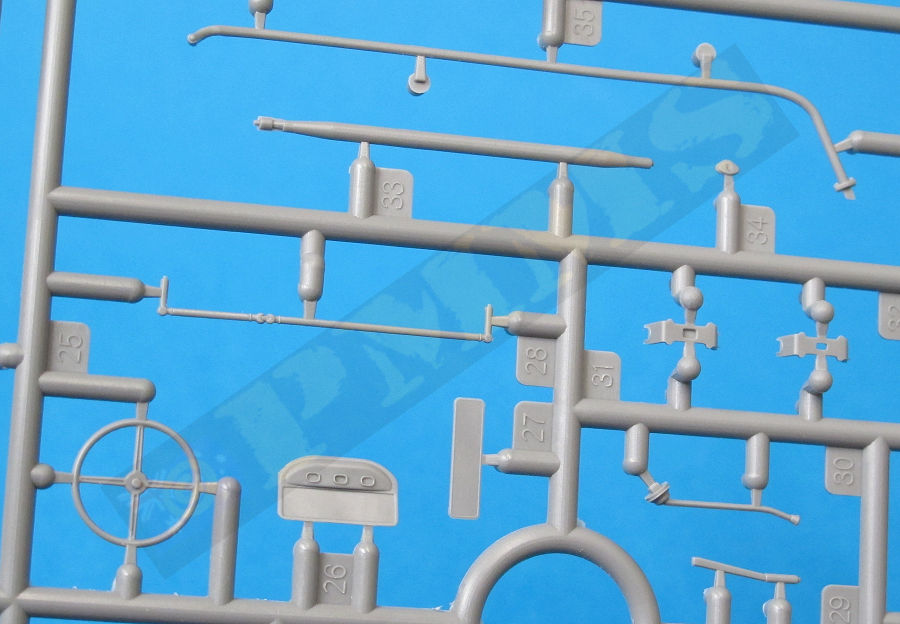
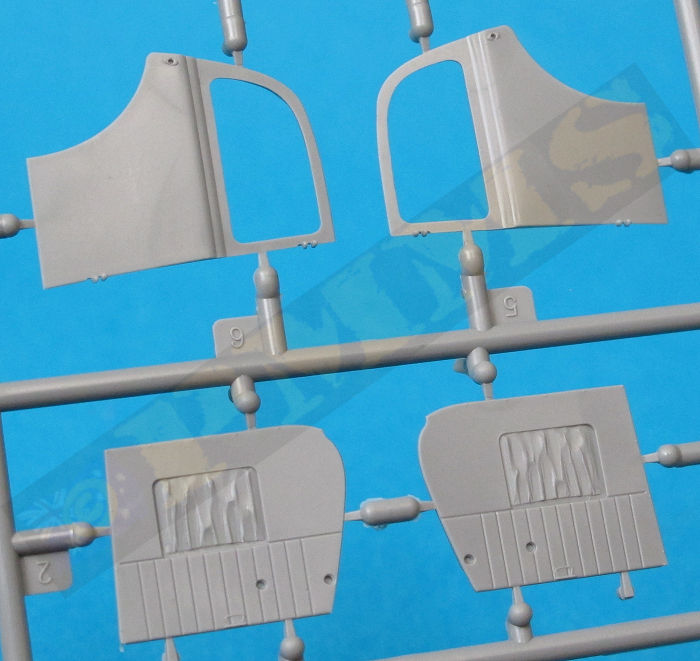
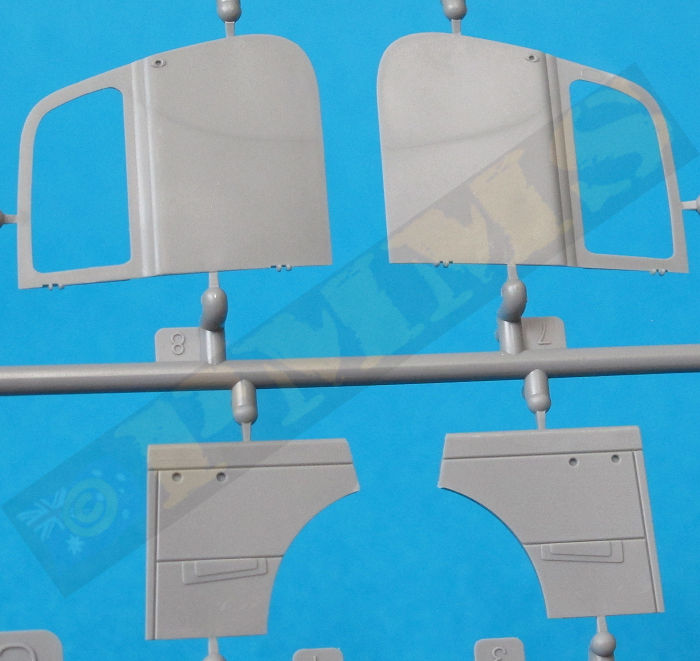
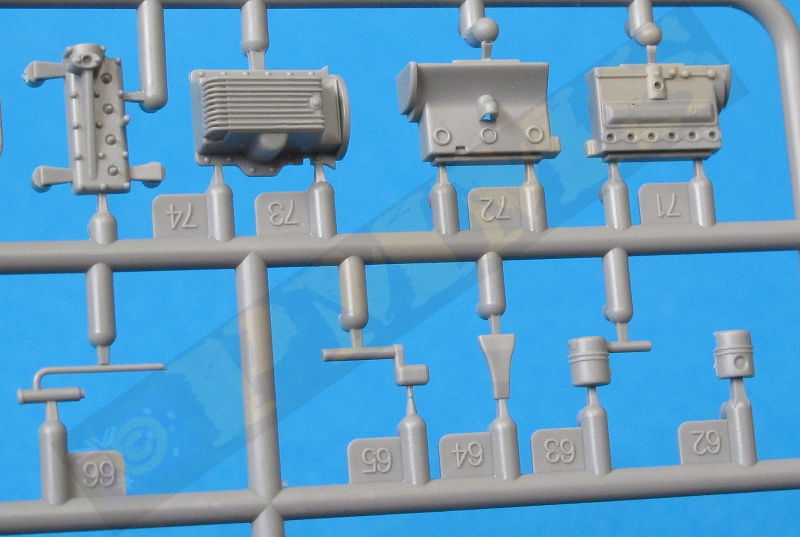
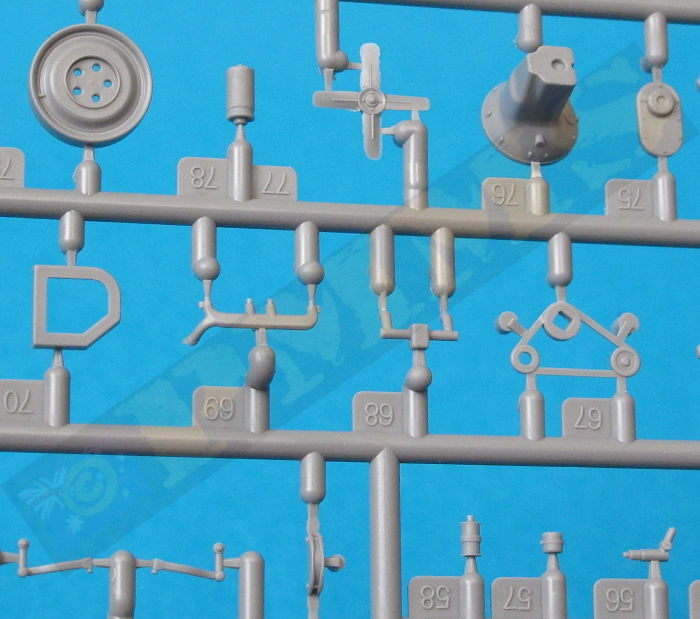
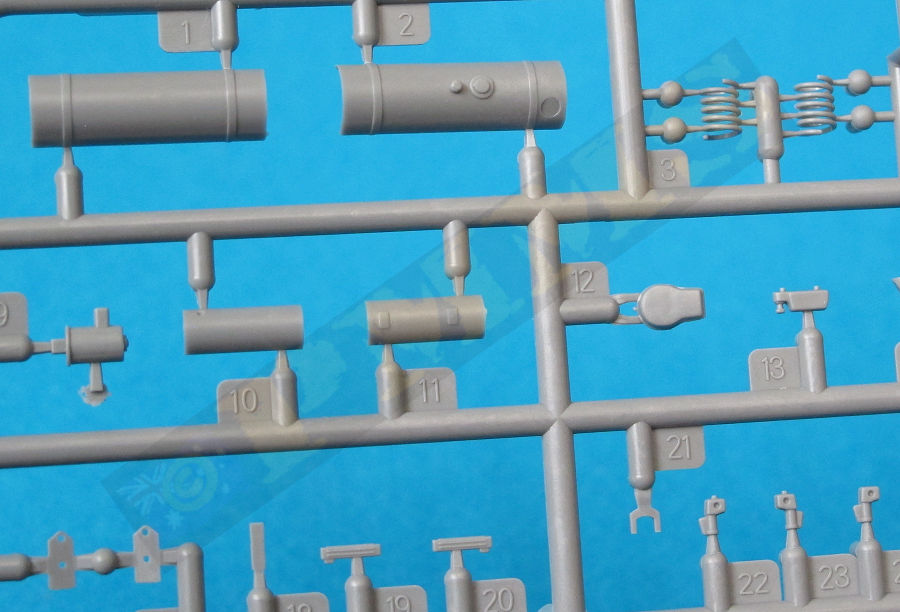
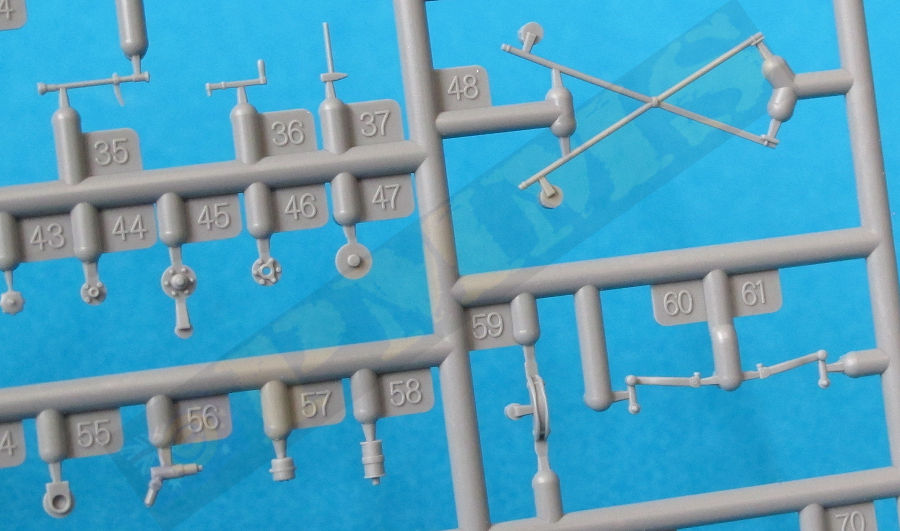
Sprue detail images


35203 Instructions


38008 Instructions


Thanks to
Please to help the reviews continue, thank you
