

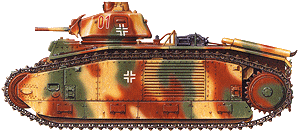
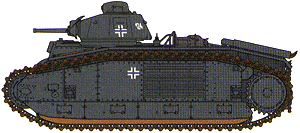
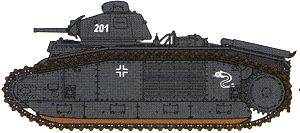
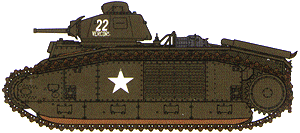
The most basic modifications to the B1 bis was the addition of a modified turret observation hood with top opening hatches and other minor aerial additions and additional armour on the hull front. Some vehicles were simply repainted in German markings and used as they were retaining the French style observation hood and both these options are provided in this kit.
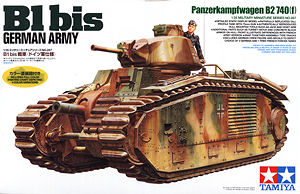
This new kit from Tamiya in basically the same B1 bis from the previous kit (#35282) with additional parts for the German Army version and has 262 parts in light beige plastic plus another 130 individual track links is chocolate coloured plastic along with two lengths of thick chain and a length of twine, a few poly caps and the decal and instruction sheets.
It is possible to build a standard French Army B1 bis from the kit as all the original parts including the French Commander figure are still included although there are no French markings, but people like Archers, Bison and Echelon can solve that problem with good selections of French B1 bis markings on offer.
As the kit is 90% the same as before, so much of this review is the same as the previous review with additional notes on the new parts and markings.
The standard of moulding is again excellent as we know well from Tamiya with very few if any pin marks and no flash to contend with along with superb details such as the many rivet and bolt heads all over the Char B and very subtle cast effect on the turret shell.
Most of the main hull dimensions, suspension components, hatches, fender width, and track link size match closely to the 1:35 plans in the Trackstory and Ground Power books with any discrepancies being well with acceptable tolerances.
The only area that differed was the location of the top hull panel join just behind the turret which differed between the Trackstory plans and the kit, but on checking this against photos the kit has the join in the correct position and too far back on the Trackstory plans.
For those who want to check this the panel join is level with the rear of the crew entry door panel as clearly shown in photos on page 87 of the Ground Power book which has a square on side overhead shot with the side door clearly showing the location of the upper panel join which matches the kit and the on Trackstory plan join is 3mm further to the rear while the Ground Power plan matches the kit.
The turret is interesting in that the plans show the kit turret to be about 2mm short and the shape contours at different angles. But comparing the kit turret directly with photos, especially against the overhead production line photos on page 80 of the Ground Power book show the kit turret ring is the correct size and in the correct place. Page 87 of the Ground Power book has a square on overhead shot clearly showing the turret in relation to the hull sides and top panel lines and this as well as comparing the many angles to various photos all lead me to conclude the kit turret to be quite okay and the plans are out in this instance. The only issue is with the rear hatch plate angle not being steep enough by a couple of degrees but overall it matches the real photos well.
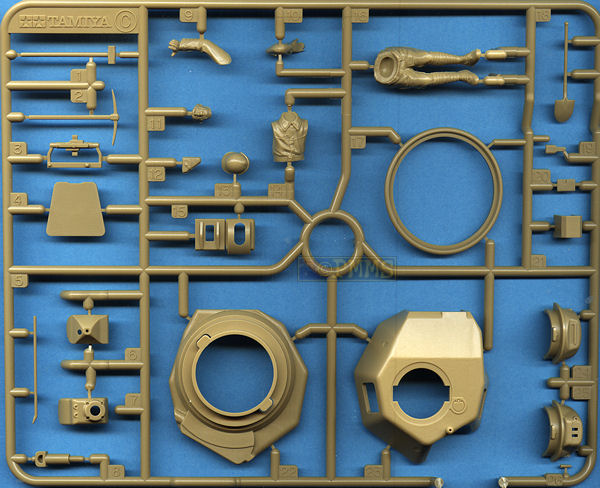
The lower hull plate has excellent underside details including the escape hatch, side suspension fairings and three small square holes which are actually on the real Char B as a couple of shots of overturned Bs in the Histoire & Collections book. Also included on the inside of the hull plate are two hex bolt recesses with these being used on past Tamiya kits to punch out allowing you to bolt the kit to a diorama base if required and as no other use is indicated I presume the same is envisaged here.
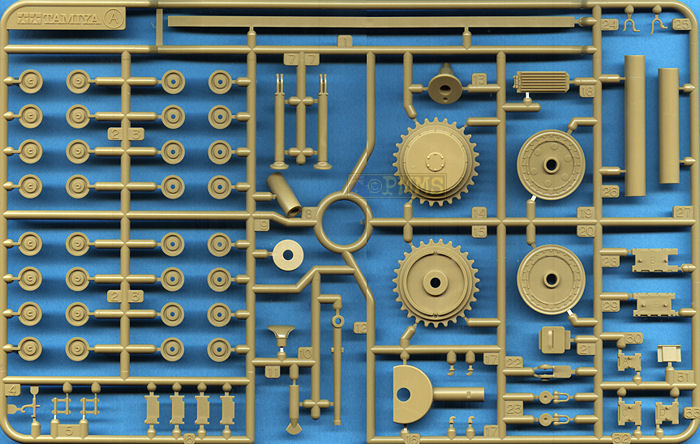
The lower suspension road wheels are made up of 16 small twin wheels fitted into the long rail which is then attached to the lower hull, the instructions indicate not to glue the wheels into the rail allowing them the rotate but I found these to be very slippery little suckers and glued them in place, but ensure you line the wheels up if you glue them so the track will sit evenly along the wheels.
The large drive sprocket and idlers wheels are in two halves each with the usual poly cap trapped between them for easy fitting to the axles but watch the direction of the two idler halves as the inner wheel has what appears to be six large pin marks but these are actually discs that are on the real idlers so don’t be tempted to remove them.
The left idler is incorporated into a detailed mounting that includes the hull mounted 75mm gun and this is made up of two halves with an inner post that traps three poly caps allowing very limited traverse and some elevation.
You should glue the two gun halves together and clean up the small join seam along the barrel before proceeding but due to the good fit of the parts the seam only needed light sanding to eliminate. The barrel also incudes two small notches on either side of the barrel which are correct so again don’t be tempted to fill these.
Assembly of the gun and idler mountings was very straightforward thanks to the good fit but take care as you have to slip the large trunnion pin through the gun mounting with the lower armour panel. The left and right idler mountings fit snugly to the lower hull and it’s best to let the glue dry thoroughly on these parts before moving on.
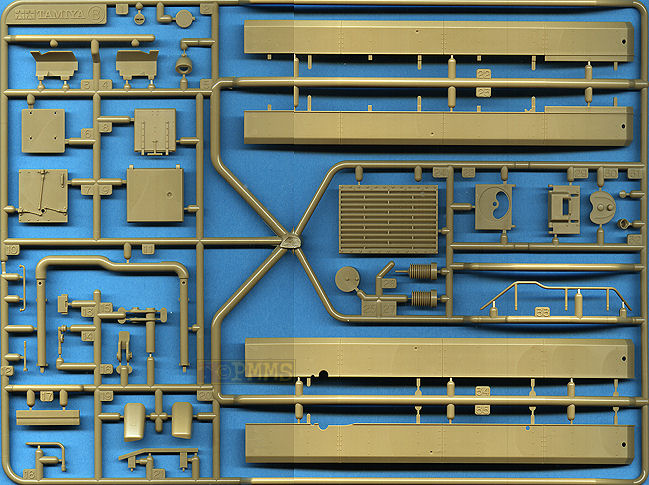
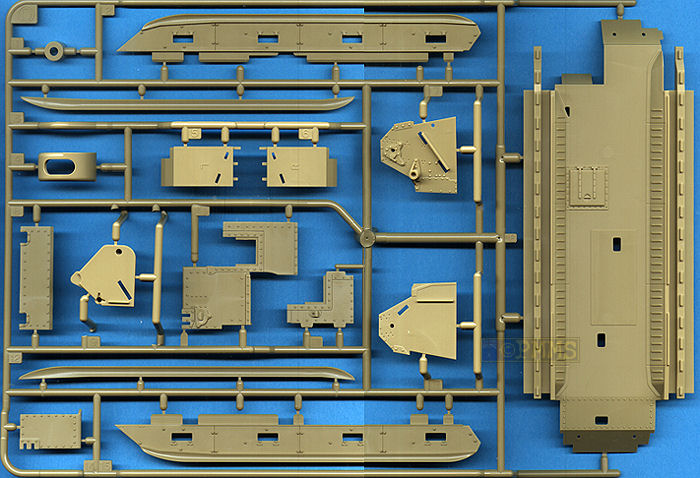
The inner and outer lower skirt panels fitted easily into place and include the four lubrication hatches along the outer lower panel as separate parts which are spaced evenly but the front two should be slightly further apart than the rear two on the B1 bis but this is not that easy to notice and most will overlook this minor discrepancy.The large upper hull tub is one of the most sophisticated single mouldings you will see in any kit and includes the hull top, the sponsons and both hull sides in the one piece with the definition of the many rivet/bolts and panel detail beautifully rendered by the extensive use of slide moulds and to top this off the three intakes on the upper hull even have open intakes, very impressive indeed.
On the inside of the tub are 26 x 1mm holes that need to be opening up for the many parts to be added to the hull top as well as the forward inner mud slides and rear sponson panels added initially with the instructions showing which holes to open up. These are different from the French Army version so take note which are the correct ones to open up for this version.
Along the sides are the large left side radiator panel with excellent relief on the grillwork and the right side crew hatch has a separate inner panel with latch detail as well as a separate opening lever but you will probably want to leave the door closed as the cavernous interior is completely empty. Above the door is the grab handle and rail guard to finish off the nice hatch detail.
On the top of the sponsons are the track guide skids and these have letter A-E engraved on the undersides so you know exactly where they go after taking them off the sprues and this is great help as each skid is a different size and shape. There are some shallow pin marks on top of the skids but as these are covered by the tracks they are not an issue.
The instructions show to fit the upper and lower hulls together before proceeding and the fit is again very good all around with no trimming of filler required but remember to fit the front idlers onto their axles before hand as you can’t fit these after assembling the hull.
The outer front panel is then attached for all the excellent rivet head details and there is an optional axillary light that will need its locating hole opened up in the front panel before fitting if you intend to add this light? The main headlight has a separate cover that can be attached open or closed and the front towing shackles are added that include the bar support in front of the gun. One item still missing is the “Renault” name badge from the glacis which is included in most detail sets already released for the B1 bis kit.
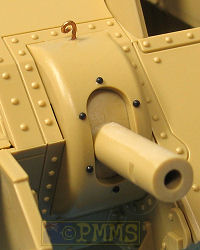
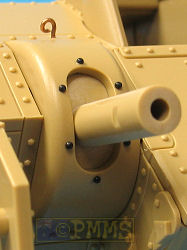
Fitting the 75mm gun mantlet is easy but there is some detail still missing from the mantlet as there was from the original kit. There should be six hex rivets around the gun opening and I added these using the CMK .08mm rivet set #003 as these appeared to be the right size. Most photos of the B1 bis have these rivets but if they were not present there would still be six small holes in the mantlet for the rivets as depicted on the Tamiya box top illustration.
Also required is the “pigtail” lifting ring on top of the mantlet which I made from thin wire with this also shown on the box art for those without any of the reference books available.
The driver’s hatch has the front hatch and top panel as separate parts with the top kidney shaped cover designed so it will rotate if you are sparing with the glue and the front hatch can also be shown open or closed with a separate visor that can also be shown open or closed but again with no interior it’s probably best to leave these closed.
On the upper engine deck is the separate right side hatch which has a separate top panel that covers the hinge detail to give good detail relief but be careful as some vehicles didn’t have this top panel fitted to the hatch. The two left side louvered hatch covers are nicely detailed and are correctly fitting flush for the B1 bis and the aerial has the outer armoured guard again correct for the B1 bis, as is the curved guard rail added behind the turret with all these features being different on the B1 and shows Tamiya has done their homework here.
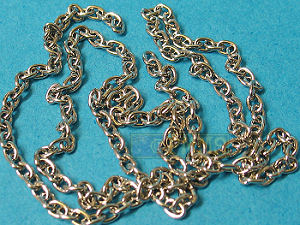
There are six separate attachments added to the rear hull as well as the rear towing shackles which come into play when draping the large chain supplied which does add greatly to the final appearance of the kit.
Before fitting the fenders the track must be attached but we’ll get to them shortly, but back to the fenders where you get a choice of two types with subtle differences depending on the vehicle being built, the instructions tell you which to use depending the markings to be used so you have to decide about now on the final finish of the kit. The fenders fit securely into locating holes in the hull sides but the front edge could be thinned down a little for a better appearance.
Only the shorter exhaust pipe assemblies with new fishtail outlets are used for this version and fit together easily without any trimming needed.
Additional parts for the German version include the concrete armour block added to the right front of the hull with an additional side panel plus new tools for the fenders that have moulded on tool brackets. There are also the two large jacks carried on the fenders which were missing from the first kit and will come in handy to backdate that kit also.
There is also the German style aerial base and brackets on the upper rear hull plus the twine used for the steel cable with plastic end eyelets that can be added to the hull top.
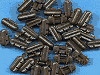
These are provided as individual links with the only cleanup required being a small pour plug on the front which is easily removed with light sanding but you have to do this on each of the 130 links, but no big deal if you are used to individual link tracks.
Assembly is very straightforward as the links simple click together and as the plastic has more “give” than resin the links are very easy to fit together and in no time you have the full runs of 61 links per side ready to go. The track articulate very freely which is sort of lost as the track sits along the top track guides and lower wheels without any chance of sag but the definition on the links is truly superb.
The track plates are slightly thicker than they should be as many have noted from the first kit and these can be shaved slightly for a thinner appearance or use the replacement tracks from Friulmodel (Set #ATL-88).Individual Track
Click on thumbnail for larger view
Close new window to return to review
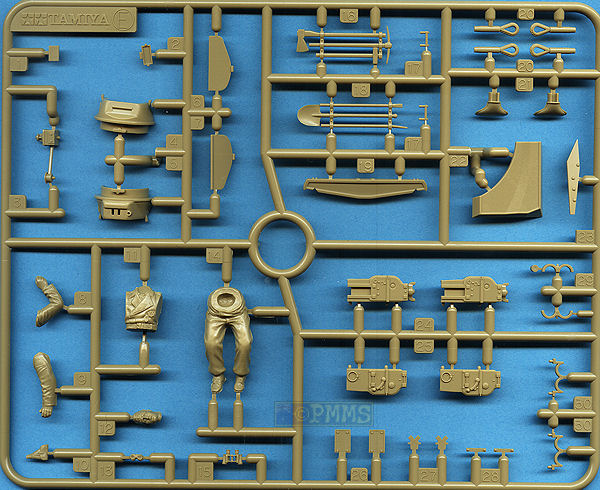
The turret has the upper shell and lower turret section as separate parts with the turret ring guard attached to the hull top another separate part. Additional parts are for the upper observation hood and rear hatch as well as the main 47mm gun and co-axial machine gun housing.
As mentioned the original observation hood is still included as well as the new German style cut down Commander’s observation hood with twin hatches which still uses parts from the original hood and this simply fits to the turret in the same manner as the original.
The upper observation hood is split in two and the resulting minor join seam has to be sanded smooth while the turret side visor has internal detail included in the new hood.
As mentioned above the turret matches available period photos well and the inner 47mm gun mounting is held in place with a polycap allowing elevation with the co-axial MG also fitted to the inner mounting allowing this to elevate with the main gun but the small co-axial MG barrel will need drilling out for a better look.
The upper and lower turret sections fit together very well and the join seam line is actually a small weld seam on the real turret and you may want to add this seam to hide the join line for a better appearance. The new hatches have no internal detail other than a few shallow pin marks and are quite basic and it would be best to show these in the closed position or use aftermarket resin hatches for a better appearance.
At the back is the Commander’s hatch with inner latch details as a separate part and the hatch is designed to be attached open or closed with the sitting Commander figure (French or German) included to use if you have the hatch open.
The detail on the 47mm gun and MG mantlets is very good and the 47mm barrel length also matches the plans perfectly and the whole turret assembly is very straightforward with the three separate small lifting hooks finish it off nicely and as you would expect the fit into the hull turret ring is perfect.
The bonus commander figures have basic details and while they will paint up okay using any the available resin crew figures will add the overall effect.
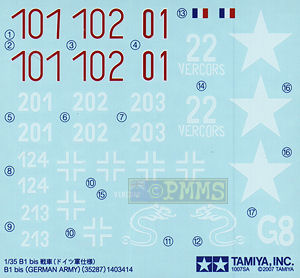
The decal sheet is again the usual Tamiya fair with nicely printed markings but the carrier film is a little thickish with markings for eight vehicles lavishly illustrated on a large fold out full colour painting and marking guide with five view illustrations of each vehicle.
The Char B1 bis has an almost endless array of camouflage schemes and many aftermarket decal sheets have already been released to offer the modeller more choice.
Markings included are:
|
This is another good kit from Tamiya with excellent details throughout and the large upper hull moulding a standout. The attention to detail is very good with alternate parts for the fenders but as with any kit there is some room for improvement for those wanting to add the extras.
Most of the additional detail required on the first kit is also needed here as the majority of the kit is the same as outlined above.
The ability to build the kit as the French or German Army versions adds a little choice other than the markings provided and any of the already release update and detail sets can also be used with the kit.
Highly recommended 7.5/10Also see the Subject listing page for other reviews of Char B1 items.
Click on thumbnails for larger view
Detail images


Close new window to return to review
LE CHAR B1 bis
KitMaker Photos (login required)
MaquetteGarden.free.fr
| Hommes et Matériels
du 15e BCC CHARS B AU COMBAT Histoire & Collections ISBN 2-913903-42-8  |
Les CHARS B B1-B1 bis-B1 ter Trackstory No.3 ISBN 2-9520988-4-4  |
| Char
B1 bis AFV Super Detail Photo Book Vol.2 Model Art Co.Ltd  |
French
Military Vehicles of WWII Ground Power Special 12/03 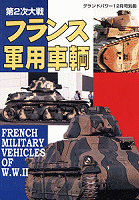 |
Thanks to my credit card and ![]() for
the review kit.
for
the review kit.