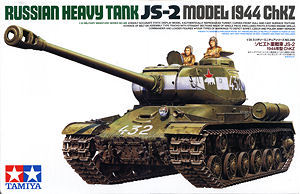
It should be noted the actual series was named ‘Iosef Stalin’ with this particular vehicle designated IS-122 to use its correct title, the name JS-2 was an allied interpretation as Iosef in Russian is pronounced Joseph in English and the 122 was shortened to just 2.
The IS-122 was armed with the 122mm D-25T main gun which could defeat any tank in the German inventory out to significantly greater ranges then earlier tanks as well as possessing greater armour protection.
This all new kit from Tamiya represents a late production IS-122 with cast frontal hull armour produced in 1944 and differed from earlier production tanks in having a one piece sloping glacis with revised driver’s periscope as well as other improvements, final production IS-122s had a welded front section as well as cupola mountings for the 12.7mm DShK machine gun.
The kit has 268 parts in dark green plastic and a further 122 track links in light brown plastic as well as a set of full length vinyl tracks, two etched engine intake screens, a length of twine for the tow cable plus a plethora of different sized poly caps for attaching the running gear and the main gun.
Quite a few of the parts have the sprue attachments overlapping the parts and not the usual butt join which means there is no scar on the part proper when cleaned making the job easier as well as preserving the surface detail.
Standard of moulding is very good overall with extremely clean crisp details as mentioned, no flash at all and only the occasional pin mark to contend with such as on the inner face of each track link and some very shallow marks inside the crew hatches.
Surface detail is also well done with the cast effect included on the main hull parts and turret as one would expect but also on many smaller parts such as the road wheels, axles, drive sprocket hubs, exhausts and turret cupola. The weld seams are quite extensive but if you wanted to be picky some are too uniform and understated as those on the actual IS-122 are quite rough and uneven. You will have to add few welds not present but overall the surface texture and welds should come up nicely after painting but even more so if you enhance them with putty or the like.
Dimensionally the kit measures up to known data but be careful if referring to the Tank Power IS book listed below as that has the overall IS-122 dimensions and subsequent 1:35 plans incorrect for the length and width but they are correctly stated in the two Russian language references and the Tamiya kit matches these very well.
I matched these as best I could but not speaking Russian there were some I couldn’t decipher but the overall length and width matched the stated dimensions to within acceptable tolerances while other smaller items sush as the wheels also matched well.
The turret on the other hand matches the plans in the Tank Power IS book perfectly but these are the only set of 1:35 turret plans on hand and I don't have the actual turret measurment to confirm further.
The lower hull is a conventional tub with underside details of access panels and axle channels with the axle mountings included along the sides and all other parts provided separately for good definition. A notable feature is the flame cut texture around the final drive mountings that again will come up nicely during the painting process.
At the front are two upper sections added either side with the idler axle mounting and this section has cast surface texture included as does the separate lower hull front that also includes the spare track mountings and at the back the lower plate is also separate with the fit of these being spot on not requiring any trimming at all.
The separate axles also include cast texturing and the mould seam line is so small it can be virtually ignored so as not to compromise the cast effect and these fit into the hull side axle mounting holes with keyed locating pins to get the right angle. There is a very small amount of play with the axles and you are given a long plastic jig to ensure these all line up even which makes the job very easy.
You should note the axle on station 1 is square in profile while all the others are round but this shouldn’t be a problem if paying attention to the instructions.
The road wheels are the all steel type and include cast texture on both sides of the inner and outer wheels with some small pin ejector marks on the inside faces which are completely hidden after you join the two wheels together.
An interesting design feature with all the wheels is the standard Tamiya poly cap is trapped between the outer wheel and the separate hub cap as the wheels are two narrow to fit between them in the normal manner and you should ensure the glue on the hub cap has fully fried before you push the wheels onto the axles to avoid “popping” the caps off.
The return rollers also include subtle cast texture on the faces and a smaller poly cap again held in place by the separate hub cap with the separate large return roller mountings also added to the hull sides.
Similarly the drive sprocket poly cap is a larger type trapped in place by the hub cap which also includes surface cast texturing while the two drive sprocket wheels have excellent bolt head and rib detail on both sides of each sprocket for excellent detail.
When fitting the drive sprockets to the final drive axles there is the large mud cleaning device which again includes cast surface texturing but you should note that while you can attach the device (parts C10, C11) after fitting the drive sprocket you can’t then take the drive sprockets off the axles with the device in place, so take note of this.
Added to the front plate are the spare track segments provided as well as the tow shackles with securing clips with the tow hooks and spare track also added to the lower rear plate.
the kit gives a choice of full length vinyl track that has very respectable details for the medium and will also glue together using normal plastic cement or separate link and length separate track links that again have good detail but also two small pin marks on the inside of each link that will be a little tedious to remove. The links are designed to just butt join together and are not workable but the detail is more defined than on the vinyl track.
There is a long section of track for the ground run and a couple of shorter end sections but most are individual links and you are provided with another jig to glue these together to form the upper track run with the sag over the return rollers. Just be careful not to glue the links to the jig as you assembly them which is easy to do if over generous with the glue in the process.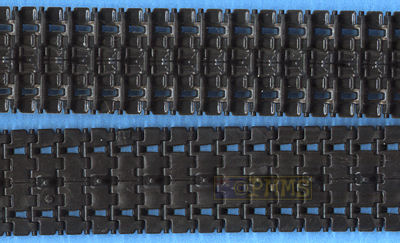
This is in two large sections, the front to just behind the turret ring and the rear engine deck and these are glued together with robust locating points to form the full upper hull. Providing the hull in this manner allows many possibilities for future kits such as the early production IS-122 or the later IS-122 with welded front as well as the IS-122M and of course either the ISU-122 or ISU-152 and hopefully Tamiya will follow through with some or all of these?
Tamiya have finally included underside sponson fillers but before fitting these you have to open up a few locating holes in the hull and take note as the front holes are different depending of your marking choice. There are inside rear intake baffles that have to be fitted before the sponsons also with the fit of the sponson panels being spot on not requiring any trimming or filling.
Also added to the inside of the forward hull is the inner driver’s periscope to fill this void and the two front fender extensions that have separate side panels plus the upper rear hull plate with the fit of all these being again perfect making for a quick and easy build.
The surface texturing in the hull sees subtle cast texture on the hull front with the large welds along the front very well done as is the main hull join just in front of the hull periscopes but the weld around the driver’s periscope housing is a little uniform and could do with being roughed up a little.
After adding the hull machine gun fairing to the right side you will also need to add welds around this as these are quite prominent on the real IS.
Surface detail on the rear engine deck is also well done with separate small lifting hooks for the central inspection hatch and cast texture on the two exhaust outlets but the welds around the two circular engine access hatches on the rear plate can again be roughed up a little for a better appearance.
The engineering on the main engine grills sees some of the grill louvers included on the main hull moulding with separate louvers added over the top of these to form the full louvered intake grill with the final appearance being very good. You may want to blank off underneath the grills as you can see right through into the empty insides from some angles.
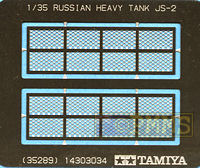
You are also provided with the side intake mesh screens in the typical Tamiya etched stainless steel which is harder than brass or copper requiring a little more filing to clean up the attachment burs but these fit neatly over the intakes with the inner baffles blanking off the insides.
Other items added to the hull are the four side mounted fuel tanks that include the weld seam down the middle and the join for the two tank halves being away from the weld so this isn’t compromised while cleaning up the join.
There are then the two part headlights and horn at the front, the small position keeping lights on the hull sides and tow shackles and long storage box on the front fenders as well as the typical Russian bow saw and shovel with moulded on mountings added to either side of the hull.
At the back is the barrel travel lock on the rear plate as well as the tow cable using the twine provided which is attached to plastic end shackles and then added to the rear hull.
Finally the fit of the upper and lower hulls is again very precise not requiring and trimming and the sponson fillers sitting neatly along the top of the hull side completely eliminating the see through look.
This has a conventional upper turret shell and lower turret ring with the join between the two following the cast join seam on the real turret so you don’t have to worry about eliminating this, just smooth off the sharp edges a little after the glue has dried.
The turret and lower ring have nice cast surface texturing with weld seams around the roof panel nicely done but the weld across the roof centre is a little underdone and could be beefed up a little. The front nose cap/gun mounting is a separate part with again subtle surface texture as does the gun mantlet and the two part muzzle brake. This is split in half vertically to avoid compromising the nicely done weld seam along the sides of the muzzle brake but I had to use a little filler on the join seam and care was needed not to damage the cast surface texture when sanding but this was the only area of the kit requiring filling of any type during the review build.
The gun mounting is a simple arrangement that fits inside the turret front and held in place with a couple of poly caps and thankfully these are tight enough so the barrel doesn’t droop after assembly as is often the case with this setup.
The barrel is split vertically but the fit is very good leaving just a small seam to be sanded out and this fits neatly into the gun mantlet with two locating recesses to ensure the correct orientation of the barrel and muzzle brake. The muzzle brake has a vertical locating hole to ensure this is fitted the right way on the barrel so there shouldn’t be any slips ups while fitting this?
A quick note on the turret surface details, quite a few IS-122 turrets have prominent casting numbers on the rear wall and on the side of the front section but these differ depending on the factory and some don’t have them at all so the kit parts are correct but you could add the numbers to dress it up a little.
The Commander’s cupola is a separate part with subtle surface and again some cupolas had small casting numbers but not all and the welds around the roof join are also very rough on some cupolas allowing for scope to make yours look a little different by adding these.
The vision slits of the cupola are open and from some low angles you can see right through the cupola and blanking these off from the inside would be advisable.
Added inside the turret are two basic supports to sit the crew figures on and the two side wall pistol port plugs are just that, plugs added from inside and you can’t show these open at all with the fit of the turret shell and lower ring again being very good with just minor tweaking of the join as mentioned above.
The separate roof ventilator will need welds added as these are quite rough but none are included and the tops of the periscopes fit neatly in place as does the long hinge for the Loader’s hatch and the five lifting hooks are easily glued in place but again you might want to rough up the welds around these for a better appearance.
The crew hatches as mentioned have shallow pin marks on the inside that are very easy to remove as there is no detail round them and you can fit these open or closed depending if you mounting crew figures or not? The Commander’s hatch has a separate periscope and you can fit the hatch ring in one of two positions with open hatch to the front of the side.
The rear mounted machine gun is finely moulded in a two part mounting and if sparing with the glue the MG will move after assembly with the final items being the numerous grab handles added around the rear of the turret. The upper handles have small indentations showing the attachment points but the lower seven handles have very small raised lines showing there position and it is easy to remove these during the minor cleanup of the turret join and you will have to refer to the painting guide to determine the right position if the locating points have disappeared.
The kit provides two crew figures, a full Commander and three quarter Loader both with separate heads and arms with the uniform detail being adequate and should come up okay with careful painting with the one piece heads having good facial detail but are the only parts in the whole kit to have some minor flash around the sides. These can be added to the turret as required and both have the arms positioned to be leaning the hatch sill and so are not suitably for anything other than being in the turret hatches.
These are the usual exploded view drawings that are easy to follow as there aren’t a lot of parts and I didn’t come across any traps with assembly going smoothly from start to finish.
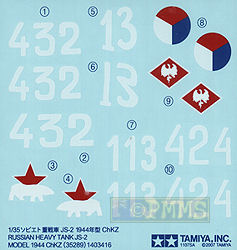
The small decal sheet is well printed with turret numbers, unit insignia and national markings for 4 vehicles and provides a good cross section of those using the IS-122 in 1945.
Markings included are:
|
This is another excellent kit from Tamiya with very clean details and superb engineering resulting in trouble free assembly and is as close to shake and bake kit you will find but as with any kit there is scope to add additional details if you wish?
The surface details are generally well done but as mentioned you could rough up or add additional welds to enhance the final appearance but other than this the kit will build easily into an excellent replica of the late war IS-122 and should keep Allied and Russian armour fans very happy.
As mentioned the break down of the upper hulls leave the door open for any number of follow on kits and let’s hope we don’t have to wait years for the next version as is often the case with Tamiya.
Highly recommended 8.5/10.
Click on thumbnails for larger view


Detail images


Close new window to return to review
| Heavy Tank IS 2/2M Model Detail Photo Monograph No.6 Rossagraph ISBN 88-916229-6-7 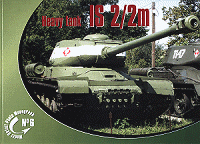 |
IS Vol.1 Tank Power Vol.XLVII Wydawnictwo Militaria No.273 ISBN: 9788372192738 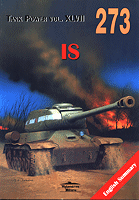 |
| Heavy Tank IS-2 Ground Power Magazine #165 - 2/2008 GALILEO Publishing Co.,Ltd.  |
IS-2 Heavy Tank 1944-1973 Osprey New Vanguard 7 by Steve Zaloga, Peter Sarson ISBN 1 8552 3986 6 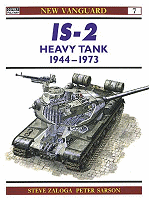 |
| Heavy Tank IS-2 Modelist Konstruktor publications 3'98 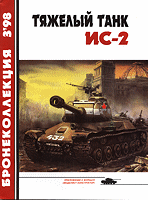 |
Soviet Tanks 1939-1945 Russian text 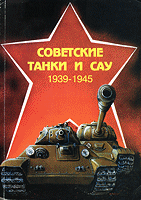 |
Thanks to my credit card for the review kits.


