
Dragon
Wagon Soft Cab
Conversion (M26A1)
#TX 0101
Modifications to Tamiya kits
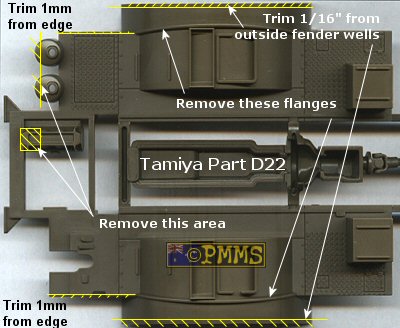
Most of the modifications are to the Tamiya chassis (part D22) and are
highlighted in the image below.
- Remove approx. 1/16” (1.75-2mm) from the outside
of each fender well.
- Remove and sand smooth the inner flange for the armoured
cab sides.
- Remove the front ¼” (4mm) from the upper part of
the winch motor.
- Bevel the top of the two air cleaner cylinders by about
2mm, the lower air cleaner part (B11) can remain unchanged.
- Shave
approx. 1mm off the outsides of the forward lower floor.
Other modifications:
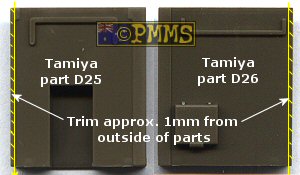
- Remove approx. 1mm from the outsides of the Driver’s
and Commander’s
forward bulkheads (parts D24, D26) to correspond to the altered lower floor.
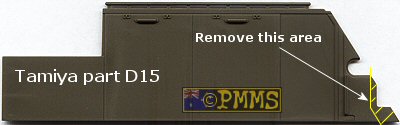
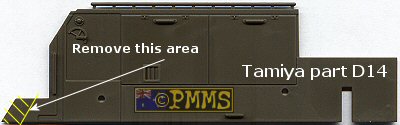
- Remove
small portions off the engine compartment walls (parts D14, D15), the instructions
say to remove all the plastic forward of the Driver’s and Commander’s
forward bulkheads but this is erring on the side of caution and only small
alterations are needed as you can still see the panels inside the radiator
opening.
- Cut
the steps off the tops of the Fuel tanks (parts C8, C20).
Some minor alterations may be needed when test fitting but I found with
these modifications the cab fitted well to the Tamiya chassis.
Assemble the rest of the Tamiya kit as per instructions
Return to M26A1 review.
Page created 5 August 2004
Click Browsers BACK button to return to list
Home / Reviews / Vehicle
Reviews / Trakz