

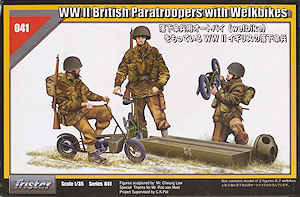
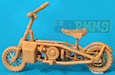
The British Welbike was a small single seat motorcycle originally designed to be used by the SOE (Special Operations Executive) but was eventually issued to the Parachute Regiment and used at Arnhem during Operation Market Garden.
The Welbike was powered by a Villiers 98cc single-cylinder two-stroke gasoline engine and measured 4 feet, 3 inches long and was just 12 inches wide and 15 inches high when folded to fit into a standard parachute airdrop container.
There were three production versions of the Welbike, the Mk.1 (1183 built) which didn’t have a rear mudguard, Mk.2 Series 1 (1400 built) which featured a rear mudguard and other minor modifications and the Mk.2 Series 2 (1340) which had a 'saddle' fuel tank with a splash shielding between them and an improved filler cap.
After their initial use at Arnham the Welbike wasn’t used a lot due to operational limitations and the advent of larger gliders that could deliver items such as jeeps and motorcycles directly to the drop zones. The Welbike became a prized acquisition at RAF stations as excellent personal transport around the open spaces of air bases.
Tristar first announced this kit of the British WWII Welbike last year and after a series of delays for various reasons it is now ready for release to the eager Allied modellers of the World.
The Welbikes included in the kit are Mk.2 Series 1 bikes with the rear mud guards which can be built either folded from air drop or assembled ready to ride. You have to decide before assembly which mode you want as there are alternate parts to be used.
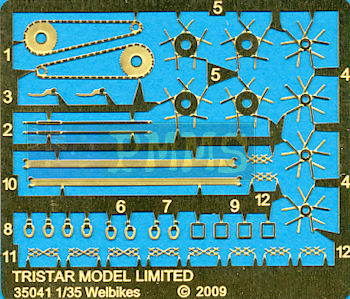
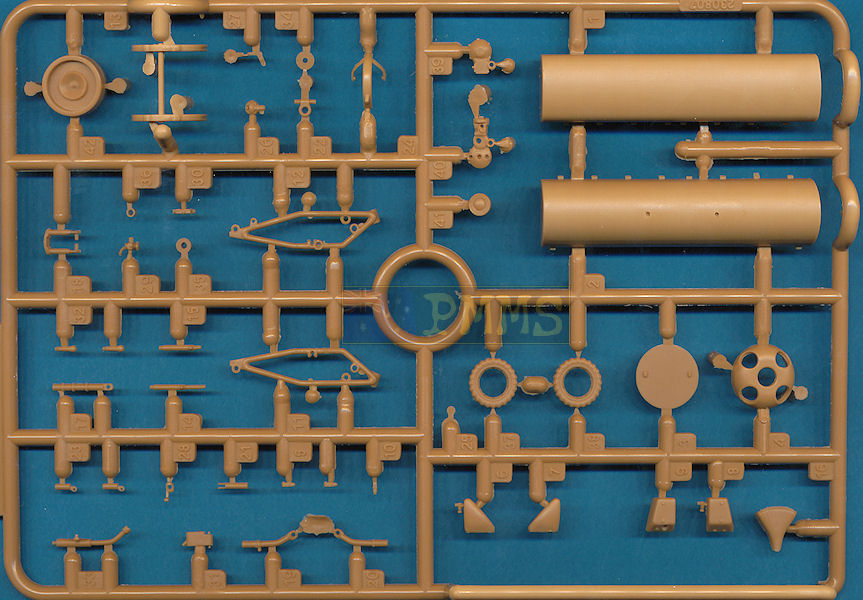
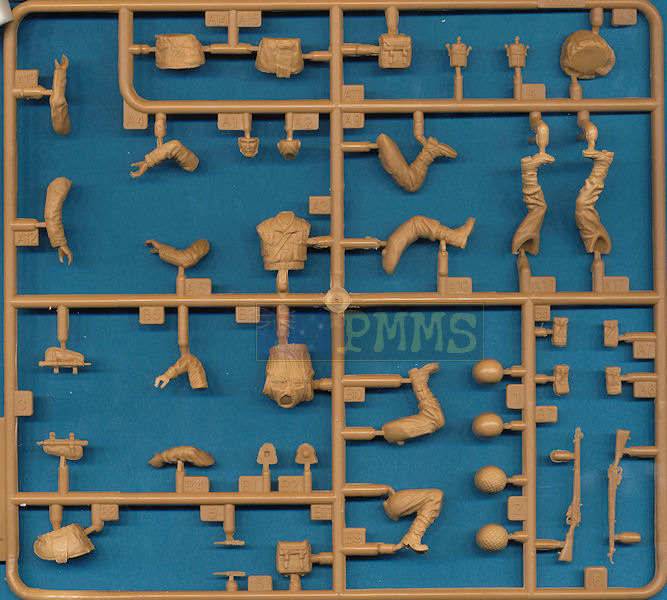
The kit gives you two complete Welbikes, two drop canisters and two Paratrooper figures with a total of 130 parts in the usual Tristar beige plastic plus 38 etched parts along with the decal and instructions sheets.
I don’t have any 1:35 plans of the Welbike but the overall length and wheel diameter of the kit matches available dimensions very well and the standard of moulding is also good overall with very few pin marks or sink marks but there is a little minor flash here and there as well as fairly prominent mould seam lines to be removed.
As you might expect from a finished model only 37mm (1 1/2in) long there are many small parts and this seems to accentuate the mould seam lines and extreme care is needed when removing these parts from the sprues and during cleanup.
The small size of the parts and the finished model does lead to some issues with quite a few parts being a little over scale in thickness which makes the final kit a little chunky in appearance. The kit has etched parts for the wheel spokes to give these a finer appearance than could possible be obtained from plastic.
The Villiers engine is made up of 8 main parts with the cooling fins on the head quite well defined as are the other moulded on details on the engine block with assembly being straightforward but you should ensure the mating surfaces are cleaned to ensure they are nice and smooth for a better fit.
There is a small (or large depending on the view point?) issue with the carburettor which is a little on the big size and simply would not fit in place between the engine flywheel and the fuel tank without modification and it’s best to leave this off until the engine has been fitted into the frames so you know exactly what trimming is needed.
Attached to the rear of the engine is the etched chain and rear wheel cog and this is held in place by a small bracket with three small locating pins and I did have to open up the middle pin hole for a better fit.
The two main frames are slightly over scale in thickness as are the locating rings and lugs included for the engine but otherwise cleanly moulded and other parts added to the frames are the two foot pegs that can be fitted raised or lowered and the accelerator pedal, the linkage for this is a fine etched part.
Also included are two different styles of fuel tanks, the initial rounded profile type and the more common square type which is applicable to this model as the rounded type was used on the prototypes and first series produced.
The front and rear tyres are just 9mm in diameter and moulded in one piece with the separate etched spokes added to the insides of the wheel rims, the tyre tread pattern is again a little on the chunky side due to the small size.
There are different etched spokes for the front and rear wheels and thankfully Tristar have included a plastic jig to bend the spokes to shape and this does make the process very easy.
After carefully removing the spokes from the etched fret, you slip one textured side down onto the jig. Note the jig has two sides, one with a small central pin for the front wheel and the other a larger pin for the rear wheel, so make sure you use the correct jig pin for the appropriate wheel.
After laying the etched spoke on the jig you then slip the wheel hub (part 36 for the front wheel and part 35 for the rear wheel) and press the hub down into the jig to bend the spokes to the correct profile. You repeat this for the remaining three spokes, see the assembly images.
There are small notches inside the wheel rims to ensure the correct location of the spokes on both sides of the wheel to get the correct offset of the spokes and the wheel hub has to be secured between the two spokes and due to the small size extreme care is needed here, I guess that goes without saying.
I attached the wheel hub to one of the spokes with cyanoacrylate but attached the spokes to the wheels using small dabs of white glue. This gave time to manoeuvre the spokes into the correct position as using cyanoacrylate for this wouldn’t allow the time needed to align the spokes correctly. I found the white glue will hold the spokes in place even after full assembly due to the small overall size of the model providing you don't give it any rough handling.
Once the wheels have been assembled you can fit the engine and rear wheel into the main bike frames which is fairly straightforward due to the precise locating pins on the insides of the frames. The carburettor can now be added after test fitting and trimming to fit into the small space but this is still oversized as the actual carburettor doesn’t take up the whole space as it does on the model.
The front wheel forks are moulded in a single piece with long “axle” pins and the instructions show to slip the forks over the front wheel and slip the axle pins into the wheel hub, easier said than done.
This is really impossible without snapping the forks or destroying the delicate etched spokes you just spend time assembling as you would need to spread the forks so wide to clear the spokes, something would have to give.
Instead I used a very sharp scalpel blade to carefully cut off one of the fork arms which made slipping the axles into the wheel hubs very easy and then re-glued the fork arm back in place and then glue the fork to the frame. The front wheel isn’t steerable after assembly but you can position this at any angle when gluing to the frame.
The two part handle bars and mounting post are again slightly over scale in thickness and these can be assembled folded or extended depending on the mode of the finished model. The left side hand grip lever is a small etched part but the curve of the lever is the wrong way around in relation to the mounting bracket, not that you would probably notice with such a small part.
The saddle mounting post again has alternate parts for the folded or extended position and you simply select the appropriate mode with the seat/saddle nicely depicted. The right side exhaust pipe is added from the engine to the rear frame mounting and I drilled out the pipe for a better appearance and finally the rear wheel mud guard is glued onto place.
There are a few additional details that can be added as some of the details are quite basic in places. The front and rear wheels have no retaining nuts on the axle/fork attachment and these can be added using small plastic aftermarket nuts and of course there are the engine wiring and control cables from the handlebars to the engine as these are very prominent on the Welbike due to the small overall size.
Repeat the above for the second Welbike included in the kit, this should be easier to build as you will have found any problems with the first build, right?
There are two drop canisters included in the kit which can be assembled open or closed with attachment brackets for securing these under aircraft wings as they were sometime delivered.
There is no actual parachute provided but there are 4 small etched clips for the parachute attachment points inside canister as well as small etched and plastic canister fasteners to add some nice finer details.
The canisters have inside rib details depicted without any annoying pin marks as these will probably be shown in the open position in most dioramas with the Welbikes.
Also included are the end crash “bumpers” with five large openings and the separate mounting plate, these were not usually attached once the canister had hit the ground and been opened so can probably be left separate from the main canister.
Included in the kit are two Paratrooper figures wearing the typical camouflaged Paratrooper jump smock and trousers with boots and anklets as well as four Para helmets 2 with and 2 without netting, two 303s and a selection of personal equipment.
Figure A has alternate arms and legs which allow it to be built standing holding the handle bars or sitting on the bike seat as shown on the box top illustration. The second figure depicts the classis wartime publicity shot of a Para taking the bike from its drop canister.
Each figure has separate torso, lower smock segments, legs, arms, 2 part head (split front and back) and helmet as well as the personal equipment such as the 303 ammo pouches, backpacks, trenching tool, water bottle and knife. The rifles have etched slings provided and before attaching these it’s best to anneal by running the strap through a candle flame as this will allow more natural curves to be included in the sling.
Details on the figures is quite nice with well defined details such as collars, pockets and fabric seams with well done fabric folds and should come up well with careful painting. The only cleanup required was the usual casting seams but take care not to compromise the detail while dealing with these.
Assembly if fairly straightforward although there were a few gaps here and there at the arm joins and when adding the lower smock segments. But in all instances the added equipment hid these gaps quite nicely, the ammo pouches and sling for the arm and the water bottle and knife at the sides of the smoke sections, so check this before spending time filling and sanding as it may not be needed?
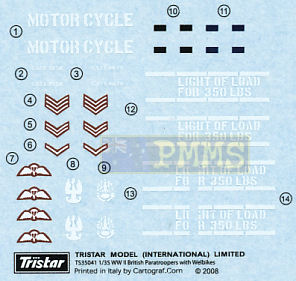
The small decal sheet included has stencilling for the drop canister including the “Motor Cycle” stencilling used on canisters containing the Welbikes.
A selection of rank and unit insignia is also included for the Para figures to add life to these.
These are nicely done Welbikes overall and portray the miniscule appearance of the Welbikes and while being dimensionally accurate some of the parts are a little over scale and gives a slightly chunkier appearance when compared to the slender appearance of the real Welbike.
The etched spokes will require care and previous experience with etched parts would also help but the jig included takes all the pain out assembling the wheels and spokes.
There are a few things to watch out for along the way as well as scope for additional detailing such as the control cables and engine wiring while the nicely detailed Para figures are a nice bonus.
Recommended.
Click on thumbnails for larger view
Detail Images

Close new window to return to review
Thanks to Tristar Models for the review kit.