
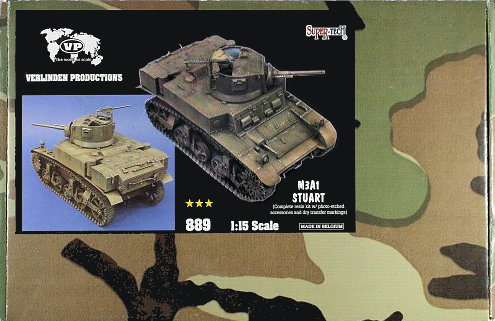
M3A1 Stuart
Verlinden Kit No.889
1/15th Scale
Review by Terry Ashley
The initial production M3’s had a number of small changes in the production run of 5811 vehicles between March ’41 and August ‘43. The M3A1 differed from the M3 with the fitting of an improved turret design and other design improvements as a result of experience gained in war situations. As with the M3 it was produced with both gas and diesel engines and between July ’42 and Feb ’43, 211 diesel engined and 4410 with the Continental Radial engines were produced. Production was then switched to the improved M5 series of vehicles.
The M3A1 first saw action with the US Marines in Guadalcanal in Sept ’42 where it was more than a match for the Japanese armour encountered. They next saw action in North Africa in late ‘43 against French armour, giving a good account of themselves. Things did not go so well when coming up against German Panzer III’s and IV’s in Tunisia , late ‘42,’43 and where totally outclassed in tank v’s tank engagements.
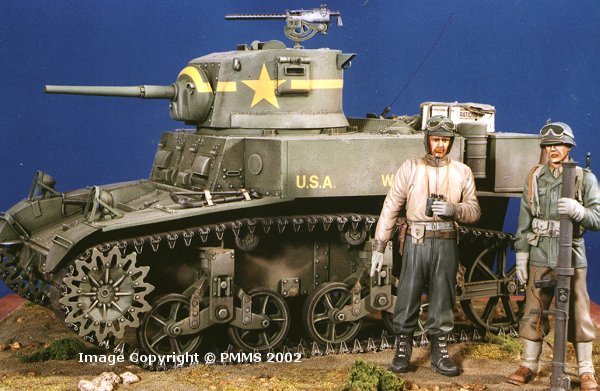
The M3 has always appealed as an attractive vehicle and with the release of this kit in big 120mm (1/15th), I chose the Stuart as my first venture into resin kits in this scale as it is a fairly simple kit as far as resin kits go and to learn the new techniques required for this medium, and believe me things are very different from injection plastic.
Just a quick word on adhesives. Super Glue (Cyanoacrylate) is stated as the
preferred type, this has a nasty habit of sticking fingers to everything and
anything (extreme care must be taken). There are several types of Cyanoacrylate,
the normal Thin liquid plus Medium and Thick gel, all types have their uses,
gel taking slightly longer (up to 30 seconds) to cure, is stronger and can
be
used to fill small gaps (you can also use an accelerator). The best Cyanoacrylate
I have used is FLASH available in various size bottles from good hobby shops.
I have found that assemblies which must take the stress and load for the whole
model are best glued using ‘5 minute epoxy’, (which require you to mix two
parts together) obviously this means you have to support the parts until the
glue
cures, but the resulting join has far greater strength than Cyanoacrylate,
although the Thick FLASH gel is extremely strong. On to the model.
Step 3 is the fitting of the top hull sides and top deck which should present
no problems, (providing the lower hull is all square) a small amount of trimming
of the top deck may be required to get a snug fit.
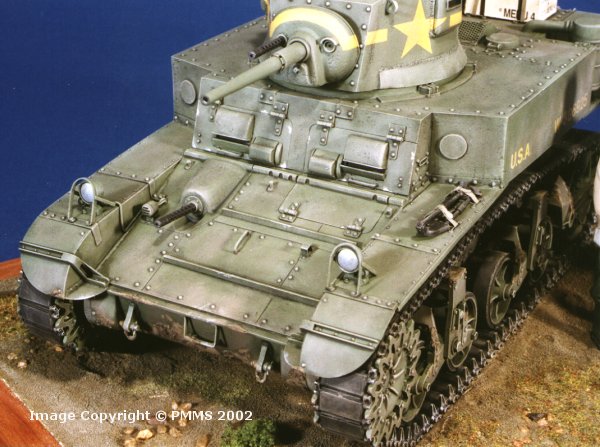
Step 4 & 5 deals with the smaller fittings to the hull, again I used epoxy to
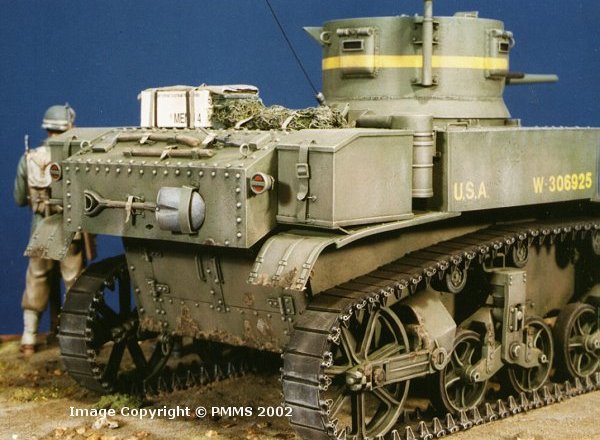
attach the side fenders for added strength. The front part of the fenders and
fender supports are from fairly thick etched copper. Carefully bend the front
mudguards around a large round object like a screwdriver shaft, gently rolling
around the curve till you get the right bend. The front fender supports are
the first major correction needed, the type provided in the kit is for the M3,
not the M3A1 version. I rebuilt these supports using plastic card. (See photo’s
for details)
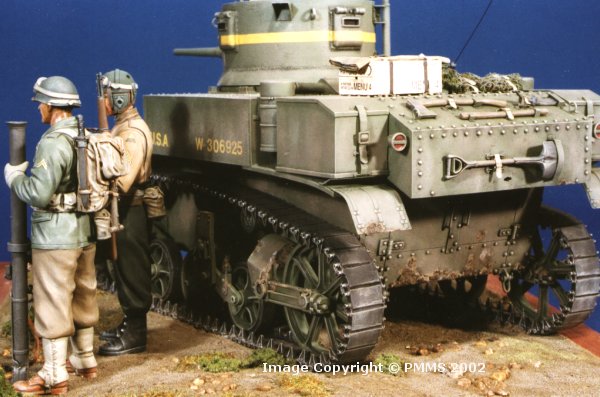
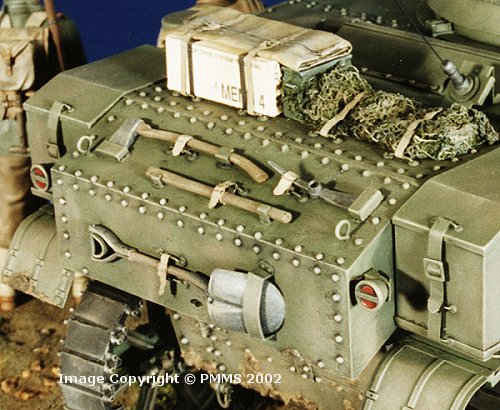
On the rear hull a number of additions are required. Wires for the tail lights should be added coming out from the side of the hull just behind the lights. The radio antenna support is provided in etched copper, but the part is about half the size it should be, again I rebuilt it from plastic card. Numerous tie-downs are provided, these should be round in profile but the etchings supplied are flat (a common problem with etched parts) in this scale it just didn’t look right, so I rebuilt the tie-downs from card and copper wire. Using a punch and die set, I punched out numerous small disks in plastic card, attached these in position with Cyanoacrylate and then drilled holes in each to take lengths of bent copper wire resulting in better looking die-downs. The remaining etched copper fittings can be fitted as they come, after carefully bending them into shape.
At this stage I attached the suspension bogies but left the drive sprockets off till the track was fitted, this makes life a lot easier as we will discover.
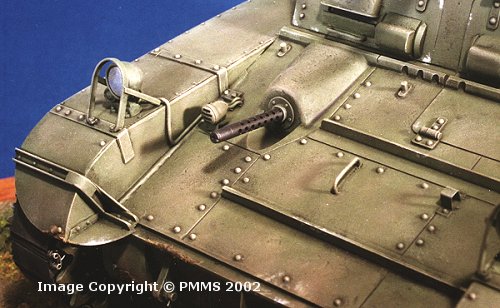
I drilled only as far as the cooling holes go in the jacket, next using a drill
the same diameter as the aluminium barrel, drill out the muzzle to take the
barrel. From plastic rod I added a collar to the rear of the jacket with a hole
for the barrel which was added using a length of aluminium tube, this is extended
out the back of the jacket and inserted into holes drilled into the hull and
main body of the machine gun.
This all sounds complicated but if you take things easy a very realistic appearance
is achieved.
Fortunately the tracks on the M3 are “live” (as with all American tanks) which means they will curl up on themselves if not supported resulting in no sag between return rollers on the top of the roadwheels (other than a very small amount for gravity eg the M113), as opposed to Russian and German tanks which have “dead” track (which flops all over the place) resulting in the characteristic “sag” between return rollers.
The long straight sections of track along the ground and along the top of the
suspension were easily assembled using 5-minute epoxy and a straight edge to
ensure they were aligned correctly.
For the curved sections around the idler and drive sprockets, I attached the
track links to lengths of masking tape on the inside of the track (to hold
in
position) added the 5 minute epoxy and positioned these around the drive and
idler wheels, adding more masking tape to hold in place until the epoxy cured..
To add more strength I drilled holes in each track link end at opposing angles,
which when filled with epoxy resin forms solid ‘pins’ when the epoxy cures.(This
technique can be used on other assemblies for added strength as well)
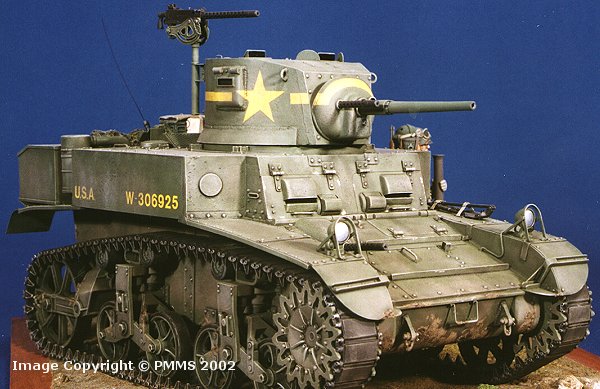
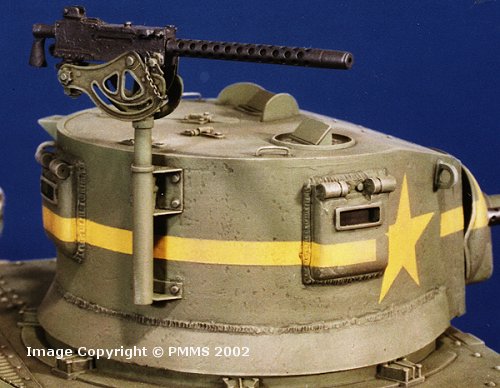
The overall Green was airbrushed using Humbrol ‘Marine Corps Green’ (HP5). When
dry a wash of Black oils was applied to highlight the details and final weathering
was added by drybrushing (on a model this size, that’s an exercise in itself).
Various shades of green and earth colours where drybrushed until the desired
effect was achieved.
I mounted the finished model on a rudimentary base with two 120mm Verlinden
figures to give perspective to the size of the model and ease of handling.
Please to help the reviews continue, thank you
