
Sd.Kfz.234/4
Fenders early version
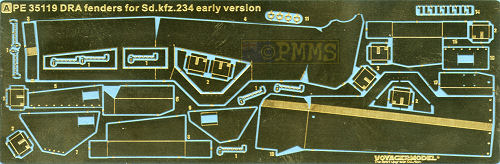
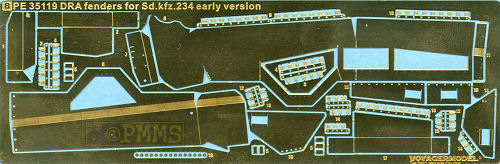
Voyager 1:35 Set # PE 35119
(for Dragon #6221)
Review by Terry Ashley
The set also includes alternate gun shields for the early and late configurations with the etched parts in different thickness brass such as the thicker shields and thinner parts for the ammo boxes and brackets to give good variation and add to the detail effect.
Included in the set are two large etched frets and four smaller frets plus a turned aluminium pedestal base and formed brass fender width indicators as well as lengths of plastic rod and steel wire and a four page instruction sheet.
As with previous Voyager sets the standard of etching is excellent with good relief where needed and clean crisp etching with the usual bending lines to make the job easier.
One very interesting feature on the thicker etched gun shields is that the bend line is situated at the front and you bend the shields away from the engraved bend line as opposed to bending the parts into the bend line as is the normal practice. Take care here as the instructions don’t actually tell you to bend away from the engraved line and if not careful you could bend them the wrong way, or normal way as the case may be.
The reason for this is the bend lines are slightly wider than normal and include weld texturing which when bent to shape result in weld seams at the joins of the shields, quite a neat idea. If you really wanted to be picky you may say the welds are a little too uniform and you could alter this by applying some old thick matt paint or some while glue both of which will still show the weld texture when dry but alter t
The welds also extend to the smaller triangular panels at the bottom of the shields and the overall effect of the weld texturing gives a better appearance to the shields than both the plastic and etched shields found in the kits.
Other major parts are the lower pedestal base which as mentioned is in solid aluminium and has the lower base circular brackets in four separate etched parts that are sandwiched together to form the base. There are four “bolt” holes though all four parts and these can be used to line up the four discs to eliminate any problems during assembly. There is an additional lower disc to use when fitting the pedestal to the AFV Club kit
The top section of the pedestal, AFV Club parts F23, F24 and Dragon parts F44, F48 are glued to the top of the metal pedestal with cyanoacrylate and the kit gun mountings assembled as per kit instructions.
There are a number of small etched detail parts for the upper gun mountings including a very fine ring sight and the small brackets holding the flash suppressors in place but most of the work is for the lower ammo box supports and securing straps all of which are in fine etched parts with the lower brackets in multi-parts and care will be needed when assembling these.
The six ammo boxes (four small and two large) are completely made up of multi-part etched pieces with all four sides of the boxes separate parts and not a single part bent into a square as you might expect. This is so the distinctive lip at either end of the box is represented which you couldn’t do if in one piece and although this requires a bit more assembly the end result has excellent detail definition.
The tops of the boxes are also separate and have working hinges if you wish as well as separate parts for the ammo chutes with the row of open holes in the front panel actually open and not just indentations which further adds to the detail as are the lifting hand holes of either end of the boxes.
Once the boxes are assembled, which will take you a bit of time as each has about 11-12 parts as well as the extra work needed if you want to make to lid hinges workable these are then fitted to the pedestal mountings and the etched straps and clips attached. The three spare ammo boxes stored at the rear of the vehicle have additional etched securing brackets again with working hinges and small wing nuts if you want to make the brackets workable, if not you can glue them in place but the hinges will still offer excellent details.
If you choose the early gun shield there are the additional hull top armoured panels with alternate front and back panels to take into account the different widths of the kit hulls (covered in the various 251 comparison reviews) with the panels having separate inner brackets and hull mounting brackets for another intricate assembly.
If you choose the late taller gun shield the added hull armour panels were often not used so this saves a bit of time for this version (check references for the specific vehicle on this). This later shield has the small curved sight cover added at the front and it is best to ‘anneal’ this by running it through a candle flame as this makes bending the curved shape far easier.
Additional parts for the gun shields are the travel gun lock attached to the upper hull plate and the corresponding small bracket of the front of the shields; both of these are in multi-parts and again will need care during assembly.
There are a few other details included such as the hinges for the engine bay doors, which again can be made workable if you wish and the brass width indicators and three part rear view mirror for the left fender.
The four page instruction sheet has the usual exploded view assembly drawings which are quite clear overall but due to the complex assemblies careful study will be needed and as mentioned watch the bend direction of the gun shields.
Conclusion:
This is a very detailed and in places complex update set for either of the
two ‘Drilling’ kits with the added bonus of early or late gun
shields included.
The weld seams on the gun shields are a very nice feature and certainly answer the question of “why include etched shields when they are already in the kit (AFV Club anyway)
The intricate details in the ammo box mountings and the ammo boxes themselves also add considerable detail even above that found in the well represented boxes in the kits.
Overall this set offers a number of excellent additions to the two kits but it is not for the novice builder as some of the assemblies are quite complex and previous experience working with etched parts will be advisable.
Highly recommended.

Thanks to Voyager Models for the review set.
Page Created July 1, 2006