| Introduction: |
The etching is the usual standard from Voyager with clean crisp etching with embossed details plus the usual engraved bending lines while the brass barrels are cleanly machined with no cleanup required.
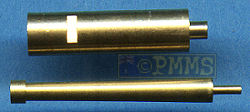
The main 75mm barrel has a small resin plug that is inserted inside the Tamiya gun mountings (parts A16) and when you cut off the plastic barrel the small pin on the metal barrel fit neatly into the hole in the resin plug.
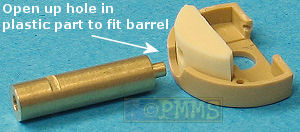
The barrel is the correct length and diameter but you must ensure you open up the hole in the Tamiya gun mountings (parts A16) so the barrel is flush with the inner resin mounting and not flush with the Tamiya part or the exposed length will be too long. There is also no rifling included and the two notches on either side are a little too big than they should be when compared to photos, but this is only minor and not a lot you can do to change this in any case.
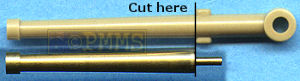
With the smaller 47mm barrel the taper seems a little overdone as many photos don’t show much tapering at all but it matches the kit barrel and to fit you just cut off the plastic barrel in front of the two small mantlet mounting notches, drill a small hole and insert the barrel, all very easy.
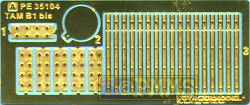
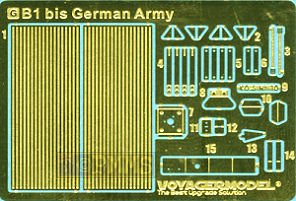
The main etched parts are the full length narrow fenders which require careful bending for the side contours and the subtle bends at various points along the length and you have to press out the rivet heads from the small indentations on the fenders.
Separate fender mounting brackets are provided which will allow you to remove the fenders at any time as well as separate three part tool brackets which require you to trim off the moulded on tool brackets.
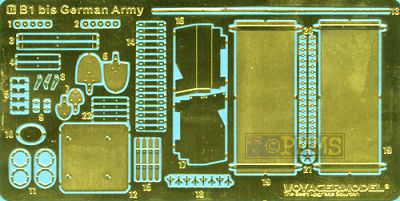
The large plastic tube is used to replace the exhaust piping with etched heat covers and mounting brackets and you should anneal the covers by running through a candle flame to make bending the curve easier.
Additional etched parts give you the rain guard over the side crew door, bolt strip for inside the turret hatch and the head light cover and oval Renault name plate for the front hull plate as well as the two cables brackets on the rear hull.
The instructions are the usual exploded view drawings which are easy enough to follow but as normal you should study these before bending or assembling any parts.
| Conclusion: |
If this set is used in conjunction with the excellent Blast Models update sets #BL35103K or BK35107K you can give your B1 bis a real makeover.
Highly recommended 7.5/10See the Char B1 bis Subject Page for additional reviews.