


It would also be possible to use the sets with the StuG III Ausf.G (kit # 6320) but you would be left with the 7.5cm gun breech although if building the model buttoned up this wouldn't be a problem. They can also be used for the original Dragon StuG III Ausf.G 10.5cm (kit #9058) but some modifications would be needed to fit the resin mantlets to the the kit gun mountings.
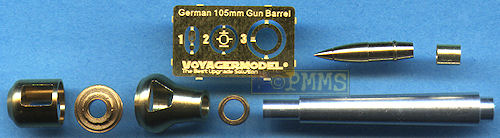
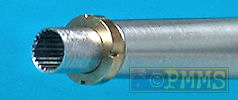
Both sets use the same gun parts consisting of the turned aluminium barrel tube with hollowed out muzzle and fine rifling included plus 4 brass parts for the muzzle brake, a single brass 105mm shell and a short piece of brass tube for one charge casing plus 3 etched detail parts. Also included is the cast resin mantlet which is a single piece in both sets with just the large casting block to be removed. This is beveled in at the join to the part leaving just a very small seam on the bottom of the mantlet to be cleaned and this block had already broken off the welded mantlet in transit leaving just the small seam to deal with.
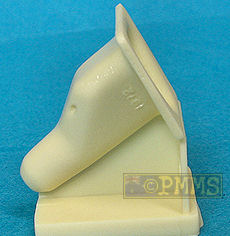
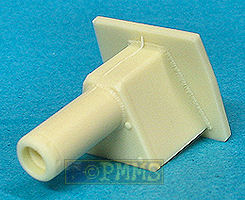
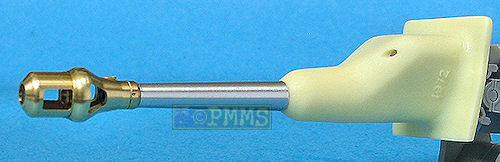
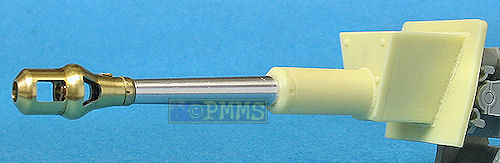
Resin mantlet, set #VBS0121 (left), #VBS0122 (right)
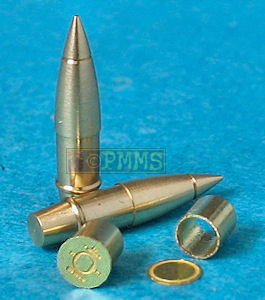
Brass and etched shell and charge casing.
Note, there is only one shell and one casing in each barrel set.
Dimensionally the barrel matches available plans and data perfectly with any discrepancies very minor and well within acceptable tolerances. It should be noted that some of the available 1:35 plans vary in barrel length making things tricky but the mantlet size matches all available plans perfectly.
The resin mantlets are superbly cast without any air holes, warping or other blemishes and have excellent surface details that include fine surface cast texturing and casting numbers on the Saukopf Mantlet as well as cleanly opened out co-axial MG port and the Welded Boxed mantlet represents the initial design without the co-axial MG port with well defined mantlet bolts and weld seams with the fine flush screws included around the gun collar.
The muzzle brake is in 4 main parts, the front and rear parts of the muzzle brake with separate inner baffle that comes with the raised detail already included and the rear muzzle brake/barrel collar which also has an additional etched ring between the muzzle brake and collar. No cleanup was required on any of the parts apart from the usual attachment burs on the etched ring but the fit of the collar over the barrel was extremely tight and a bit of force was needed to push this down into place. This was done by using a pair of tweezers to evenly push down the collar but take care here not to slip and damage the soft aluminium barrel.
Muzzle brake assembly
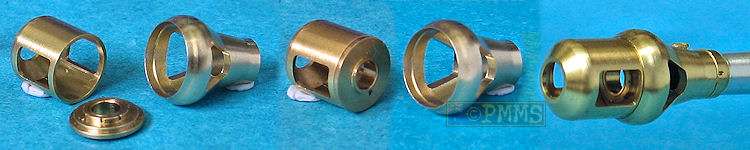
Assembling the muzzle brake is straightforward by adding the inner baffle to the front section of the muzzle brake and then slip the two muzzle brake halves together ensuring the side gas holes line up with each other, The resulting join seam is very small and almost invisible from some angles but running some solder around the join will eliminate this completely for a smooth finish.
The small muzzle brake retaining bolt is a single etched part where you fold the top bolt back over the lower bracket and then attach this to the muzzle brake with a small dab of cyanoacrylate with the assembled muzzle brake fitting perfectly to the barrel tip without any problems.
The assembled barrel/muzzle brakes then fit perfectly onto the recess at the front of the respective mantlets but the fit was a little loose so ensure the alignment is correct as the glue used (cyanoacrylate or epoxy) cures and you are ready to add these to the kit gun mounting.
Added the resin mantlets to the Cyberhobby/Dragon kit requires some minor modification to the kit gun mounting parts (G12, G15) by cutting off the stub at the front of the mounting and while the instructions don't indicate this it's quite obvious when you try fitting the resin mantlets to the kit gun mounting.
The welded box mantlet is based on the kit mantlet and as such fits perfectly to the kit mounting after the above mods but the fit of the cast Saukopf Mantlet is not as good without any precise locating points and it's best to mark with a soft pencil where the top of the mantlet should line up on the gun mounting (see image below) and align the cast mantlet to this and just glue in place while assuring the final alignment is correct.

Set #VBS0121 cast Saukopf Mantlet added to modified Dragon gun mounting from Kit #6454/6320
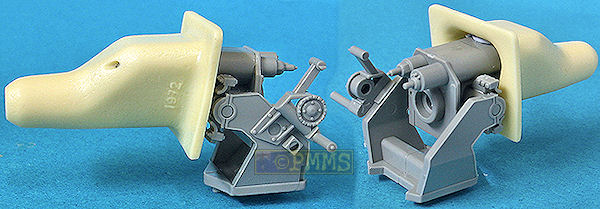
Image of fully assembled barrel and mantlet
Set #VBS0122 Welded Box Mantlet added to modified Dragon gun mounting from Kit #6454/6320
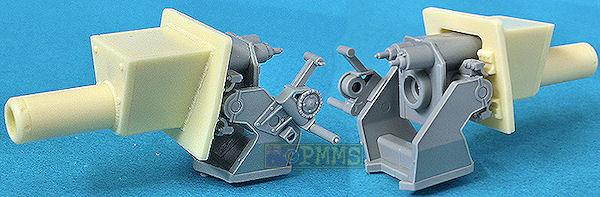
Image of fully assembled barrel and mantlet
The modifications are exactly the same if fitting the barrel/muzzle brakes to the earlier StuG III Ausf.G (kit # 6320) but to fit to the original Dragon StuG III Ausf.G 10.5cm (kit #9058) will require additional modifications to the simplified gun mounting and test fitting will be the best option to determine the best fit if you wished to uses these update sets on that kit.
As a bonus you get the single brass 105mm round and charge casing in each set with the casing having a separate etched base plate with fine data engraved, this also has an engraved locating ring for the ca sign making fitting together very easy and you can use these bonus parts any way you wish.
The detail included on the resin mantlets is superb and the Welded Boxed mantlet saves a bit on kit assembly with the cast Saukopf Mantlet offering a nice alternative as this is not included in the kit.
After assembly the metal muzzle brake offers a marked improvement in detail and appearance over the plastic kit parts for a very viable update.
Very highly recommended
| Achtung Panzer Vol.5 - Stug III, Stug IV ISBN: 4499226546  |
"Stug III" Monograph Acción Press/EuroModelismo ISBN 84-95464-40-3  |
Sturmgeschutz III Osprey New Vanguard 19 ISBN 1 85532 537 3  |
| Sturmgeschütz III Ausf.G Walk Around Squadron Signal 5702  |
Sturmgeschütz III in action Squadron Signal 2014 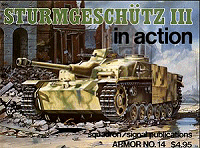 |
Allied & Axis
No.10 Sturmgeschütz at the Front Ampersand Publishing 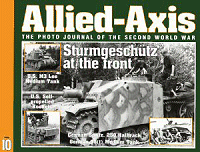 |
| Ground Power Magazine #140 1/2006 GALILEO Publishing Co.,Ltd 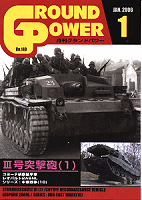 |
Ground Power Magazine #49 6/1998. GALILEO Publishing Co.,Ltd 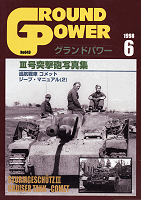 |
Thanks to Voyager Models for the review sets.