
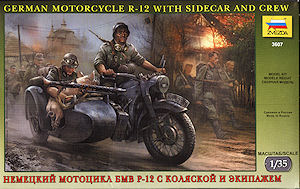
German Motorcycle R12 with Sidecar and Crew
Zvezda 1:35th Scale Kit No. 3607
Review by Terry Ashley
The R12 had a 745cc four stroke two cylinder flat twin engine with a maximum power output of 18hp and was capable of 85km/h on good roads. The R12 was well liked being reliable, fast and easily maintained and was used as a solo cycle or fitted with a sidecar which was not powered like those on the later R75 Military Motorcycle.
The sidecar could be fitted with a mounting for the MG34 and was used by specialist units in this configuration but is most commonly seen in wartime photos without the MG mounting on the sidecar.
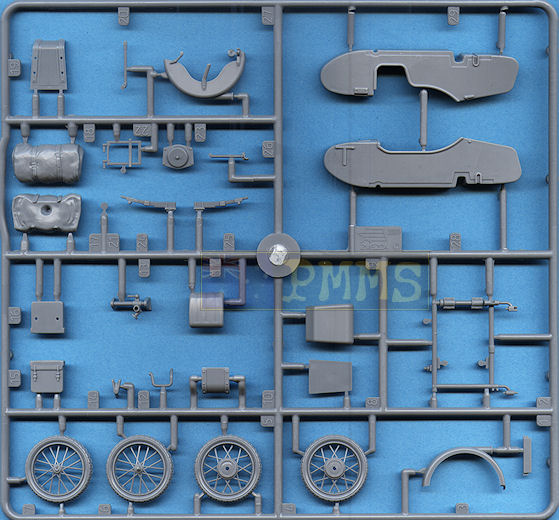
The kit has just 132 parts in light grey plastic as well as a small decal and instruction sheet for a fairly basic kit by today’s multimedia standards.
There are quite a few very small parts that need extreme care removing from the sprues and during assembly but despite this the standard or moulding is excellent without any flash present and just the usual mould seams to be removed from the parts before fitting.
Due to the small size some parts are a little over scale but are about as fine as you could get using conventional moulding techniques, but some smaller details can be improved if replaced with thin wire or sprue. The four wheels (two for the cycle, one for the sidecar and a spare) have normal plastic spokes, but these are about as thin as you will find for conventionally moulded wheel spokes.
Most notable though is the excellent fit of the parts throughout and the only part requiring any trimming to fit during the build was the headlight mounting with everything else just slipping into place. This results in very fine join seams on things like the fenders and sidecar that are very quick and easy to eliminate with light sanding. The only filler needed was on the front of the sidecar and that was due more to me being heavy handed when trimming the sprue attachment.
One thing to watch is the two very small spark plugs moulded onto one half of each cylinder block as I mistook these for sprue burs and cut them off as can be seem in the images, so take care when trimming the finer parts.
The assembled engine is trapped between the main chassis frame along with three small cross members and the lower bike stand and it’s a little tricky to get all these lined up between the frames at the same time.
Added to this sub-assembly is the two part fuel tank, seats, drive shaft, foot rests as well as the two long exhaust pipes. The two small knee pads on the upper edge of the frame has the letters BMW clearly in raised letters but these are about double the size they should be and you may want to replace these with smaller etched letters from available etched sets?
One item missing from the frame assembly is the battery which should be on the left side just in front of the rear mud guard. There is a space left and as the battery is a retangular shape this could be made from card or by salvaging a similar shaped part from the spares box. The battery sits on a small base plate attached to the lower frame.
The round BMW badge is on the side of the frame but not the actual logo due to the now familiar licensing dramas model companies have with greedy manufactures. You’d think they would welcome a bit of free promotion for their product but that’s a whole different story.
Care is needed when cleaning the small mould seam from the rider’s seat mounting springs to not damage the detail and you could improve the look by replacing these with thin coiled wire or even real springs of the appropriate size.
The rear wheel mud guard is in two halves and you should eliminate the join seam before fitting to the bike frame with the luggage rack added at the back for the two side mounting carry cases, these are in two halves with separate mounting brackets.
All that is needed on the assembled engine and frame is the addition of the spare plug wires and other smaller wiring to really finish off the very well represented twin BMW engine.
This is quite time consuming and is best done with a sharp #11 blade with extreme care; this process also helps to reduce the thickness of the spokes a little more for an improved final appearance. The fit of the two wheel halves is very good and results in the correct alignment of the spokes and tread pattern on the assembled wheel.
You must take note of the different numbered wheel halves for each wheel to not mix these up as the hubs are different for each of the four wheels but the final wheels are very good for conventual plastic wheels. Obviously the spokes are not as thin as with wire spokes from Swash Designs or the LionRoar/Great Wall Hobby etched spokes from their BMW R 75 (kit #L3509/10) but are finer than any contemporary plastic motorcycle available.
The handle bars are very finely moulded and care is needed when removing the moulding seams, there are actually two handle bars included in the kit. One ‘normal’ bar for general use and one moulded with the rider’s hands around the handgrips for use if building the kit with the rider figure included. Adding the control cables will enhance the final appearance of the handle bar.
You should note not to glue the mounting pin (part B30) to the forks as this has to be slipped inside the chassis frame as you attach the front forks to allow the forks to be steerable after assembly. The fit of the pin is very snug to the two forks making for a solid fit and as mentioned it’s best to leave this last to avoid damage.
The sidecar gondola is in two halves with separate rear panels along with moulded on inner duckboards and two part seats plus the forward MG mounting posts. The brackets for the post are moulded with the sidecar halves so if you wish to not fit the MG the brackets will have to be removed and the small notch filled.
Added to the front of the sidecar is the third leather carry case with the mounting bracket included on the sidecar for precise location. There is also the spare wheel mounting and spare wheel added to the back of the sidecar as well as a rolled tarpaulin to add if you wish.
It is also best not to glue the sidecar to the frame until after the frame is attached to the main cycle as this will make assembly easier and will also allow easier access to the engine for painting. The fit of the sidecar to the frame is very good making it easy to fit at any time during assembly.
The MG34 supplied has a separate drum magazine and folded bipod and while the MG is the correct scale length the details are rather ‘chunky’ compared to those in Dragon Gen2 kits for example. The barrel cooling jacket holes are just large indentations and replacing this with any of the available metal MG34 cooling jackets/barrel will improve the appearance considerably.
The only problem being the image included is that of a BMW R 75 and not an R 12 but the idea is very good and there is nothing to say it couldn’t occur with the R 12 instead.
The figures themselves are broken down in conventional manner with the two legs, torso and separate arms, head and steel helmet for two of the figures. The uniform detail is quite well done and will come up okay with painting and there is a good selection of personal equipment such as water bottles, gas mask canister, ammo pouches with a Kar98 rifle for the rider.
The two alternate rider figures sit well on the seat but you may need to trim the right knee a little to clear the side of the sidecar but this will depend on the assembly and test fitting will determine if any is needed. The pig carcass also fits snugly into the sidecar if you choose this option.
For the sidecar passenger/machine gunner figure also fits snugly into the sidecar but unfortunately if you assembly the MG mount as indicated in the instructions the the MG34 sits too far back and will not align with figures hands and shoulder. This can be remidied by reversing the direction of the MG mount (part A14) which results in moving the MG34 further forward to align with the figure better. You may have to trim a small amount off the bottom of the MG34 receiver to fit the mounting correctly and also modify the position of the right arm for a better fit.
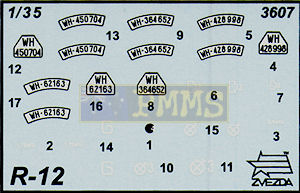
The 4 markings included are;
- 12th Panzer Division 1941
- 2nd Panzer Group 1941
- Eastern Front 1941
- Eastern Front 1941
The standout feature of the kit is the excellent fit of the parts not needing any trimming which makes assembly fairly straightforward but care is needed with the many small parts and sub-assemblies.
To add more value to the kit is the three figures included if you wish to use the model in a diorama as well as the rider and pig ‘passenger’ making for a different scene, the only problem being the fit of the passenger to the MG as mentioned above.
Overall this is a very nice model of the BMW R12 from Zvezda which can be built as a solo cycle or with the sidecar and should please German modellers as well those interested in motor cycle models in general.
Highly recommended.
Sprue Images
Click on thumbnails for larger view


Detail images
Close new window to return to review
| Heavy Sidecar Motorcycles of the Wehrmacht 1935-1945 Schiffer Publications ISBN: 0764312723  |
Motocykle Wehrmachtu Tank Power Vol.LXVIII Wydawnictwo Militaria No.300 ISBN: 9788372193001  |
| German Military Motorcycles in the Reichswehr and Wehrmacht 1934-1945 Schiffer Publications ISBN: 0764301926  |
Motorcycles of the Wehrmacht Horst Hinrichsen Schiffer Publications ISBN: 0887406858  |
Thanks to
