
Faun SLT-56
Tank Transporter
Kit Construction
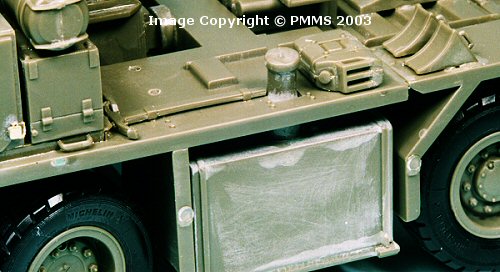
Step 11 to 13: Fuel Tank, Spare Tire and Chassis details
by Terry Ashley
Step 12: Attaching cab:
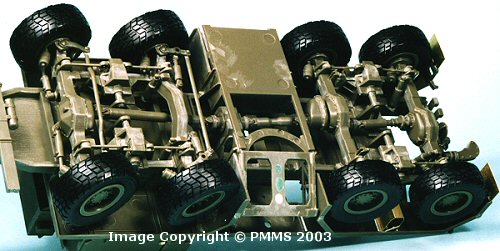
Before attaching the cab there is the lower winch and cross beam to be fitted
to the lower chassis, this was straightforward but I did have to enlarge
the locating holes for the winch slightly to fit. After slipping the cab
in place there is the steering mechanism to fit to the left side of the
chassis, no problems here.
Step 13: Attaching wheels:
This is the assembling of the wheel hubs and attaching the final small parts
to the rear chassis, no problems were encountered here with again just the
normal cleanup of the parts required before assembly.
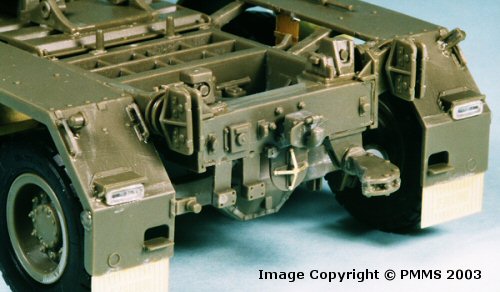
The eight main wheels are assembled with a locating disc (part C56) trapped between the inner and outer wheel rims, be sure not to get glue on these during assembly. The wheels clip onto the ends of the metal axles (for the rear) quite firmly without the need for glue but a small dab of glue will be needed when fitting the front wheels to the axle stubs, take care not to use too much glue if you want them to rotate otherwise glue them firmly in place. It could also be an idea to leave the tyres off until after final assembly and painting for ease of handling. The vinyl tyres are easy to fit to the rims at any time so leaving them separate shouldn’t be a problem?
Tractor Assembly: Steps 1 to 24.
Step 1 to 5: Cab Assembly.
Step 6 to 10: Chassis and Suspension.
Step 11 to 13: Fuel Tank, Spare Tire and Chassis details.
Step 14 to 19: Rear Tractor Assembly (1).
Step 20 to 22: Rear Tractor Assembly (2).
Step 23 to 24: Adding hoses and piping.
Trailer Assembly: Steps 1 to 14.
Step 1 to 5: Deck underside and Suspension.
Step 6 to 7: Gooseneck Assembly.
Step 8 to 10: Final Deck Assembly.
Step 11 to 13: Ramp Assembly.
Step 14: Attaching Trailer to Tractor.
Return to the first look review of the kit.
Page updated 14 September 2003