
Faun SLT-56
Tank Transporter
Kit Construction
by Terry Ashley
The two large side supports (parts F2 and F20) don’t have any pin marks
in the recesses between the ribs which is good but the mould pop out points
are on the extremities of the raised ribbing leaving small indentations along
the outside edges.
Using a fine flat file you can quickly smooth out the edges of the supports
and then attach the upper and lower centre panels (parts F18, F19, F31 and
F37), it should be noted that the join lines between these parts and the side
supports have to be eliminated completely (as these aren’t present on
the real thing). Thankfully the fit of these parts is good, just make sure
you align the joins evenly and eliminating the seams doesn’t pose any
problems.
The instructions show there should be five drive shaft universal joints (parts C62) but only four parts 62 are supplied in the kit. Although I did find part D3 lurking unannounced, which is another U/J but slightly larger than parts C62, this fifth U/J can be used on the rear of the main central transfer case leaving the other parts C62 for the diffs.
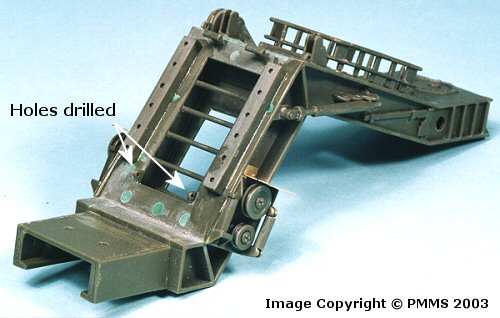
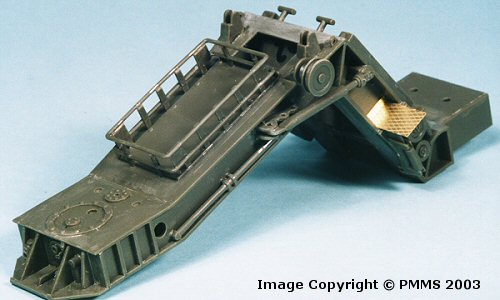
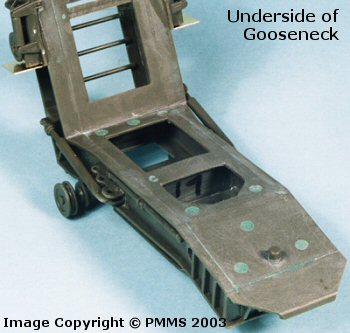
The fit of all the accessories on the gooseneck was good and only required the normal cleanup of the parts before assembly, the two etched side steps also fit well after bending to shape, the only additions on this step was to drill out the two lifting eyes on the sides of the top panel (part F18). I left the gooseneck separate from the trailer until the trailer was completely assembled for ease of handling, but this is up to when you attach these parts.
Tractor Assembly: Steps 1 to 24.
Step 1 to 5: Cab Assembly.
Step 6 to 10: Chassis and Suspension.
Step 11 to 13: Fuel Tank, Spare Tire and Chassis details.
Step 14 to 19: Rear Tractor Assembly (1).
Step 20 to 22: Rear Tractor Assembly (2).
Step 23 to 24: Adding hoses and piping.
Trailer Assembly: Steps 1 to 14.
Step 1 to 5: Deck underside and Suspension.
Step 6 to 7: Gooseneck Assembly.
Step 8 to 10: Final Deck Assembly.
Step 11 to 13: Ramp Assembly.
Step 14: Attaching Trailer to Tractor.
Return to the first look review of the kit.
Page created 14 September 2003