
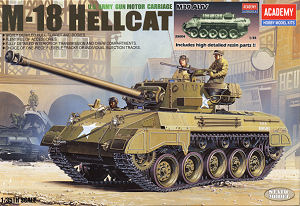
M39 AUV
Academy Europe 1:35th Scale
Kit No.35004
Review by Terry Ashley
It was designed as an artillery tractor and reconnaissance vehicle and served in NW Europe in the closing months of WWII and also in Korea as well as by a number of foreign users.
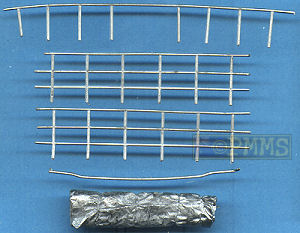
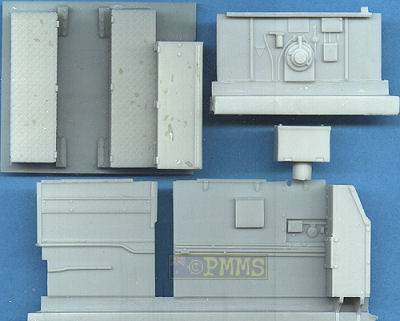
This new M39 kit from Academy Europe is based on the Academy M18 kit #1375 and you get the full M18 kit including turret which is obviously not used for the M39 and can be consigned to the spares box. The completely new upper hull is a one piece resin casting based on the kit hull plus five resin pieces for the new interior and four white metal railing parts for the hull storage baskets. There is also a white metal rolled tarp and a small decal sheet with markings for two M39s.
The moulding quality of the plastic parts is quite good with a minimum of pin marks to contend with and included nice crisp details on most parts while the resin parts are cleanly cast with no air bubbles or other blemishes and just the usual casting blocks to be removed. The full upper hull was slightly bowed in that one corner was higher than the other when viewed dead on but this will pull into line when glued to the lower hull and shouldn’t be a problem.
The Academy M18 kit (#1375) has been around for a few years now and includes interior details of forward transmission/gearbox and will build quite easily into a respectable model and I will give a brief rundown on the M18 kit for those who may not have encountered this over the years along with modifications required to add the new resin parts.
There are a number of dimensional issues with the M18 kit which are not that easy to fix; most notably around the rear hull with the curvature of the upper rear panel being far too sharp, the rear full width intake grills being too shallow, the engine deck contours have the centre raised section too narrow and the two fuel filler caps are spaced too wide apart as well as the forward intake grills too narrow and the engine deck is slightly too long which means the turret ring is a little too far forward resulting in the front crew hatches being slightly over 1mm too short to fit onto the reduced space as the overall hull length is okay.
There are a few issues with the running gear such as the lightening holes on the drive sprockets and idler wheels only being on the outside rims as well as the road wheel hub bolts being undersized.
But at the end of the day there is very little one can do about these issues without a major rebuild so unless you feel inclined then just ignore some or all of them and move on with the kit.
Lower Hull:
This is a conventional tub with bottom, sides, front plate and sponson covers
included with a separate rear panel and includes fittings for motorization
but the final drive housings cover the side openings with screw hole underneath
if you wish to fill this?
The axles are all separate parts with separate shock absorbers on the stations one, two, four and five with all the wheels held in place with poly caps trapped between the inner and out wheel halves. The drive sprockets have a solid inner rim with the outer rim split in two with the inner disc and outer tooth disc that when fitted together include the round lightening holes around the rim. There holes should also be on the inner rim and you can either drill these or just not worry.
The rear idlers are similar with the solid inner rim and two part outer rim to give the oval lightening holes but again these should be on the inner rim and the holes are also slightly undersized so you may want to enlarge these a little for a better appearance. The hub bolts on the wheels are a little undersized and the hub contours not too flat but apart from finding replacement wheels there is little you can do about this.
With the rear panel you are required to cut off the upper hull section leaving just the lower rear panel as the resin upper hull includes the rear hull section, this shouldn’t be too difficult as you simply cut along the line of the upper and lower sections of the rear plate.
The rear hull plate is also at the wrong angle in the M18 kit and the instructions indicate to cut a 2.5mm angled section from the rear of the lower hull tub to correct the angle and care will be needed to cut the same amount and at the same angle on both sides of the hull tub.
On the inside you dispense with the plastic firewall and fighting compartment floor as these are replaced with the resin floor, rear bulkhead and sidewalls but you can still install the front floor section with the gearbox and transmission which is in multiple parts that gives the basic structure but the crew seats don’t fit when the resin parts are fitted in place.
The resin interior parts give you the basics of the floor with storage boxes, the rear bulkhead and the two side panels but there is no central drive shaft cover or crew sets included which you will have to add yourself. The resin parts feature nice tread plate pattern on top of the inner storage boxes and upper superstructure sections.
There is an indentation under the front of the resin interior designed to fit over the transmission if you include this but I had to enlarge this to fit properly and the sides of the resin interior needed minor trimming to fit into the lower hull. The resin interior is designed to fit on the same locating lugs as the kit plastic interior which it did after the minor trimming which makes lining this up quite easy.
There is an excellent article by Steve Zaloga in the Osprey book “Modelling US Army Tank Destroyers of World War II” which is an invaluable reference for building the M39 as it shows the interior of the actual vehicle as well as Steve’s step by step build showing a number of smaller details missing from this conversion.
Upper Hull:
This is one large resin casting and as mentioned is based in the Academy M18
hull and unfortunately inherits all the dimensional errors mentioned above
except for the rounded rear hull contour which is included on the resin hull.
The superstructure is cast in place but as the front crew hatches are still slightly too short (to make use of the kit doors) the superstructure extends slightly too far forward but will probably not be that noticeable on the final model.
There is one issue with the hull casting that may not be in all kits as resin parts can vary from kit to kit but the hull in my kit was not 100% square with the length of one side being about 1.2mm shorter than then the other meaning the rear hull was not perfectly square with the sides. This is only minor but will need careful dry fitting and possible trimming when mating to the lower hull with the modified rear plate but may not be that apparent on the final kit.
The two part crew hatches are used from the M18 kit and have separate periscopes and inner detail without any pin marks to contend with plus separate grab handles plus inside hull latch details but are a little too short as mentioned above.
At the front are the head lights and siren with separate bush guards which are moulded quite thin with just minor mould seams to be removed as well as the two bolted side panels and right side intakes.
The side mounted tools include moulded on brackets but are fitted in different locations than on the M18 with the instructions clearly showing the revised locations and there is the full suite of front and rear fenders which have nice panel details which are usually fitted to the M39.
The large storage racks fitted along the sides and back of the superstructure are provided in fine while metal that is supplied flat and you are required to bend this to the required shape using plan view drawings in the instructions as a guide. Extreme care will be needed her as the thin metal bars tend to break easy and careful study of the instructions and additional references will help get the bends right the first time as you won’t have many chances to re-bend if need be. This is probably the most difficult part of the whole conversion as most other alterations should be well within the capabilities of most that have worked with resin or tackled conversions before.
The M18 kit weapons ring (part H15) is added to the top of the superstructure with a white metal support bar with the kit .50 cal added as required.
The fit of the upper and lower hull will require some test fitting and possible trimming for a good fit and again this may vary between kits so check as you go and make any required alterations.
Tracks:
There are two sets of tracks included, one being full length vinyl joined together
with pins you melt weld with a small hot screwdriver tip and the other a
set of plastic link and length track with quite nice details which are probably
the better option as there is no track sag on the M18/M39 tracks.
Additional sprues have a selection of .30cal and.50cal ammo boxes, some jerry cans, ruck sacs and other equipment as well as left over 76mm rounds and ammo boxes not used here as well as the white metal roller tarp to add to any of the storage racks.
Decals:
A small decal sheet is included with the markings for two M39s although no
unit information is given in the instructions.

Conclusion:
This set gives you the main parts for the conversion to the M39 which definitely
saves on scratch building but there are some additional internal details required
such as the drive shaft cover and seats.
The dimensional errors of the original M18 are carried over to the new resin hull and while a fairly simple conversion in some respects experience working with resin would be an advantage and there is a little work required on the kit hull as described in the instructions.
But with a bit of work a respectable M39 can result and is a nice addition to the Allied ranks in kit form.
Recommended for Allied fans
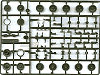
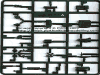
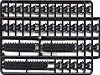
The Sprues:


| STUART A History of the American Light Tank R.P.Hunnicutt. Presidio Books ISBN 0-89141-462-2  |
Toadman's Tank Picture
CDs M18 GMC and M39 AUV Walkaround CD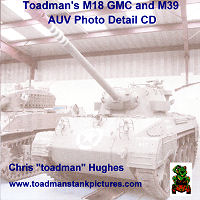 |
Modelling US Army
Tank Destroyers of WWII Osprey Modelling No.13 Steve Zaloga  |
| Allied-Axis The Photo Journal of the Second World War No.4 Ampersand Publishing. The publishers of MMIR  |
US Tank Detroyers in action Squadron Signal Publications No.2036 ISBN 0-89747-385-X  |
US Tank Detroyers Walk Around Squadron Signal Publications #5703 ISBN 0-89747-456-2  |
| M18 GMC Hellcat Museum Ordnance Special Number 17 Darlington Productions, Inc.  |
M18 Hellcat Tank Destroyer 1943-97 New Vanguard No 97 Osprey Publishing  |
US Tank Destroyers of WWII photo CD Enygma Graphics  |
Thanks to ![]() for
the review kit
for
the review kit
Contact Academy Europe: order@academy-europe.de
Availability:
The main question is where to buy the Academy Europe kits as they appear to be
only available in mainland Europe.
The following online shops have the kits listed, but let me stress this is in
no way an endorsement or recommendation as I have had no experience or feedback
on their service levels, they are listed for your information only.
They all have Engish pages available on the sites.
Moduni
Mol
Plastic Modelbouw VOF
Note: I have had a number of e-mails from reliable people who say their dealings
with Mol Plastic has been very good with prompt service.
Page created November 10, 2006