
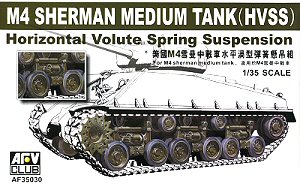
M4 Sherman HVSS Suspension
Kit No. AF 35030
Construction Review
by Terry Ashley
There is the normal cleanup of the sprue attachments points and very small
mould seam lines on the parts and then it’s on to the construction. The
road and idler wheels require some minor work on the rubber tire as there is
a slight concave effect in the centre but this is easily dealt with by shaving
with an X-Acto #11 blade.
The plastic used is quite soft which makes this very easy but you should take
care not to damage the parts due to the soft plastic, the plastic may be soft
but it does not diminish the fine crisp details included on the parts.
The assembled bogies articulate so long as you are sparing with the glue and
are quite impressive as it is accomplished without any detail compromises.
The only thing to note is the shock absorbers don’t compress so the bogies
don’t articulate exactly like the original but should suite most situations
if you want to add animation to your model?
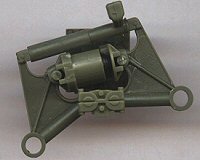
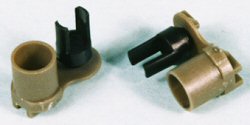
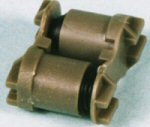
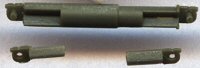
Step 1 sees the vinyl inserts fitted to the two Volute Spring assemblies and then fit together without the need for any glue.
 |
 |
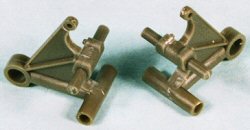
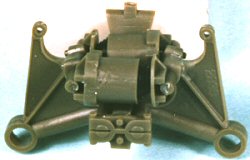
| Attaching the support arms |
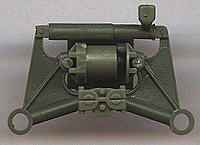
Step 3 is the final assembly; here you slip the two spring supports into the ends of the Volute Spring assemblies again without any glue and then clip the shock absorber pins into the tops of the two arms to hold the whole assembly together, all very easy. Glue the two small retaining parts (S6, S7) to the insides of the shock absorbers to hold them in place permanently.
 |
 |
 |
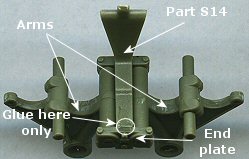
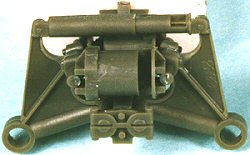
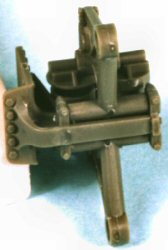
| Slip arms into Volute Springs | Attach shock absorber | secure with attachment lugs |
 |
 |
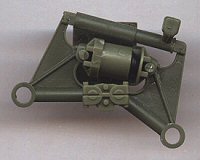
| underside view with hull plate attached | fully assembled bogey assemblies |
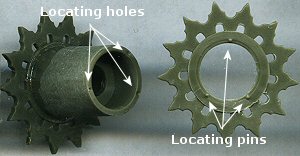
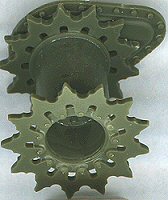
Step 5 is the drive sprocket and again these went together without any problems,
the only thing to watch is the sprocket centre (part S18) has a seam line around
the middle requiring cleanup. The inner dividing ring is deeper on one side
than the other and the deeper side faces out and this is the when you insert
the centre hub (part S19); again the fit was excellent with a very snug fit.
The two teeth sprockets have small notches on the inside spread unevenly which
make it easy to get the sprocket teeth lined up correctly.
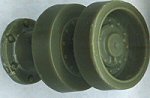
Finally there is the idler wheels and return rollers and apart from shaving the rubber tires slightly to get flat everything else fitted perfectly.
A quick comparison with the HSVV suspension included in the Dragon/Italeri M4A3 HVSS kits shows this set is streets ahead in detail and finesse and all
that is needed to fit these bogies to the Dragon/Italeri M4 hulls is to remove
the moulded on side details and replace with the AFV Club bogies, the final
drive plate will also fit the Dragon/Italeri hull without modification as will
the idler wheels to the kit axles.
The AFV Club bogies will fit to the Dragon M50/M51 hulls without modification
to either.
To fit these bogies to the Tamiya M4A3 hull you will need to remove the moulded on VVSS suspension mounting plates to take the new HSVV units and remove the front drive sprocket axles to fit the new AFV Club parts, nothing to taxing. It should be noted that the idler wheel supports are slightly different on the VVSS Shermans than on the HSVV Shermans and some minor details will need to be added, check the photos in the references listed below to see the differences.
With the Academy M51 hull you will again need to remove the moulded on hull mountings to take the AFV Club bogies but again the difference in detail comparing the two is light years apart and really does show how good this AFV Club set is.
This is a superb suspension set and just as the full kit of the M3A3 which followed the earlier release of that suspension set was top shelf this all looks good for the forthcoming M40 SPG from AFV Club, lets hope they don’t stop there and hit us with an M4A3E8 as well.
Return to First Look review.
References: While there is a lot of books about on the Sherman, these are probably three of the best from a modellers point of view?
Page Created 29 August 2003