
Centurion Mk.5/2, 6
105mm Gun (NATO)
AFV Club 1:35 Kit No. AF 35122
Review by Terry Ashley
This new kit is basically the same as kit #AF35100 with the addition of the armoured side skirts and 105mm gun as all other parts required for this version were already included in the earlier kit. It also still includes all the RAAC parts except for the 20pdr gun barrel and therefore much of the review below will be the same as for kit #AF35100 with additional comments on the alterations for this version.
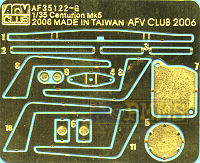
The kits consists of 414 parts in olive drab plastic, 18 in clear plastic with a metal barrel, six large suspension springs, 26 vinyl tyres and the vinyl tracks plus a length of twine for the tow cable and a selection of vinyl poly caps with the decal sheet and small fret of etched parts.

The quality of the mouldings is excellent overall with some very minor flash on some parts which is easily removed and quite a few large knock out nodes on the inside of the larger parts which again are easily removed and don’t effect to detail in any way.
Detail on the parts is excellent with some weld seams present as well as nice cast texture on the turret and final drives plus some very finely moulded parts such as separate grab handles and turret basket rails to finely represented springs on the hatch hinges but as with any kit there are areas for improvement.
The clear parts provided for the Commander’s cupola periscopes and all other periscopes are moulded in a ‘softer’ clear plastic than the usual brittle clear plastic making it much easier to work with while still being nice and clear.
Lower Hull/Suspension:
The large lower hull tub has the distinctive angled sides with nice weld beads
around the final drive mountings and front plate supports with all other detail
as separate parts. The rear hull plate is nicely designed with two upper ‘pins’ that
fit into holes in the hull sides taking any guesswork out of where this part
is located with the final drive housings are two parts with excellent details
on the outer and inner sections that overhang the lower hull that include
the bolt head details and nice cast texture to the surface.
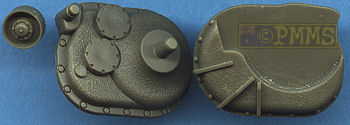
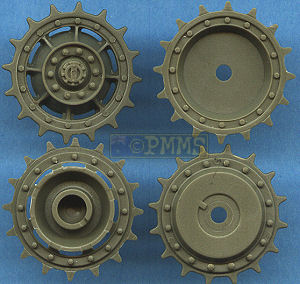
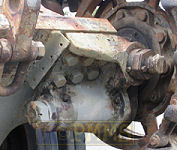
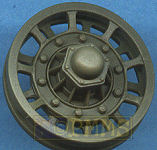
The drive sprockets have excellent details on both sides of the sprockets including the complicated rib and hub details and bolt heads with a small poly cap trapped between the two sprockets for fitting to the final drive axle.
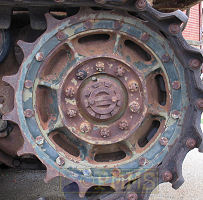
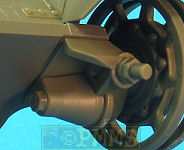
At the front is a separate idler axle mounting and axle which can be fitted at different angles with small ribs inside the axle mounting and you can fit the axles without glue if you wish making it easy to reposition the axles later. The front of the idler mountings are filled in with separate inserts for the large bolts (parts H12,H13,H18 and H19) and these are identified in the instructions with this kit.

There are actually three different style of idler wheel seen on these Centurions
with the kit only having the one ribbed style of wheel and you should check
to see if the vehicle you are building has this style wheel.
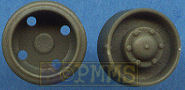
The idler again has a poly cap trapped between the two halves and a separate
hub cap for good detail definition.

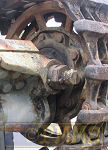
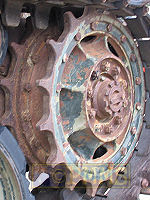
The four duel return rollers have nice hub details with separate mountings plus the additional single roller added just behind the idler wheel to help prevent track loss and this is a simple steel wheel unlike the other rubber rimmed rollers. The single roller fitted to the final drive housing is also an all steel wheel but some vehicles have a rubber rimmed wheel here which again is an alternate style used on the Cent but the kit only included the steel rollers for these positions.


The six big bogie units have movable main axle mountings with a large spring
trapped between the two just like the real bogies with the front and rear
bogies also having additional suspension arms that are sort of workable? The
connecting rod and top arm (parts E8/E9, E20) are designed to be movable by
heat melting the attachment pins but the lower connecting rod attachment point
is glued into place meaning when the suspension in compressed the connecting
rod just bends while the top connections articulate which is a strange set
up.
When the large front and rear halves of the bogies are glued together and the
wheels attached the large springs are completely hidden, but we all know they
are there.
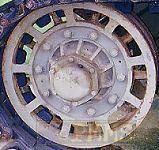
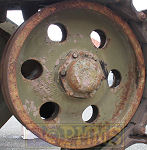
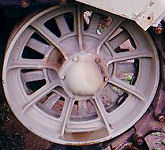
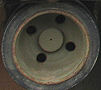
Turning to the road wheels we have a very interesting design with the inner and outer road wheel having excellent bolt head detail and a small weld seam around the outer edge as well as the six lightening holes. These again trap a small poly cap between them and the outer rubber section of the wheels is provided in black vinyl.
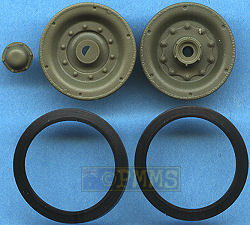
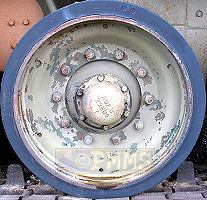
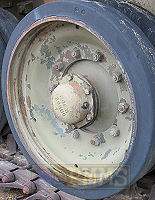
This is not just the rubber wheels section but actually includes the outer wheel rim which when fitted to the plastic inner rim includes the ribbed area inside the outer wheel dish for a very well detailed look. Painting will be a little tricky but the overall effects on the wheel detail in very good as kit road wheels traditionally have missed the detail on the outer dish sections.
One thing I found was that the poly caps trapped inside the road wheels were very difficult to fit over the axle stubs and I ended up drilling out the inside of the poly cap to open up the hole width, not real easy with flexible vinyl but they did fit better after doing this. You may simply resort to gluing the road wheels in place for a more solid assembly.
The assembled bogie units have very precise locating lugs for the hull sides and the large contact area means a very strong join to the hull, just watch the connecting rod on the rear bogie unit as this may foul the final drive housing if the back of the pin heat join is not trimmed sufficiently.
At the back is an elaborate exhaust deflector and upper grill assembly that fits together easily without any problems with these grills visible through the top grill after fitting this in place plus the two side tow shackles and the large central large leaf mounted tow shackle as well as the infantry telephone box.
The large armoured fuel tank from the RAAC version is not used on this kit and can be added to the spares box.
The tracks are provided in continuous length vinyl that has quite good details on both sides for this medium track but will not glue together with normal plastic cement so you have to heat weld it or use thick cyanoacrylate.
The separate individual Centurion tracks set #AF35102 are available but only if purchased separately.
Upper Hull:
The upper hull is not a single part as is usually the case but is broken down
into seven segments with the front glacis and the front sections of the fenders
with additional etched parts for the fender supports. Next is the upper driver’s
panel, the central turret ring panel, the engine hatch grill panel which is
actually two parts with the inner section that fits under the outer slats
and hinges to give excellent definition to the part with the rearmost engine
deck and hinges fitting into this part. Lastly at the back is the full width
intake grill and the fit of all these parts is simply superb without any trimming
of filler needed, if fact the parts in the assembled hull images are simply
tack glued in place with white glue which demonstrates the excellent fit.
Other details on the engine deck included a total of 14 very small grab handles to be added plus the distinctive outer engine deck ribs which are a feature of the Centurion, Chieftain and Challenger engine decks.
At the front , the driver’s two part hatch has separate inner periscopes and outer covers in clear plastic with two small etched parts for added detail as well as the locking latch on the right door with the only clean up being some small pin ejector marks to be removed from the outside strangely.
For the Mk.5/2 version the “normal” glacis is used while the Mk.6 has a separate appliqué panel added, but note this is a different part (F8) from the appliqué panel used on the RAAC version (F23) so make sure you use the right panel.
Added to the glacis are the four headlights made up of two parts each with clear lenses plus the finely moulded guard cage in two parts and you will have to take extreme care when removing these from the sprues and cleaning up the minor mould seams. The racks for the spare track links on the glacis are also extremely fine also requiring care in handling but the resulting assemblies look very much to scale.
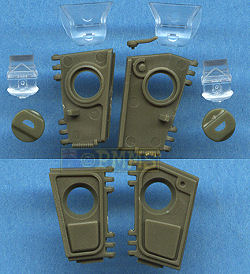
The side fenders are separate parts with detail on the underside as well as rib detail on the top with the forward storage boxes made up of four separate parts each with nicely defined side latches and separate small light with wiring and separate fire extinguisher handle on the front box side for excellent detail definition but there are a coupe of small pin marks to be removed also.
The fenders locate easily into large channels along the hull sides for the solid attachment and the small rear fender sections are the normal size for this version.
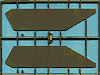
Included for this kit are the full length skirts moulded in one piece per side which are attached to the large brackets on the hull sides and these include engraved panel lines between the three skirt segments.
Each side exhaust is made up of 9 parts each with two part fishtail outlets for nice detail as well as smaller fittings for the tow cables clips with other details added including the front and rear tow shackles, the barrel travel lock and rear mounted telephone box as mentioned previously.
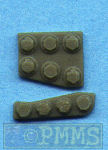
There is also a selection of pioneer tools to be added to the fenders and these have their attachment clips included with small locating holes in the fenders for easy attachment.
This kit includes twine for the tow cable as opposed to the wire cable in the first kit with plastic end sections that is fitted in the usual locations around the rear hull.
Turret:
The turret shell is in four parts, the lower turret ring, the left and right
sides and the roof all of which have a very nice cast effect on the surface
and very crisp details included casting numbers on the left turret wall.
The turret sides are all but the same but there is one extra bolt head on the right side box support and the trunnion bosses have slightly updated detail for very subtle improvements on the original parts.
For this version the “standard” Mk.5 mantlet (part I14) is used but this as with the original kit does not have the canvas mantlet cover so noticeable on Centurions which is shown on the box top illustration and you should be aware this is not included in the kit.
The two turret sides fit together easily with a large joining tab under the bustle (part I29) which helps secure the sides together as well as adding additional detail under the bustle and the inner mantlet (part I13) is held in place between the two turret sides by two small poly caps (parts R4) allowing elevation and you obviously have to position these as you fit the turret halves together.
When the metal barrel is attached the weight of this means you will never get the barrel to sit level as the poly caps are not tight enough to hold the barrel weight which means it will be better to glue the mantlet/barrel in place at the desired elevation.
To fit the lower turret ring you will need to slip the large tab at the rear over the rear lower ring sill and the ring then sits recessed inside the turret halves.
The turret roof is a good fit but there is a very small join seam that will have to be eliminated as there is no join on the actual turret and care will be needed not to damage the nice cast effect here.
The metal barrel is in one piece with fine rifling in the hollowed out muzzle and has the fume extractor in two plastic halves that are fitted around the barrel but these required a small amount to be trimmed from each end of the plastic parts for a better fit. Once attached the two halves of the fume extractor joined together quite tightly leaving only a very small seam to be eliminated.

The distinctive Centurion turret bins are in multiple parts each for good definition but the storage straps on top of the bins are not included and the pistol port on the left side is also a separate part although these is no internal port detail included if you wanted to show this open. Added to the back of the turret is a two part jerry can with separate handle and etched brackets and this replaces the large RAAC storage bin not used on this version.
The Commander’s cupola is entirely in clear plastic with the inner periscopes included with a separate upper race and main sights. The separate hatch has nice details inside and out but with three small pin marks to be removed from the inside and there is a separate grab handle added to the outside
The two part Loader’s hatch also has excellent details inside and out with a few unavoidable pin marks to be removed but the detail on these hatches is probable the best of all the hatches.

The main sight in front of the Commander’s cupola has a clear plastic face as well as a separate Loader’s periscope on the forward part of the turret roof also from clear plastic.
Also included are the smoke grenade clusters on each side of the turret and the these have separate mounting brackets, grenade racks and the smoke grenades themselves with just the fine wiring to be added to finish off the detail.
There are other smaller fittings and aerial mounts added to the turret plus a .30cal machine and pintle mount for the Commander’s cupola as often fitted.
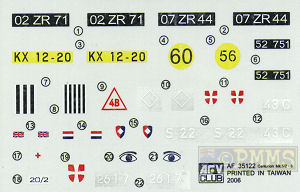
Decals:
The sheet has markings for five Centurions with the markings being nicely
printed with thin carrier film but there are no actual unit information given,
just the Country and some additional references will be needed.

Conclusion:
Overall another excellent effort with good crisp mouldings and some very fine
details with the fit of most parts being very good, only the canvas mantlet
cover will have to be added to finish off but the model will make a nice model
of the widely used version by the British and various European forces.
Highly recommended
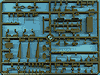
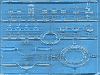
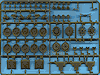
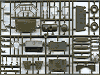
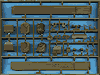
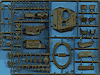
The Sprues:


See the Centurion Subjects page for other Centurion related reviews.
References:
Centurion Ian Allan Ltd. |
 Centurion
Universal Tank 1943-2003 Centurion
Universal Tank 1943-2003 Osprey New Vanguard 68 ISBN 9 781841 763873 |
 The
Centurion Tank The
Centurion Tank by Bill Munro. Published by: The Crowood Press Ltd ISBN 1 86126 701 0 Hardback, 192 pages |
 Centurion
in action Centurion
in action Squadron Signal Publications No.2013 Stephen Tunbridge |
 for
the review kit.
for
the review kit.
Page Created December 4, 2006