
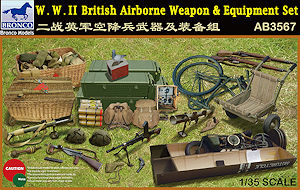
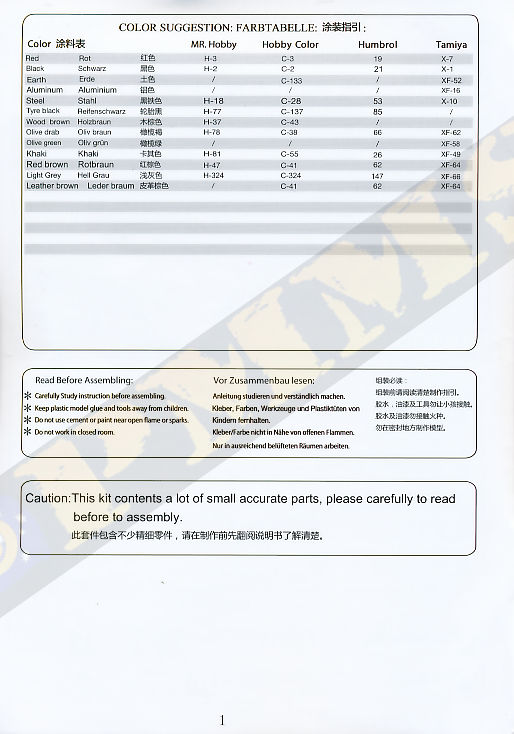
WWII British Airborne Weapon & Equipment Set
Bronco Models 1:35 Scale Kit No. AB3567
Review by Terry Ashley
The kit consists of 22 plastic sprue runners and 1 etched fret with:
270 parts in light grey plastic
41 PE parts
1 decal sheet
1 x 15 page instruction booklet
The list of equipment in the set is:
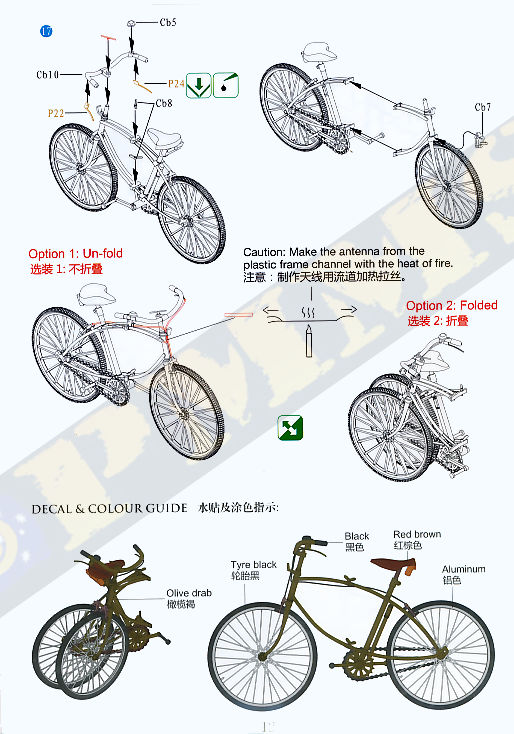
1 x BSA Folding Bicycle
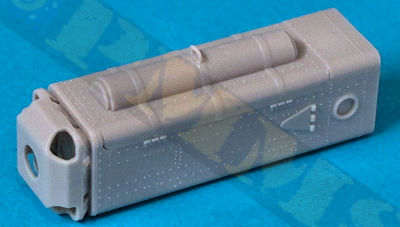
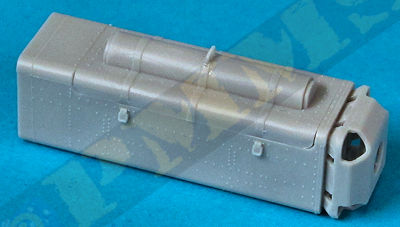
1 x Welbike and container
1 x Collapsible equipment trolly
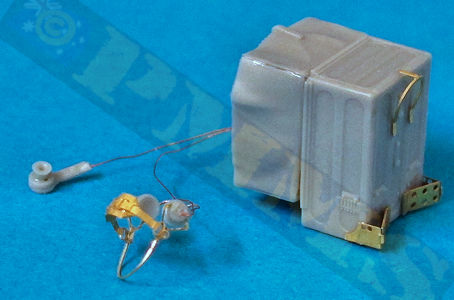
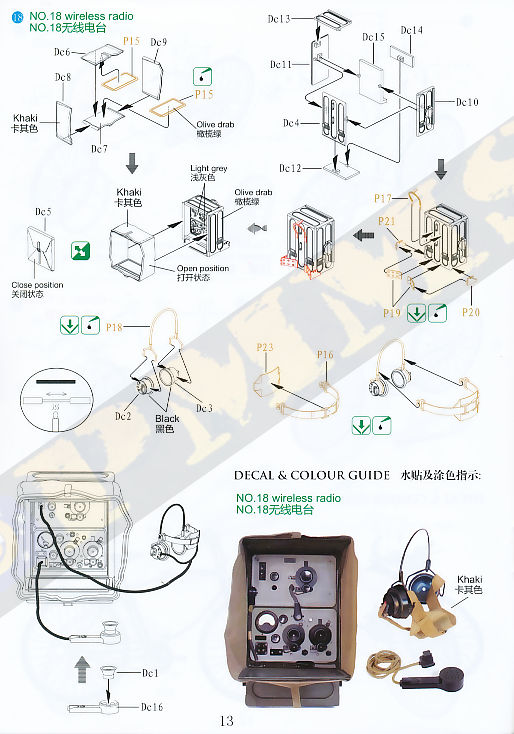
1 x No.18 Radio Set
3 x No.4 Mk. I Lee-Enfield .303 rifles
3 x Bren Light Machine Guns with bipods
3 x Sten Mk.V Sub-machine gun
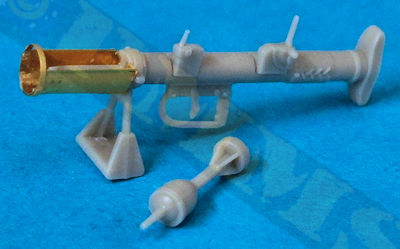
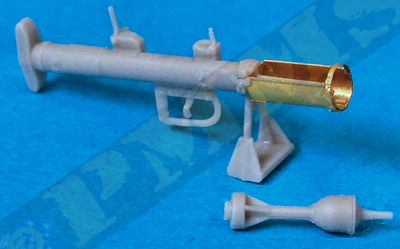
1 x PIAT Anti-Tank weapon and 1 HEAT Projectile.
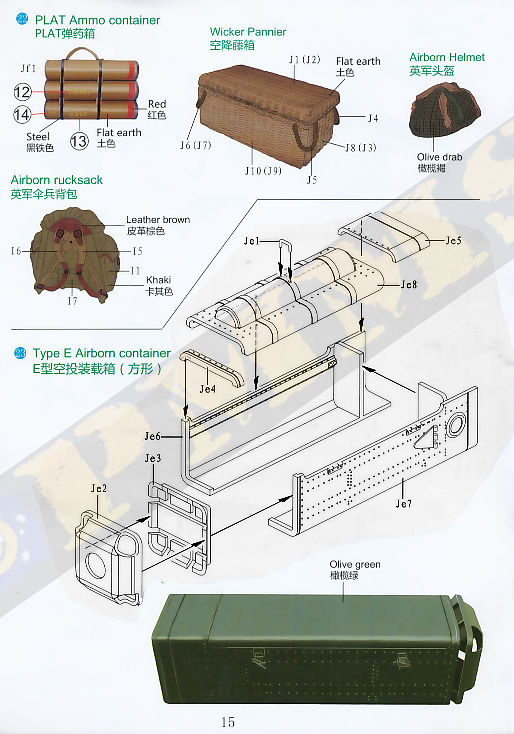
3 x PIAT 3 round ammo containers
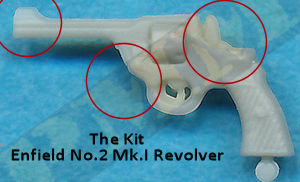
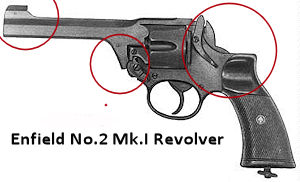
3 x Enfield No.2 Mk.1*
Revolver
3 x Enfield No.2 Mk.1*
Revolver in holster
3 x Enfield No.2 holsters
1 x Pigeon and wood box cage
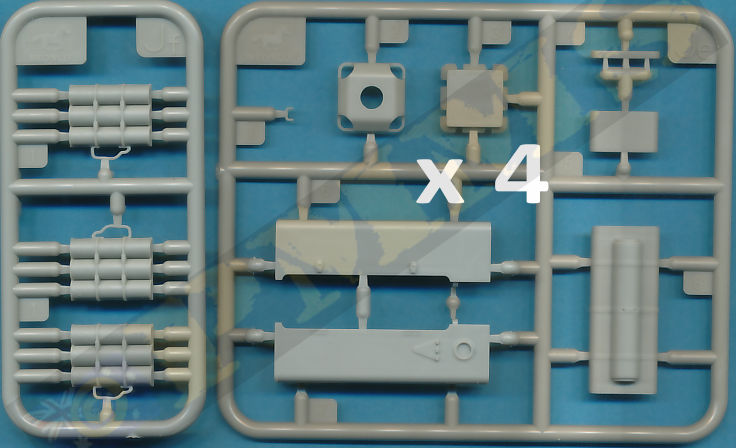
4 x Type F Airborne Container
5 x
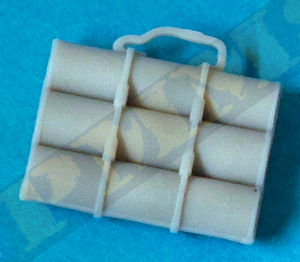
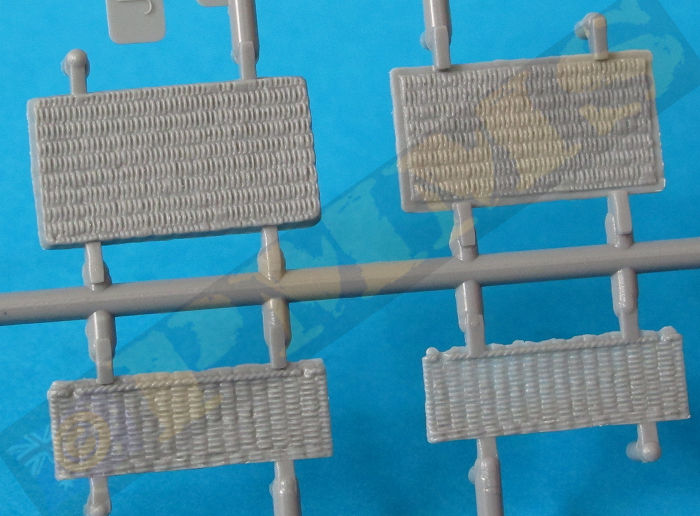
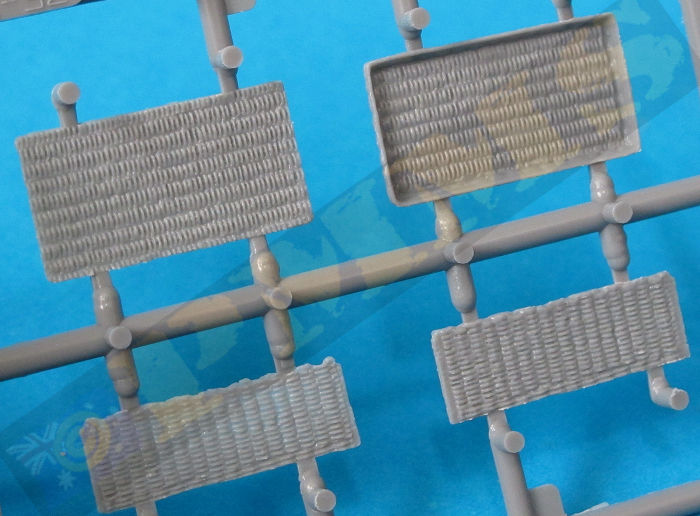
Wicker Panniers
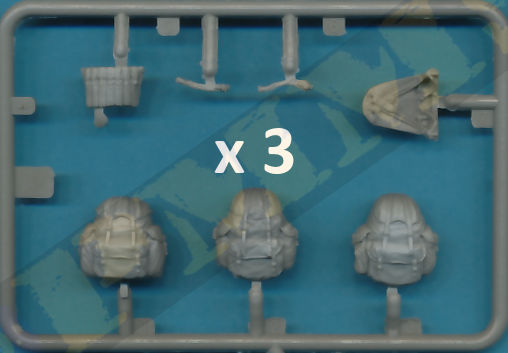
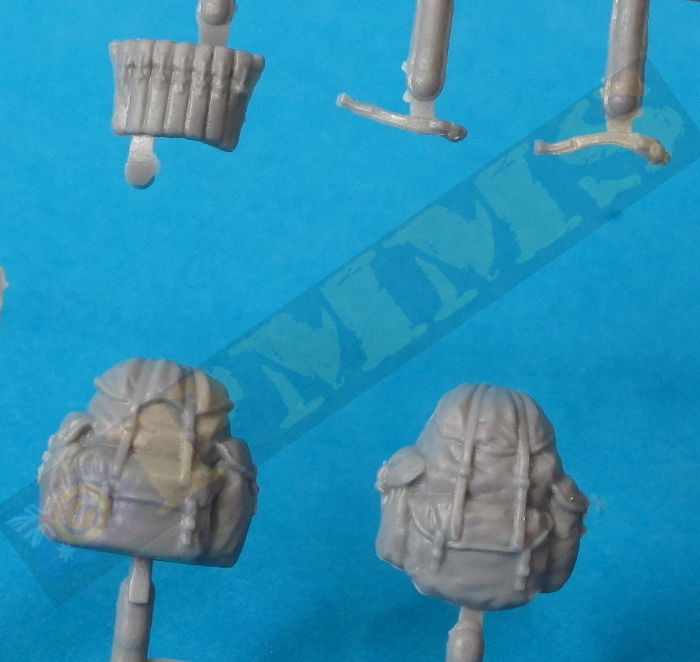
4 x Airborne Helmets
9 x P42 Bergen Rucksacks w/3 frame racks
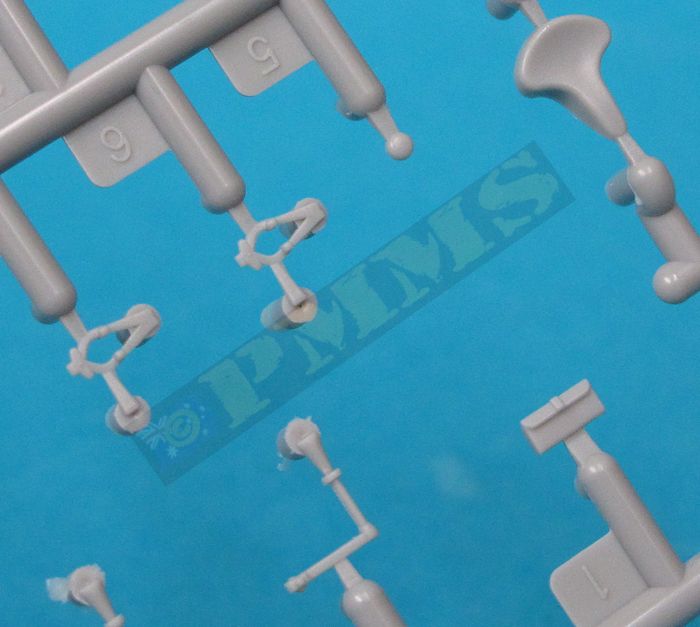
The quality of the moulding is excellent with clean crisp details virtually free of any flash or pin marks and any present is quite minor and easily dealt with. There are the usual mould seam lines to be removed and as some of the parts are extremely small and you will need to take care removing these from the sprues and during assembly.
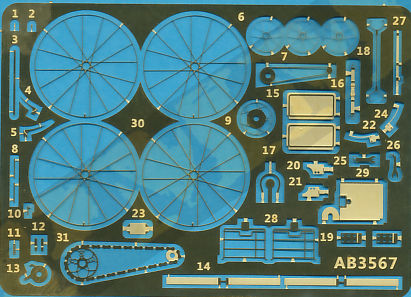
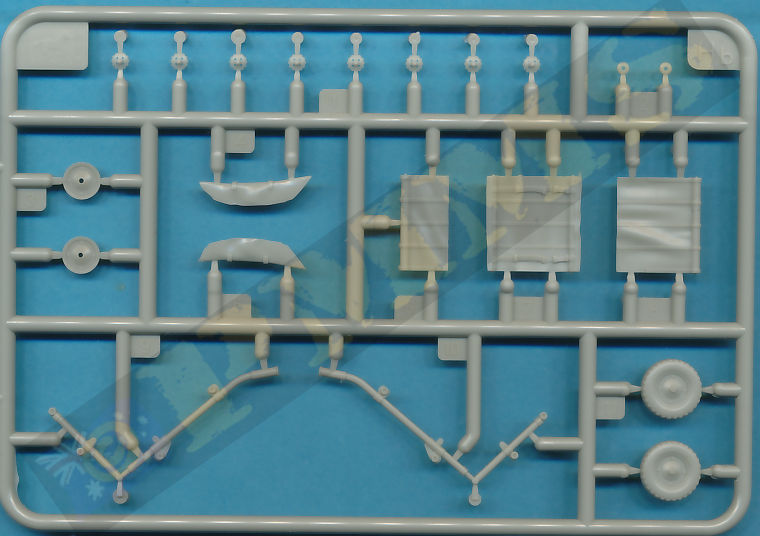
The etched parts are also of high quality with excellent details included on these and the plastic parts most notably those parts with detail included on both sides that are totally free of any pin marks to spoil the appearance, this is best seen on the trolley and wicker panniers that have highly textured detail on both sides of the parts and any pin marks would have been difficult to remove, but thankfully the detail is perfectly rendered.
Details on the weapons is also very well done with etched parts to enhance the PIAT although no slings are provided for the weapons and having these included on the etched fret along with the buckles would have added that bit extra to the kit.
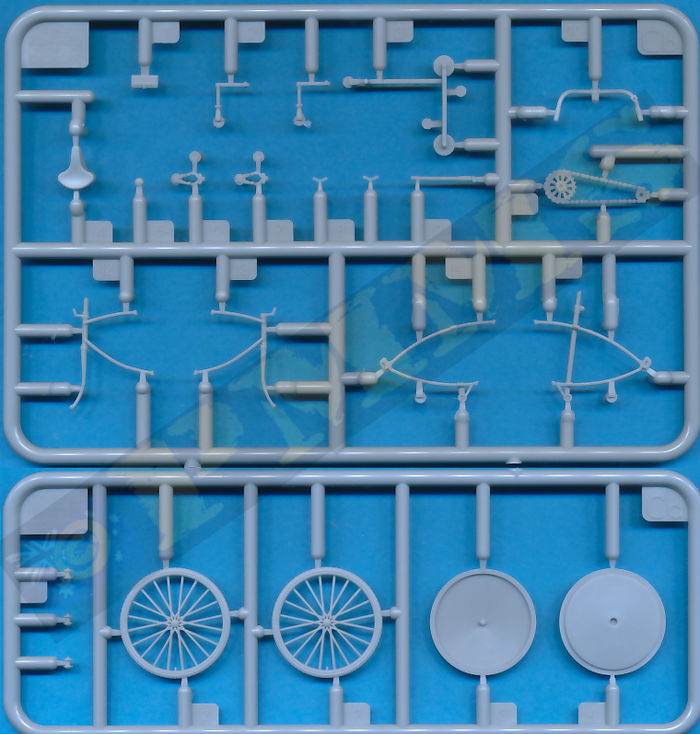
The standard of moulding is excellent with no flash or other blemishes on the parts and just the usual fine moulding seems and small moulding nodes to be removed before assembly. The etched parts are also well done with numerous very fine parts than need care removing from the frets with the bike frames moulded commendably thin for a good scale appearance.
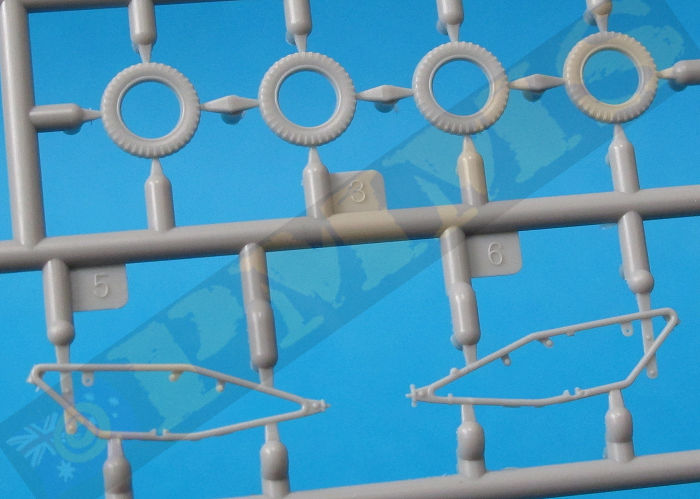
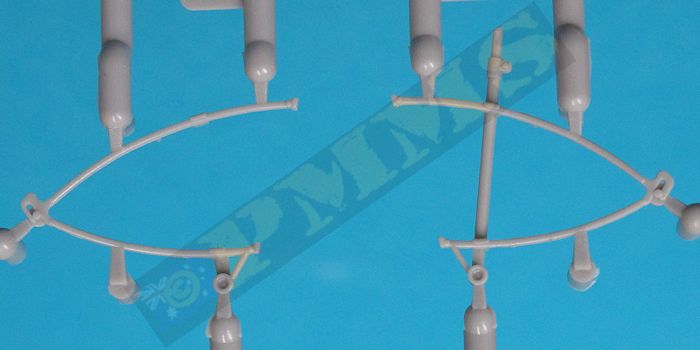
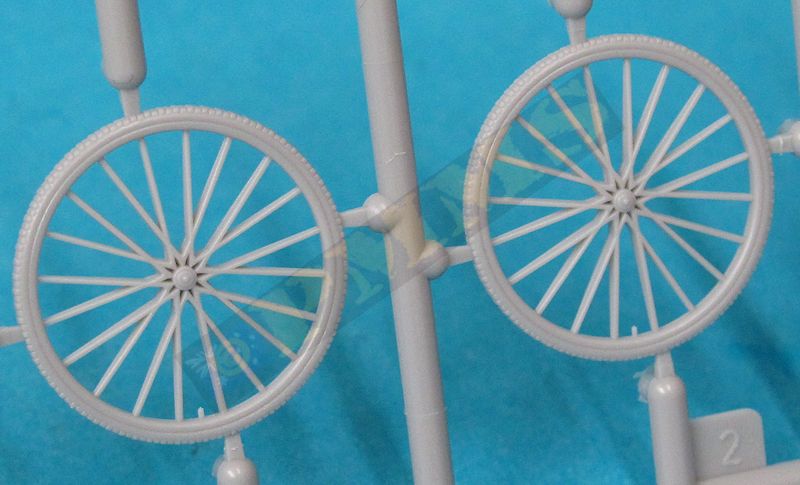
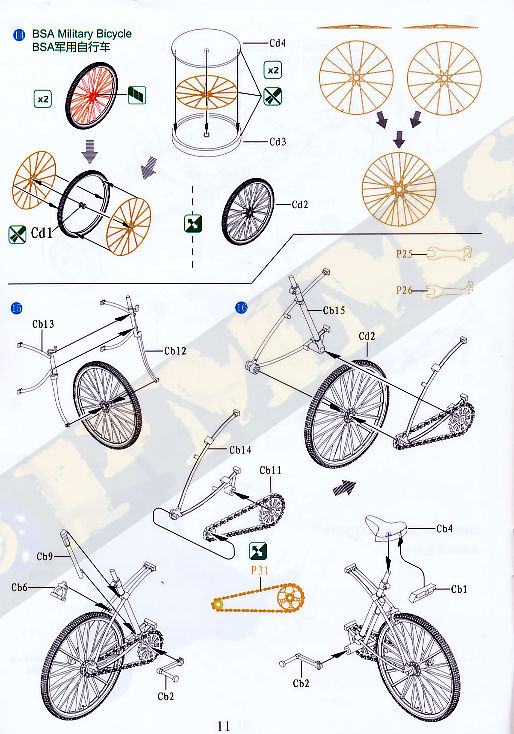
The notable feature of the kit is the wheels which are moulded with plastic spokes but you also get etched spokes to use for greater detail. To use the etched spokes you need to cut away the moulded plastic spokes from the rims and replace with the etched spokes. To aid with the etched spokes is a two part jib to get the correct dome bend for the spokes, you also need to take care when gluing the etched spokes to stagger the spokes on each side for the correct appearance.
The tyre tread is nicely textured but removing the central mould line can also remove some of the texturing so care is needed, this does though give the impression of a slightly worn tyre.
The main assembly in the kit is the wheels if you decide to use the etched spoke option and not the moulded plastic spoke wheels which are woefully over scale and inaccurate, to get the most out of the fine frame mouldings in the kit the spokes are really the only choice. See link to Etched Wheel Spoke Assembly below.
With the wheels assembled the remainder of the kit is quite straightforward although care is needed due to the very fine mouldings for the frame, handlebars and smaller parts.
The rear frame has the lower right frame fed through the chain so the large pedal sprocket in on the outside and the smaller drive sprocket on the inside of the frame and then the left frame is attached trapping the rear wheel in place, just make sure the wheel is parallel to the frame as the glue dries.
Added to the rear frame are the small brake calliper, the hand pump, seat and tool bag plus the pedals which can be set at any angle, if building the bike in the folded position the right side pedal must be facing forward.
The front frame is just as simply with the front wheel trapped between the font forks, the wheel is fixed in the straight forward position and can’t be altered as the kit comes, if you wanted to alter the angle of the front wheel the forks would need to be cut from the frame and repositioned along with the handle bars.
The small front brake calliper is attached along with the separate handle bars that have the two brake levers as fine etched parts, these are just butt glued to the underside of the handlebars so thicker cyanoacrylate is best to give added strength to the join. There is also a separate bell and this very small and round making it quite slippery to handle when removed from the sprue do take care.
The front and rear frame sub-assemblies can be joined together either in the folded position or extended in the riding position, the two are designed to simply glue together so you need to make a choice of final configuration with two small wing nuts added to the central frame join. There were no fit issues at all once the wheels had been assembled.
All that is needed to finish the model is add the brake cables from thin sprue, wire or whatever is preferred but remember the brake lines are not that flexible so only have sweeping bends and using wire makes it difficult to achieve this so stretched sprue may make a better medium for the brake cables.
This is an excellent rendition of the BSA folding bike with the finesse of the frame mouldings and etched spoke wheels being a standout feature. The assembly once the wheels are done is quick and easy with the additional etched chain and sprocket added eve more nice detail to the bike.
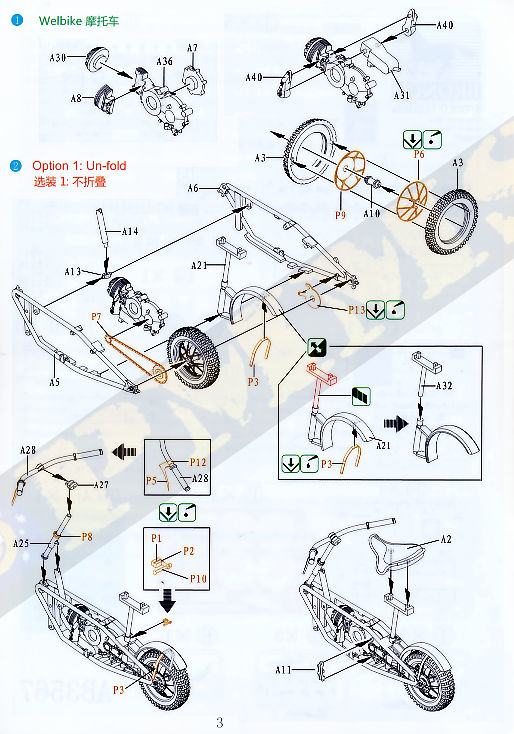
The engine while just 11mm long has 7 parts that fit together easily if a little fiddly due to the small size and this is trapped between the two very fine outer bike frames, the instructions don't actually indicate where the engine fits to the frame but there is a small pin on the bottom of the engine that fits into a small notch on the bottom of the left frame and I found it easier to fit the engine to the frame and allow the glue to dry before proceeding, this makes it easier when fitting the two frames together later.
One the right frame I also fitted the seat mounting/rear wheel guard to the frame and allowed the glue to dry, this again makes one thing less you have to worry about when fitting the two frames together.
Before proceeding the wheels have to be assembled and this is the trickiest part of the whole assembly as the front and rear wheels have very fine etched spokes that are trapped between the wheel halves along with the central axle hub. The etched spokes with my kit are by design or fault simply too fine to be used and will disintegrate before you can do anything, let alone get them off the fret. This may have been an issue with the first kits released as the newer WWII British Paratroops Set B that includes a Welbike have thicker etched spokes that can be assembled quite ok although not without a few assembly issues and I have used those spokes to assembly this bike.
Click on the image links below for a full guide on assembling the Welbike as well as tips for the spoke assembly.
With the wheels assembled we can proceed to fit these and finish off the bike, firstly the rear wheel is attached into the right frame and into the rear guard making sure it is aligned correctly as the glue dries. Next the left frame can be joined to the right frame and this is very straightforward seeing as we glued the engine and etched chain to the left frame earlier as mentioned above. A quick note on the handlebar column support (parts A13/A14), I actually glued A14 into A13 while A13 was still attached to the sprue as A13 is incredibly small and gluing to A14 made it a lot easier to remove from the sprue and also to fit to the frame. When fitting A13 between the frames this fits into two small holes allowing the arm A14 to pivot back and forth and leaving this free to move at this stage will help when mating to the column A25 later.
I fitted the two front wheel forks (A41/A42) to the front wheel as a sub assembly allowing the glue to dry before fitting to the frames as I also did with the handlebar (A27/A28) and column (A25) also leaving to dry completely before fitting to the frames, this made fitting both these sub-assemblies to the front of the frame very simple just making sure they are aligned correctly, you can also position the wheels/handlebars in a turned position if you wish for a little animation on the finished bike.
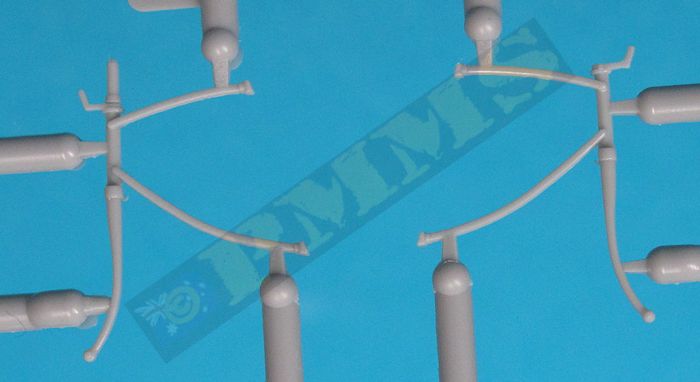
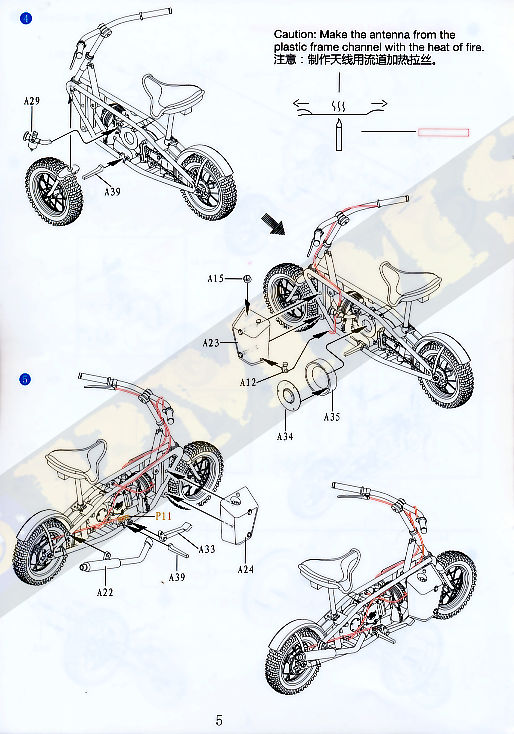
The seat is then attached as are the other smaller items around the bike such as the foot pegs, fuel tanks, carburettor, gear pedal and exhaust pipe noting that some of these are extremely small parts and care is needed removing from the sprues and in fitting. The final thing to add are the control cables for the brake and accelerator and using stretched sprue for these is best as they should have smooth curves and using wire may result in some sharper curves which you don't want. the smaller engine wiring as shown in the instructions on the other hand is best from very thin fuse wire to obtain the bends required which would be difficult with stretched sprue.
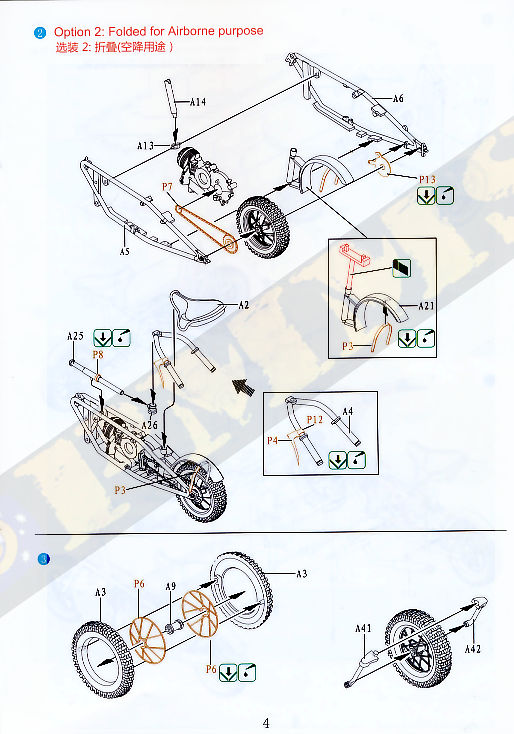
While there is quite a bit of assembly required for such a small bike the result is very pleasing due to the finesse of the many small parts that don't look that over scale on the finished bike, and as mentioned the wheel spokes are the main area of concern where time and care is needed with the assembly. You can also assemble the bike in the folded configuration if you wish with the instructions showing the alternate handlebar parts and other mods to make the stowed bike that be fitted into the drop contained provided if you wish for a diorama setting.
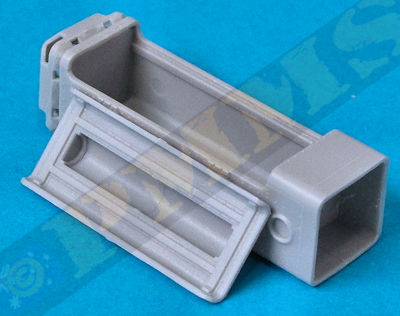
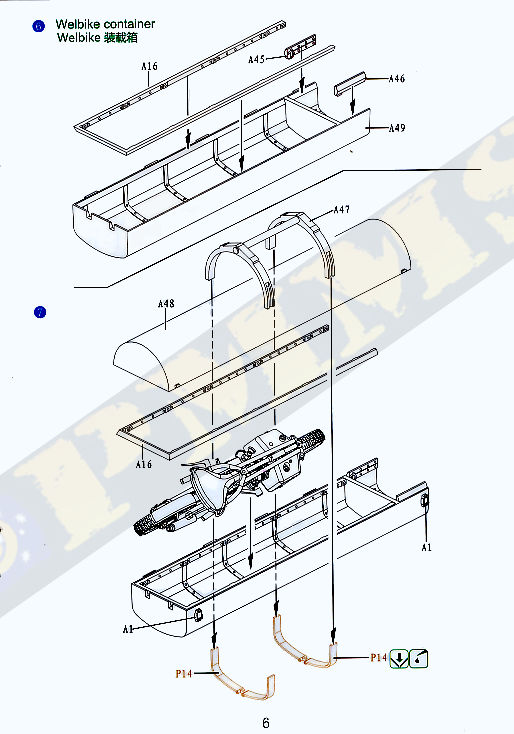
The kit also includes the Welbike CLE drop container and this is very nicely detailed with rib detail on the inside of the lower section and the opening top section as well as interior mountings for the bike. The inner edges of the container halves are supplied as separate parts for excellent detail definition and these all fit without any problems, just note the different parts used if building the container open or closed. If in the closed drop configuration there is the top attachment bracket (part A47) and lower etched straps (P14) and these parts are not fitted if displaying the container in the open position. The small inner brackets used in the open position have two numbered incorrectly and you just swap the part A37 and A38 to the opposite side from that indicated in the instructions, all very simple. At the front is the collapsible crash pad dome in three parts that assemble precisely and fit neatly to the front of the container. The rear parachute bay is empty so if you want to depict the CLE prior to a mission you will need to fabricate a folded parachute to add to the bay.
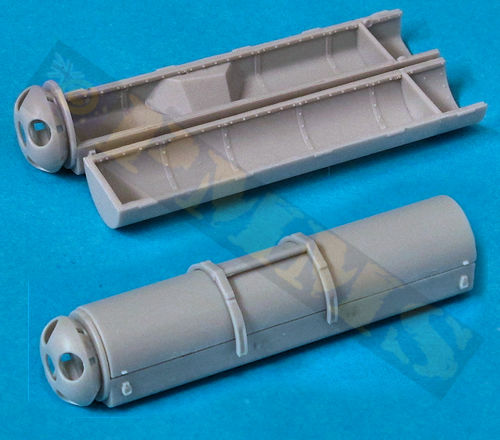
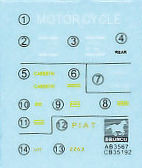
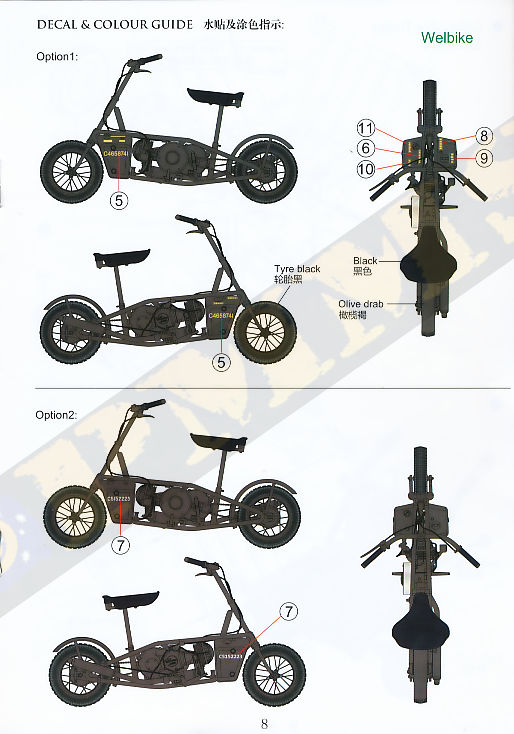
The kit also includes decals for two Welbike marking options as well as the container to add once painted to add to the good appearance of the assemblies.
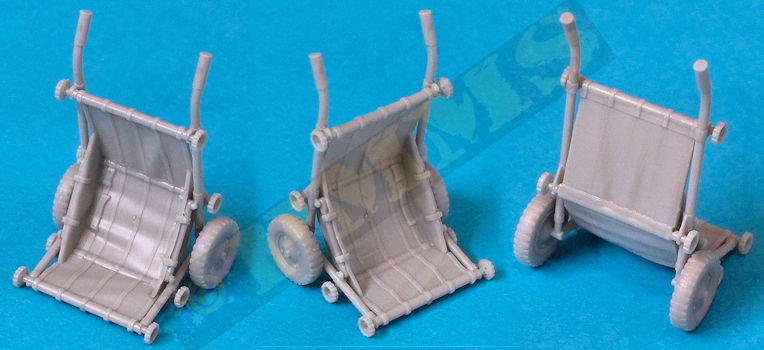
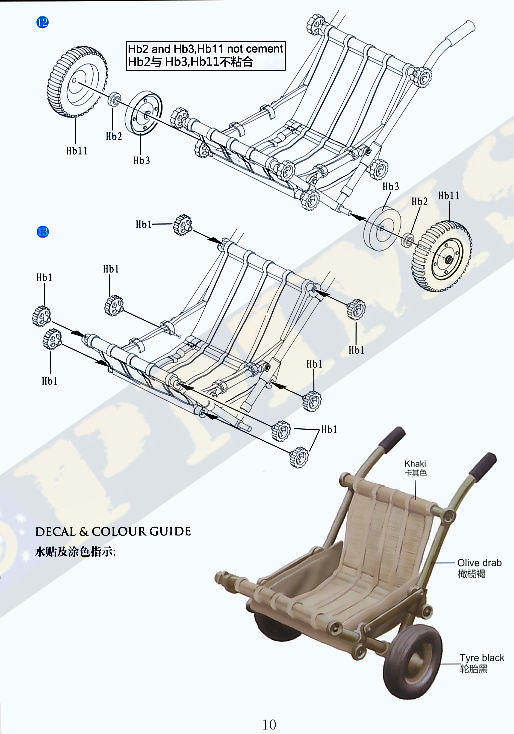
The two large side frames just need the small moulding lines removed and these again fit precisely to the canvas sections, it is advisable to fit the frames while the glue on the canvas parts is still pliable so allow for any small adjustments to fit the frames, there are precise locating pins so there shouldn’t be any problems.
The main wheels are again nicely moulded with excellent detail definition and fit to the frame axle stub without any problems, note the instruction show to fit the small inner attachment rings (Hb2) between the outer wheel and inner hub and then just glue the rings to the axles allowing the wheels the rotate, to do this just slip the inner hub over the axles and fit the rings taking care to just glue the ring only and then attach the outer main wheels. Or you can just glue the wheels directly to the axles which may be easier unless you plan to play with the trolley?
This just leaves the eight small hand tightening wheels to be added, these need care removing from the sprues but again fit neatly into the locating holes on the frames resulting is a nicely detailed and easily assembled addition to the Para equipment.
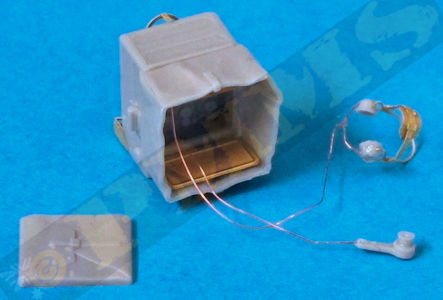
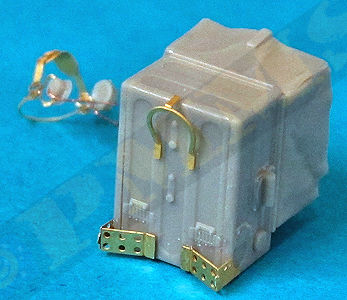
Added to the front is the canvas cover either in the single piece folded up cover if you wish the radio to be shown not in use or the four part extended cover with very nicely done contours in the canvas flaps, the front edges of these flaps could be thinned a little for better scale effect with two etched panels added inside the canvas flaps for when the radio is in operational configuration.
You also get a set of earphones and with the ear phones and very fine etched parts for the head band and these really do take a bit of assembly due to being extremely fine and fiddley to assembly. After carefully cutting the head band (P18) from the fret leaving the attachment burr as small as possible as it quite difficult to file this down after wards, I the drilled two small holes in ear phones to take the ends of the etched attachments otherwise these would just be a butt join which is asking for trouble. With the holes drilled fitting part P18 was then fairly easy although care is need when handling due to the delicate nature of the part. The large two part head support (P16/P23) is easier to handle, just bend to the required shape before gluing together with cyanoacrylate as this will crack if you try to bend after gluing.
I used very thin fuse wire for the wires from the radio to the two part microphone and to the headphones as this is easier than stretched sprue to get the bends in the wires for a natural appearance.

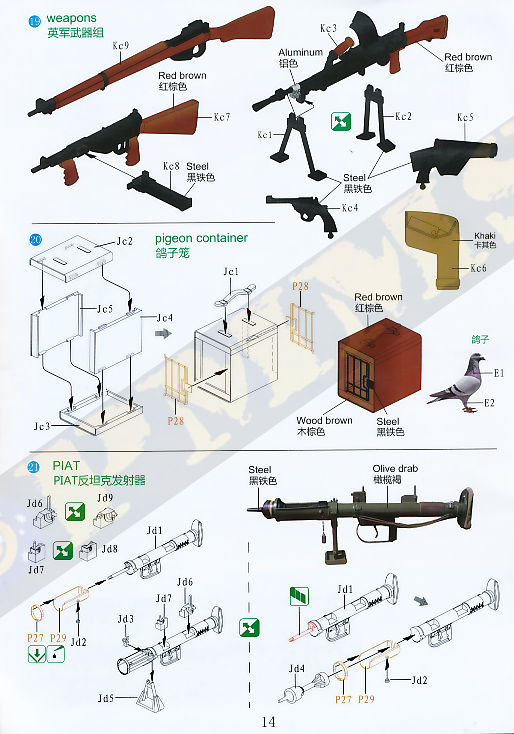
The kit PIAT gives you the launcher tube inclusive of the trigger and guard and rear shoulder stock; there are alternate sights to add to the top of the tube as required. At the front the open trough or ‘tray’ is provided in etched brass and you have to bend this to the appropriate curved profile, the diameter of the curve is determined by the rear section of the trough included with the etched part. Using a drill bit to bend the etched brass you can get this to the right shape without much trouble and attach the rear section, this has a groove that located to the notch on the plastic tube ensuring it is aligned correctly. At the front of the trough is a circular ring again in etched brass and this has to again be bent to shape and glued to the front of the trough.
The rear tube also includes the spigot pin, if you wish to show the projectile in the trough ready for firing the spigot pin will need to be cut off beforehand. The large front bipod is also included which was fixed in position and a separate projectile is included which represents the actual round very nicely. As with the other weapons in the set there is no sling provided and this will need to be made from scratch with the assembled PIAT being a very good representation of the real thing.
Additionally you get three 3 round ammunition containers for the PIAT rounds to use in dioramas or as required.
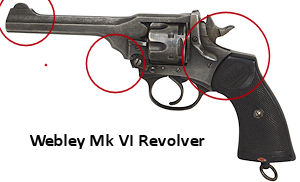
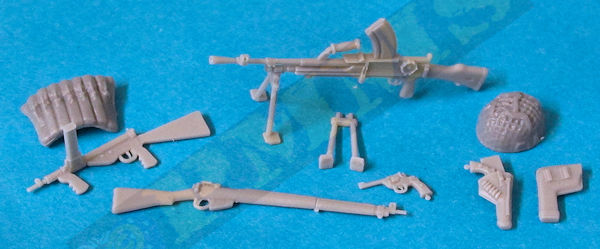
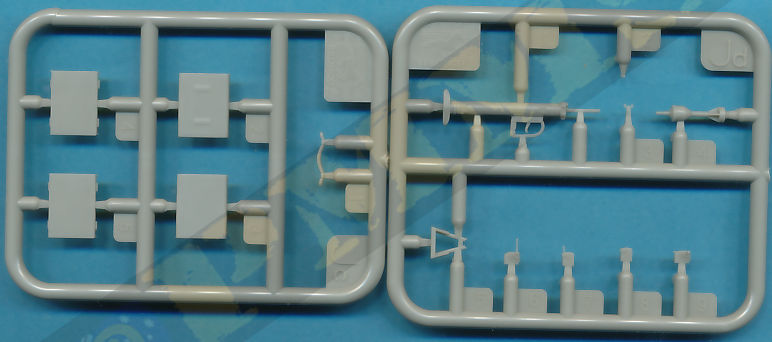
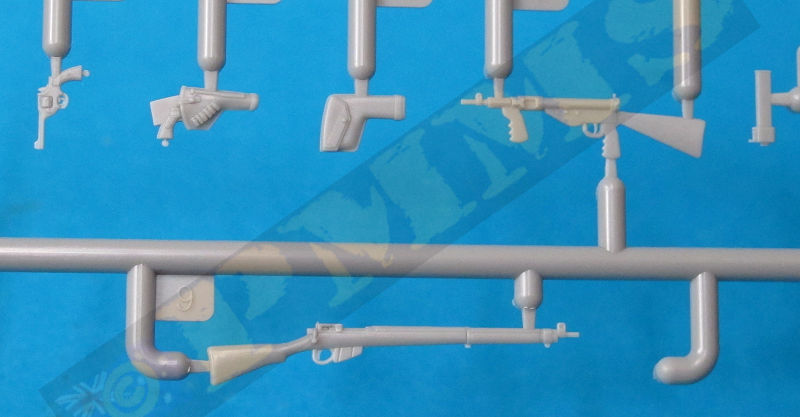
The Enfield in the kit is nicely done and has all the correct features of the Enfield as indicated in the images and the set gives you three revolvers, three revolvers in cut down holster and three in the fully enclosed holster to use as you wish.
Enfield No.2 Mk.I* or 1**Revolver
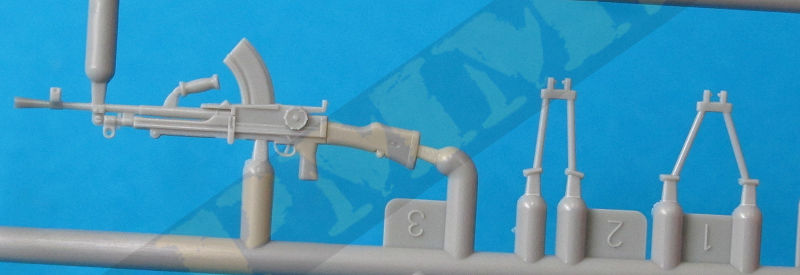
You also get three No.4 Mk. I Lee-Enfield .303 rifles, three Bren Light Machine Guns with bipod (open and closed) and three Sten Mk.V Sub-machine guns, the Mk.V is distinguished by the full wood stock and fore grip as opposed the open metal stock of earlier models. All the weapons have excellent details for the respective weapons with the only things not included are the slings which would have been nice if they were included on the etched fret to include the buckles and attachment clips, but you will have to make these yourself to finish off the weapons.
Also included are three 8 magazine pouches for the Sten and four Para helmets with cam covers, but these don’t include the chin straps so again you will need to make these yourself.
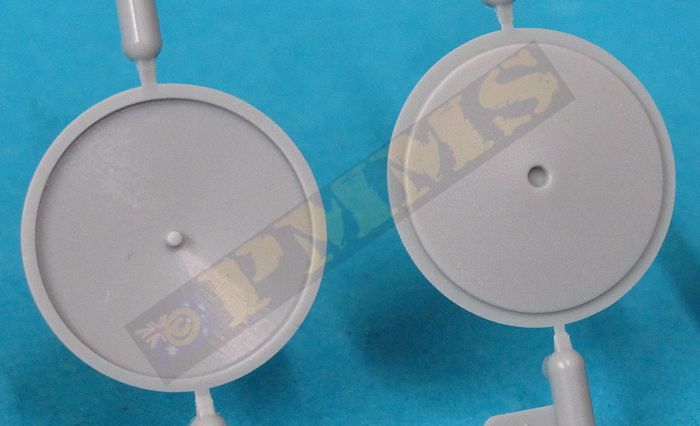
These are in two halves that included nice surface details and with the top lid separate allowing you to assemble the container in the open of closed position, the top has excellent details on the inside should you wish to show this open. At the front is a two part collapsible crash pad, this has a square profile which again is a distinguishing feature of the Type F container.
If using the CLEs in a diorama with parachutes attached note these were different colours so the troops could quickly identify the contents, the colours were:
Red: ammunition
Yellow: medical supplies
Light Blue: food and water
White: general stores
Green: signals equipment
The rear parachute bay is again empty so if you want to depict this prior to a mission you will need to fabricate a folded parachute to add to the bay.
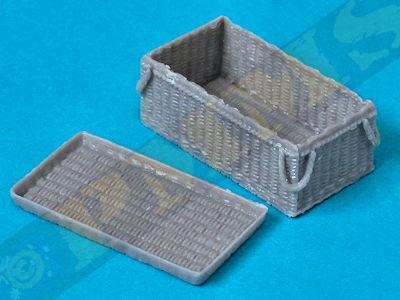
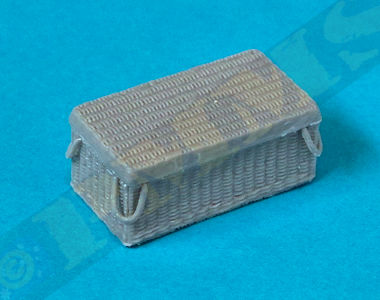
Five Wicker Panniers are included made up of five parts each and a separate top lid with all being moulded commendably thin with excellent weave texture on both sides and no pin marks to mar the appearance. Assembly is straightforward and there are the four corner rope handles to add and the separate top lid can be shown in the closed or open position as required. The panniers had two or four large securing straps running right around the pannier length wise and width wise but again these straps are not included and will need to be made or sourced elsewhere to complete the panniers.
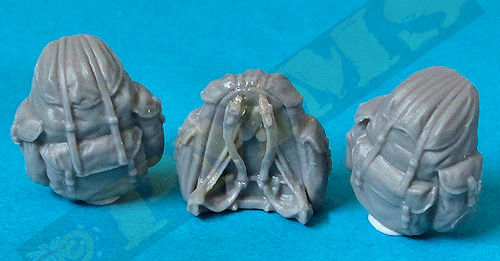
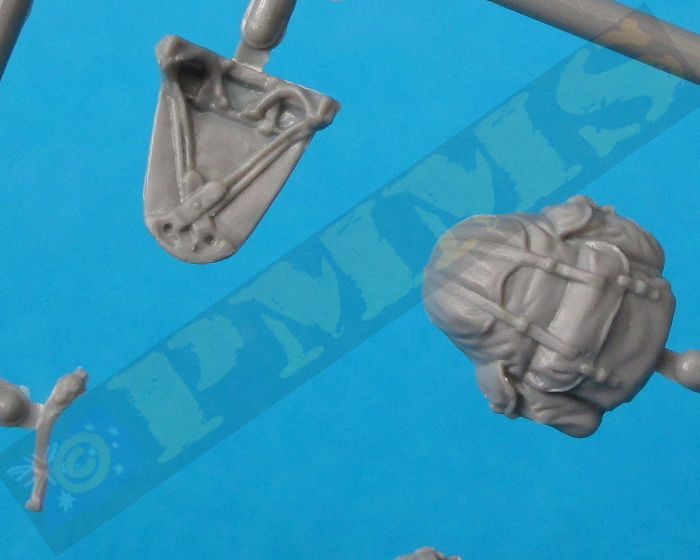
Nine P42 Bergen Rucksacks are included that have excellent details included for the pouches and other details with three of rucksacks also getting the rear section with back mounting frame and separate back traps, the remaining six rucksacks just have open backs so you will need to choose where to display these to best advantage.
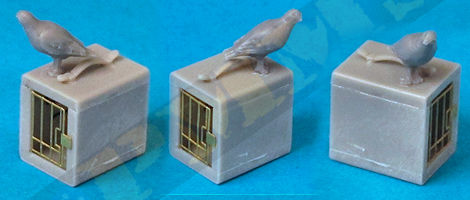
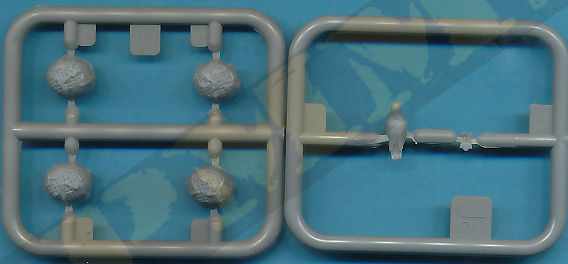
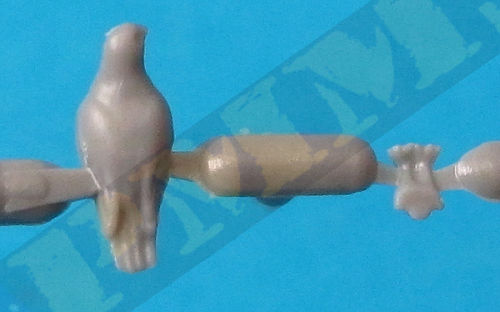
Lastly you get a single carrier pigeon with a wooden carry cage, this has etched doors on both ends for a very good appearance and the pigeon has the full body with separate legs and actually does look like a pigeon and should look excellent with careful painting. Assembly of the cage is straightforward with large locating notches on the inside of the parts making for precise location, note you have to eliminate the bottom panel join between Jc3/Jc4/Jc5 but leave the top join for the opening lid, this also has a separate grab handle for added detail.
Rating: 9/10.
Click on thumbnails for larger view
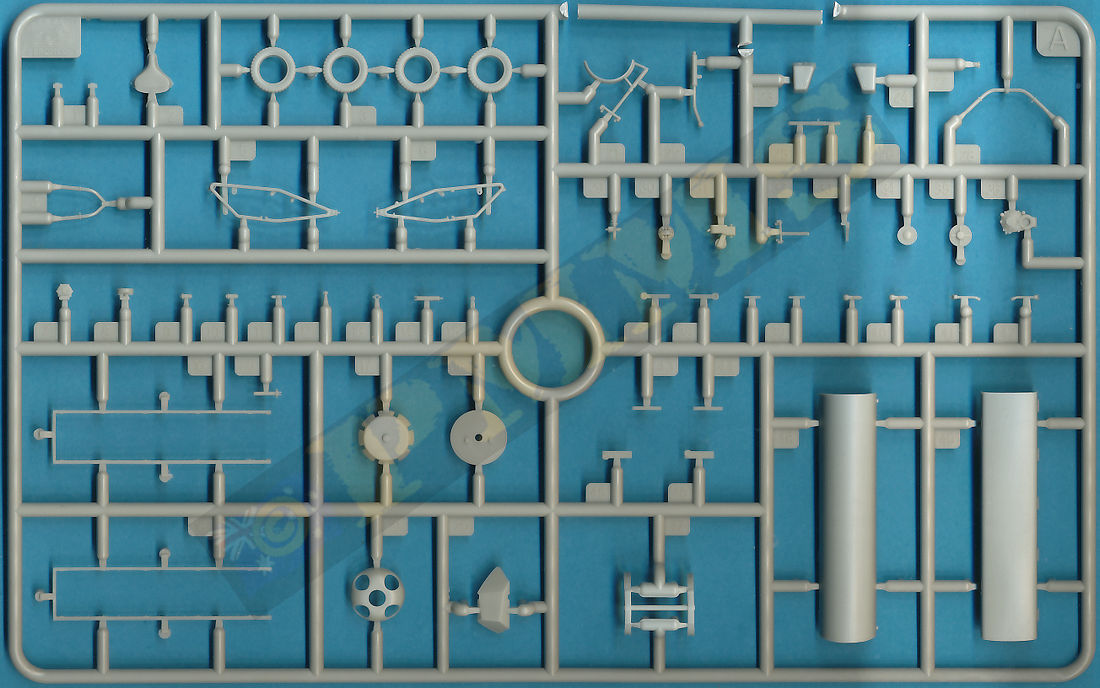


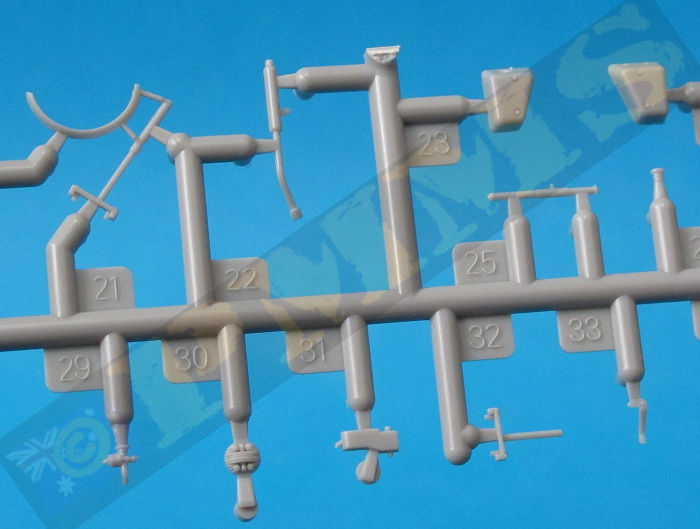
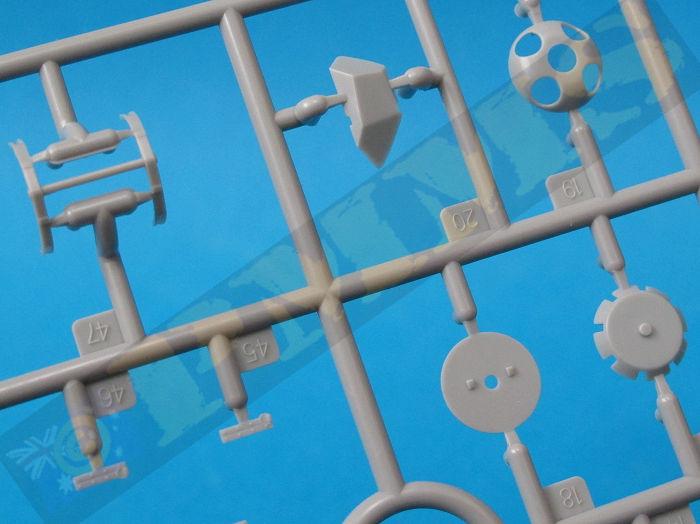
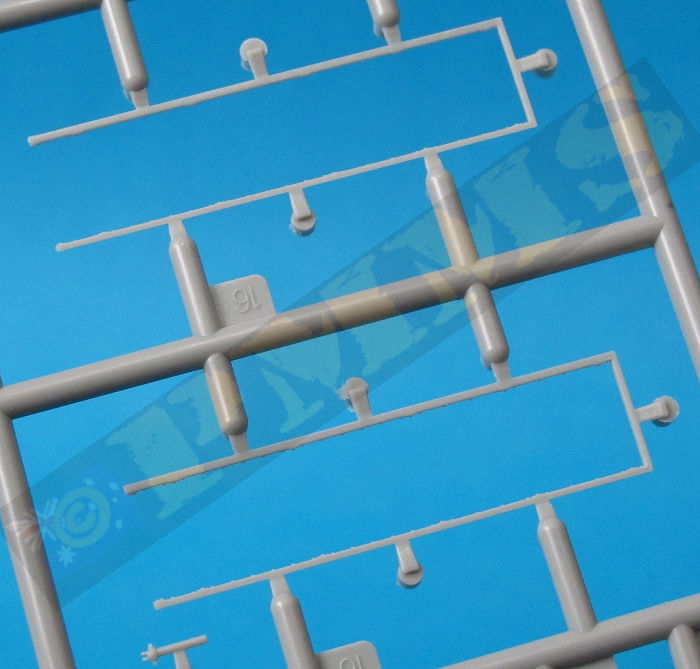
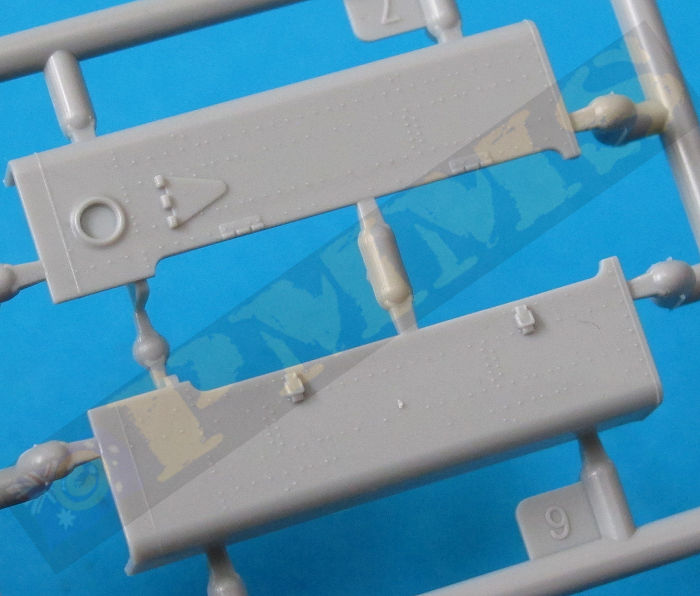
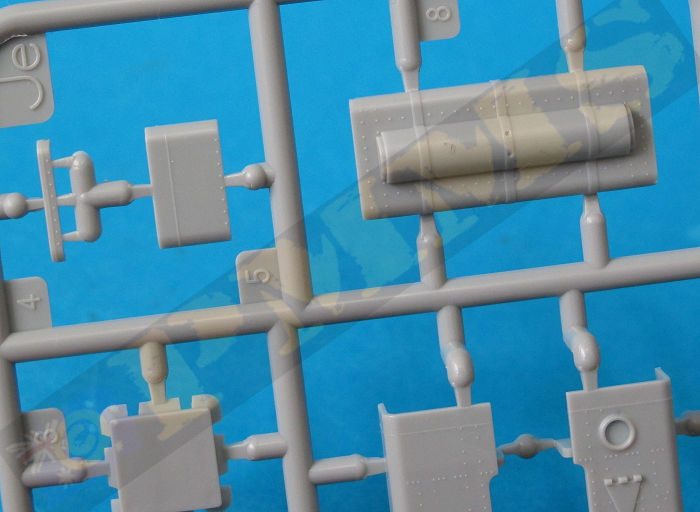
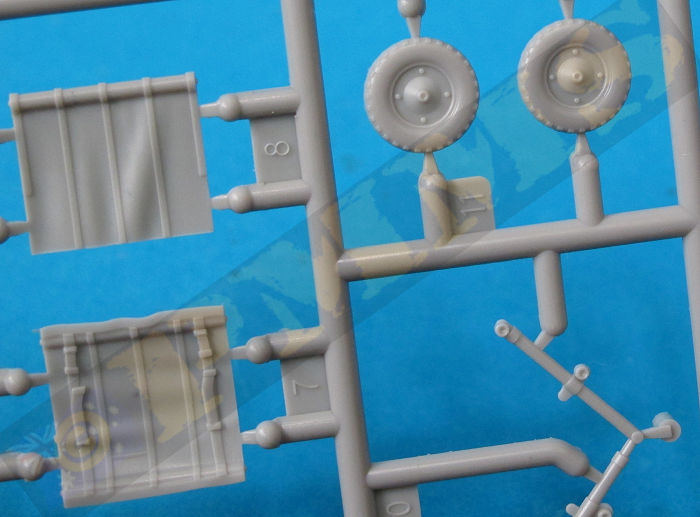
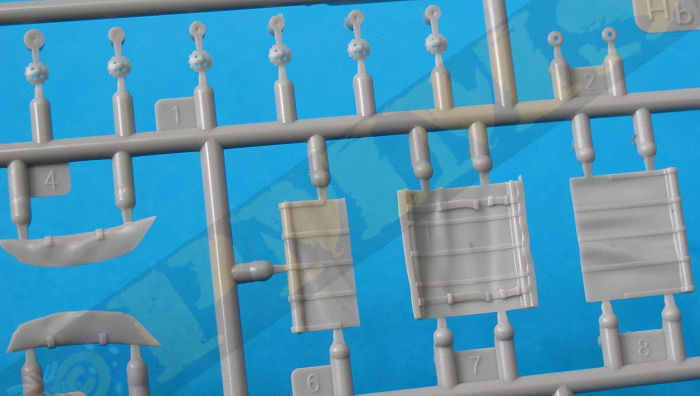
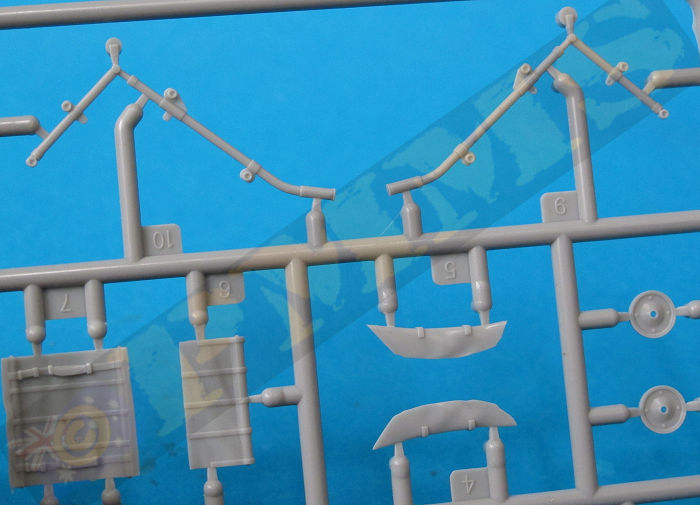
Sprue detail images


Instructions


Thanks to
 for
the review kit.
for
the review kit. Please to help the reviews continue, thank you
