
M26 Pershing
Engine Compartment
1/35 Kit #35017
Review by Terry Ashley


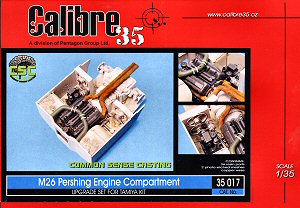
Consisting of 36 crisply cast resin pieces in light cream resin and a small fret of etched metal and a short length of thin wire this set is at the highest level of resin casting today.
The parts are crisp blemish free castings with only the usual casting blocks to be removed, this shouldn't pose any problems but the usual care should be taken so as not to damage any of the smaller and finer parts.
The set comprises the full engine bay cast in one piece and is a superb example
of resin casting with complex angles and undercuts handled expertly to provide
a detailed bay 'tub' to which is added the additional pieces. The tub includes
the lower floor torsion bar detail and side fuel tanks as well as the engine
mountings, the only cleanup required is the removal of the lower casting
blocks and
the
forward bulkhead opening
which is only filled in with a thin resin film very easy to remove.
The engine itself is again a superb piece of intricate
and detailed casting to which is added the exhaust manifolds and other small
fittings. Added to this is the transmission, another excellent blemish free
casting which has additional parts for the final drive connections added as
separate pieces.
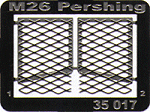
The two side mounted cooling fans have the fan detail on one side and the radiator detail on the other plus the addition of pulleys and belts from thin wire supplied, with the Auxiliary Generator also a separate part for the left side of the bay as are the two etched screens on the rear corners of the engine bay plus the full exhaust pipes leading to the rear of the bay.
The fans are correctly moulded as two separate assemblies located either side of the engine/transmission assembly and not the other way around.
The instructions are in the form of a small double sided sheet with clear exploded view drawings showing the placement of the parts, these seem clear enough with the parts called out by number but as with any instructions careful study before gluing is advisable.
Fitting the engine bay:
One thing the instructions don't show you is what needs to be done to fit
the engine bay into the Tamiya hull.
Firstly you have to discard the "working" suspension and remove the internal
mountings for the springs and screws and the hex bolt moulding in the middle
of the lower hull. Ensure the inside of the hull is smooth, this means
slightly
trimming the end of the internal wheel mounts for the two rearmost wheels.
On the Calibre35 parts you have to completely remove the casting
block on the bottom of the compartment casting (part 3), this is best done
with a larger
razor saw. I also had to slightly thin the two sides panels
of the engine compartment so it would fit better inside the upper Tamiya hull
(Test fit often so you don't remove too much as we are only talking a small
amount here). There are also some moulding marks on the inside of the Tamiya upper
hull sides which can be removed for a
smooth
finish
to help
here
also.
After attaching resin parts 4, 18 & 19 to the main compartment I trimmed
the edges of part 4 so it was flush with the sides of the main compartment.
Once these minor modifications were made the compartment fitted perfectly
inside the Tamiya hull and you can continue to assemble the engine details.

Conclusion:
A superb update set that will really fill out the rear end of your Pershing,
the quality of the castings is simply sensational. Thankfully Tamiya have
moulded the rear engine deck doors as separate parts so you don't have to
do any surgery on the upper hull parts to show of the engine bay details,
just needing to remove the lower hull internal mountings as above.
This is by far the most detailed and correct engine bay for the Pershing as the detail is not compromised by allowing for the intrusion into the rear hull of the attachments for the working suspension. You also get a full engine/transmission and fan casting and not 3/4 castings due to the same compromises. This does mean you have some surgery as mentioned above but the end result is far more accurate.
Highly recommended.
Click on Thumbnails to view the resin bits


Close
new window to return to review
Page Created 21 June 2003