

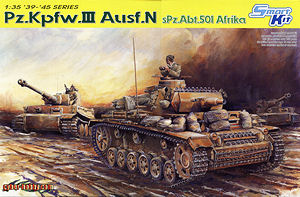
Following on from their recent Panzer III Ausf.J (kit #6394) Dragon, well Cyberhobby have now released this follow on kit of the final Panzer III version, the close support Ausf.N armed with the short 7.5cm L/24 gun left over from upgraded Panzer IVs.
The Ausf.N was built from existing Ausf.J, Ausf.L and Ausf.M hulls which means Ausf.N appears with numerous detail differences depending on their base chassis with most having just the spaced hull armour but there are a few photos available of Ns with spaced turret armour but this is quite rear.
This new Ausf.N kit is actually based on the Ausf.L (not the Ausf.J as you might expect) as Dragon/Cyberhobby have modified the parts such as the lower hull and turret to represent the Ausf.L configuration which means with a bit of cross kitting (the L/60 gun) from kit #6394 you can build yourself a Panzer III Ausf.L.
Also still included in the kit are numerous parts for later versions which will obviously follow this release such as the Ausf.L and Ausf.M and possibly a later Ausf.N based on the Ausf.M which many regard as the “classic” Ausf.N. There are also numerous parts left over from the earlier kits not used here that can be consigned to the spares box.
As with the Panzer III Ausf.J the kit measures up very well with available 1:35 plans as well as the new gun housing also matching data to well within acceptable tolerances and as most of this kit is from the Ausf.J (kit #6394) much of the review below will be from that review with updated comments on the new and amended parts.
Quality of the mouldings is again excellent with a minimum of pin marks and virtually no flash to contend with other then the usual fine moulding seams to be removed. There are of course the many small plastic nodes on the parts that do require care when removing especially on the smaller parts but the cleaner parts resulting are a small price for the extra cleanup.
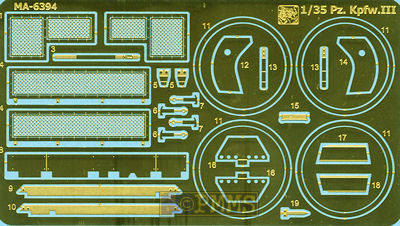
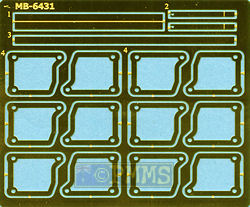
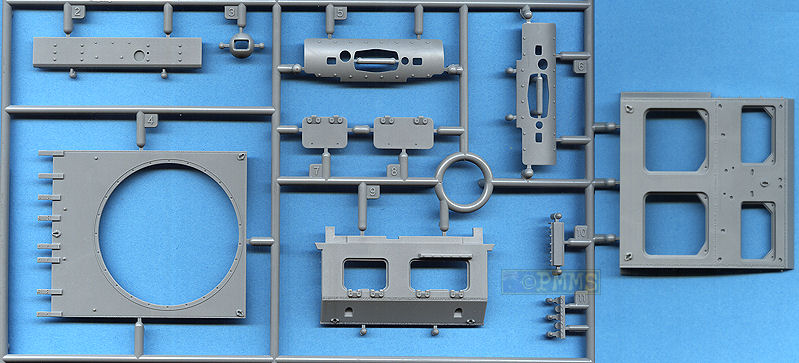
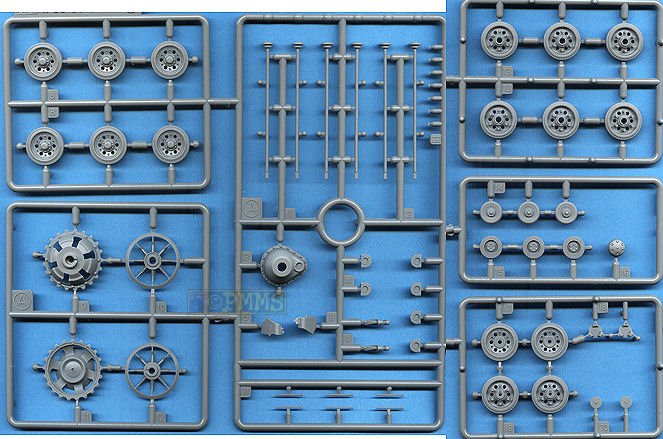
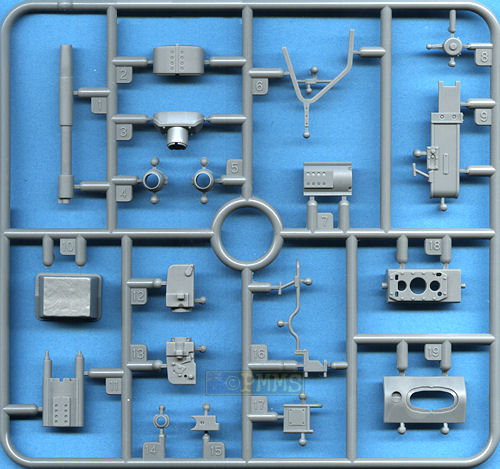
This consists of 581 parts in light grey plastic, 15 clear plastic parts, two etched frets with 44 parts as well as two bags of individual “magic tracks” and has a few of the sprues from the previous StuG III G kit (Sprue A, B, G), some from the Panzer III Ausf.J (A, B, C, D, E, F, M and MA) for the suspension and running gear and the lower hull parts as well as sprue (L) from the earlier Panzer IV for the 7.5cm gun. The remaining parts, sprues G, H, MB and N are new for this kit and as you may have noticed there are a few duplicate sprue numbers (A, B, D, G, H) creeping into these kits due to the number of crossover parts and care is needed to make sure you are looking for the right sprue to find the part you want.
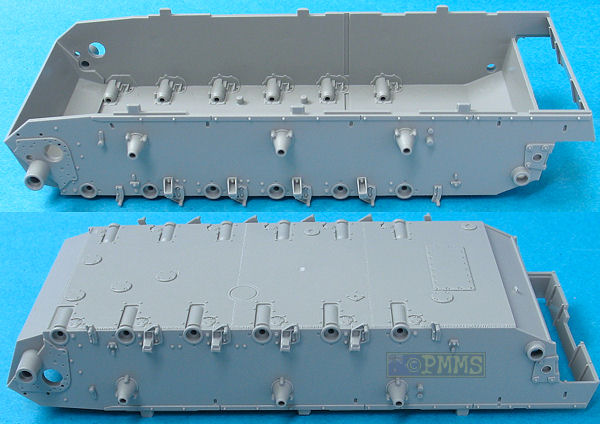
The lower hull tub is similar to that in the Panzer Ausf.J kit but with some alterations to eliminate the hull side escape hatches with the detail including nice weld seams and access plates as well as having nicely defined axle mountings and additional final drive plates that incorporate the tow shackle mountings as well as the upper flange detail along the top of the hull sides.
On the inside are separate full width torsion bars with the axle mountings correctly offset and nicely detailed axles and shock absorbers for the first and last stations as well as separate bump stops for a well represented lower hull arrangement.
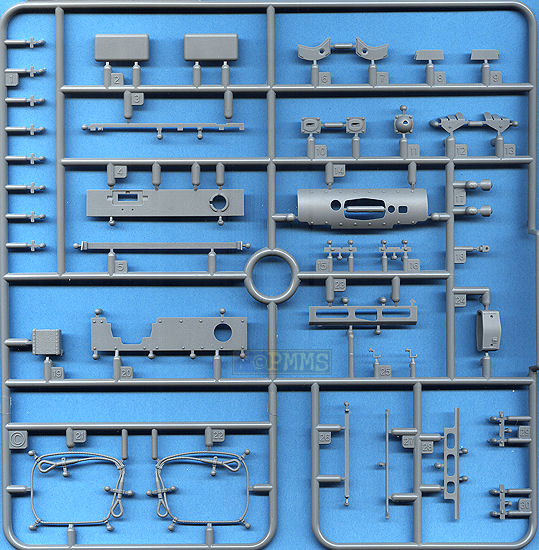
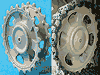
The drive sprockets are in two halves with nice bolt head detail on both sides of each sprocket and good rim contours to nicely represent the Pz.III drive sprockets as well as a separate final drive housing added to the hull sides.
The twin road wheels again have nice hub detail as well as the “continentau” embossing on the rubber sections and it’s a simple operation to convert the U to and L if you wish using the tip of a #11 blade. The size of the “continentau” is a little oversized if you want to get picky but would probably not be an issue on the finished kit.
One thing to note with the road wheels, these have a mould seam around the middle of the rubber section and the real wheels also have a seam at the same location when new and you may want to leave the mould seam to represent the actual seam. But this was a little uneven on my wheels and I shaved the seam smooth for more worn wheels but this is up to the modeller to decide according to their preferences.
The return rollers also have the “continentau” embossing but this is more over scale here and a little more noticeable than with the road wheels and personally I would remove this altogether as it’s all but invisible on the real return rollers from a normal viewing distance, but again this is up to the individual modeller.
At the back are the 5 part idlers with the two wheel discs and two etched rings that add the inner rim to each idler disc to give a good appearance as well as having a separate hub cap for better definition. The locating lugs on the inside of the idler halves have been corrected from those on the Ausf.J idler and the spokes now line up correctly as they should.
The rear hull plate is quite detailed with separate exhaust mufflers, tow shackles and mountings for the hull over hang “box” as well as additional parts for the exhaust deflector and inside the overhang is a two part smoke grenade rack and etched screens to add on each underside of the box.
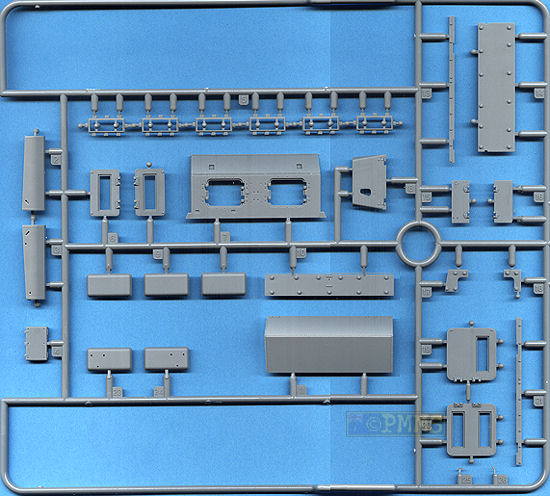
Included are individual 40cm “magic track” that requires virtually no cleanup and have nice details including the open guide horns. The track is “handed” meaning the left and right track links are mirrored to have the track pin bolt on the outside on both sides of the model. The left and right tracks are packed in separate plastic bags with one set being in a darker plastic than the other to avoid mixing these up but no other indication is given to identify left and right.
The tracks are not workable but designed to be glued together which is easy enough and you will have to use the drive sprocket and idlers as jigs as you glue the respective links around these to form the curves.
Also take note that the instructions indicate the incorrect side for the track placement as it indicates L (left) instead of R (right) and visa-versa and you should watch this to make sure you fit the tracks correctly. Traditionally left and right is determined on a vehicle when seated in the driver’s position looking forward not when facing the vehicle.
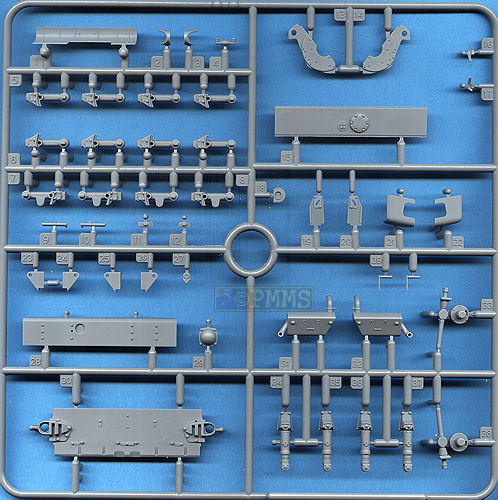
These are new for this kit and have nice ‘diamond’ tread plate pattern on both sides correctly depicted as raised on the upper surface and indented on the underside and another nice touch is the locating holes for the many tools and equipment only go half way trough the fender meaning the underside tread plate is perfectly clean (the Ausf.J had this feature as well). Before proceeding the full length fenders have to be added to the lower hull tub as the upper hull parts fit over the fenders.
Added to the fenders are separate mounting brackets, tools, Notek and tail lights with the tools having their clips moulded on but it would be easy to trim these off if you wanted to use any of the etched tool clips available separately to improve the look.
The jack and mounting clips consist of 10 parts for a nicely detailed unit in plastic with additional small etched parts for the jack block and end fender clips.
The instructions show to fit all the tools and other equipment to the fenders before fitting to the hull but it’s up to the individual if you do that or leave them till all the main assemblies are together to lessen the chance of damaging the smaller parts.
The rear engine deck is a separate part with all the hatches and intake covers as separate parts and this represents the later Ausf.J/L/M configuration with one piece hatches and alignment of the intake covers. Detail on the deck has nicely defined weld seams with separate lifting hooks and hatch hinges for good definition.
Added to the side of the deck are the separate intake trunks with openings in the deck side to give a nice hollow look and there are also etched screens provided for the intake tops to finish these off nicely and no problems were encountered assembling these.
All the hinges for the hatches as mentioned and the tow cable attachments are separate parts for good definition and the coiled tow cable while in plastic is nicely rendered with just the fine moulding seam to be removed carefully to ensure you don’t compromise the cable detail.
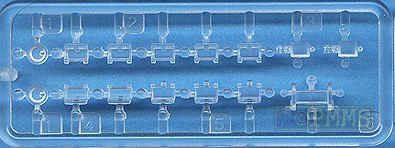
The front glacis plate is from the Ausf.J but the original StuG III glacis is also still included so make sure you use the right part with this kit (part B9) as shown in the instructions and added to this are the separate one piece access hatches, front brake outlets and headlights with separate clear lens. Note if adding the spaced armour there are a couple of locating holes that need to be opened up in the glacis before attaching the hull tub.
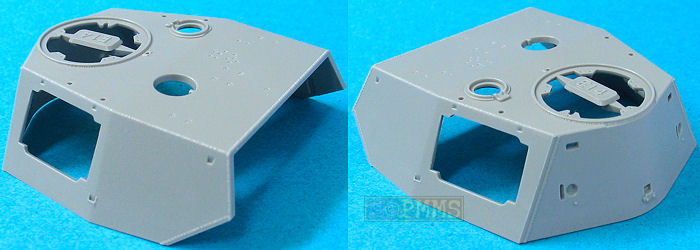
For the main superstructure there is an inner “box” to which is added the side plates, driver’s plate and upper decking and you are provided with a choice of two top decks depending if you are fitting the spaced armour panels or building the standard tank. These decks have the turret ring detail included and the separate V bullet splash guard is still provided but this should not be fitted for the Ausf.L based Ausf.N and again the instructions show not to fit this.
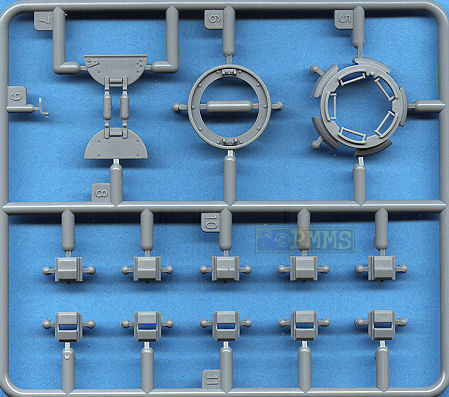
The side panels have separate visors with inside detail that allows you to show these open or closed for a bit of variety as well as a clear vision block for the left visor (the right visor is solid without the vision slit).
For the driver’s plate, there is the two part driver’s visor with inner clear “glass” and the right side machine gun ball housing and again there are two housings on the sprues so make sure you used the right one (part G31). This has the full MG34 and inner mounting as supplied with previous kits and is a nicely detailed assembly.
The fit of the front, side and top plates to the inner box is very good not requiring any trimming and the superstructure is then added to the lower hull tub, you have to fit the glacis first as the superstructure sits over the top of this. The rear engine deck also fits neatly after adding the superstructure.
If building the spaced armour versions there is the separate 20mm spaced armour panel which fits to the mountings on the appropriate top panel and holes previously opened up in the glacis. The top and side panels are very thin on the real vehicle and you are provided with etched panels here for a good scale appearance. The small extended mountings for the spaced armour panel are rather simplified if you want to get picky but perfectly adequate and no doubt an etched update set will be released to replace these for those wanting this added detail.
The main shell turret has been revised to remove the side vision ports applicable for the Ausf.L and Ausf.M with separate front plate, gun mantlet as well as the side hatches with the surface detail being well done such as the top flush screws. The overall dimensions again match the data with such items as the gun barrel lengths and gun housing being well within acceptable tolerances.
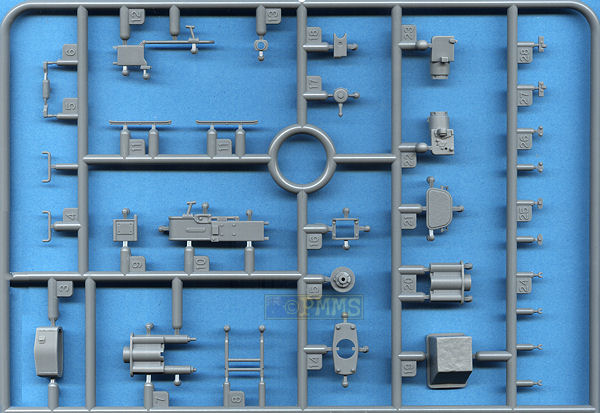
The main change for the Ausf.N is the inclusion of the 7.5cm L/24 gun which is from the previous Pz.IV kits and includes the full barrel in one piece with just the finest of moulding seams to be sanded off as well as having fine rifling included in the open muzzle.
There is the full gun and breech included as well as the side guards and lower shell basket with the barrel trapped between the two gun housing parts.
The main gun housing has the square profile captured well and has nice weld seam and other details with a separate end section and barrel sleeve to which is added a choice of notched or smooth end caps, but the instructions don’t tell which is used for what version (a common thing when alternate parts are provided) and it’s best to use the smooth cap (part G9) for this version.
The kit has three mantlets, the initial two from the Ausf.J kit and a new one for this kit so again make sure you use the correct mantlet for this kit (part G10) which has just the left side vision port for the Ausf.L/N with the one piece gun housing added to the front.
You also need to watch the inner gun mounting as the instructions tell you to use the wrong part, you should use part G5 and not part E11 as indicated for this kit.
There is also again a choice of co-axial MG collars, one with the muzzle of the MG34 included and the other hollow is you want to use an aftermarket metal MG34 barrel which is a nice touch. But one thing not included is the actual MG34 mounted next to the 7.5cm gun and adding this would give a more complete assembly.
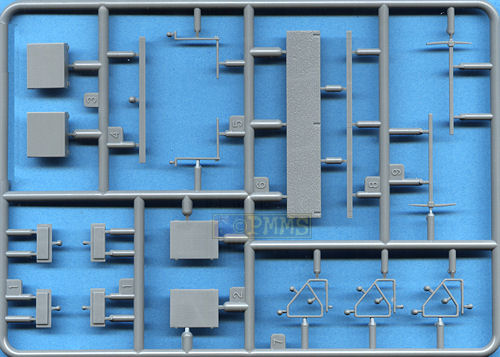
The side crew hatches have the frame added from inside the turret and the separate doors have nice detail on both sides if you wish to show these open as well as a separate rain guard for above the doors with the only other internal detail being Commander’s seat (stand) and the inside roof ventilator housing.
The top Commander’s cupola is from the later Panzer IV kits and has the separate armoured visor covers with clear “glass” inserts as well as the two hatches and this builds into a nice replica of the actual cupola.
Other details added to the turret include the top ventilator and port covers, the crew entry grab handles and small two part lifting hooks for the upper corners of the turret as well as separate pistol port for the rear wall.
Also included for this version are the six smoke grenade launchers for the turret sides and these have separate pots with small inserts for the grenades as well as the mounting plate and you would only need to add the wiring to finish off the assemblies.
At the back is a three part turret bin with main bin shell and separate forward wall and lid which again makes into a nice representation of the standard Pz.III turret bin.
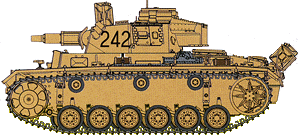
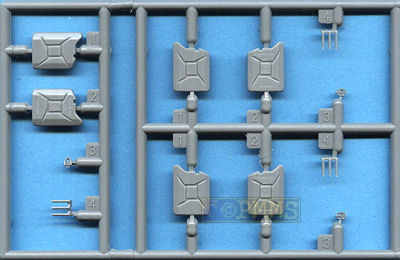
Additional items are included for the Tunisian version with Jerry Can racks along the front of the turret roof and for the rear engine deck which give you a choice of plastic or etched mounting brackets. The Jerry cans are similar to those included in previous kits having two halves with an etched central bracket trapped between the two that gives good detail to the central join on the Jerry Can when fitted together. The grab handles and filler caps are also separate.
There are a couple of issues to note when assembling the jerry cans, first the etched part has locating holes that don't match the locating pins on the plastic can halves but its easy to just cut off the plastic locating pins and align the etched and plastic parts by eye.
The second is the separate handles are designed for the original jerry cans without the etched insert so after fitting the etched inner lip the handles are too narrow for the cans, this is about .5mm each side but is noticeable and there is little you can do about this other than leave out the etched inserts.
Also note when assembling the turret roof rack you have to fit the handles over the rack securing rod as you assemble the Jerry Cans, this is to secure then to the rack and if you fully assemble the cans first you will have to cut the rod from the end brackets and feed this through the can handles later.
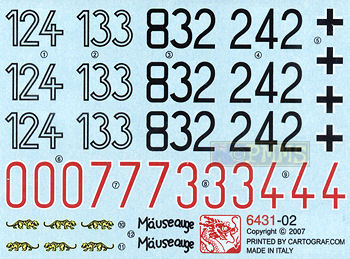
The single sheet is well printed with good colour register and provides markings for 7 Panzer III Ausf.Ns of sPz.Abt.501 used as close support for the sPz.Abt.501 Tiger Is in Tunisia 1942/43 but only 4 are illustrated on the instruction sheet;
The markings included are:
 |
Following on from the Panzer III Ausf.J Dragon/Cyberhobby have again produced another fundamentally accurate and well detailed kit of the Panzer III Ausf.N as based on the Ausf.L chassis.
Any issues are in the minor category but of course there is scope for additional detail as with any kit but you will get an excellent representation of the “mid” Ausf.N if built from the box.
One issue with this and virtually every Dragon/Cyberhobby kit where alternate parts are provided is there is no information on what is the appropriate part to use with which version? They obviously know themselves to include the parts so why not tell you instead of leaving it as some sort of guessing game.
Highly recommended 8.5/10
Click on thumbnails for larger view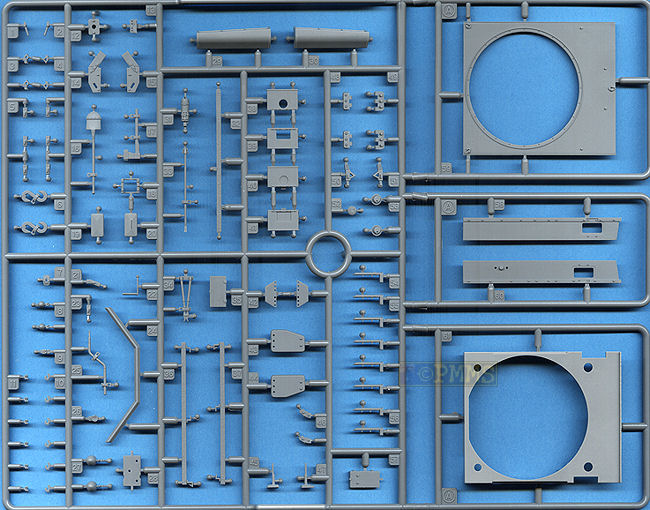


Detail Images

Close new window to return to review
 |
Achtung Panzer No.2 Excellent detail coverage of the Panzer III with the usual detail photos and drawings of all versions of the Panzer III. |
 |
Pz.Kpfw.III Ausf.J/L AFV Super Detail Photo Vol.6 Published by Model Art Co.Ltd. |
 |
Panzerkampfwagen III A good overall pictorial coverage of the Panzer III. |
 |
Panzerkampfwagen III A typical NV with good coverage of the Panzer III and the cebtre colur plates. |
 |
PzKpfw III in action #2024 The usual in action fare with photos and drawings of the Pz.III versions. |
Thanks to my credit card and the excellent service from![]() for
the review kit.
for
the review kit.