
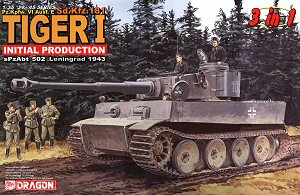
Pz.Kpfw.VI Ausf.E Sd.Kfz.181 Tiger I Initial Production 3 in 1
DML 1:35 Scale Smart Kit #6252
Review by Terry Ashley
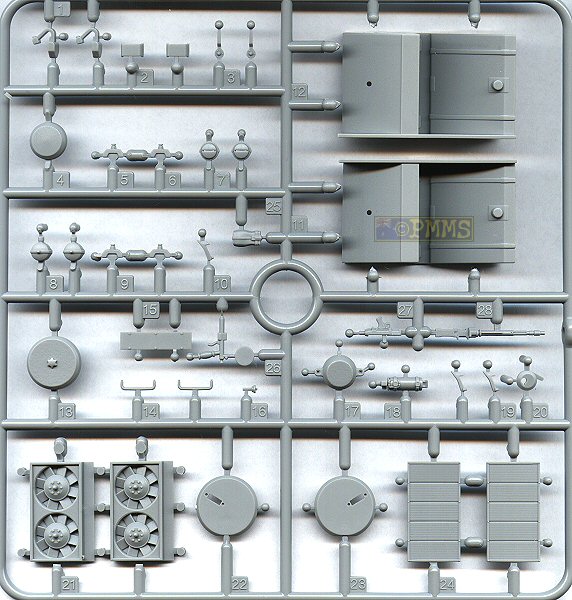
But enough of the talk lets have a closer look at the kit contents and I have included many images to go with the text to hopefully fully show the many details and to clear up the speculation of what makes up the 3 in 1 options, they are one; vehicle No.100 from sPzAbt.502 with the two distinctive storage boxes on either side of the turret, two; vehicle No.121 from sPzAbt.502 with the Panzer III style storage box on the back of the turret and three; the option to depict the model with the snorkel gear attached and you not only get the extended snorkel for the engine deck but alternate parts to show the central engine deck intakes closed and the sealing cover over the hull machine gun ball mounting.
The kit box has the following contents;
401 parts in light grey plastic
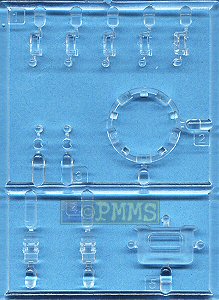
11 parts in clear plastic
25 figure parts and clothing in soft DS100 plastic/vinyl
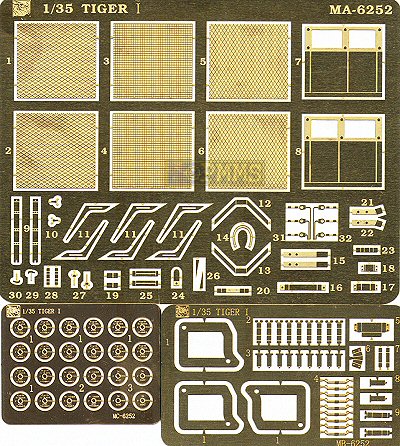
3 frets of etched metal parts with approximately 110 parts
1 metal barrel and recoil spring
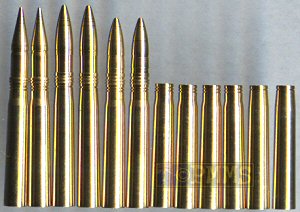
12 turned brass 88mm rounds and shell cases
38 assorted metal parts
Individual link “Magic Track” tracks
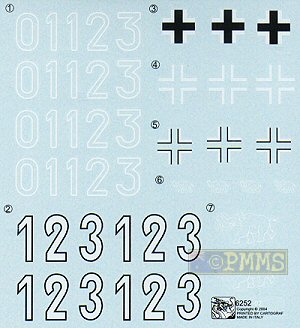
Decal Sheet
Instruction sheet
The standard of the plastic moulding is superb with virtually no pin ejector marks on any parts due to the use of many small knock out nodes on the parts and while this makes for a little more cleanup it is a very small price for the clean parts and is a lot easier than filling pin marks.
There are many alternate parts with all the clear parts having grey plastic equivalents to use if you wish and I think this is a very good thing not being a fan of the clear periscopes and other parts as these are harder to work with due to the brittle clear plastic which is hard to see the details and also periscopes aren’t clear anyway so the plastic alternative is good to see.
Most of the metal parts also have plastic equivalents such as the barrel, 88 ammo, the towing shackles and smoke grenade launchers which again gives you a choice of medium depending on your preference but the finesse of the metal parts makes them irresistible and there are pioneer tools with the tool clips moulded on and additional ‘naked’ tools with etched tool clips provided as well as templates on the sprue for bending the clips to the correct shape, a very nice inclusion.
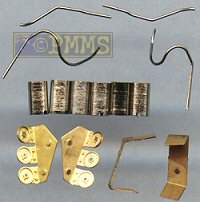
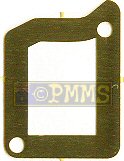
The etched parts are also done to a high standard with clean etching and well defined parts with the usual bending lines and the other metal parts in different mediums are equally well done with pre-formed smoke grenade mountings and metal bucket which is simply superb with wire handle already fitted.
Sprue C is from the recent Panzerkampfwagen IV(P) kit #6210 but all other parts are new for this kit with some parts for the later Tiger included which obviously aren’t used here.
Smoke grenade parts and additional wiring, Shackles and pre-formed bucket
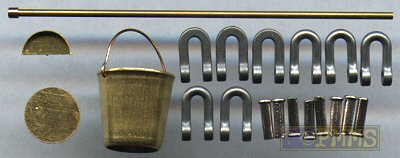
Metal barrel and recoil spring

Brass 88mm rounds and sheel cases
Clear parts
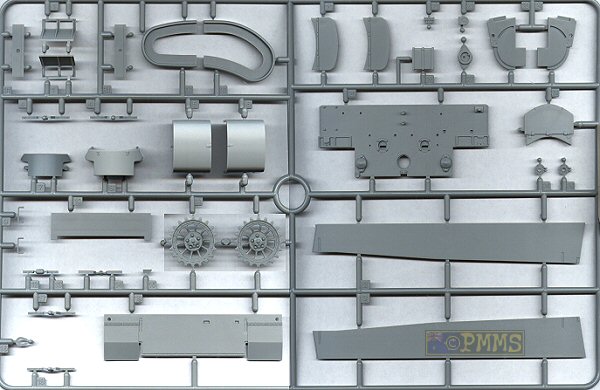
On the inside are separate torsion bars which allow the suspension to work if you are sparing with the glue during assembly but you have a choice in fitting the separate axles with central weld seam in the normal manner with pins on the hull sides to hold the axles in the neutral position and you have to cut off these pins if you want the axles to articulate.
Other details on the hull sides include the distinctive flanges between the hull and top sponsons and the external shock absorber bolts, bump stops on the first and last road wheels and separate track pin bumper plates.
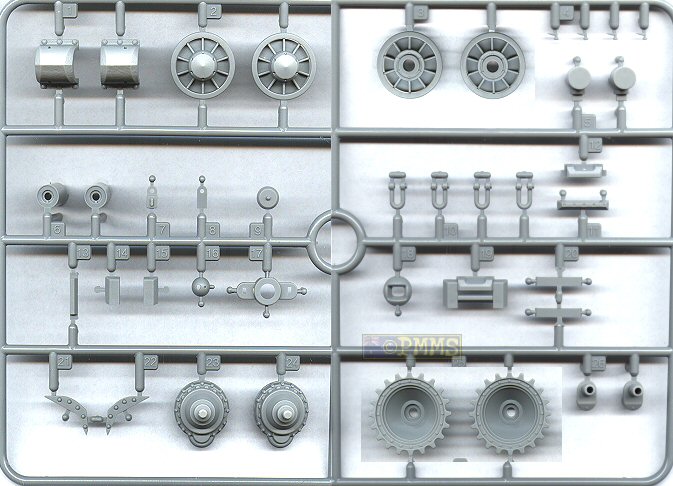
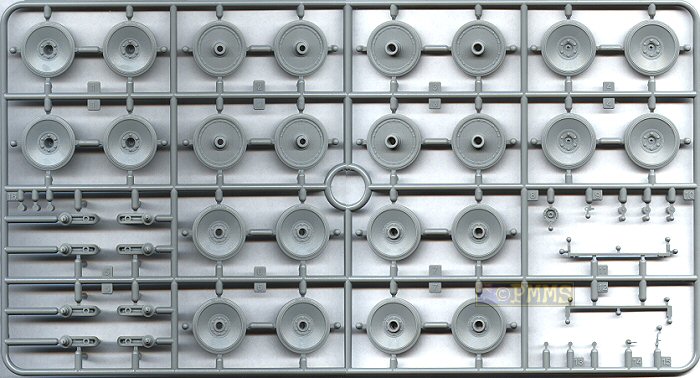
The details on the drive sprockets, road wheels and idlers is superb with subtle weld seam and bolt head details on the outer road wheels with the correctly spaced bolts on the inside faces as well as fine embossing ‘Continental’ on rubber section of the road wheel although this actually says ‘Continentau’ presumably due to some copyright issue or just a small slip up but the embossing is very small and unless you walk around with a magnifying glass in your pocket this won’t be an issue, you could of course use a sharp blade to convert the U to an L if it is an issue?
The idlers are the 700mm type as they should be with separate inner and outer wheel with inside details and the details on the drive sprockets are equally well done with the spokes lined up between the drive teeth and nice hub details with the inner sprocket wheel having bolt head details around the outer rim on both sides.
The final drive housings are separate parts with nice detail with all wheels being designed to be glued in place while on the front plate are mountings brackets for the spare track carried here.
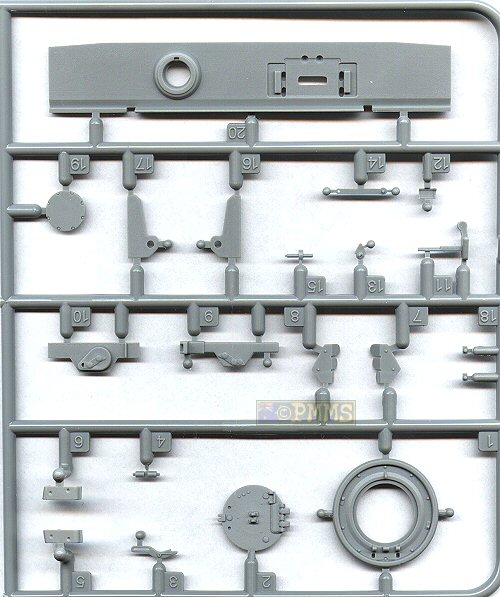
The separate rear hull panel has most details separate to again allow for the later versions with nicely detailed exhausts and the armoured covers with subtle cast texture included. There are separate tow shackle mounts and alternate metal or plastic shackles, the metal ones also give you a choice of the early square profile or later rounded profile shackles for some variety. There are separate fenders with additional etched stiffeners and the seven part jack has separate etched clips.
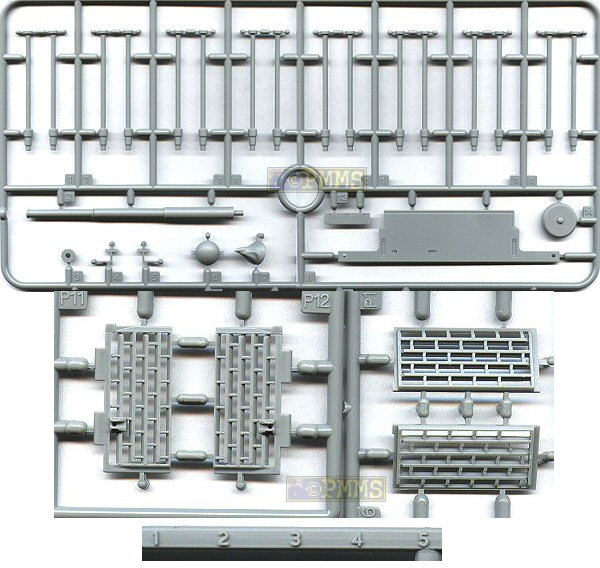
Also on the inside are rear radiator assemblies to fill the void under the engine deck grates and have the large tubs with separate fans and radiator grillwork that should look quite convincing when looking through the grills.
I fitted together the major parts either with dry fit or with glue and found
the fit very good. The rear hull sides were slightly bowed inwards but after
fitting the rear hull plate these re-aligned themselves okay but I did get
a fright and I thought I’d mention this for when building the kit.
When first fitting the rear hull plate there were two large gaps low down on
either side between the rear plate and hull side but these are supposed to
be there to accept the rear towing shackles (parts F16/F17) in the next step
in the instructions, so don’t be tempted to fill these.
These are probably the only area of the kit not as well detailed as each link has a couple of small pin marks on the inside and the guide horns do not have the cut-out which is surprising given Dragon’s slide mould technology used to good effect on other parts. To aid in assembling the track runs two large jigs are provided for forming the track around the drive sprocket and idler wheels and this does make it easy to assemble the tracks which are also mirrored so watch the orientation when assembling and fitting tracks. The different links are packaged in separate plastic bags so don’t mix these up or you could have problems.
Assembling the tracks proved interesting as each seemed to want to keep popping apart from the previous one and I had to stick one at a time allowing the glue to dry before moving on and using a quicker drying cement like Tenax-7R made things easier as did using the jig supplied which is a must to line the links evenly but take care as it is easy to get then uneven. Once assembled using the jig and the glue has dried completely the track snapped perfectly around the drive sprocket after a little coaxing as you have to open the links a little to fit the teeth in place but no problems if care is taken and the idler just slipped into place no problem, also don’t glue the idler axle to the hull until after fitting the track as you may have to move this a little to get the good fit.
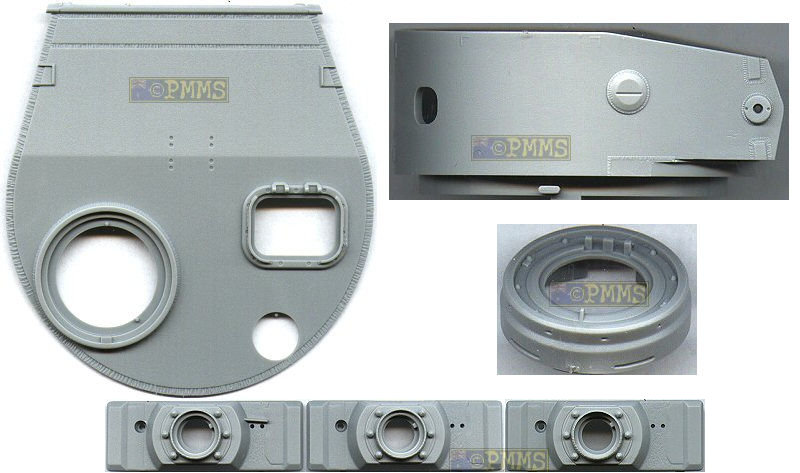
At the front the separate driver’s plate has separate outer ball mounting with etched wing nut fasteners and a full MG with its own spent shell case bag and the mounting also comes with alternate parts for the snorkel sealing and a moulded canvas cover if you wish to fit this?
The driver’s vision port comes as a complete open assembly as well as
a four part assembly which allows you to position the visor open or closed
and there is an additional clear part for the inside vision block.
The two crew hatches have excellent details on the inside with separate clear
periscopes, inner latch and separate outer periscope cover and hatch hinge
which allows the hatches to be positioned open of closed.
On either side are the two Bosch head lights with separate mountings that have
details on the middle of the mountings if you don’t fit the lights and
the electrical junctions on the hull top already has a small cut out holes
to add the light wiring provided while the lights themselves have separate
front section with hollow cut out and clear lens for the inside for a well
detailed assembly and the central front ventilator cover is also a separate
part.
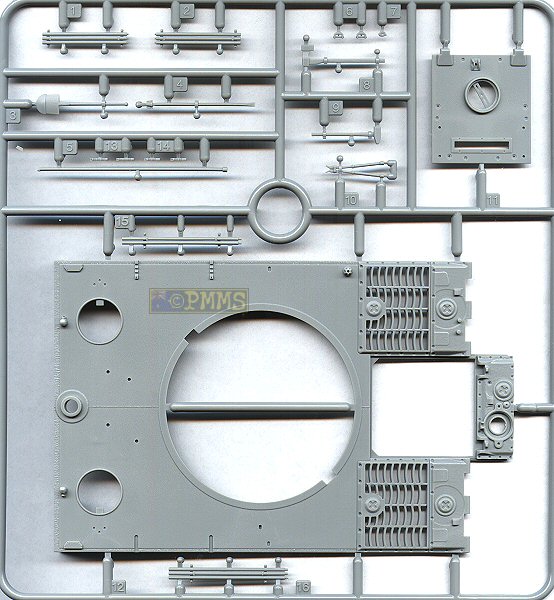
The rear engine deck has excellent details with correct style deck grates
with the two rear panels being separate parts with a separate inner grate panel
and you can position these grates open or closed another good reason the have
inner radiator details included and there is also a separate supporting latch.
The cover for the snorkel attachment is a separate part to allow the use if
snorkel device and the central engine door includes the cover plate for the
Feifer gear and as mentioned also included alternate closed cover if the snorkel
is fitted.
The large central forged intake cap is a separate part with the ‘star’ tightening
lug included and there is also internal detail in the intake opening which
won’t be seen on the finished kit unless you show the assemblies apart
for maintenance as well as nicely moulded fire extinguisher for the right side
of the deck.
At the front the glacis is a separate part with the armoured fillet in front
of the driver’s visor is also a separate part and the early style fenders
have the three different tread plate patterns included on the etched fret and
also have the front securing latch included on the hull side extension parts
for added detail definition.
For added detail the moulded on latch can be cut off and replaced the etched
latch and securing bracket to add even more detail.
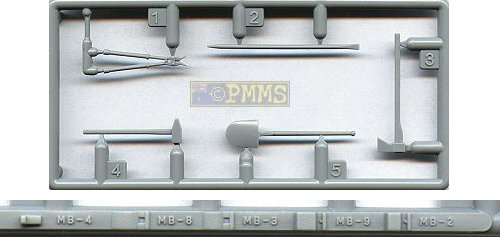
All the tools are separate parts and as mentioned you can use the tools with
clips moulded on or the ‘naked’ tools with the etched clips which
do look much better when fitted and the inclusion of the bending template a
very nice touch from Dragon.
Again the fit of the major components presented no problems with things like
the rear engine deck doors and grates fitting like gloves.
On the inside of the cupola are vision block mountings with a choice of normal plastic or clear parts and the top hatch has excellent details on both sides with separate securing latches on the inside as does the loader’s hatch with separate grab handles and latch wheel on the inside.
The asymmetrical turret shell has nice weld seam details and the side vision slots at the correct height for this version and separate pistol ports for the rear sides and these also have additional internal plugs to fit into the open hole in the ports for another nice detail addition.
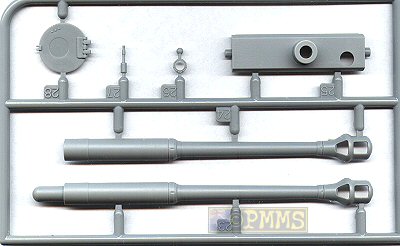
At the pointy end you get a choice of four mantlets, the original from the Panzerkampfwagen VI(P) kit which you wouldn’t bother with here and three new mantlets with separate one piece gun collar which feature for the first time in any plastic kit the two recessed screw heads at the front of the collar in three positions.
The 88mm barrel offers a choice of three setups, the original full barrel and muzzle brake from the Panzerkampfwagen VI(P) kit or a new three part plastic barrel moulded without join seams or the full metal barrel with the new single piece muzzle brake with separate end cap and internal fillet with the last two barrels also having a recoil spring that is trapped when fitting to the mantlet but this is quite gimmicky and I don’t really think anyone will sit there pushing the barrel in and out, unless you are amused by small shinny things?
On the inside is a basic gun and breech with side guards and spent shell basket as well as two crew seats to add a bit of detail if looking through the open turret hatches.
The side mounted smoke grenades are provided in plastic or completely in metal which are really quite amazing assemblies with pre-formed brass turret mounting brackets and grenade mounting plates with nickel grenade canisters and etched parts for the connectors and build into impressive little assemblies.
The three alternate mantlets all with the binocular sight holes offer small variations seen on early mantlets including the sun/rain shield added over the sight openings and weld beads around the collar junction as well as small numbers on the sprue runners that can be cut off and positioned on the mantlets for the casting numbers.
The alternate turret baskets for the two sPzAbt 502 vehicles include the two rounded bins on the side of vehicle 100 that includes the four mounting brackets and separate lids and also included for this vehicle is an etched horse shoe for the front plate.
For vehicle 121 there is a three part Panzer III style bin with separate etched mounting brackets and for both you have to remove the moulded on mountings for the normal Tiger turret bin and finally there is also the modified head light mountings for some sPzAbt 502 vehicles where they were moved to the front plate behind the fenders and these mountings are provided in etched metal parts.
As mentioned earlier there are alternate intake and hull MG parts if using the snorkel device.
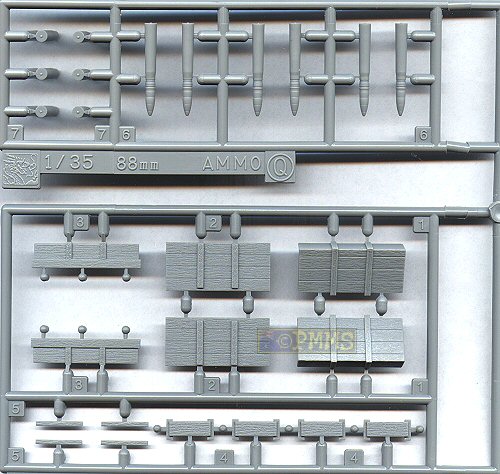
Additional metal parts include the 88mm rounds and shell cases with separate etched end caps for good detail definition and as mentioned these are also included as plastic parts with the plastic shell cases hollowed out using Dragon’s slide mould technology and the pre-formed bucket is excellent.
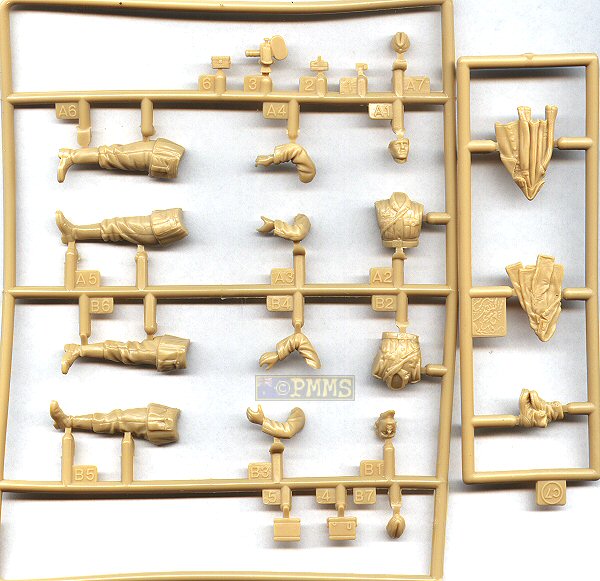
As with previous kits you also get some spare uniforms moulded in the DS100 vinyl as well as two additional figures in the same material that form a film crew taking family album shots of a passing Tiger with a movie camera included in the set for this purpose. The detail on these figures is quite well defined in the medium but cleanup can be an issue as it doesn’t take kindly to sanding while removing the sprue bur and small mounding seam but you can use normal plastic cement to assemble the figures.
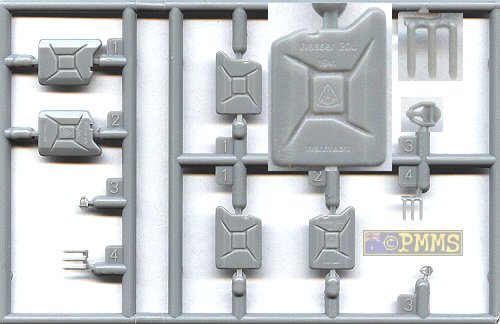
Additional items include the nicely detailed Jerry Cans from with the Panzer 1B DAK version which have etched brackets to form the central join seam on the cans for very good effect and a couple of plastic ‘wood’ ammo boxes for the 88mm rounds to add to a diorama setting.
The decal sheet is well printed and has a selection of vehicle numbers and balkenkreuz to make any combination including vehicle 100 and 121 with each item printed separately on the sheet so you can just use them as required to form the vehicle number needed.
 |
While I’m not a Tiger expert I can’t find any glaring errors with the many small details included such as the screw heads on the gun collar to name just one being superb with any issues well in the nip pick category and as mentioned I particularly liked the inclusion of both normal plastic and metal or clear parts for the same parts for good choice.
The only area of the kit not up to the high standards is the tracks with the lack of holes in the guide horns very conspicuous given the attention to detail in the rest of the kit.
But overall a simply stunning kit that will have those asking “why another Tiger” clamouring to get one or two and we can assume the later production kit will be to the same high standard and attention to detail.
Highly recommended
Click on thumbnails for larger view
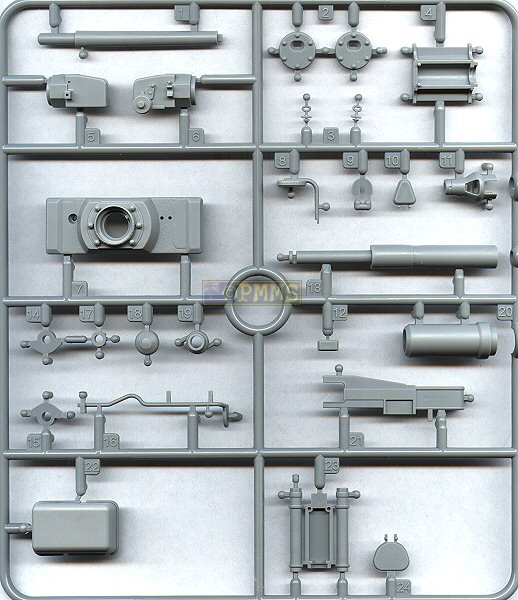

Sprue detail images


| Germany's Tiger Tanks Thomas L Jentz and Hilary Louis Doyle  |
Modeler's Guide to the Tiger Tank A complete and comprehensive guide to modelling the Tiger I and Tiger II in 1/35th scale Military Miniatures in Review. Ampersand Publishing.  |
| Panzerkampfwagen Tiger Actung Panzer No.6  |
Tank Power 13 Tiger I (Vol.1), 14 Tiger I (Vol.2), 15 Tiger
I (Vol.3), 16 Tiger I (Vol.4) and Sturmtiger. AJ Press     |
Thanks to Dragon Model Ltd for the review kit.
