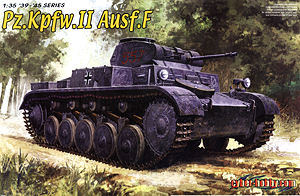
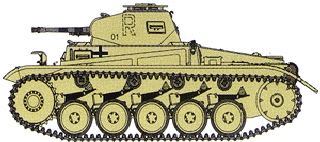
When the Marder II (kit #6262) was released in the middle of last year it was inevitable that the standard Panzer II Ausf.F gun tank would follow and this has now appeared and like the recent M4 Mortar Carrier half-Track comes labelled Cyberhobby in some parts of the World and Dragon in others but is the same kit in both.
The kit captures the overall features of the Panzer II Ausf.F nicely inside and out with the kit dimensions measuring up well to available data. There were some differences between the 1:35 plans in the books listed below which made things tricky and again shows you can’t bet your house (or kit) on a single set of commercial plans.
Overall the kit dimensions measuring up fairly well to available data with a few discrepancies but the plans varied considerably on things like the hull length and turret sizes. The Panzer Tracts book No.21-1 Pz.Kpfw.Tuermen (Panzer Turrets on Concrete & wood stands) has the most accurate Panzer II F turret plans and the kit turret matched these well within acceptable tolerances for printing reproduction etc. Using the Mk.1 eyeball the hull dimensions are also quite acceptable, the only real worry is the main 20mm gun dimensions which we will get too shortly but nothing to get real excited over.
The main area of concern is with the running gear and one in particular being the drive sprocket which basically has one less tooth than it should but more on that later.
Left over from the Marder II kit are the optional parts such as the standard Panzer II drive sprocket and the reinforced drive sprocket used exclusively on the Marder II and Wespe. There are three types of idler wheels supplied each with a different style of hub and checking references will be best to determine which is most appropriate for the kit being built.
Also carried over from the Marder II kit are items such as the suspension and running gear with minor modifications with new sprues for the upper hull, turret and associated parts.
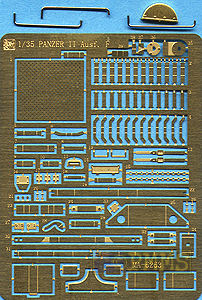
The kit consists of 421 parts in light grey plastic, 51 parts in clear plastic with a large etched fret and a couple of wire grab handles and formed brass shovel bracket plus individual link “magic track” and a single decal sheet.
Standard of moulding is again excellent with the heavy use of ‘plastic nodes’ on the parts which helps keep pin ejector marks to a minimum but will take a bit of effort to remove in some cases. There is the usual fine moulding seams on the parts to remove but nothing really out of the ordinary for plastic kits.
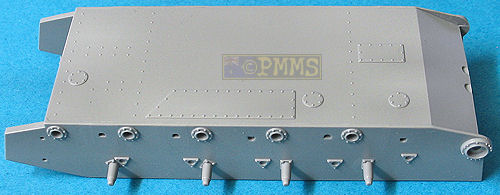
This is a conventional plastic tub which has quite thick sides with internal bracing fillets and includes raised detail on the sides for the suspension mountings and access plates on the bottom with separate front and rear panels to make up the full tub.
There is no other detail on the tub sidewalls and fitting some of the additional parts is hit and miss as there are no locating tabs or lines provided so you have to line these up by eye after adding the floor and engine bulkheads.
The four return roller mounting posts on the Panzer II are not level with the rear post being lower than the first and the kit captures this feature precisely for good attention to detail.
Each axle/spring assembly is made up of three parts each, the lower axle, upper spring and end plate and you have to take care as the forth assembly is different from the first three as indicated in the instructions with the Panzer II style brackets supplied in place of the large dampers in the Marder II kit.
The mould seam lines down the centre of the springs will need care during removal to ensure the definition of the springs is maintained but the springs face downwards after assembly and the seams may not be that noticeable if not cleaned up.
As most will know the suspension springs on the Marder II were wider to take the additional weight while those on the Panzer II were the original narrower leaf springs which is noticable in 1:35 scale for those concerned with accuracy.
The leaf springs in this kit are the same as included in the Marder II kit which means one or both of the kits are wrong if this detail is taken into account. On checking the kit leaf spring units against photos I am of the opinion the springs are not correct for either kit as they combine details from both the original Panzer II units and the strenghtened Marder II units. I have added an additional page here with details and images of the suspension units to explain this better and of course I'm open to further input on this.
The final drive housing is a separate part with four small bolt heads moulded onto the sprue runners which you have to carefully cut off and attach to the final drives in four places and care is needed when cutting the bolts from the sprues so they don’t take off into the void. This method ensures good definition of the bolts which wouldn’t be possible is moulded directly onto the housings.
As mentioned there are alternate drive sprockets, the standard Panzer II type (parts E2) would be best used with the re-enforced type used exclusively on the Marder II and Wespe and these feature well defined bolt details around the rims with the correct number of bolts for the specific type and also have the bolts around the inside of the sprockets. There are some shallow pin marks on the insides which are very easy to remove as they can bee seen after assembly with the sprockets designed to be glued to the final drives.
The major issue with the drive sprockets supplied in that they only have 25 drive teeth when the actual sprocket has 26 drive teeth but there is little you can do about this other to live with the incorrect sprockets unless someone want’s to make resin replacements with the 26 drive teeth.
All the 1:35 plans in the references below show the 26 teeth and on checking any suitable side on photos of the Panzer II (and other types) confirms the presents of the 26 drive teeth and hopefully this will be fixed at some stage?
The road wheels have the outer wheel and tyre with a separate insert for the back to eliminate the hollow look and the wheels feature excellent details such as the weld beads around the outer rims with “Continentau” and tyre data embossing on the rubber sections. Also included is the raised seam around the middle of the rubber section which is evident on newer wheels but the attachment points to the sprues means there will be two scars in the seam line, one of which can be hidden at ground contact but the other is evident. If you take extreme care and some nifty knife work when removing the excess plastic from the sprue attachment you can preserve the raised seam line so the scar is less evident.
The return rollers again have nice details of weld beads and embossing with the raised tyre seam and the same comments apply here as with the road wheel but both types of wheels are very well done and look very good with careful painting bringing out the detail.
At the back are three alternate idler wheels with different pattern hubs and a separate outer rim with again very good detail on the wheels and checking references will show which hub design best suits your model. Providing the three types of idlers and two types of drive sprockets give a good choice and probably indicates a standard Panzer II or Wepse may be in the works.
The rear panel has separate detail for the tow pintle, tail light and four part exhaust with a separate etched heat guard which you have to bend to shape to fit and annealing the part beforehand will help with this. Also included is the armoured smoke grenade box carried on the Ausf.F and this is made up of six parts and you can show the top cover open or closed as required.
Take care when fitting the rear hull panel (part C34) and the two lower fillets (parts C12/C13), the instructions indicate to fit the fillets before the rear panel but you should fit the real panel before the fillets or there may be problems getting the rear panel to fit properly.
The interior of the gun tank is not as visible as with the Marder II but Dragon still gives you a fairly comprehensive interior with some parts such as the forward vision ports and rear bulkheads added to the underside of the upper hull.
The transmission assembly is in ten parts that go together without any problems with the brake drums in multiple parts with good details added into the lower tub as are with additional gear levers and the driver’s seat, foot pedals added to the separate floor panel with fine tread plate pattern for a very busy interior.
The side engine bulkhead is in five main wall parts with additional smaller items and the main parts fit together without any problems as do most of the smaller details but watch the parts J37, J38 as there are no locating pins for these and you have to cut off a couple of small bolt heads for part J38 to sit flush.
The two part air cleaner has additional etched mounting brackets added but watch the lower bracket (part MA30) as this has to be bent “away” from the engraved bend lines and not “into” them as is the normal procedure for etched parts. If you bend these the “wrong” way they will break off when bending back the other way due to the thin metal so ensure you bend them the correct way first time, which is with the triangular indent for part MA25 facing outwards.
All the sub-assemblies go together without any real problems and also fit neatly into the lower tub and of course there is scope for adding finer details for those wanting the detail up the kit further.
The small equipment boxes and radio located on the tub side walls have straightforward assembly but need care when fitting as its location is not clearly marked as mentioned and fitting after the floor has been fitted should make it easier to line up.
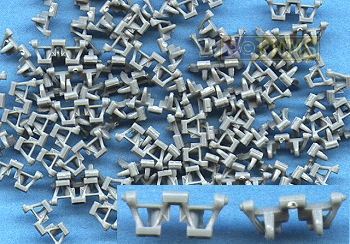
Included is a set of individually moulded “magic track” with the only cleanup being a very small moulding scar on the inside of each link which really doesn’t need cleanup if you don’t want to.
The detail on the links is very good with nice face detail and hollow shell effects on the guide horns with the use of slide moulds and the links are designed to be glued together but are not workable.
Fitting the links together is quite easy as they simply intermesh but are fairly small and slippery especially when getting them to form around the drive sprockets and idler wheels. The best method is to apply a small amount of liquid cement to each link and wait for the glue to start and “go off”, you can then form them around the sprocket and add track sag easier then if the links are loose.
The assembled track runs look very good with the instructions indicating there are 99 links per side.
The upper hull is in one piece including the fenders with cut-outs for the engine access hatches and turret ring as well as the glacis access hatch with the front and side superstructure panels also separate parts.
Detail on the hull top includes nice tread plate pattern on the fender top sections although the undersides are plain and nicely depicted weld seams and engraved panel lines around the hull and as well as the rear bullet splash guard separate with the front guard included with the hull moulding.
At the front the separate glacis access hatch has nice inside details but cleaning up the sprue attachments are tricky to remove as they overlap the inside lip groove and some nifty knife work will be needed to clean these up without damage to the hatch.
Other front details include the two fender mounted head lights with clear lenses plus the Notek light and hatch rest post with just the light wiring needed to finish off. The front superstructure plate has the left driver’s visor in two parts and the right side dummy visor as a single part that arte simply but perfectly okay for the job. The spare road wheel carried on the glacis has separate support brackets for good definition and the forward tow shackles are also separate parts.
The two superstructure side panels have the front bullet splash guards and outer visors separate with four clear part inner visors with frame, vision block and opening mechanism to allow the visor to be shown open if you wish. The fit of the side panels to the superstructure is spot on without any gaps or trimming needed.
As mentioned fitted inside the upper hull is the Driver’s visor with a four part binocular sight plus the instrument panel which would be very difficult to see after assembly but it’s good to see it provided.
Added to the fenders are the various storage boxes and pioneer tools which have separate etched brackets and clips for good detail definition with the four part jack having a choice of plastic or etched mounting brackets depending if you want a quick build or more finer detail.
The engine deck has open intake grills with separate engine access doors and access hatches while there are alternate inner grills and covers that help to eliminate the see-through look but you may want to blank off some of the grills to prevent seeing into the empty engine bay.
This has the upper shell with separate lower ring and front panels with the gun mounting and has excellent surface details including the roof flush screws and panel weld seams as well as all the vision port covers as separate parts.
The Commander’s cupola consists of the lower ring with clear periscopes and the upper ring that represent the cupola nicely. Added to this is the cupola hatch which is nicely done and includes all the relevant details such as the central signal port and top support post as well the inner latch as an etched part with about the only nit pick being the inner head pad could do with better texturing.
Fitting the hatch to the cupola ring was little tricky as the hinge is moulded as part of the top ring and a bit of care will be needed to get in place, it would be easier to show the hatch open showing off the interior.
The main 2cm KwK30 L/50 gun is in one piece with the flash suppressor hollowed out using slide moulds although the small suppressor holes are not open but just indentations and you may want to drill these out for a better look. The barrel itself is the correct length when comparing to the available plans but actual photos appear to indicate it is slightly too large in diameter and the flash suppressor has excessive flair. This may not be an issue for many but if you want to address this there is the metal 2cm KwK30 L/50 gun from armorscale (set #B35-027) already available.
The co-axial MG34 is also in one piece and very well done for a plastic gun but note that the gun provided has a number of small fittings along the cooling jacket for the sights, tripod and AA mountings which are not applicable when fitted to the turret mounting and you should cut these off before fitting. The instructions don’t tell you to remove these parts but the sequence images do show the rear sight removed but not the cooling jacket fittings, you can also improve the look of the MG34 by using the excellent metal barrels/cooling jacket from Adlers Nest or others available if you wish which will also deal with the additional fittings as mentioned above.
Both the 2cm and MG34 fit to the full gun mounting inside the turret which is quite detailed but you have to be careful positioning some of the smaller parts as the instructions are not that clear on the location and some trial fitting will be needed.
The instructions don’t show you to fit the gun into the two mounting halves (parts B38, B39) as you glue these together but you must do this as it is difficult to fit the gun later and there are a number of other parts that are a bit tricky. You must attach part B14 first to part B38 before fitting part B40 and fitting part B33 is again not clear and more attention needs to be given to these instructions as things are not that clear.
These assemblies attached to mountings on the lower turret ring and the curved front brackets glue to the back of the curved gun mantlet allowing for elevation but this is a very tricky operation and some care will be needed. The two small port covers on the mantlet can be positioned open of closed and the outer front plate fits neatly in place once the mantlet has been positioned.
Other items inside the turret include the traverse gear and the rear Commander’s seat but watch as the turret does not have any locating tabs to hold in place and just rests inside the superstructure opening, this shouldn’t be a problem unless someone turns the model upside down.
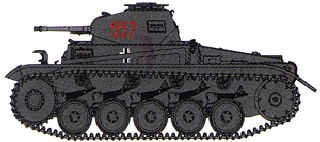
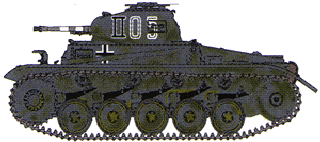
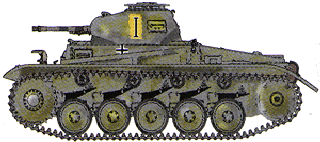
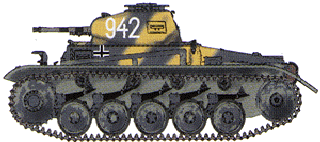
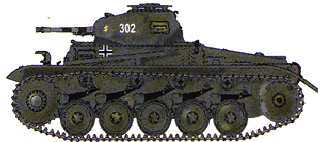
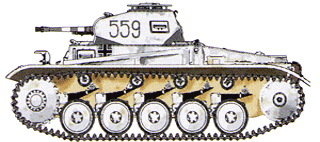
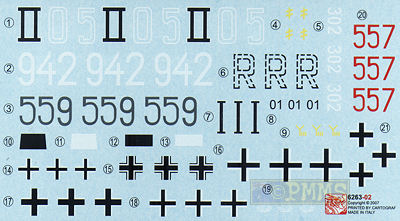
The small well printed sheet has markings for seven Panzer IIs all a variety of cam schemes from different theatres with some colourful marking options.
One thing to note is that many Panzer II Ausf.Fs in Africa had supplementary armour fitted to the front of the turret between the guns but this is not included in the kit, so checking references for the Africa markings provided would be the best option.
A minor point with the marking diagrams is they show the rear hull plate from the Marder II and not the Panzer II Ausf.F but this is academic really as it doesn’t effect the decal placement.
|
|
Overall this is another well done little kit from Dragon which will build into a nice replica of the Panzer II Ausf.F from the box with only a few minor issues if they are of concern. There are nice details such as the surface welds and other finer details for good definition and a number of alternate parts but make sure you use the right ones for this version.
The full interior also adds to the appeal of the kit and while providing most of the major structures with some more excellent detail such as the engine compartment bulkheads there is as with any kit scope for those wanting to go to town and add all the finer details.
As with previous Dragon kits you really do have to study the instructions closely as some areas are not as clear as they could be and more attention needs to be given to these instructions, but taking your time and test fitting should eliminate most potential disasters.
Highly recommended 8/10.
Also see Paul Owen's review on Track Link for another opinion on the kit.
Click on thumbnails for larger view


Detail Images


Close new window to return to review
| Pz.Kpfw.I/Pz.Kpfw.II
and variants Achtung Panzer No.7 Dainippon Kaiga Co.,Ltd..  |
Pz.Kpfw.II Ausf.F AFV Super Detail Photo Vol.7 Published by Model Art Co.Ltd.  |
| Panzers I and II and their Variants: From Reichswehr to Wehrmacht by Walter J. Spielberger ISBN: 0764326240   Covers show original German Language edition and re-issued English Schiffer Publications edition |
Ground Power Magazine Issue #138 Nov 2005 GALILEO Publishing Co.,Ltd. 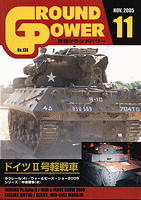 |
Thanks to my credit card and the excellent service from  for
the review kit.


