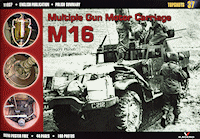
The Maxson M45D quad cal.50 M2HB mounting as used with the M16 MGMCs was also fitted to the M51 and smaller M55 trailer to allow the mounting to be towed behind a suitable vehicle. The M55 quad trailer has been used in action from WWII to Korea and extensively in Vietnam by the U.S.Army as well as by other countries.
This kit from Dragon uses as you would expect the Maxson M45D quad cal.50 M2HB mounting parts as well as the clear sprue from the recent M16 MGMC (kit #6381) along with new parts for the M55 trailer.
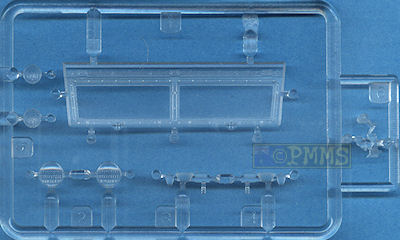
The kit has 121 parts in the usual light gray plastic, 8 in clear plastic, 1 etched part plus the small decal and instruction sheets with the standard of moulding again very good with clean crisp parts that did not have any flash apparent and just the usual array of small plastic knock out nodes on many of the parts which takes a bit to remove but result in cleaner parts.
The details on the cal.50s sees the received very well done with excellent crisp details along with separate ammo feed chute covers that have additional detail on the insides. These covers also include the cocking handle which are a little basic in detail and it also means you can't show the cover open without minor alterations to reposition the cocking handle. You should also take care as the guns are reversed for the left and right side of the mountings with the cocking handles facing outward on both sides.
In short MG parts Q11/Q3 go in the left side of the mounting and parts Q12/Q4 go on the right side, the instructions do show the correct numbers but the use of the numbering system of just Q11(Q12) for left and right can be a little confusing if not used to it?
While the receiver detail is well done the same can’t be said for the cooling jackets which are rather plain and lacking in any real definition on the cooling holes but the muzzle is slightly hollowed out and there is only a very fine mould seam line to be removed from the barrel and receiver.
I have replaced the kit cooling jackets and barrels with metal cal.50 barrels from Adlers Nest (set #ANM-35024), Lionmarc (set #LM10026) and the recent barrel from Griffon Models (currently only available in the full M16 detail set #S-BPL35001) to show the added detail from these barrels as these really do improve the look of the kit guns. To add these you just need to carefully cut away the kit cooling jackets ensuring the lower mounting bracket remains and then drill the hole for the barrel pin into the receiver ensuring this is located centrally and slip your choice of metal barrel into place.
has two small inspection hatches but these are again very basic with just the outlines and you may wish to add a little more detail to these hatches. The etched bolted strip provided to add to the recess between the turntable floor and trailer mounting is the same as came with the M16 kit and is unfortunately still way too wide and simply does not fit into the recess as intended.
The etched strip is 2.5mm wide but the recess it is to fit into is only 1.5mm wide and you will need to trim 1mm off the etched strip to fit, this should actually be about .75mm off the bottom and .25mm off the top to ensure the embossed bolt heads are located centrally round the strip. It really is a pity this has not been rectified from the previous kit as it takes a bit of work to trim the thin etched strip to fit (see images) inside the recess as it should and not on the outside of the mounting as designed.
Added to the floor turntable is a 6 part auxiliary motor but only 5 parts are shown in the instructions with part P13 not getting a mention but just appearing in the diagrams so watch this when assembling the motor. The 2 part battery is added next to the motor and you may want to add the additional wiring for the motor and battery to finish of these assemblies.
The two part gunner’s seat, two part gunner’s control stick and forward footrest all fit easily into place without any problems and there is also a gunner figure provided which will have to be added at this stage if you are going to use this as it can’t be added later.
Added next are the two large side mountings which are cleanly moulded without any pin marks and detail on both sides but there are quite substantial mould seams around the edges and inside the many recesses that will need to be removed which is a little tedious. There are two cross members between the two side mountings (parts P25, P32) and it’s best to glue these to one side beforehand to make fitting easier but other than that the fit of the side mountings is very precise.
Added to the back of the mounting is the loader’s platform which identifies the mounting as the M45D variant and this too fits into place without any problems.
The two outer gun mountings have excellent details including the lower elevation teeth but you should note these are not designed to elevate after assembly and you have to decide on the degree of gun elevation before attaching the gun mountings to the inner mountings.
Added to the side gun mountings panels are the four gun mounting posts which are again different on each side so take care with this and you should also ensure the posts are aligned correctly by temporarily fitting the guns in place as you glue the posts in place will ensure the alignment is correct.
The gun mounting posts have small tabs on the ends to fit into the large ammo canisters and this makes fitting these easy with the ammo canisters themselves are made up of two parts each with the join line along the edge of the canister face eliminating the need to fill and join line with the detail on canisters quite well done.
Fitting the guns and ammo canisters with the short sections of ammo belt between the gun and canister is fairly straightforward but watch as mentioned that everything aligns correctly before the glue has dried.
Fitted between the two side gun mountings is the gun site rod (part P24) with separate clear gun sight (part E6) but you should take note that the sight is not located centrally on the rod but offset to the right. Unfortunately the instructions are not clear on this and if not careful you can easily fit the mounting rod the wrong away around and end up with the sight offset incorrectly to left so watch this.
Attached to the front of the mounting is the large circular gun shield but the lower angled fillet is too short and lacks the weld seam around the fillet join which is quite evident on pictures of the shield. There is not much you can do about the undersized fillet but you could add the weld seam for a better look.
Overall this is nicely done Maxson mounting but as always there is room for the smaller details such as wiring to be added. You also get the gunner figure to add if you wish and this will have to be added early on in the assembly as it's a little tricky to fit after assembling the mounting.
This is quite a small compact trailer which is reflected in the kit parts with the main square base in one part with just the real plate and lower plate separate, this is a fairly clean moulding but there are a couple of mould seams on each side of the base to be smoothed out before assembly begins.
Added to the base are the smaller detail fittings along with the front trailer arm and apart from the normal part cleanup these are nicely detailed and fit together without any problems, just watch the alignment of part R26 as the fit is a little vague.
The two trailer wheels have the main wheel and tyre in one piece with the inner wheel hub separate with well done hub detail on both sides, the wheels have separate mounting brackets that allow the wheels to be fitted in the normal towing position or flat for the firing position.
There are also the three outrigger jacks used the steady the trailer in firing mode and these are in two halves each with the central jack "leg" a separate part with fine ratchet teeth and small notches that allow the leg to be positioned raised or lowered. The jacks can also be positioned deployed or stowed on the trailer depending on the final setting for the trailer.
While the trailer is a fairly simple affair there are a couple of details you can add to improve the look. These are the hand grips on the outrigger jacks should be hollow and drilling these out will give a better appearance and the small front cross member on the towing arm should also be a hollow tube. You can either drill this out or replace with brass tube to again add more detail to the trailer.
These are the normal exploded view drawings which in the main are easy to follow and as the kit doesn't have a lot of parts there are only 7 steps to get through.
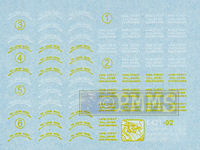
The small decal sheet is well printed and has a good selection of stencil data for the ammo canisters but no other unit markings are provided.
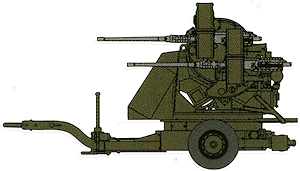
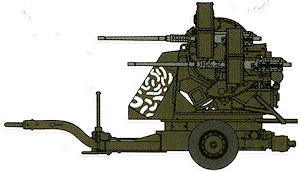
The two options provided are:
|
Overall this is a very well little kit of M55 trailer with Maxson M45D quad cal.50 M2HB mounting with very cleanly moulded parts are good fit overall, with only a very few areas requiring attention, the etched bolt strip being the most tedious.
Like any kit there are areas where improvements can be made but the kit will build into a nice little kit that can be used anywhere from WWII to Vietnam without any real modifications
Highly recommended


