

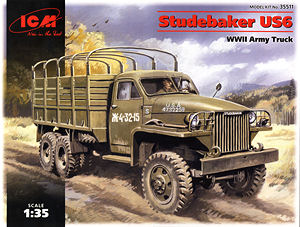
The Studebaker US6 was the contemporary of the GMC 6x6 ‘Deuce and a Half’ and due to standardisation was not adopted as the main transport truck used by US Forces in WWII but instead formed the bulk of supplies to the Allies under the Lend-Lease program, most notably the Soviet Union that received large numbers of Studebakers.
The truck proved to be extremely reliable and robust being well liked by its operators and was also used by the Soviets as the basis for some of their Katusha rocket systems as well as many being captured and used by the German Army.
The kit:
This new kit from ICM represents the standard early model 6x6 hard top cargo truck version without winch as typified by the “Studebaker” name plate on the top of the radiator grill. Like the GMC there were many variations built on the US6 chassis including a short wheel base version and also an open cab with canvas cover although this was much less common as well as a version with the forward mounted winch.
I don’t normally comment on a kits packaging as it’s basically irrelevant unless it impacts on the contents and with this kit all 7 sprues are packaged together in just one plastic bag and this has resulted in a bit of damage to some of the finer parts as they impact on each other during transit. Thankfully the broken parts were still in the bag and easily repaired but using individual bags like most other kits would reduce this damage considerably.
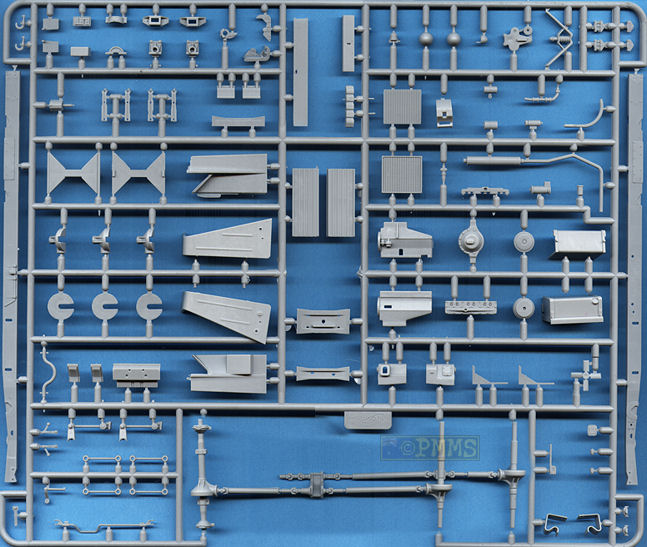
The kit is quite conventional by today’s standards having just 206 parts in a couple of shades of light grey plastic, 6 in clear plastic plus the decal and instruction sheets with the standard of plastic moulding quite good overall.
Detail on the parts ranges from very fine to good overall and there are some extremely finely moulded parts that will need care when removing from the sprues. Most notable is the very few ejector pin marks about the place with the parts being very clean apart from a bit of light flash that can easily be removed.
There is also some substantial mould seams on some parts to be removed but overall the quality of the mouldings is perfectly acceptable.
One thing that proved a little annoying was that the parts are not numbered on the sprues but only on the parts layout diagram which means to identify the parts during assembly you continually have to refer back to this diagram and then back to the construction sequence which has you flipping back and forth through the instruction pages while trying to assembly the parts.
It may be worth while to use a fine marker pen and number the parts yourself beforehand to make assembly a little easier but in any case you have to make doubly sure you have the right part especially with the smaller parts that are not that obvious.
Chassis:
The main chassis consists of the two longitudinal beams joined together by five cross members made up of a total of 11 separate parts and it is essential this assembly is perfectly square and level as it will govern the fitting of all other parts to the kit. Thankfully the fit here was generally good but test fit beforehand and use a slower drying liquid cement to give you time to make adjustments while checking the alignment before the glue dries. I also left this assembly overnight to cure completely before adding the suspension to avoid and unwanted movement while adding the additional parts.
The main drive train on the other hand is moulded in one single part that includes all three axles, drive shafts, differentials (with just half of each diff separate) and the central transfer box and this ensures everything here in perfectly square and correctly spaced to eliminate any problems.
Added to this are the rear leaf springs and sway braces with additional diff halves as mentioned for better detail definition as well as the front steering linkage with the detail on the springs nicely defined with just a small mould seam to be removed from down the middle.
Other details added to the chassis are the cab steps, side mounted fuel tank and spare wheel, front bumper as well as the rear bumper bars and tow pintle.
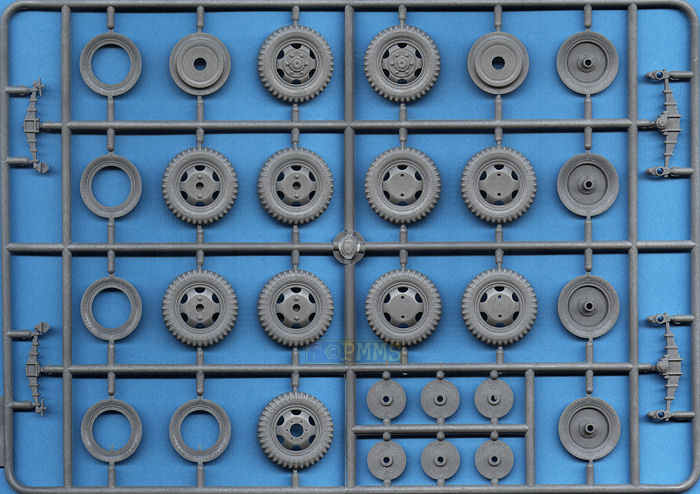
Wheels:
The rim and hub detail is quite well done and the tyre sidewalls have fine embossing which looks quite good but unfortunately it is down hill from here.
Firstly the back of the wheel is fully blanked off with the rear insert when in fact there should be space between the brake drum and the rim meaning you can see daylight through the rims at given angles.
See the images of the Tamiya GMC wheels for the correct representation of the wheel rims and brake drums.
Second the tyre tread pattern is even on both sides where all military cross ply tyres have offset tread pattern and as the wheel is in one piece and not in two halves you simply can’t rotate the thread to achieve the correct offset.
Therefore apart from the hub detail there is little to recommend about the wheels and the best option is to “borrow” a set from the Tamiya GMC kit or use any of the available resin wheels for the GMC. There will no doubt be resin wheels released for this kit to rectify these issues as they are quite major in the scheme of things.
Engine:
Included is a full Hercules JXD 6-cylinder engine and radiator that provides most of the basic parts such as separate head, manifold with carburettor and air cleaner plus the alternator, oil filter and separate front fan. The three part radiator has a separate top section and fine grill work as well as the top hose back the engine with the battery added to the side panel.
Overall the engine detail is acceptable but you could detail up the engine considerably by adding all the wiring and plug leads as well as other smaller details if you want to show the separate hood open?
Once the engine is attached to the chassis there is the two part exhaust added from underneath and this would look better if you drilled out the end of the pipe.
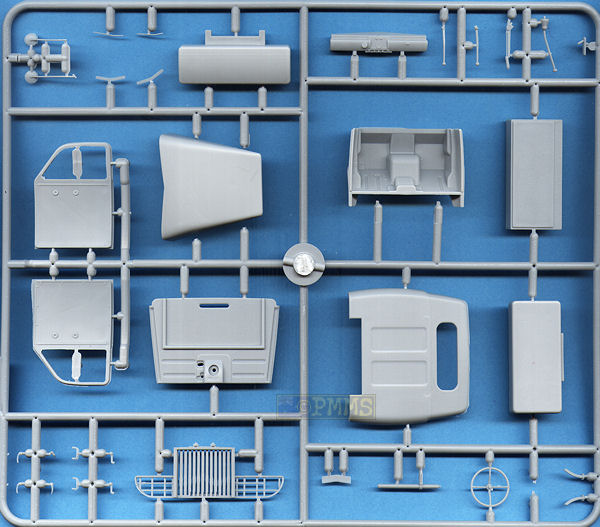
Cab:
This is made up of several parts, the floor with added bench seat, the firewall, windscreen/roof and rear wall as well as separate side doors with glass parts for all the windows.
The detail is well done with the driver’s foot pedals with the correct hexagonal pedal shape, nicely rendered gear shift levers especially the hand brake and the steering wheel has the correct kink in the four spokes as well as finger grips on the underside of the wheel for some very good attention to detail.
It should be noted that if the winch is fitted there is an addition lever added to the left of the main gear stick which is correctly not included in this kit as it is without the winch.
The dash board/instrument panel is also a good representation of the US6 part with a separate decal for the dial faces and the doors are very cleanly moulded with no pin marks to be seen and have separate fine door handles, window winders and grad handles for further excellent detail.
There is one thing to watch with the doors in that the sprue attachments go over the rear lip and some careful trimming is needed to remove the excess sprue without damaging the door sill.
The fit of some of these panels will require a bit of trimming here and there and test fitting will be called for with the fit of the floor/rear wall needed the most attention on my kit.
The clear windshield is a separate part that allows you to show this open or closed and there is also small brackets provided if showing the screen swung open and to add to this are more very fine windscreen wipers that will require care in handling. The long rear view mirrors added to the doors are so finely moulded that it’s hard to clean up the small mould seam without breaking and replacing the mirror arm with thin wire would provide a more robust mirror, sort of the part being too fine for its own good, you don’t get to say that very often.
Added to the front are the two separate engine bay side panels, separate front grill and top engine hood that will allow showing this open to display the engine if you wish. The front grill suffers from being plastic in that the grills and head light guards are way too thick and careful thinning with a sharp knife blade will improve the appearance and replacing the headlight guards with thin wire will do the same there. As mentioned the grill has the “Studebaker” name bar included (the actual word “Studebaker” isn’t as it would be too small) which is present on early model trucks only and you can simply trim this off for later vehicles after checking references.
The two fenders are also separate parts and have the distinctive square profile with separate head and blackout lights added with just the wiring needed to finish off. The fenders look quite thick at first glance but they actually have a fairly large lip and the thickness corresponds to the lip nicely and while the fenders themselves are overly thick it is hidden in most instances by this lip.
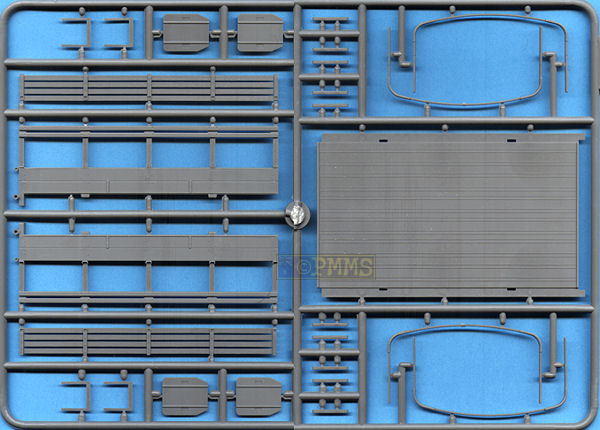
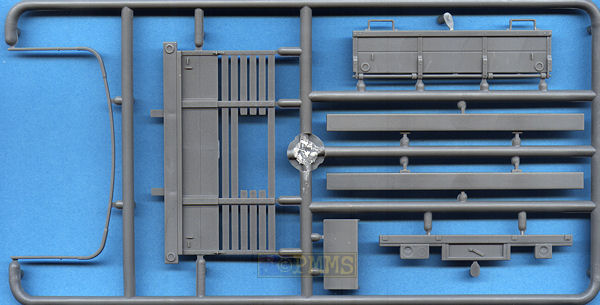
Cargo tray:
The large rear cargo tray is fairly simple affair with floor and four separate panels that have very well defined details as well as additional inner bench seats that can be shown raised or lowered, the rear gate is also movable and can be easily shown raised or lowered but remember to trap this between the two side panels as you fit these as it is difficult to add later.
There is no warping on any of the parts and the only pin marks are two on the inside of the front panel but these are raided in any case making them very easy to remove and the wood panels have the subtlest of wood grain effect that is difficult to see but shows a very good scale effect as most photos in the books below are also hard to see the wood grain from normal viewing distances.
Added to the tray are the five canvas cover tilt frames that can be stowed behind the cab or fitted to the tray uprights whichever configuration you prefer and the assembled tray fits neatly to the rear chassis of the two bearer beams provided.
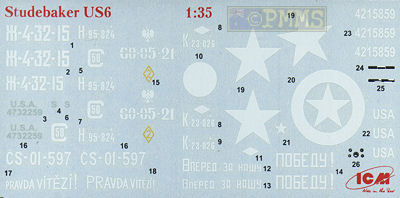
Decals:The large decal sheet is well printed with fairly thin matt carrier film and provides markings for 6 Studebakers, one Czech, one Polish, three Soviets and one USAF for a good selection of users although no specific unit info is given. There is a good selection of unit insignia, vehicle numbers and slogans as well as the Allied stars for the USAF vehicle with three view B&W illustrations of each to show the decal placements.
|

Conclusion:
Overall this kit will be welcomed by Allied models as being long overdue in plastic and will build into a very nice replica of the Studebaker US6 with some excellent details such as the cab interior, engine and chassis/suspension detail with just the wheels being a letdown. But this is easy to address by using any kit or resin wheels for the GMC and adding a set of resin wheels with snow chains provides a good opportunity to add a different look.
The fit is mostly okay but there are a few areas needing care and while the details provided will result in a nice model there is scope for additional detailing to bring this out further.
Highly recommended 7.5/10
The Sprues:
Click on thumbnails for larger view
Detail images
Close new window to return to review
| Studebaker US6 in detail Special Museum Line No.23 Wings & Wheels Publications ISBN: 80-86416-19-4  |
Studebaker US6 Model Detail Photo Monograph No.17 Published by Rossagraph ISBN: 83-89717-15-8  |
Thanks to my credit card and the excellent service from  for the review kit.