| Introduction: |
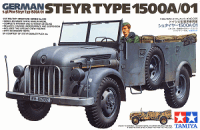
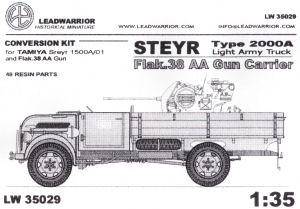
 Leadwarrior from Russia have released a number of conversion sets for the Tamiya Steyr Type 1500A (kit #35225) with this set converting the kit into the longer chassis Steyr Type 2000A which also featured duel rear wheels and reinforced rear springs for the additional weight. This particular version has the cut down cab and fittings for the 2cm Flak38 to be mounted on its normal base allowing the gun to be fired from the truck or dismounted and used as a stand alone weapon. Later vehicles were fitted with the 3cm Flak 38/103 Jaboschreck if you wanted a different home for the Dragon kit (#6353).
The conversion can be used with any available 2cm Flak38 from Dragon, Italeri, Tamiya or Tristar with the only thing to watch depending on your choice of gun is the position of the mounting brackets in the rear tray to match the kit base.
| The kit: |
The set has 49 parts in light cream resin cast to the highest standards with the large cargo bay floor and sides cast perfectly flat without any hint of warping or other blemishes apart from one minor issue mentioned below. There are no airholes present on any of the parts and just fine resin film to be removed from some parts while others have the usual casting blocks that are quite easy to remove.
The detail on the parts is also very good with fine planking with very subtle wood grain for the truck bed and clean details on the smaller parts, the usual care is needed when cleaning up the parts due to the finesse but there are real issues.
The set provides a full rear tray with floor and the four sides plus the underside chassis mountings with additional smaller parts for the bench seat and latches, a new driver’s cab floor, rear wall and doors plus additional rear springs and wheels for the duel wheel layout. The Tamiya kit cab interior is added to the resin floor with the only actual kit modifications being the removal of the old rear tow hitch with all other parts simply replacing the kit parts.
| Assembly: |
This is fairly straightforward as far as resin sets go with the rear tray parts fitting together easily, there was one minor alteration required in that while the floor is cast perfectly flat it was not perfectly square at one edge. This required just 0.5mm trimmed from one front corner and using a metal “square” this is easily trimmed with all other edges being nice and square.
The folding side panels have fine hinges cast on the lower edges and care is needed with these as they are quite fragile and two were missing from my parts and the rear folding flap required minor width trimming to fit precisely. Inside is the folding bench seat that can be shown raised or lowered as well as a spare 2cm barrel case to add as you wish.
The underside chassis mountings again are cast perfectly straight and have notches that make fitting together very easy and fitting these together on a flat surface such as a piece of glass ensures there is no warping in the assembly.
This assembly can then be added to the underside of the tray with the smaller fittings added but it is best to fit the inside 2cm Flak mountings using the chosen kit base as a guide as there is no indication where the parts should go otherwise.
For the kit chassis you cut off the rear tow hitch and add the chassis extension as well as the additional rear springs and mountings which again are all very straightforward without any traps.
Fitting the second rear wheel for the duel wheel layout required a little work as the additional resin wheel just sits flush against the kit wheel but should have a small gap between the wheels. This can be achieved by adding a small washer made from thin card and modifying the brake drum part (B46) so it still holds the poly cap in place. The new duel wheels fit to the kit axles without any further modifications and add a different look to the kit.
The cab floor has the driver’s foot pedals cast in place like the Tamiya kit and has nice tread plate pattern included with locating holes and lugs to take the kit seats and driver’s levers as well as separate side panels and doors.
These parts fit together easily but there was a fit problem attaching the kit firewall bulkhead (part A26) to the resin sides and floor which leaves some gaps around the forward edges that can be filled with thin card and while these are a bit out of sight after assembly will still need attention.
The fit of the cab to the kit engine compartment is straightforward as this fits to the firewall bulkhead (part A26) the same as with the normal kit and the cab floor and rear tray fit easily to the kit chassis. There are no locating pins for these parts so make sure you line them up correctly while being glued in place but other than that no other problems arose.
| Instructions: |
These are a series of photos of the parts during assembly with the parts called out by number along with a parts layout diagram to help identify the parts.
Most sequences are easy to follow but some will need careful study such as the cab parts fit as it’s not clear exactly where the resin parts fit to the kit firewall which may have resulted in the gaps in my set.
| Conclusion: |
The standard of resin casting is superb with finely rendered details and no blemishes to deal with and while assembly is straightforward the minor work mentioned above is not out of the ordinary for resin conversion kits.
The fit of the full rear tray parts is superb and other than the minor trimming on one corner went together like a normal plastic kit for a relatively easy conversion.
Using your choice of 2cm Flak will result in an excellent model to add to your collection and should appeal to any modeller as it is a fairly basic conversion as resin conversions go.
Highly recommended 7.5/10
| Resin parts: |
Click on thumbnails for larger view

Detail Images

Close new window to return to page


