

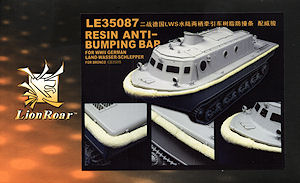
With the recent release of the Bronco Models Land-Wasser-Schlepper Mid Production (kit #CB-35015) the most conspicuous absence from an otherwise well done kit was the rope bumpers seen fitted in most photos of serving LWS's.
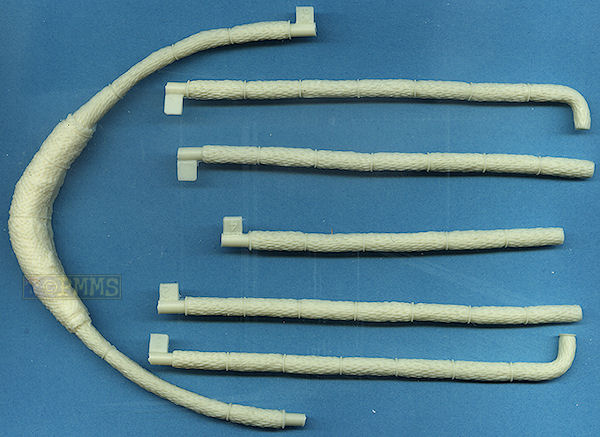
Lion Roar have have released this set of resin bumpers designed for the Bronco kit to fill this void with the set consisting of just six parts cast in light cream resin.
Updated September 9, 2008
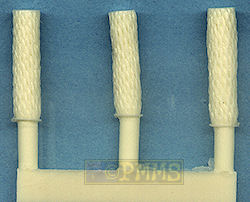
Lion Roar have now modified the set to include an additional three short sections of rope to deal with any gaps when fitting the bumpers to the kit as mentioned below.
Click for larger view
Additional short sections included
The standard of resin casting is excellent without any blemishes such as air holes or the like and just small casting blocks to be removed from the ends of the "bumper" sections which also include the parts numbers for the individual parts. You should first note that these part numbers are important as the left and right side parts are specific in their location on the model with there also being fine "L" and "R" cast on one end of the side parts to further help get them on the right order.
As well as the bumper segments having to go on the appropriate side of the hull they should also be fitted the correct way around with one end having the raised rope attachment and the other plain with the parts fitting together so each attachment orientates correctly, so make sure you don't mix up the segments during assembly.
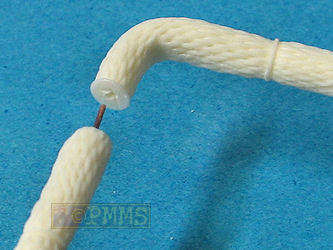
Each segment of the bumpers have very subtle woven texturing included that will need careful painting to get the best result with each section just designed to butt join together which does make things a little tricky as there was a fair bit of trimming needed to fit the bumpers to the Bronco LWS hull.
The first thing I did was to drill holes in the end of the each segment to fit a wire pin which then slips into the corresponding hole drilled in the next segment to help hold these in place during the test fitting and trimming that is to follow.
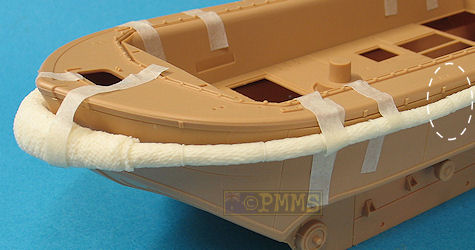
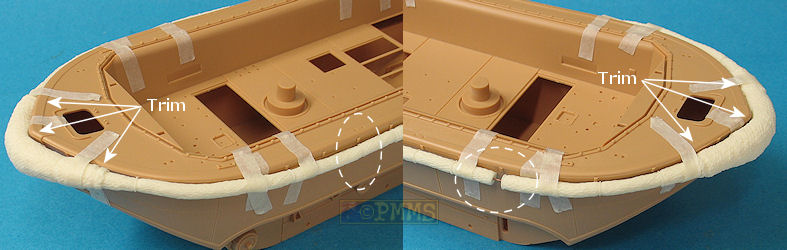
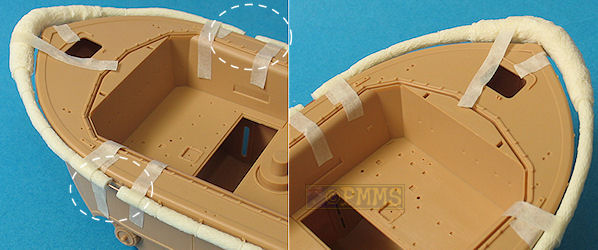
It should also be noted that the resin bumpers are designed to sit just below the hull gunnel ridge and not level with the top of the gunnel as seen in most LWS photos but thankfully all the cast on rope attachments lined up with the corresponding attachment points moulded around the Bronco kit hull which made things a little easier during final fitting. All images of the bumpers below are dry fitted (taped) to the model during the test fitting.
On first test fitting the large front rope section sat rather low on the bow to get the segments to fit together without gaps and the two stern corners also needed squaring up on the inside corner to fit snugly. Unfortunately if trying to fit the bumpers level with the top of the gunnel there were large gaps between the front segments but we will look at this a little later. There may also be some trimming needed on the stern to 'sit' the bumper segment around the kit winch guide assembly when this is fitted into place (not shown in my images). If fitting the bumper section level with the gunnel adjustments will be required here but less so if you sit the bumper section lower as sdesigned.
The short sections now included can be used to fill in any of the gaps between the larger rope segments by trimming the small sections to the required length, you just have to make sure the rope segments still line up with the attachments on the hull while fitting the new rope "fillers". Some trimming of the inside of the rope section, especially at the bow will still be needed for a snug fit to the hull but these additional segments will make fitting the resin bumpers much easier.
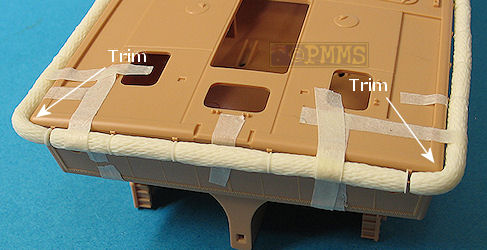
get the side segments to mate together requiring trimming on the inside of the front section.
The fit at the rear was better only requiring the inside of each corner
to be squared a little to fit snugly to the hull contours.
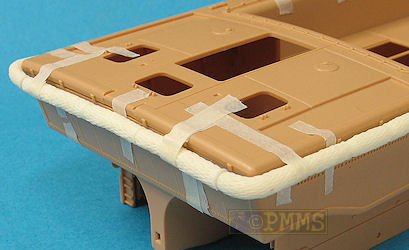
Aligning the bumpers just below the gunnel lip as designed saw the inside of the large front rope section having to be trimmed quite a bit to get a snug fit and test fitting often is the best option to determine the amount of trimming needed. A reasonable fit was achieved after some trimming with the wire pins added earlier making this a lot easier to hold the segments in place as you go.
of trimming needed if you wish. The new shorter bumper sections will deal with any gaps arising during the fitting of the bumpers as shown in the images here to make things a lot easier.
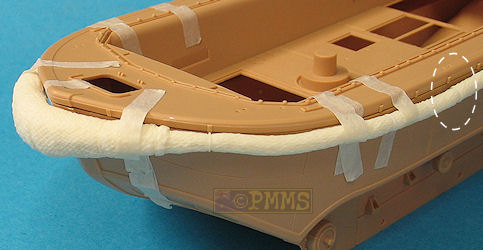
As mentioned if you want to fit the rope bumpers level with the top of the gunnel as seen in most photos there will be additional trimming needed inside the front section and also for each of the moulded on kit attachment points to sit 'into' the bumpers instead of the bumpers sitting over the top of the attachments, if that makes sense?
will be needed to seat the bumpers to the hull if you want them level with the top of the gunnel?
In the end it may be easier to align the bumpers just below the kit gunnel lip as designed for less trimming and you could add thin thread attachments from the bumpers to the kit attachments to take away the "just hanging there" look when finally glued in place around the hull.
One issue when fitting the bumpers was the hard resin mating to the hard plastic of the hull giving no play at all that required the careful trimming to get a snug fit all around but the rigid side and rear sections also meant they stayed in place once fitted not wanting to flop about the place so I guess that is a bit of a trade off?
Once they are fitted in place they add that finishing touch missing from the kit and as mentioned after the trimming and careful painting should do the job nicely for most?
A small instruction sheet is included showing the position of each numbered bumper segment and you should take careful note of this to ensure they are fitted together correctly as mentioned above.
The set is nicely cast with minimal cleanup of the parts, but there was a lot of trimming needed to get the bumpers to fit to the kit hull and as mentioned are designed to sit just below the kit gunnel line and more trimming will be needed if you wish to fit them level with the gunnel as seen in most photos.
The inclusion of the additional shorter segments of bumper will make dealing with any gaps in the rope segments during fitting very easy and Lion Roar are to be commended for rectifying the fit issue with the initial release of the set.
The resin bumpers are also quite rigid lacking the subtle sags and other contours seen in some LWS photos but for a reasonable cost they should help to add this missing detail and finish off the Bronco kit nicely with the trimming required nothing that can't be overcome.
Highly Recommended
See the Land-Wasser-Schlepper (LWS) Subjects page for other reviews of kits/update sets
Thanks to Lion Roar for the review set.