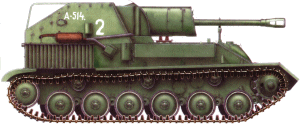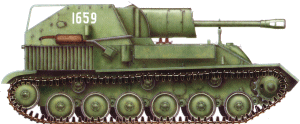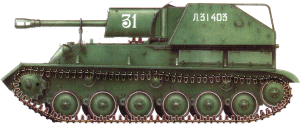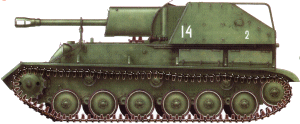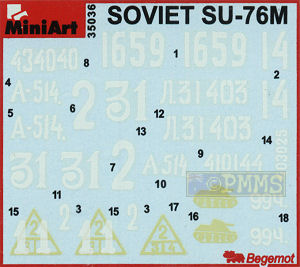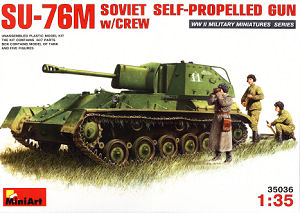
SU-76M Soviet Self-Propelled Gun w/Crew
MiniArt 1:35 Scale Kit No. 35036
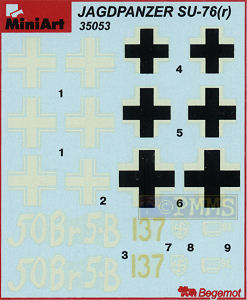
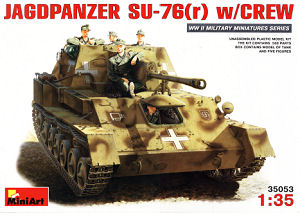
Jagdpanzer SU-76(r) w/Crew
MiniArt 1:35 Scale Kit No. 35053
Review by Terry Ashley
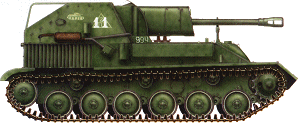
It featured the ZiS-3 76.2mm Anti-tank gun mounted in the open rear compartment and proved to be reliable and well liked vehicle that could defeat most German armoured vehicles other than the heavy Tiger series at normal combat ranges.
It also remained in Soviet and satellite Army use until the late 1950’s seeing combat in the Korean War and Hungarian Uprisings of 1956.
The kits represent the improved SU-76M type produced from 1943 to 1945 with about 17,000 built and as both the kits are identical other than the figures included and decal sheets offered I will included both in the one review.
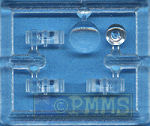
The SU-76 kits (both 35036 and 35053) have 321 parts in light grey plastic, 4 in clear plastic with a further 220 individual track links plus an additional figure sprue with 68 parts (35036) and 49 parts (35053) which gives a total parts count of 609 (kit #35036) and 590 (kit#35053) plus of course the decal and instructions sheets.
The standard of mouldings is both good and not so good with most of the details nicely rendered with crisp details although there is a few shallow pin marks about the place as well as quite a bit of fine and not so fine flash about the place that will need a bit of care to remove before assembly.
The fit of some parts will require a degree of trimming and test fitting is advised before any gluing to determine if any is needed as well as some parts don’t have inside locating pins meaning you have to ensure you line up the parts correctly as they are glued. The plastic used in the kits is also quite soft and care is needed while cleaning up the flash and the sprue attachment burs not to take too much material from the parts.
There are also many very fine parts included that are free of flash but will require extreme care when removing from the sprues and in dealing with the normal mould seams and it is best to do most of this clean up while the parts are still attached to the sprues so you have something to hold onto.
My second kit had less flash overall than the first so this may vary from kit to kit but the amount of flash is a little excessive by today's standards.
One thing with this and other Miniart kits is there are no part numbers included on the sprues just the instruction parts layout diagrams and you have to continually check back to these diagrams to ensure you get the right part. While the larger parts are self explanatory some of the smaller parts are not so easy to identify using this method especially with the odd miss-numbered part in the instructions to keep you on your toes.
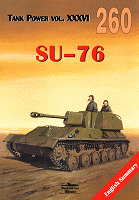
Dimensionally the kit matches the 1:35 plans in the new Tank Power book #260 SU-76 almost perfectly in all respects other then the barrel length with the kit barrel being 3mm longer than that shown in the plans. As I have mentioned previously you shouldn’t put the house on a single set of plans but given all other dimensions such as hull width/length, superstructure and gun housings as well as the road wheels diameter and track size all match the plans to well within accepted tolerances you could extrapolate from that the barrel length in the plans is also correct but I would like some corroboration before a final verdict.
As the barrel tube has no taper for the exposed length shortening this would not be a problem if you wished to do so?The axles, road wheels and drive sprockets are from the T-70 kits with the road wheels having detail on both sides as do the drive sprockets although this is a little on the heavy side and the teeth are too thick but there are some major fit issues when assembling the suspension.
Detail on the road wheels is nicely done for the six road wheels and idler but there is an issue with one of the wheels (one on each side), the rubber wheel section is moulded off centre meaning it is wider on one side and thinner on the other. There is little you do about this but it can be used for the idler and the thin section positioned where the track goes around the idler as this will sort of ”hide” the narrow rubber section.
The main issue is the axles come unaltered from the T-70 kit but the locating holes in the SU hull are different from those in the T-70 hull meaning if you push them into the SU hull holes the axles will be skewed at an angle as the notch on the axle has nowhere to go.
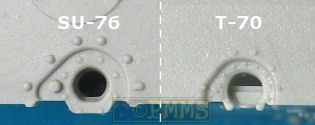
You could open out the bottom of the axle hull hole but this means the axle fit is very loose with the best option being to cut off the raised tab on the axle stubs and this allows you to fit the axles at the correct angle with quite a snug fit.
and view of axle fit before and after alterations

There is still a bit of play with the axles and you must ensure you line up the axles evenly as well as getting the ride height correct and using some form of jig as Steve Zaloga suggested would help aligning everything.
The centre of the axles should be even with the bottom of the hull line so you can use this as a visual guide to the ride height.
Moving to the return rollers the supports arms the hull locating holes will need a little flash removed from inside the hole and slightly enlarged for a good fit with the fit of the return rollers to the arms being quite good thankfully.
You should watch the numbering on the final drive housings as they are different left and right but the fit to the hull is good but not so the fit of the drive sprocket to the final drive and you will have to enlarge the hole in the final drives for a better fit.
Fitting the remaining smaller suspension and hull parts is quite straightforward but test fit first as some required their locating holes enlarged slightly but nothing excessive.There are a couple of shallow pin marks in the insides of each link which are easy to remove being outside of the guide teeth but the tracks are not designed to be workable with the links simply glued together to form the track runs.
The fit of each link is a little loose and laying these out on a flat surface and adding a small amount of liquid glue before fitting around the drive sprockets or idlers would be the best way to go with the fit around the drive sprockets being good.The first part added to the hull is the large mid-hull cross member that is also the gun support (part 32) and the fit of this is suspect and can effect the final fit of the kit is fitted incorrectly.
The indentations in the hull sides for part 32 are 1mm too deep and if you push part 32 down to fit snugly in the indentation it will be 1mm too low, this in turn will mean the gun and the front superstructure wall will also be 1mm too low affecting the fit to the superstructure sides.
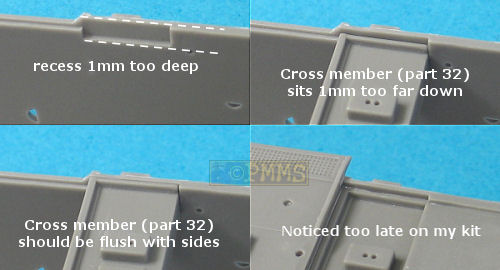
You must ensure that part 32 is fitted flush with the upper edge of the hull tub for proper alignment and this is an easy trap to fall into if you just go by the recess in the hull walls.
The fit of the left side of the top engine deck also suffers from the same issue where the hull side indentation is also too deep and you should ensure the deck is glued flush with the hull sides for the correct fit.
I had to thin the right side hull wall to fit the glacis correctly but other than that the fit was good, there are as couple of smaller issues with the glacis detail but little you can do about it.
The separate engine inspection hatch is slightly oversized and the lower corners of the driver’s hatch and bullet splash guard on the glacis are not rounded enough meaning the space between the top corner of the inspection hatch and the driver’s hatch is less than it should be. But as mentioned there is little you do with this and it will not be an issue with most as the differences are only minor.
On the right rear of the hull is the large exhaust box made up of 4 main parts that fit together well apart from the end (part 82) which will need some trimming for a good fit.
The fenders are quite nicely done but there some flash to be removed with separate fine support arms added to the moulded on fender supports but the two locating tabs will need the corresponding holes in the hull sides enlarged to fit. The fit around the final drives at the front will need some care when gluing the fenders to the hull sides to avoid any gaps. The right side fender in my kit was quite warped at the front which required some careful bending back into alignment while gluing to the hull but the softer plastic made this easier than it would be on some kits.
Added to the fenders are quite fine fender supports that will need care in handling but look commendably thin when in place and other items such as the three part head lights and left side storage boxes can be added.
There is additional 76.2mm ammo racks added inside the compartment with separate rounds that include the securing clips so you really can’t use these outside the racks without trimming off the clips.
The front superstructure panel is cleanly moulded without any pin marks but the side panels have a few shallow pins marks on the insides to contend with, the sides are also an even thickness for a good impression but are slightly too thick if looking at scale thickness although this will not be that noticeable on the finished kit.
Additional equipment is added inside the superstructure walls and it may be better to add this before fitting the walls to the hull but test fit the walls first to ensure a good fit as this may be difficult with the equipment attached. Also included are two nicely done PPSh submachine guns but they don’t have any magazines that can be fitted to the gun as they are moulded inside the ammo racks, also the German SU-76(r) kit has the same PPSh submachine guns and these would have most likely been replaced with MP-40s?The barrel as mentioned above is 3mm too long according to the Tank Power plans but if you decide to shorten this it is easily done as the exposed length of the barrel is parallel but don’t fit the two part muzzle brake until the gun is fitted inside the large gun mounting. There is also some flash to be cleaning from the muzzle brake halves and there is no locating pins on the gun parts which actually results in a better fit for the barrel and muzzle brake.
Assembly of the gun is quite taxing as the fit is not the best especially with the forward recuperator piston support but thankfully this is hidden inside the large gun housing so you don’t have to worry about the poor fit. Take note that there is a large gap down the middle of the top recuperator housing that should actually be there so don’t be tempted to trim this and join the two halves together.
The many small parts for the gun are quite fiddly to fit as there is some flash as well as the usual moulding seams to be removed and care will be needed when fitting these to the main gun. Also watch as part 136 is shown as part 36 in the instructions but part 136 is quite different from part 36 so the error should be obvious when looking for the right part.
With the breech, this has a separate breech block that will need minor trimming to fit inside the block and there are two large sink marks in the sides of the breech. Thankfully the left side gun shield will hide the left sink mark so you really only have to fill that on the right side before adding the breech opening handles.
Assembly of the large front gun housing sees the fit of parts quite good after trimming some substantial flash from the housing sides with the front panel also fitting neatly in place as does the housing to the front shield.
Fitting the assembled gun into the large housing is rather tight and you have to get everything lined up correctly when slipping the gun into the housing, you must also make sure the front barrel section has been sanded perfectly round as the fit though the front housing opening is again very snug providing the barrel is perfectly round.
Adding the rear housing sections will require care during assembly to both identify and fit the right parts in the right places and removing the flash before hand to ensure the mating surfaces are nice and smooth.
The fit of the rear hull plate is thankfully good without any trimming required and the rear door can be shown open or closed as you wish.Detail on the figures is well done with nicely done fabric folds and other details, the two over coats have the lower sections as separate parts for better definition and these add a nice bonus to the kit.
For kit #35053 you also get five tank crew figures wearing the standard assault gun uniform but again these are not designed for the SU-76 with one driver figure that is all but useless with this kit as there is no interior provided and the others are designed to be leaning on superstructure sides or sitting. The box top image gives a few ideas of the poses and you should be able to fit them okay.
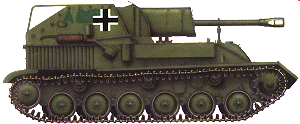
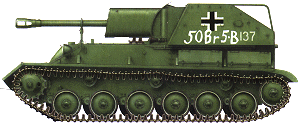
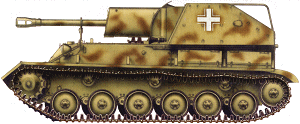
Again the uniform detail and detail such as fabric folds and lapels are well defined and the figures will come up well but as mentioned are not designed specifically for the kit but again getting them is a nice bonus.Kit #35053 has markings for three German vehicles, two still wearing the overall green finish and one repainted in overall Dark Yellow with Red Brown can scheme applied for a different looking SU-76.
Kit No. 35036 SU-76M Soviet Self-Propelled Gun w/Crew
|
|
The fit of the axles will be the most taxing and the fit of the main hull cross member will result in substantial problems further down the track if miss-aligned due to the oversized location recess in the hull.
While you will need to reach into your bag of old fashion modelling skills to get a result the kit with all its issues is still a marked improvement over the previous offerings in plastic and should be welcomed by Allied fans, just don’t expect to build it over the weekend.
The inclusion of the figure sets in both kits is a nice bonus that may ease a bit of the pain for those thinking of a diorama setting for the kit.
Recommended 7/10
I will add additional images tomorrow showing the kit details.
Click on thumbnails for larger view


Detail Images


Click Browsers BACK button to return to page
Tank Power Vol.XXXVI
Wydawnictwo Militaria No.260
ISBN: 83-7219-260-X
Thanks to my credit card for the review kit.

