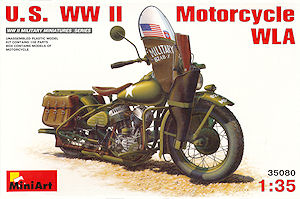
U.S. WWII Motorcycle WLA
Miniart 1:35 Scale Kit No. 35080
Review by Terry Ashley
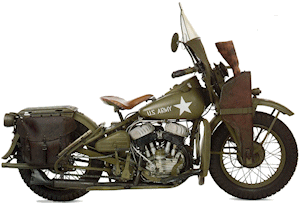
The WLA was based on the civilian WL model with changes for military use such as the paint scheme of predominately olive drab and black plus the inclusion of blackout lights front and back, heavy duty luggage rack and Thompson SMG scabbard and additional air/oil cleaner (filters) added to the motor.
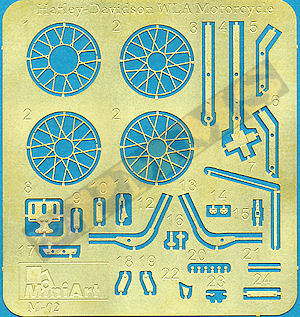
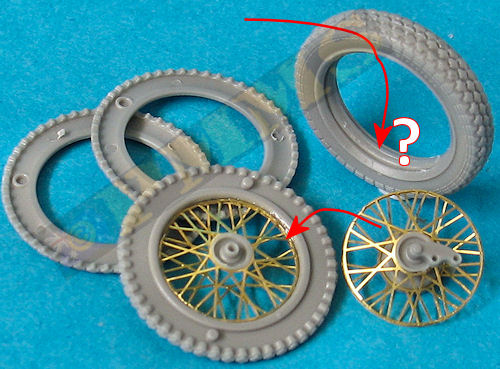
After bending the spokes to their disc shape the two spoke halves are joined together and you must ensure the spokes overlap correctly at the edges to get the right appearance, the edges of the spokes are in small segments presumably to allow the contours to be achieved but this does result in some unevenness around the outer spoke edges that you need to make sure are as flat as possible while gluing the halves together with thin cyanoacrylate.
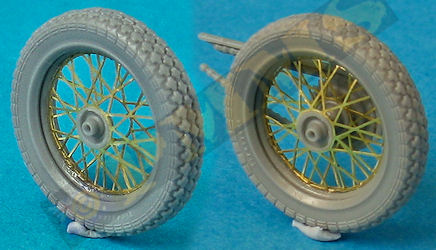
Fitting the etched spokes to the tyre rims is not that easy as they are not designed to be trapped between the tyre segments but instead you have to just “rest” the spokes centrally to the rims inside the middle tyre segment which raises a couple of issues. Trying to position the spokes perfectly centrally after joining the three tyre segments together proved a very difficult exercise and it’s far easier to fit the spokes to the centre tyre segment before fitting the outer tyre segments as this allows you to sit it centrally far easier.
The other issue is with the spokes not being trapped between the tyre segments means the outer solid edge of the spokes sit above the rim and you don’t have the appearance of the spokes going into the rim itself, this may be a small point but distracts from the final appearance of the wheels unfortunately.
The engine itself is very complete with all the major components included as separate parts for good definition such as the carburettor and distributor between the cylinders along with the large box air filter (with small etched clips) and connecting pipe on the left side. The forward mounted dynamo and the rear mounted battery with extremely small etched butterfly bolts for the securing brackets and the electrical coil in front of the battery.
All the brake and clutch pedals are separate parts as are the foot rests and large chain guard on the left side to the finely detailed drive chain and top guard added to the right side and rear wheel hub plus the full length exhaust pipe also on the right side. One item missing is the kick stand located on the left side of the frame, most images of the WLA at rest show it resting on this stand. There were no assembly problems with any of these parts with everything fitting perfectly but you need to follow the instructions and fit the parts in the order shown to avoid any problems.
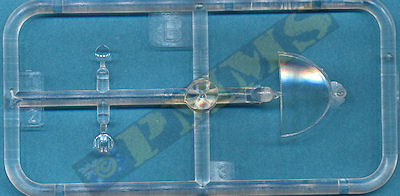
Added to the assembled engine/frame are the two part top fuel and oil tanks with separate filler caps and small etched connectors added under the tanks. The instrument fairing is added above the tanks and there are decals provided for the main dial (with clear plastic “glass”)and the data block for the rear of the tank but the printing on the dials and data block is very heavy and blotchy and doesn’t look that convincing. Thankfully Archer Fine Transfers have a set (#AR35327) of replacement dials and data block with very fine printing to improve the appearance of the kit considerably in this area and is a highly recommended update.
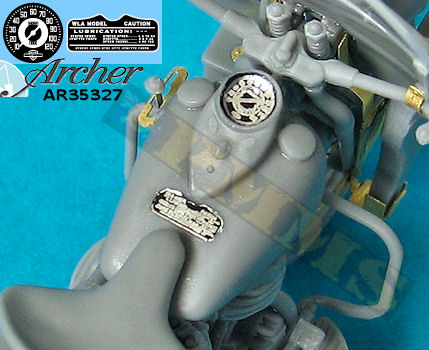
Located on the side of the fuel tank is the gear lever bracket and lever in etched brass with a small plastic gear knob added to the top of the lever. You have to carefully bend the bracket slightly to fit the contours of the tank and the longer lever also needs to be bent around the lower tank contour but there is no indication given for bending this and you may want to use the tank as a former before actually fitting the tank to the frame to make this easier. The thin etched gear push rod doesn’t actually end up anywhere and you should just sit this on the inside of the circular chain guard to give the impression of it going back to the gearbox.
There are also two quite thin guard frames (parts A34, A35) added to the rear and front of the assembly and these need care removing the fine mould seams as well as during fitting and have excellent scale appearance once attached.
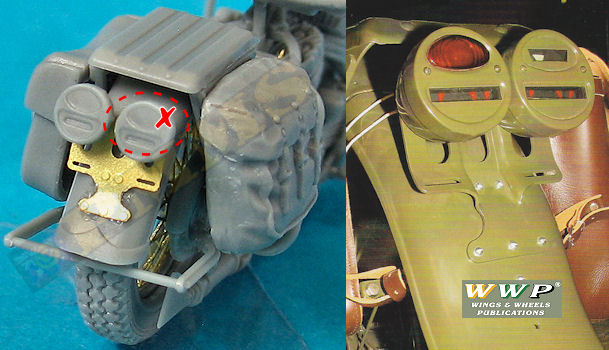
Added over the back wheel between the frame supports is the rear mudguard with two small tail lights on an etched mounting bracket for excellent definition. The only issue here is both taillights are the same style but the right light should have a thin blackout strip at the top and not the same eye shaped lens as the left light. The bracket and lights are a little oversized with the bracket extending too far down the mudguard but this is not that noticeable on the assembled bike. I may have fitted the light bracket too far down on the fender as there is no actual locating points given so take care with this assembly.
The luggage rack is added between the frames with leather rucksacks as well as the under pan engine guard with two etched attachment brackets and the rear folding stand frame. There is scope for adding the myriad of wiring and other plumbing to the engine and fuel tanks to finish off the assembly nicely using thin wire or sprue as preferred.
It is advisable to attach the forks/mud guard to the front wheel hubs while the glue is still malleable to allow for any minor adjustments to get the correct alignment of the forks and wheel for the correct ‘sit’.
Added to the forks are the mountings for the head light and siren and small light on the front of the mud guard, the main headlight is moulded in one piece with separate clear ‘glass’ but don’t fit the head light until after attaching the windscreen later as well as a separate mounting post for the blackout light. This position of this post is not made clear in the instructions and it should be angled as far forward as possible from its location point on the forks.
There are numerous etched mounting frames for the front fender supports as well as frames for the sub-machine gun holster and the tool box on the left side. These etched frames have to be bent to shape using the bending template jig provided in the kit and this does make it easy to get the correct shape of the frames but they do need careful assembly with each frame made up of three etched parts and the V angle must be correct to fit properly onto the forks.
Once the frames are attached there is the two part sub-machine gun holster with the stock of the Thompson included and the small tool box with etched clips but its best to leave these till after the forks have been added to the main engine/frame assembly and the large windshield is added as there was a minor fit issue with the sub-machine gun holster and windshield that will need some minor trimming of the holder and windshield for the best fit.
The handlebars are another finely moulded part with the brake lever included and separate rear view mirror as well as very small etched brackets added to the windscreen locating points, these need careful bending as the bars are at a angle where the brackets are located and the etched brackets have to be bent to reflect this angle, not the easiest of procedures given their small size.
The forks are attached to the main frame/engine with the handlebars trapping the locating bracket on the front of the main frame between the two allowing the forks to turn. The windscreen can then be added but I needed to trim a very small amount off the top corners of the headlight bracket (part A20) to allow the windscreen to fit properly but other than that the fit was good, the headlight, blackout light and siren can now be added to finish off the assembly.
The kit is not for the inexperienced modeller but will build into an excellent replica of the WLA without much drama and a welcome addition to the range of Allied subjects in kit form.
Rating 8.5/10
| U.S. Military Motorcycles of WWII Squadron Signal Publications Walk Around No.5707 ISBN 978-0-89747-574-7 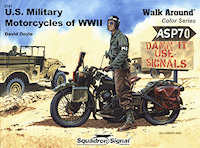 |
Harley-Davidson Soldier in detail Special Museum Line No.33 Wings & Wheels Publications. ISBN 80-86416-43-7 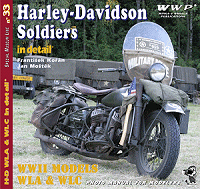 |


