
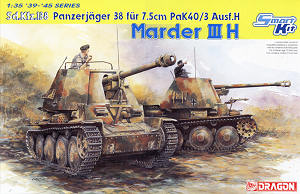

Panzerjäger 38(t) für 7.5cm PaK40/3 (Sd.Kfz.138)
Marder III Ausf.H
1:35
Part 1 Exterior
by Terry Ashley
Following on from the individual kit reviews for the Dragon Marder III Ausf.H (kit #6331) and the new Tristar Marder III Ausf.H (kit #35030) we will now take a look at how the kits shape together in this detailed comparison and I will also include the older Marder III Ausf.H (kit #6210) from Italeri which although re-released recently is really from a different era of kit making and doesn’t really cut it against the current generation of kits detail wise.
The prototype Marder H was built on the 38(t) Ausf.G chassis with the production vehicles based on the updated 38(t) Ausf.H chassis with a number of detail updates, hence the designation Marder III Ausf.H.
The Dragon kit includes a number of parts from their forthcoming kit of the 38(t) Ausf.G (kit #6290) as well as from the previous Aufkläerungspanzer 38(t) (kit #6294) plus new tooled Marder III parts but does suffer from a number of detail issues as a result while the Tristar kit on the other hand only uses the suspension and running gear from their 38(t) Ausf.G (kit #35022) with all other parts retooled to take into account the many detail differences of the Marder H.
The detail issues with the Dragon kit will become apparent as we move along and it’s interesting in that many of these details are depicted correctly in the kit box art so someone knew how they should look. The Tristar kit on the other hand has every one on these detail issues correctly depicted with the older Italeri kit also including a number of the details missing from the Dragon kit despite having some other drastic errors of its own.
For this comparison I have used the references listed below and in particular the recent 1:35 scale plans in the Panzer Tracts No.7-2 Panzerjäeger and Wydawnictwo “Militaria” 175 Marder III/Grille plus the many excellent close-up detail shots of the real Marder III H in the Nuts & Bolts Volume 18 Marder III Part 2 Ausf.H, Wydawnictwo “Militaria” 175 and Ground Power #100 with general 38(t) details from the other books listed. It should be noted that the 1:35 plans in the Nuts & Bolts book have a number of dimensional errors and again shows you should be careful when using just one set of plans or drawings as reference before hanging your hat on them. I also cross referenced the Panzer Tracts plans with the many real photographs to ensure everything was as it should be before comparing the kit parts to get the most accurate assessment possible.
The comparison will be in two parts, this Part 1 dealing with the exterior and Part 2 on the interior to follow shortly but the general theme of the exterior continues and I will just address the various details as the full reviews will give the fully kit picture.
Lower Hull:
 The
Dragon lower hull tub has the floor and both sides moulded together with well
defined detail on both sides of the hull walls for the inner fighting compartment
and insides of the final drives and includes revised upper edges but the top
row of bolts is incorrect for the Marder III H being in the wrong position
and lacking the support flange, note this flange is on the INSIDE of the fighting
compartment when the superstructure sides are fitted.
The
Dragon lower hull tub has the floor and both sides moulded together with well
defined detail on both sides of the hull walls for the inner fighting compartment
and insides of the final drives and includes revised upper edges but the top
row of bolts is incorrect for the Marder III H being in the wrong position
and lacking the support flange, note this flange is on the INSIDE of the fighting
compartment when the superstructure sides are fitted.
The position of the right side vision port is incorrect and this should be 2mm further back which is easy enough to do as the visor is a separate part but you will have to fill part of the port opening and the front locating hole in the process.
Detail on the tub exterior is very good with rivet detail on the bottom and sides as well as the idler mountings included with separate final drive covers and return roller mountings.
The Italeri tub is also in one piece and includes the right vision port which is in the correct position and all the suspension mountings with the hull moulding but again the top row of bolts is incorrect for the Marder III H lacking the support flange.
The Tristar lower hull tub is made up of the full length bottom plate that includes the lower front plate with separate hull side panels that includes detail on both sides plus the rear plate that when fitted together form the basis for the rest of the kit and as such the fit of these parts is paramount to the final outcome. The fit on my kit was spot on without any warping on the floor plate to start with and precise location resulted in a perfectly square and robust assembly not requiring any trimming or filler.
The right side vision port is a separate part and also located in the correct position with the top row of bolts also correct for the Marder III H with the support flange included.
It should be noted that you shouldn’t glue both side plates to the floor until the internal gearbox and transmission is assembled as the drive shafts fit into the locating holes on the gull sides.
Added to the hull sides when you do assemble these are separate return roller mountings and bump stops for the front suspension bogie as well as the final drive housings.
Obviously there is more assembly work involved with the separate hull tub parts but the details are correct on the Tristar parts while there are the issues mentioned above with the one piece hull tubs.
Suspension/Running Gear:
 Both
the Dragon and Tristar kits have separate bogie parts that will build to be
partially workable along with separate return roller mountings and idler axle
stubs while the Italeri kit has the bogie plates as part of the lower hull
and are fixed in place.
Both
the Dragon and Tristar kits have separate bogie parts that will build to be
partially workable along with separate return roller mountings and idler axle
stubs while the Italeri kit has the bogie plates as part of the lower hull
and are fixed in place.
The road wheels on both the Dragon and Tristar kits are the right size with the correct number of rim bolts on both sides of the run plus the Tristar wheels have the rubber sections separate that makes painting a little easier but they both look similar once assembled.
Similarly the drive sprockets of both have nicely rendered details on both sides of the sprockets with separate outer hub caps and both kits provide the sprockets with outer ring of lightening holes which are by far the most common type seen on the Marder H as well as the Dragon kit including the sprockets without the outer holes for an alternative. It’s best to check references to see if the model you are building used the solid sprocket but as mentioned the most common type is that with the outer ring of holes.
The idler wheels on both provide the type with teardrop lightening holes but those on the Dragon idler are noticeably undersized when compared to the real idler but otherwise they have nice details while the small return rollers have minor differences but are both acceptable although the “Continentau” embossing on the Dragon wheel is a little oversized.
On the other hand the Italeri road wheels are the large Hetzer type and too big for the Marder H as well as the drive sprockets and idlers being oversized and quite a letdown.
Tracks:
 The Dragon tracks are provided as individually moulded “magic tracks” which
have nice detail including minute casting numbers on the edge of each link
with no cleanup required.
The Dragon tracks are provided as individually moulded “magic tracks” which
have nice detail including minute casting numbers on the edge of each link
with no cleanup required.
The tracks are designed to be glued together and are not workable and you will
have to incorporate the track sag as you glue the lengths together. By gluing
a length together and letting the glue “go off” you can them add
it to the suspension and add the curve around the drive sprockets and idlers
as well as the track sag easier.
I found the track very tedious to put together as the links are quite loose and don't hold together so you virtually have to glue each link in place as you go but look good when fitted.
The Tristar tracks are in individual links designed to clip together for fully working track to go with the movable suspension and the details on the links is very good with crisp detail and the moulding process adding detail to the guide teeth, there is a little flash on some links to be cleaned up as well as the sprue attachment scar but not a lot.
Each link has two small pins and corresponding locating holes on the opposite side of the link and is designed to clip together in the same manner as many resin track sets.
They click together easily but due to the small size of the links the pins and locating hole edges are quite fine and there was a quite high attrition rate where the links simply came apart with only light handling. With care you can assembly enough to go around the driver sprockets and idlers with those that won’t clip together used for the ground contact run and glued in place.
But the assembled track runs do look impressive and add further to the level of detail in the kit.
On the Italeri kit the tracks are old style full length vinyl with basic levels of detailing and again are not up to today’s standards.
Front Hull plate, Glacis and Rear Hull plate:
 Most
of the issues here with the Dragon kit parts stems from the use of the Ausf.G
parts instead of the correctly redesigned Marder H parts as with the Tristar kit.
Most
of the issues here with the Dragon kit parts stems from the use of the Ausf.G
parts instead of the correctly redesigned Marder H parts as with the Tristar kit.
On the lower front plate the Tristar details are correct apart from the two hook plates being about .5mm too tall but the Dragon tow hook plates are too tall with a rounded top profile which should be square as well as the four bolts being too high on the bracket. You should note the raised detail on the Dragon and Italeri plates but not present on the Tristar plate is correct for all three kits as photos exist of Marder Hs with and without this detail and again check references for the vehicle you are modelling.
The glacis plates are much of a muchness for each kit with all three missing
the small bolts on the hatch hinge.
Obviously the Italeri plate has the inspection hatch included while the other
two have it separate.
The rear hull plate on both the Dragon and Tristar kits have the circular engine inspection hatch as a separate part while the Italeri kit has this moulded with the plate.
Other separate details on the Dragon and Tristar kits includes the idler mounting covers with the Dragon kit also supplying the earlier uncovered type as well as the central cone cover for the starter crank hole but for some reason the Dragon instructions tell you not to use this but at least it is in the kit to be used if required?
The biggest issue here is the Dragon kit completely misses the small diamond shaped intake cover on the bottom right corner of the rear plate which is on both the Italeri and Tristar kits and is a noticeable feature of the Marder H rear plate.
You should also note that the Dragon instructions indicate to put the tow hooks on the wrong sides and parts B24 and B25 should be transposed with the pig tail hook pointing outward on both sides, not inwards as indicated.
Added to the Dragon rear plate is the exhaust in two halves with separate exhaust pipe and separate outlet cover but the exhaust is 1.5mm too narrow when compared to the Panzer Tracts No.7-2 plans.
The Tristar exhaust muffler is a single cylinder hollowed out using slide moulds with separate end cap and pipe which completely eliminates any mould seams or other cleanup needed on the muffler apart from a very fine mould seam and is the correct size according to the Panzer Tracts No.7-2 plans. The armoured cover for the exhaust pipe outlet is also provided along with additional mounting brackets.
The Italeri exhaust is also in two halves but the outlet cover is very basic lacking any real detail.
Driver's plate :
 The
Dragon Driver’s plate has a number of issues again due to the use of
the Ausf.G parts, firstly the circular machine gun ring is about 1mm too far
to the left and slightly too low as well as the six bolts in the incorrect
position, its simple enough to cut off the inner locating ridge and rotate
the ring to locate the bolts correctly as well as relocating the ring on the
front plate. This will mean altering the cut-out for the machine gun but this
shouldn’t be too much trouble.
The
Dragon Driver’s plate has a number of issues again due to the use of
the Ausf.G parts, firstly the circular machine gun ring is about 1mm too far
to the left and slightly too low as well as the six bolts in the incorrect
position, its simple enough to cut off the inner locating ridge and rotate
the ring to locate the bolts correctly as well as relocating the ring on the
front plate. This will mean altering the cut-out for the machine gun but this
shouldn’t be too much trouble.
The left side visor should also be positioned closer to the MG ring meaning the visor should actually be 1.5mm further to the right. As a result to the visor being too far to the left there is no room for the centre bolt on the left of the plate which is missing altogether and will have to be added after relocating the MG ring and visor, there should be three left side bolts on the front panel for the Marder H as opposed to just two on the Ausf.G.
If you relocate the visor the inner opening will have to be partially filled as this is exposed after the port is moved and a little work will be needed here and again some may not bother with any of this if true accuracy is not a real issue?
The Tristar Driver’s plate is correct in all these details and no alterations are required while the Italeri plate also has the details in the correct position with all visors moulded closed while they are separate parts on the Dragon and Tristar plate which allows them to be shown open with the addition of small etched brackets on both.
The ZB vz.35 machine gun has internal detail on the Dragon and Tristar kits which we will deal with in more detail in part 2 on the interior but the barrel cooling ribs are all one diameter on the Dragon and Italeri MGs when they should be wider on the portion of the barrel inside the external cradle which is correctly depicted on the Tristar gun.
Mounted on top of the Driver’s plate is the large barrel travel lock with the Tristar parts matching perfectly to the photos of the real thing with details such as the spacing between the lower bracket and the lock, the central guide post and the end bracket detail, as well as including alternate parts to show the barrel grip open or closed as well as the travel lock being movable after assembly.
Unfortunately the Dragon travel lock is very simplified and lacks the spacing between the lower bracket and the lock, the central guide post is missing and the end bracket detail is non existent but the travel lock is movable after assembly.
On the Italeri kit there is the space between the lower bracket and the lock but the other details are a little simplified also and again the lock is movable after assembly.
The Dragon support bracket has six bolts but there should only be four as correctly depicted on the Italeri and Tristar parts but it’s easy enough to just cut the middle two bolts off the Dragon part.
Superstructure:
 The
Dragon superstructure sides are moulded in one piece per side which makes assembly
easy as there isn’t any but the detail on the inside is quite basic with
a few pin marks to contend with but these shouldn’t be a problem as there
isn’t much detail around them while being removed while the outer rivet
detail is well done. The plastic walls are actually superior to the useless
etched superstructure sides provided in the Marder III
H update set from Cyberhobby (see review for details) although the plastic walls are a little on the thick
side.
The
Dragon superstructure sides are moulded in one piece per side which makes assembly
easy as there isn’t any but the detail on the inside is quite basic with
a few pin marks to contend with but these shouldn’t be a problem as there
isn’t much detail around them while being removed while the outer rivet
detail is well done. The plastic walls are actually superior to the useless
etched superstructure sides provided in the Marder III
H update set from Cyberhobby (see review for details) although the plastic walls are a little on the thick
side.
On top is the separate roof but compared to the Panzer Tracts plans this is about 1mm too narrow each side making the contours a little off and the two periscope openings are 2mm too far inboard and would have to be moved outward for a more accurate configuration. The periscope covers are also separate parts making moving them easier and there are internal periscopes to add if you wish.
The curved front shield is in one piece with open sight aperture with separate sliding door and subtle rivet detail on the outside plus a couple of very small pins marks on the inside to contend with.
The Tristar superstructure sides are in three parts each side, the two upper sides and lower plate that allows excellent rib and rivet detail to be included on the inside faces as well as outside and the rear wall sections are also moulded quite thin for a better appearance but again there is more assembly required than one piece sides but the fit is very good and the added details makes the extra effort worthwhile.
The separate roof panel matches the Panzer Tracts plans perfectly in size and shape with the two separate periscope hatches again in the correct position with additional periscopes that you can be added inside if you wish.
The curved front shield is again in one piece with open sight aperture with separate sliding door and nice rivet detail on the outside but there are four pins marks on the inside to contend with.
The Italeri roof also matches the Panzer Tracts plans perfectly in size and shape with the two periscope hatches moulded in place but are slightly out of position by a small amount but there are no internal periscopes provided.
The curved front shield is also in one piece with open sight aperture with separate sliding door but has no rivet detail on the outside and a couple of pins marks on the inside to contend with.
Engine Deck :
 The
Dragon kit has a separate engine deck redesigned for the Marder H but still
has some Ausf.G features retained with separate side engine access doors as
well as separate rear intake grill section with the engine deck having nice
details including the nicely represented hex bolts.
The
Dragon kit has a separate engine deck redesigned for the Marder H but still
has some Ausf.G features retained with separate side engine access doors as
well as separate rear intake grill section with the engine deck having nice
details including the nicely represented hex bolts.
The new deck includes the centrally located gun cradle travel lock but this is located about 1mm too far forward and is a little undersized as well as the bolt spacings on the centre panel being incorrect and the location of the forward engine door hinges in the wrong location (but correct for the Ausf.G). The small door that covers the travel lock when not in use is not provided with the Dragon kit.
The Tristar rear engine deck also has separate side engine access doors with the correctly sized and positioned gun cradle travel lock as well as the small hatch that covers the travel lock when not in use and the upper deck bolt spacings and side panel hinges are all in the correct position when compared to the available plans and photos of the real vehicle.
Both the Dragon and Tristar kits have etched grills located under the engine door lips with the Dragon grills better representing the real things but are just glued onto the outer door lip when they should be located in small recesses inside the doors as the Tristar grills are located.
Both the kit access doors correctly have no outer bolts but they both have a fine mould seam along the curve which is easy to remove.
Both the Dragon and Tristar kits have separate small engine intake grills in plastic with etched screen covers provided that requires the sides to be bent to shape which is quite easy using a good bending tool as well as the sliding cover, I used the original Etch Mate for the job without any problems.
One thing to watch on the Dragon part is when you bend the side with the opening for the sliding cover to ensure you make the bend so the slot is fully open and not bent half way into the opening but if careful the door will easily slide open and closed after assembly.
There are actually two small bolts heads missing from the side of the intake fairing on the Dragon kit which results in the cut-outs in the etched frame being undersized as there is nothing for them to go around, you should enlarge the cut-outs and add the two bolt heads. These bolt heads and the appropriate sized cut-outs are included on the Tristar kit as they should be.
The two side “trays” are the correct size with the right perforation spacings on both the Dragon and Tristar kits as well as both having additional etched leg supports while the Italeri trays are the wrong size and the perforations way too big.
At the back is the metal basket which is made from thin round rod on the real Marder III H but the Dragon kit provides this as flat 2D etched metal with thin plastic outer edges added. This 2 dimensional PE simply doesn’t represent the real round rod at all well with the rear upward curve being too sharp and fitting the plastic edges will prove to be an interesting proposition. It’s best to use thicker cyanoacrylate for this and try and hold the plastic in place long enough for the cyanoacrylate to bite without gluing you fingers as well with the rear part also requiring slight bends added to the etched basket to conform to the plastic outer frame and care will be needed with this.
From a distance the etched basket could look okay but close inspection shows the limitations of providing 2D etched metal for such a part but there is little you can do other than scratch a new one from thin wire with additional etched supports provided for both the side and rear platforms.
The basket on the Tristar kit is in thin plastic to give the correct round profile and also has the correct curve at the back. There is some minor flash to be cleared from the rods and the usual moulding seams but these are thankfully very fine and easily dealt with but if you wanted to be really picky the rods are a little thick and could be thinned a little as you clean the moulding seam for an even better appearance.
Added to the rear hull wall are the two gunner’s seats which are in the correct position and have excellent cushion texturing included on the Tristar kit but with the Dragon kit are just plain plastic without any detail at all and are also positioned too far outboard and you should move them inboard level with the hull side plates.
Fenders:
 On
the Dragon hull sides are the separate fenders which are moulded commendably
thin with rib embossing raised on the top but the ribs at the front of the
left fender are not correct and should mirror that of the right fender while
the ribs are indented underneath but are some of the nicest plastic fenders
that probably negate the need for etched replacements. The fender support brackets
are all separate parts and also moulded nice and thin with a channel embossed
along the hull side to locate the fenders.
On
the Dragon hull sides are the separate fenders which are moulded commendably
thin with rib embossing raised on the top but the ribs at the front of the
left fender are not correct and should mirror that of the right fender while
the ribs are indented underneath but are some of the nicest plastic fenders
that probably negate the need for etched replacements. The fender support brackets
are all separate parts and also moulded nice and thin with a channel embossed
along the hull side to locate the fenders.
There is an issue here as the 38(t) fenders have a distinct upward kink half way along the fender length with the kit fenders mounded perfectly straight.
Unfortunately the locating channel along the hull side is also perfectly straight and does not allow for the kinked fenders meaning if you do add the fender kink the fenders will not fit into the channel and the front of the fender will not mate to the top of the glacis/final drive housing as this is where the straight fender meets. So there is a fair bit of work involved altering the locating channel and other angles to incorporate the kink or just live with straight fenders.
Other items added to the fenders are the typical perforated 38(t) storage box which is provided in both plastic and etched metal depending on your preference. All the tools are moulded nicely without attachment clips which are provided on the etched fret to add a nice detail touch.
The Tristar full length fenders also have very nice raised rib details with the correct ribbing profile at the front plus the attachment brackets on the top but there is no detail on the undersides but they do incorporate the distinctive upward kink of the 38(t) fenders that fits into suitably kinked locating ridges along the hull sides.
Other items added to the fenders are the five part jack, the distinctive 38(t) perforated storage box in five plastic parts with the holes cleanly depicted as well as the pioneer tools with some tool clips moulded on and others added from etched parts included.
The Italeri fenders are again rather basic with raised ribbing on the top only although the profile of the ribs at the front is incorrect and there is no detail on the undersides but they also include the upward kink.
It should be noted that Dragon released amended fenders in the Marder III H update set #3837 that have the correct front ribbing profile but incorporate other issues in that the new ribs are thicker than those on the rest of the fenders.
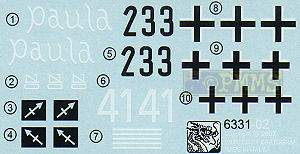
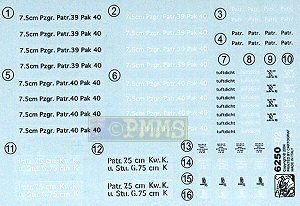
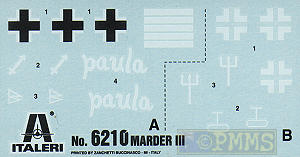
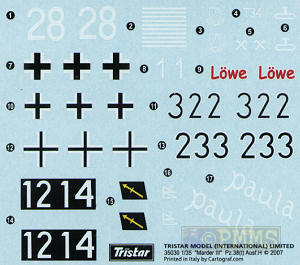
Decals:
One interesting thing with the decal sheets is all three kits give markings
for the Marder III H with the name "paula" painted on
the superstructure sides.
Both the Dragon and Tristar kits indicate this vehicle is from the 23.Pz.Div., Eastern Front 1944 in an overall Dark Yellow paint scheme while the Italeri kit indicates it is from an unidentified unit in France 1944 in a three colour cam scheme but references indicate both the Dragon and Tristar kits are correct with this vehicle identification. You should also note if modelling "paula" that the lower front plate does not have the additional raised detail included on the Dragon kit but has the smooth plate as with the Tristar kit part.
The Dragon kit has two small decal sheets, one from the PaK40 kit with a selection of stencilling and a new sheet with markings for 4 vehicles.
The Tristar decal sheet has markings for eight Marders in various paint finishes for a good selection
Conclusion:
First off let me make it clear than both these kits are a generation ahead
of any previous Marder III kit including the very nice Tamiya Marder
III 7.62cm PaK36(r) (kit #35248) and Marder III Ausf.M (kit #35255)
in terms of the quality of the mouldings and relative ease of assembly with
both the Dragon and Tristar kits building into very nice models from the box
but the Dragon kit suffers accuracy wise from the apparent shortcuts of using
the Ausf.G parts instead of redesigning them for the Marder III H as Tristar have done and there is also another marked difference between the two.
The Dragon kit with its simpler construction along with the clean mouldings will certainly appeal to the younger less experienced modeller who is less inclined to be fussed about the finer details and accuracy issues as it will produce a fine representation on the Marder III H once built and painted.
On the other hand the Tristar kit with it’s far more intricate assemblies will obviously require additional work but should appeal to the more experienced modeller who appreciates the finer and more accurate details and will without doubt build into the most accurate and detailed kit of the Marder III H available today out of the box bar none.
To reflect this major difference I will give each kit two rankings, one for build ability and one for accuracy out of the box.
The Dragon kits gets 8.5/10 for build ability as the simpler parts breakdown, overall clean parts and easy of construction taking into account the usual instruction traps will take a lot less effort to build, providing you are not bothered with the accuracy issues?
In terms of accuracy it only rates 5.5/10 as the list of issues is almost endless for those who consider accuracy important and will take a fair bit of work to correct them all and add the missing detail.
Dragon overall rating: 7/10
For the Tristar kit the build ability gets 7.5/10 as it will obviously take a lot more effort due the many intricate and detailed assemblies as well as multiple parts such as the hull and superstructure but given that the fit of parts was very good overall helps with the final rating.
As for accuracy the rating is 9.5/10 as this is as mentioned one of the most fundamentally accurate kits in terms of dimensions and the finer details I have seen in recent times and you would be hard pressed to find a more accurate mainstream kit straight from the box.
Tristar overall rating: 8.5/10
I haven’t rated the Italeri kit as it really doesn’t cut it with the current generation kits and unless you bought one for nicks or was given one it probably isn’t worth the effort
But at the end of the day as has been said before you make of the kit what you will in accordance with what you want and expect from a kit as it’s your hard earned that makes the final decision.
Some may think my comments on the Dragon kit are over critical but the fact is there are accuracy issues with just about every section, issues with the lower front plate, the Driver’s plate, the front travel lock, the hull sides and vision port, the rear plate, the engine deck, the superstructure roof, the idler wheel and we haven’t got to the interior yet but all of these issues are either correct or far more detailed on the Tristar kit.
But of course if you wanted to build a model of the Marder III H prototype you are mostly there with the Dragon kit and one could be forgiven for asking, if Tristar can get all this correct the first time around, etc., etc……
Kit Sprues: (click thumbnails for larger view, close new window to return to review)


Part 2 of this comparison review on the interior will follow in about a week. As this Part 1 has taken a lot more time than planned due to the many issues arising I have other items that need taken care of before getting back to the interior but basically the theme here is continued in the interior.
See the 38(t) Subject Page for additional reviews of 38(t) related kits and accessories.
References:| Panzerjaeger Panzer Tracts No.7-2 ISBN 0-9744862-9-9  |
Marder III Ausf.H Nuts & Bolts Vol.18 128 pages, Soft Cover  |
Marder III/Grille Wydawnictwo Militaria No.175 ISBN: 83-7219-025-9  |
| Marder III AFV Super Detail Photo Vol.4 Published by Model Art Co.Ltd.  |
Pz.Kpfw
38(t)Ausf.A-D in detail Special Museum Line No.38 Wings & Wheels Publications ISBN 80-86416-58-5  |
Ground Power
Magazine #100 - 9/2002 GALILEO Publishing Co.,Ltd. Japan  |
Thanks to my credit card and ![]() for
the Dragon review kit.
for
the Dragon review kit.
Thanks to ![]() for
the Italeri review kit.
for
the Italeri review kit.
 Thanks
to CK Pat from the Tristar
Shop for the review kit.
Thanks
to CK Pat from the Tristar
Shop for the review kit.
Page Created April 5, 2007