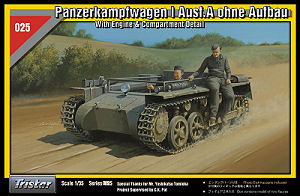
Panzerkampfwagen I Ausf.A ohne Aufbau
Tristar Kit No. 35025
1:35 Scale
Review by Terry Ashley
Operational units were authorised to convert existing Panzer I gun tanks by following the same procedure of removing the upper structures in the workshops. These conversions were done of some 2.series/La.S and 3.series/La.S chassis and also some Panzer I Ausf.Bs were also converted.
The kit best represents a 3.series/La.S vehicle with the all reinforced road wheels, the two fuel filler ports on the engine deck, the narrow 60cm glacis access hatch and longer horn but could also be a late 2.series back fitted with the later road wheels as not having the superstructure with its distinguishing features clouds this a little.
The kit consists of 266 parts in light beige plastic with another 192 individual
track links and 6 in clear plastic with Sprues A, B, C and D from the Panzer
IA (kit #35008s) and sprue E and T from the Flakpanzer I (kit #35019) with
new sprue I for the engine parts as well as the two figures.
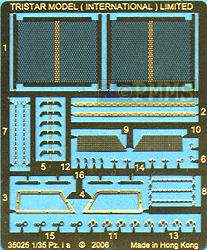
There is also a small etched fret and the decal and instruction sheets with
the standard of moulding very good overall but a few parts have a little excess
fine flash and prominent mould seams that will need cleaning. This gives the
impression on some parts such as the lower hull parts and inner floor section
that the edges are not smooth but are okay after cleanup.
There are also some nicely rendered details such as the floor and fender tread plate pattern and the front transmission with cleanly moulded suspension parts and the excellent engine parts.
Lower Hull:
This has the lower plate and both sides as separate parts that allow nice details
to be included on both sides including details on the bottom of the engine
compartment for the full engine included in the kit. Fitting the lower hull
parts together is probably the most important part of the kit as it forms the
basis for everything else and on first look the mating edges of the lower and
side panels seem uneven due to a bit of flash present but once smoothed out
fit together okay.
But before attaching the hull sides it’s best to assemble the interior parts which consists of the forward transmission made up of 14 parts and the detail on this assembly is excellent, in fact the plastic transmission has better details than on the resin part in Tristar’s own Panzer I Interior set (#TSR-001) with the reverse usually being the case.
Other details include the suspension cross members, rear bulkhead with separate central plate plus the raised floor section with excellent tread plate and compartment details. There is also the driver’s seat, control levers, foot pedals and instrument panel fitted to the underside of the glacis plus inside covers for the final drive housings. Also included on the rear firewall is the prominent starter motor with tread plate cover that is a notable feature and all this makes for a very highly detailed interior.
The interior assembled easily with very good fit of the parts, especially the rear bulkhead and raised floor with the only trimming being a small piece to be removed for the left front corner of the floor behind the seat to clear the inside axle mounting.
It is a good idea to let the rear bulkhead (part C6) dry completely before attaching the side panels as this allows the sides to be positioned perfectly upright and provides a firm footing. The fit of the side panels was very good overall and using Tenax 7-R there were only a couple of minor join gaps requiring filling with the fit of the front and rear hull panels (parts C22 and E7) being very good without any gaps for an overall good fit.
The rear hull panel has additional parts for the fenders, jack block and towing hitch and the panel features the lower curved profile but as there is a panel join line present that may need to be eliminated to represent the smooth curved profile better.
At the front is the separate lower hull panel that includes the eight small rivets along the bottom edge and also the two small brackets on the final drive housings with the fit to the hull also being good but you may want to add the weld seams that go along the undersides of the final drives for a better appearance.
The assembled lower hull tub was perfectly square and the glacis (part E4) was also a very snug fit between the hull sides without any hint of gaps and has a separate inspection hatch so you can see the excellent transmission details after assembly.
Added to the side are the full length fenders with nicely done tread plate pattern on the top surfaces only plus additional outer lip for good definition but care is needed when fitting this to ensure it lines up correctly with the fender to avoid and gaps.
Added to the front of the fenders are the small position lights and the front fender extensions that have multi-part etched attachment brackets to give very good definition to this detail. All the tools are separate parts with the clips mounded on but with small etched brackets to add a little more detail without going the whole way of removing the plastic clips and replacing with etched parts.
The two exhausts mounted on the rear fenders are in two parts each with nice texture on the ribbed engine outlet pipes but the fishtail outlets are not hollowed out which you may want to do for a better look. The finely etched exhaust heat shields are best annealed by running them through a candle flame to make bending to the curved shape a lot easier and there are small “feet” on the shields to make locating over the exhausts easy.
The Schulfahrzeuge had a frame hand rail added around the open hull and this
is moulded commendably thin meaning you should handle with care with just a
very small moulding seam to remove and there are six small mounting posts attached
inside the hull rim.
A small note on the hand rail, when fitted at the unit level there are a few
different designs seen on photos of the Schulfahrzeuge and the rail in this
kit represents one of those designs so if you look at a picture as see a different
style rail remember they were not all the same.
Suspension:
The suspension is from the initial Panzer IA kits and is very well moulded;
the wheels in particular feature nice details on the spokes as well as the
raised nipple on the outer face so take care when attaching the wheels to
have the right side facing out. The first road wheel also has a separate
centre hub as the other wheels are joined by the suspension beam and there
is nicely moulded spring and suspension arm assembly which all adds to the
good details in the suspension units.
The drive sprockets are nicely detailed but the rim bolts are only on the outer face and are slightly undersized if you want to get picky and the return rollers are the early type with basic hub details. The idler wheel is in one piece of the correct diameter but doesn’t have the lip on the inner rim as per the original while the suspension arms and mountings are all nicely moulded but there are some mould seams to be removed and the spring units need care to preserve the nice leaf spring detail during this process.
Sprue B from the Panzer IA kit is still included for just a few front fender parts and the jack which means you get a complete IA turret to add to the spares box, quite a nice little bonus for anyone who may want to build a Drehturm turret or any other project where a Panzer IA turret would come in handy.
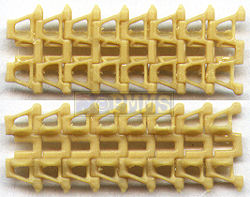
Tracks:
The small individual track links have excellent details but are not designed
to be workable and are simply glued together to form the track runs. Each link
has the three sprue attachment scars to be cleaned but other than that can
be quickly assembled and formed around the drive sprocket and idler while the
glue is still tacky.
Rear Engine Deck:
This as mentioned has the two fuel filler caps which are separate parts as is
the rear oil cooler access hatch which has louver detail on both sides and
no pin marks to mar the louvers. The two engine access hatches are also separate
with latch detail on both sides and again no pin marks to be seen with the
fit of these hatches to the engine deck being millimetre perfect. Also included
are small brackets that allow you to prop the engine access doors slightly
open for better cooling which is sometimes seen in photos of active Panzer
Is.
The rear deck panel has the cooling air outlets with very finely moulded screen mesh included but you are also provided etched screen mesh and surrounds to use if you wish. This requires you to carefully cut out the plastic screens and add the etched screens but as this vehicle did not have the armoured cowls covering these outlets adding the etched screens will make a marked difference to the appearance of the finished model.
Added on the inside of the engine deck are the exhaust outlet covers and oil cooler compartment coaming as well as the inner fuel filler receptacles, note there are four of these but you only see the two required for the model with the other two used with the later 4.series vehicles and finally the forward blanking panel is added.
Engine Compartment:
Put simply this is a superb rendition of the air cooled Krupp M305 engine and
is again better detailed than the resin engine in the previous Tristar Panzer
I Interior set (#TSR-001) moulded with the extensive use of slide mould technology.
The two large fuel tanks in either corner are nicely detailed with the oil filters (parts I40) added to the sides and the upper oil cooler has extremely fine grill detail on both sides without any pin parts and this can be fitted in the normal down position or raised with the cooler door open to show the detail below the cooler.
The main engine block is an amazing piece of injection moulding with crisp details on all sides and also fully hollowed out and added to this is the lower sump cover which has excellent details even though it can’t be seen after the engine is mounted in the bay.
On top of the engine is mounted the central magneto and two large air filters with separate top covers which are attached to two long pipes feeding to the undersides of the cylinder banks plus the two ribbed exhaust pipe extensions which attach to the outer exhaust pipes so they just don’t finish in mid air.
Mounted either side are the cylinder bank heads with again excellent details included as well as additional plumbing while on the back of the engine is added the large finned electric generator and circular fan which are again superbly moulded without any flash or other blemishes.
The only cleanup needed is the usual moulding seams and the fit of the parts is excellent and builds into a superb engine and it’s a shame to hide much of the detail when fitted inside the engine compartment.
Figures:
Included with the kit are two excellent figures, a trainee driver and instructor
sitting on the left fender holding onto the grab handle and the early war
uniform details are excellent and these figures are just no quickie add ons.
Each is in 7 parts with separate legs, torso, arms, heads and field cap with the uniform details featuring well defined fabric folds, collars and lapels as well as fabric seams on the trousers and arms as well as the facial features nicely done.
Just be careful with the instructions as the figures parts are numbered A1-A7 and B1-B7 for the two figures but the made up figures with the A parts is then called figure B and the figure with parts B called figure A, a little confusing.
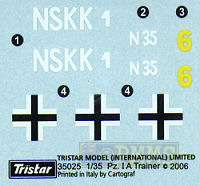
Decals:
The small decal sheet is well printed with very thin carrier film cropped extremely
close to the printed image and should help during application.
There are three balkenkreuz and generic driver school markings with no specific
unit info given.
Conclusion:
This is simply a superb little kit of the Schulfahrzeuge with a level of detail
that leaves no part of the kit untouched and just asks for the engine bay doors
be left open to show off the excellent engine compartment details. Btu as with
any kit there is room for additional detailing to really finish it off but
with this kit it really is the very fine details left to add if you wish to
really go to town.
There are a few issues with minor flash on some hull parts but the overall fit of the parts was excellent making for a superbly detailed kit straight from box and is a nice precursor of what is in the new Panzer IA (kit #35028).
Highly recommended.
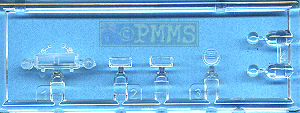
The sprues
Click for larger image


Detail images
Close new window to return to review
|
Panzer Tracts
No 1-1 |
Panzer Tracts
No 1-2 |
|
Ground Power Magazine |
Pz.Kpfw.I/Pz.Kpfw.II and variants |
| TANKS & ARMOUR: PanzerKampfwagen 1 & II Ian Allen Publishing 
|
AFV Modeller Issue 12 Excellent photo feature on the Panzer 1a  |
|
Military Modelling Magazine |
|
 Thanks
to CK Pat from the Tristar
Shop for the review kit.
Thanks
to CK Pat from the Tristar
Shop for the review kit.
Page created October 27, 2006