
British Infantry Tank Valentine Mk.II
1:35 kit comparison
Chapter 4: Turret
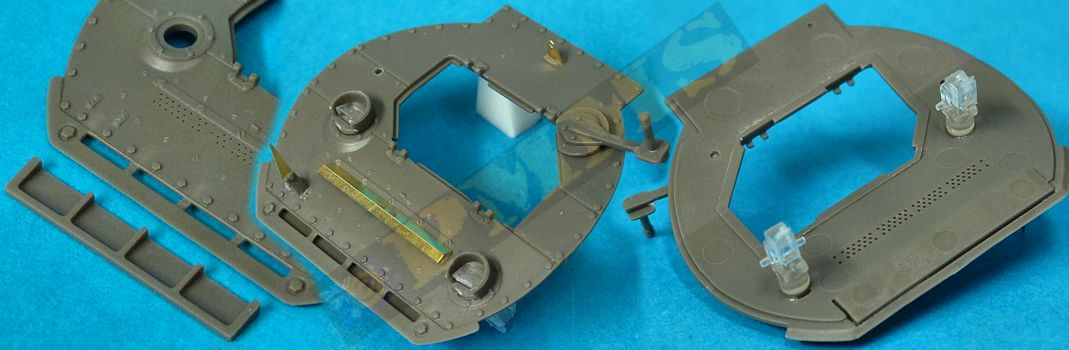
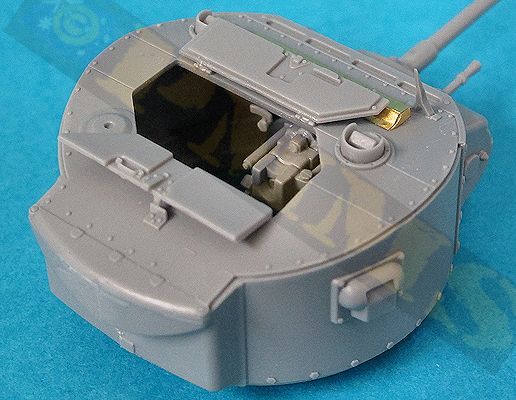
The Miniart turret is in two conventional halves and this does leave you with central join seams around the rear bustle/intake and top and bottom of the turret front, the top join is especially troublesome and a bit of clean-up will be needed. There is also no surface texturing and adding this with Mr.Surfacer or similar will improve the appearance as well as helping to cover up the join lines. There are additional small etched bolt heads included to be added to the bottom of the turret front below the mantlet and to the rear bustle and being etched lack a bit of depth but do add the extra detail to the turret.
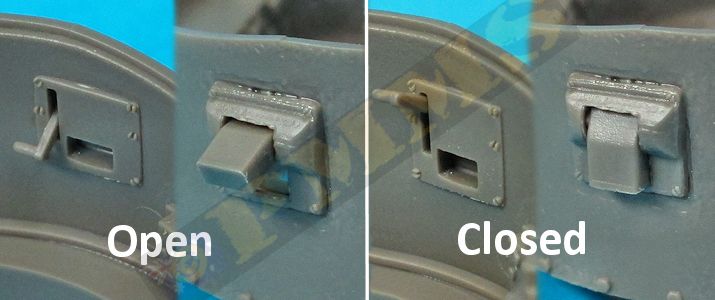
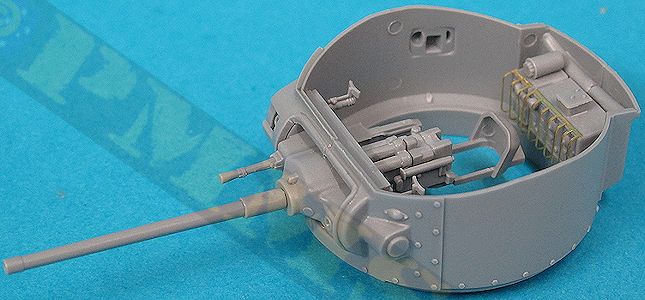
AFV Club give you two alternate left side turret walls, one with and one without the small port as early Mk.IIs didn’t have this port while later tanks did, the port itself is separate so you can display this open or closed for effect if you wish. The pistol port on the right side has a separate outer housing with two alternate designs as seen on the Mk.II and the port block is again separate and can be positioned open or closed. The inside actuating lever is provided and if assembled carefully will actually move in unison with the block, a nifty little feature if you are showing the port and the top hatches open to show it off?

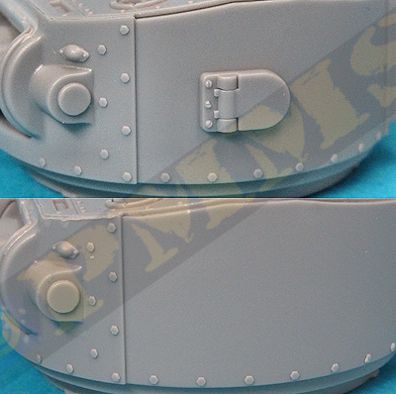
The separate AFV Club port cover allows this to be shown open if required.
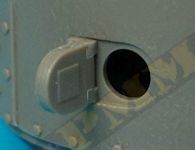
The AFV Club right side port that can be shown open or closed with the inner level moving in unison with the port block.
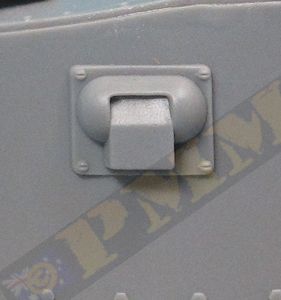
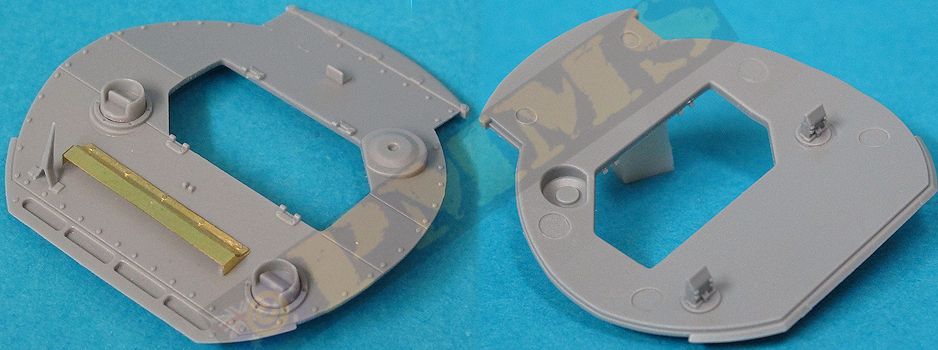
The Miniart port (right) is a different style as seen on some Valentines moulded in the closed position.
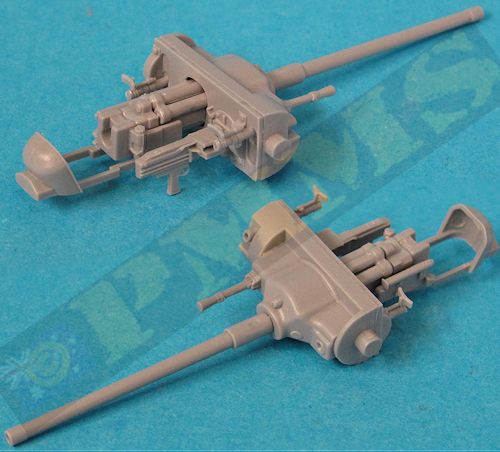
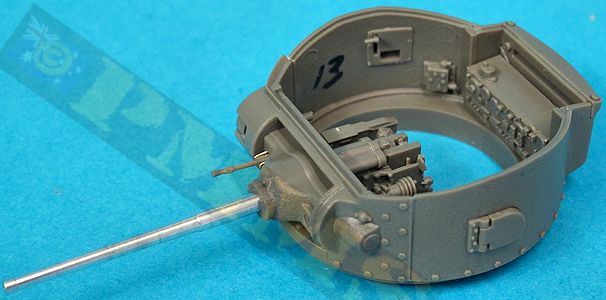
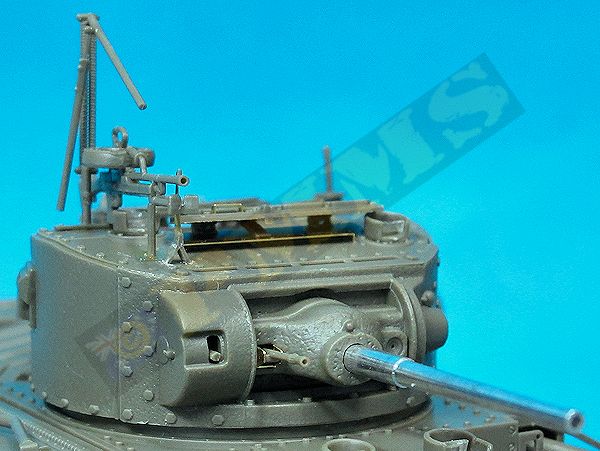
The separate front section on the AFV Club turret has the multi-part 2pdr gun attached to the back but this lacks the rear gun guard most likely because some museum examples have this missing, the Besa MG is the full gun with etched barrel cradle and the muzzle bore is drilled out for a good appearance. When fitting the Besa into the mounting you may have the trim the inside of the recess to eliminate the inner mould line as the fit is tight and the mould line can get in the way. The barrel tube in turned aluminium is the stepped type applicable to the Mk.I/II with the bore hole slightly hollowed out and fit snugly into the mantlet hole provided.
and the metal barrel on the AFV Club gun.
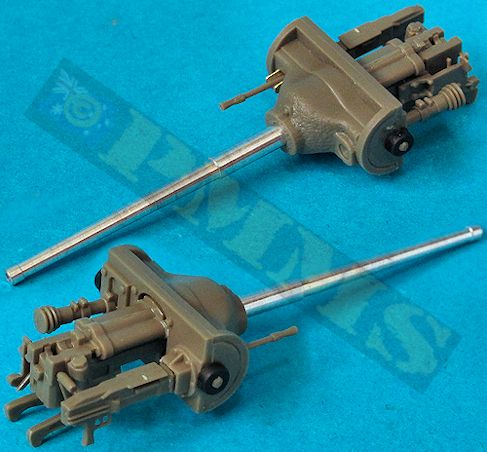
Miniart provide two complete left turret sides for the same purpose, one with and one without the small port to use as required although the port is moulded in the closed position as is the pistol port on the right turret side. Before joining the two turret halves there is the full 2pdr gun with separate breech block for inside and this includes the rear guard as well as the Besa MG receiver and the guns are attached to the rear of the mantlet that is trapped between the two turret halves to allow the gun to elevate. The plastic barrel tube is the stepped type applicable to the Mk.I/II with the muzzle bore slightly hollowed out but the Besa barrel is fairly chunky and doesn’t have the bore hole included which you will have to drill for a better appearance if not replacing with an aftermarket metal barrel. See images above.
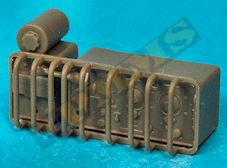
The separate AFV Club roof is also very well done with the four front intake vents open with a separate inner trough that leaves the intake vents open into the turret as on the original, the rows of small inlet holes located under the etched intake cover in the middle of the roof are also fully open holes although you can’t see this once the turret is assembled. The periscopes are the same as with the front crew periscopes with the separate outer guards with clear scope and the full periscope on the inside, there are a couple of small etched parts for the vane sight and rear hatch latch, the base for the vane sight is a little on the thick side and could do with being thinned down some.
Also the full periscope housings on the AFV Club roof and the etched vent cover on both kits that needs careful bending.
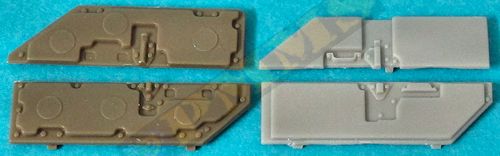
The top crew hatches in both kits are separate with detail on both sides if the hatches although the AFV Club hatches have six largish pin marks on the inside padding these are raised and therefore easy to eliminate without compromising the detail. The other thing to note is the Miniart doors are 1mm too narrow according to the plan sets listed below and the detail on the doors is not as refined on the Miniart doors as on the AFV Club doors, especially the inner padding and latch/handle detail.
padding detail on the Miniart doors.
There is a bit of confusion with the turret radio setup in both kits with the AFV Club instructions indicating for you to use the No.11 radio but the kit doesn’t include the large No.11 aerial mount on the turret bustle as does the previous Mk.I kit but just has a single No.19 radio aerial mounting on the right rear of the roof. Thankfully the No.19 radio parts are still lurking on the sprues just not indicated in the instructions. To fit the No.19 radio use parts E4, E7, E10, E31, E32 and for the aerial part B14 and etched part G21, this is fitted to the rear right corner of the turret bustle.
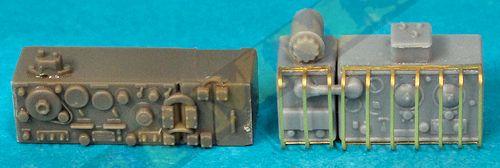
The AFV Club No.19 radio with plastic guard lurking unannounced on the sprues that should be used.
With the Miniart turret radio setup, you are provided with a No.19 radio set but only the large No.11 radio mast and antenna for the rear bustle, there are no No.19 radio aerials in the kit apart from the mounting on the left rear for one of the aerials so a little work will be needed to correctly depict the radio arrangement. But if you build the turret hatches closed using the No.11 radio mast and antenna is fine as this is the radio this early production Mk.II would most likely be fitted with in any case.
The fit of the roof to the turret sides on both kits correctly depicts the step between the side and top plates as well as the flush fitting front section and there were no fit problems with either kit parts other than the large join lines on the Miniart turret. The multi-part AFV Club turret assembly does require care to align the side, rear and front panels as there is potential for miss-fits/gaps with the roof if not careful.
Rear overhead view of the turrets showing the greater detail definition of the AFV Club turret and hatch details.
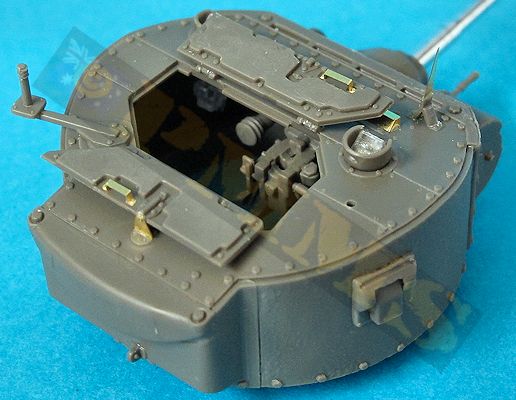
Both kits also include the delicate Lakeman support mounting and Bren gun for the turret roof but the Miniart instructions don’t mention this despite their being marking options for desert Valentines on which the Lakeman mounting was commonly fitted. The Miniart parts required are D37, D38, D44, D45, D46 and while the AFV Club instructions do include the assembly both will need the inclusion of the sling for the Bren support to finish off the mounting.
Note open bore holes on the co-ax Besa and Bren machine guns for an excellent appearance.
The Lakeman and Bren have not been added to the Miniart turret as these weren't called in the instructions but you can add these if required as per text.

|
