
M5A1 Conversion
for AFV Club M3A3
1:35 #F036
Construction feature by Terry Ashley
Part 2 - Upper Hull & Final Assembly
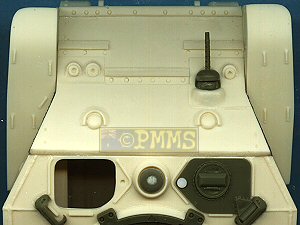
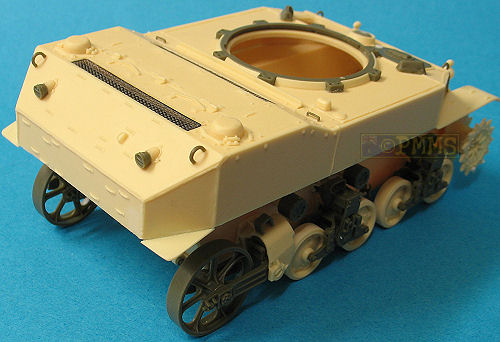
This was quite straightforward thanks to the good quality of the resin parts with only some minor trimming required in a few places.
The hull .30 cal machine gun should be fitted to the glacis at this stage either by using all the AFV Club parts (A3, E1, E2, E7) or just be cutting off the .30cal where it meets the gun opening and adding the outer parts (E1, E2) whichever you find easier?
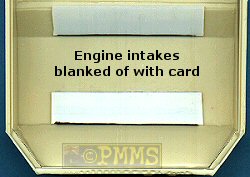
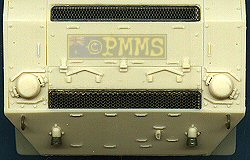
I chose to use the Eduard Set #35 492 engine deck screens and therefore blanked off the hull openings with sections of plastic card glued to the inside of the hull to eliminate the see through look but if you use the resin screens these are simply glued into the hull openings.
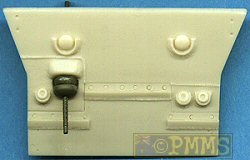
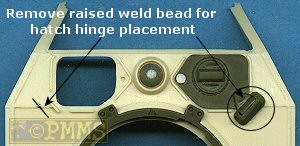
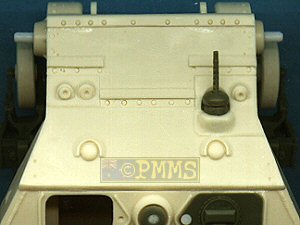
The fit of the AFV Club parts to the resin hull was superb with the large turret ring fitting so snugly glue is not really needed and other parts such as the hatches and front ventilator cover fitted perfectly with the only alteration being the removal of a small section of the weld bead at the hatch line to allow the hatch hinges (AFV Club parts D23, D24) to sit flush on the hull deck.
Attaching the hull top to the lower hull (which can be done at any time during construction as suits you) required only minor trimming of the top of the sponsons for the lower hull to sit flush onto the cut-outs inside the top hull sides. This involved shaving a small amount off the sponsons using and X-Acto #11 blade until a perfect fit with test fitting done regularly.
No other trimming was needed on the hull top and bottom fit and these just glued together using thick cyanoacrylate which gives you slightly longer curing time for minor adjustments and fills in any small gaps that remain.
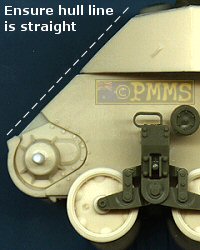
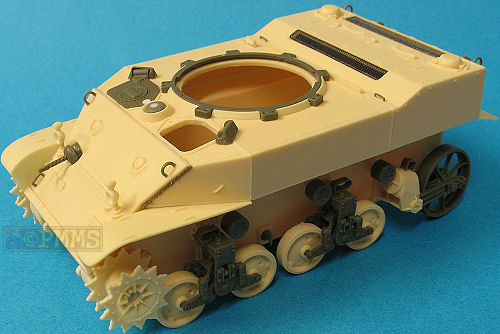
The only other trimming required was after gluing the lower and upper hulls together the line from the hatch level to the front of the lower hull must be perfectly straight to sit the glacis correctly and a very small amount was trimmed from each side but again this was only a very small.
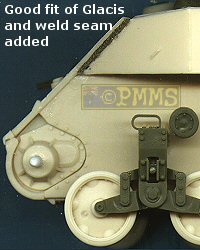
The glacis then fitted perfectly without any trimming and the lower bolted strip was attached and only very minor trimming was needed on one side and again test fitting will determine if any is needed? As I mentioned the trimming needed was very minor thanks to the parts being perfectly square and without warping and the amount of trimming was actually less than I’ve had to do on some injected plastic kits.
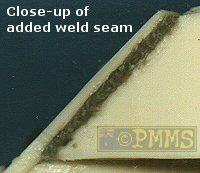
After these parts are fitted together there were no gaps to be filled but you can add a weld seam between the hull sides and glacis as on the real vehicle, and I added this by gluing a length of stretched sprue with cyanoacrylate and then ‘drowning’ this in Tenax-7R to make it soft and using a small screwdriver head to add the texture, you can of course use epoxy putty or whatever method you prefer for adding weld seams.
The fenders were then added and again the fit was perfect without any trimming needed but just check the alignment with the hull front and sides before the cyanoacrylate cures. The two small fenders at the two rear quarters were also added without problems and the only things remaining are the many smaller detail items form the AFV Club kit such as lifting eyes, grab handles, taillights and front light guards and resin head lights with MV lenses. The front bush guards can be added from the Eduard set if you have this or by thinning the kit plastic guards which I find works very well if you do this while the guards are still on the sprue for support.
The AFV Club pioneer tools can be used as they come or with the tool clips used from the Eduard set for extra detail definition and as mentioned wire bush guards have to be added to all the hull and turret periscopes for the M5A1.
One other area you may won’t to address is the underside of the rear hull overhang which is open and you could add the air deflectors that lurk up there out of sight.
Tracks:
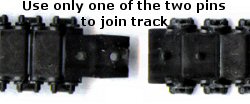
If using the AFV Club kit vinyl tracks they need to be slightly longer than
for the M3A3 and this can be done by only using one of the attachment pins
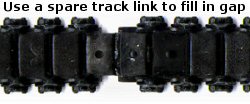
on the end of the track length and modify one of the spare track links
in the kit to fill in resulting gap in the track length. Using either of
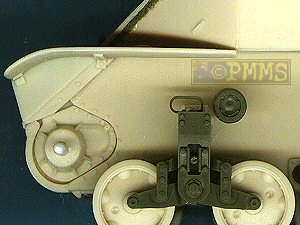
the AFV Club M3/M5/M8 individual link track sets (AF
35019, AF 35020) will
give a much better appearance and there are enough links in these sets
for the correct length track and fit perfectly around the resin drive sprocket.
Markings:
No markings are included in the Conversion but the Kagero M5A1 book
listed below comes with a decal sheet with markings for 10 M5A1s all of which
have
colour
profile
drawings
and
photos
of the
actual vehicle in the book which is really an indispensable reference for
the M5A1.
Markings included are;
Archer Fine Transfers also have various sheets that can provide appropriate generic markings plus the just released M5A1 sheet from Bison Decals.
Conclusion:
This would have to be one of the easiest resin kits/conversion I have assembled
due to the warp free parts and excellent finish of the resin parts as well
as the spot on fit of the resin to resin and resin to plastic parts and
if it weren’t for the additional cleanup needed for the resin parts
you would think this is actually a full injection moulded kit.
Any Allied modeller do yourselves a favour and get this conversion set as it not only has superb details and fits together without any problems but gives you a correct dimension M5A1 hull something previous update sets have overlooked even if giving generous amounts of “updates”.
Even if not an Allied modeller but you just want to experience resin kits without the need to spend half your time making things fit this kit would be a good place to start despite the need for the AFV Club M3A3 to start with.
Return to;
First Look review.
Construction Part 1: Lower Hull/Suspension Assembly
Also see Jim "Gunnie" Lewis's build on Armorama for another look at this excellent conversion set.
References:
| M5A1
Stuart Kagero Photosniper 18 Krzysztof Mucha, George Parada. Kagero Press ISBN 83-89088-04-5  |
STUART A History of the American Light Tank R.P.Hunnicutt. Presidio Books ISBN 0-89141-462-2  |
| M3 & M5 STUART Light Tank 1940-1945 Steven.J.Zaloga. Osprey New Vanguard 33 ISBN 1 85532 911 5  |
STUART U.S.Light Tanks in action #2018 Steven.J.Zaloga. Squadron Signal Publications ISBN 0-89747-084-2  |
Page created 6 January 2005