
Faun SLT-56
Tank Transporter
Kit Construction
by Terry Ashley
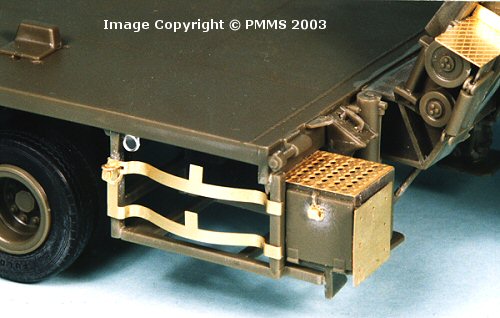
There are small etched padlocks to be added to the storage boxes and spare
wheel racks which were no problem to fit.
It should also be noted that the two hydraulic legs can’t be attached
until the gooseneck has been attached to the trailer so save these for when
you do attach these assemblies together.
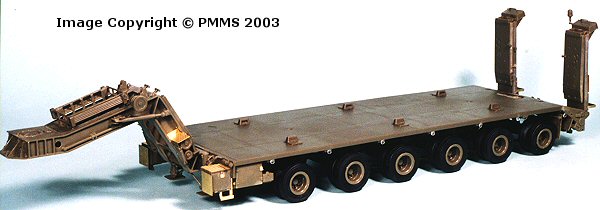
Step 10: Upper deck accessories:
Again no problems fittings these items as per instructions, the only thing
to note is the six track guides on the upper deck (parts I7) can be fitted
in different positions depending on the track width of the vehicle being carried
and you may want to leave these off until you decide on your load.
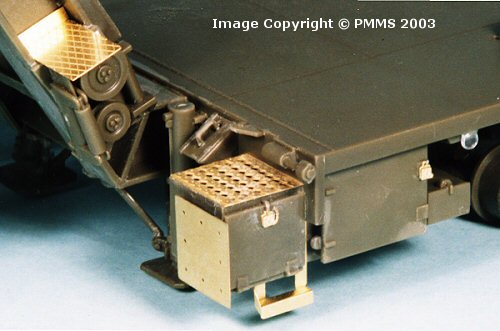
The etched step on the left side storage box (part PE18) requires some thought
as to the bend angles before hand but using my Etch Mate made the small bends
easy to do.
Tractor Assembly: Steps 1 to 24.
Step 1 to 5: Cab Assembly.
Step 6 to 10: Chassis and Suspension.
Step 11 to 13: Fuel Tank, Spare Tire and Chassis details.
Step 14 to 19: Rear Tractor Assembly (1).
Step 20 to 22: Rear Tractor Assembly (2).
Step 23 to 24: Adding hoses and piping.
Trailer Assembly: Steps 1 to 14.
Step 1 to 5: Deck underside and Suspension.
Step 6 to 7: Gooseneck Assembly.
Step 8 to 10: Final Deck Assembly.
Step 11 to 13: Ramp Assembly.
Step 14: Attaching Trailer to Tractor.
Return to the first look review of the kit.
Page created 28 September 2003